Posted on 11 Comments

How to Squirrel Proof a Bird Feeder

How to hang a squirrel proof bird feeder

In my youth, we had bird feeders, and I have found there are two types of families: Those that allow whatever to come and feed and those that fight the squirrels. Adam’s family has perfected the art of how to squirrel proof a bird feeder.  While mine comes from the live and let live bird feeder camp. Adam wanted to hang bird feeders, I thought it was unfair since we have out door cats.  Lazy outdoor cats but small furry predators none-the-less.  Oddly enough Adam’s family squirrel fighting secret also makes the feeders cat proof.  Here are the tips he taught me!

How to Hang Squirrel Proof Bird Feeders

How to hang a squirrel proof bird feeder

Supplies/tools

Bird Feeders*: Bonus points if you pick colorful feeders.  They will add some color in the winter months when all the flowers are gone.

Pulleys*

Nylon Rope*

Hooks*

Lighter

Ladder

Step 1 Gather Everything & Repeat

Get all your supplies and tools, take your ladder and set it under the eave you want to hang the bird feeder from.  Realize your ladder is about 5 feet to short.  Call a friend and have them bring a taller ladder over.  Joking aside, one of the first steps in keeping animals out of the bird feeders is to find a location that is relatively high.  We selected one that allowed us an eye level view from inside but was a good 10-12 feet off the ground outside. Also, thanks to Richard, for the ladder! (And you thought we were joking)

How to hang a squirrel proof bird feeder
A nice boring eave just waiting for a squirrel proof bird feeder

Step 2 and The Secret

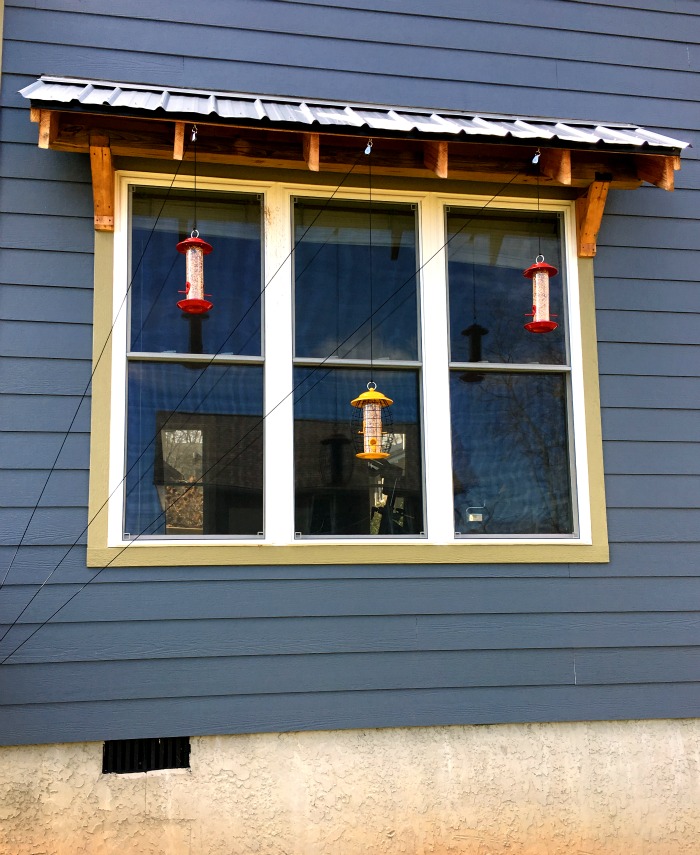
The secret is a set of pulleys.  This allows you to hang your bird feeders high, while, allowing for you to easily lower them for refill.  Take your hooks and push them into the wood.  Then hang a pulley from the hook.  You can see the pulleys below.

Step 3 The Tricky Part

The next step is not hard but certainly annoying.  You’ll have to run your line through the pulley, tie it to your bird feeder (leave it empty!!!), and then figure out the height you need to be able to lower it to a level where it is low enough to fill but keep your rope from being so long it drags all over the yard.  In our case we wanted three hung, so we had the added bonus of trying to get them the correct matching heights.  I’m pretty sure we never resorted to yelling, but there was at least one huff had in the process.  “Up an inch. No too high.  Down a little.  No that’s too low.” That is a lot to deal with, while 4 kids run about like crazy fiends and someone else stands outside, on a 12 foot ladder, in 20 degree weather trying to gauge height.

How to hang a squirrel proof bird feeder

Step 4 Hook, Line, and Sinker

You will need another hook to loop the ropes over at the bottom.  We chose one hook because we liked the way the lines looked pulled to one side and they double as perches for the birds.  You could easily add a hook under each feeder and take the line straight down if you wanted the rope to be less noticeable.

Step 5 Tying the Knot

Once all heights have been decided you will want to firmly tie a loop in two places on the rope.  One for where it will hang everyday and one at the end of the rope.  The one at the bottom of the rope will allow a single person to lower the bird feeders and fill them without needing to take them off the pulleys.  When we were completely satisfied with the two heights (which necessitated a second trip to Lowes for more rope) we took a lighter and lightly singed the ends of the rope and knots.  This will keep them from unravelling and coming untied.  BE VERY CAREFUL.  Fire and melty nylon is no fun.  Getting sued because a reader melted a rope to their finger is even less fun.  You have been warned.  You can skip this step and everything will be just fine.

How to hang a squirrel proof bird feeder
I love the added pops of color the feeders add in the winter.

Why This Works

First, for everyone who can not see the obvious, birds fly; cats and squirrels do not.  The high level keeps the birds safe from the cats.  If a squirrel decides to try to run up the ropes they are too heavy for the bird feeder and end up moving it around on the pulley.  The instability makes the squirrel jump off.  So far it has worked like a charm.  The kids love seeing the birds from inside the house.  I have to grudgingly admit I am also impressed.

How to hang a squirrel proof bird feeder

Posted on 6 Comments

DIY Chicken Water Heater

How to make a DIY water heater for your chickens

Disclaimer: This includes heat, electricity, and water.  Build at your own risk.

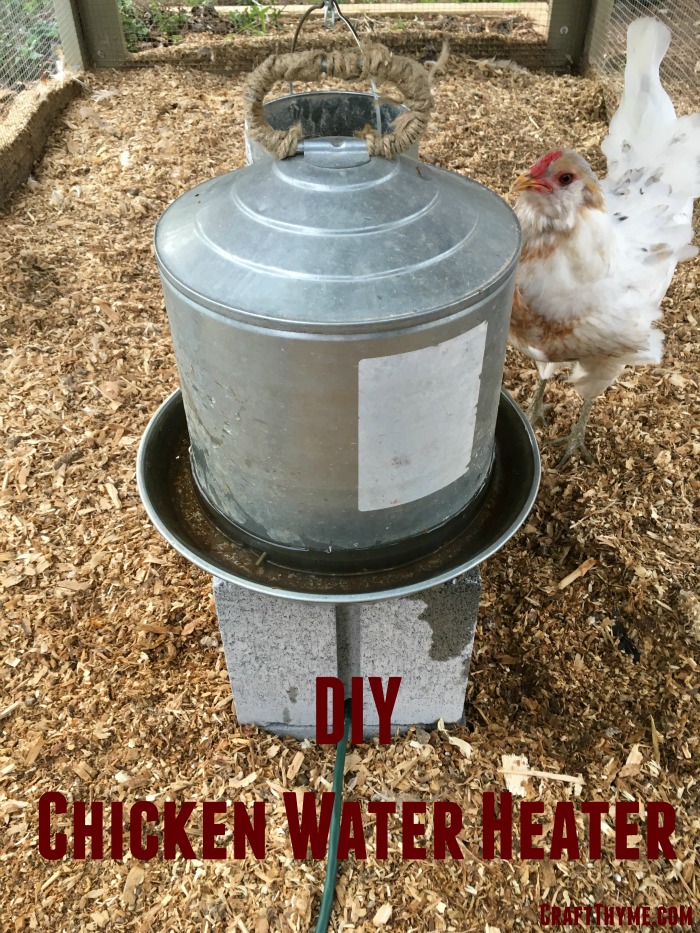
If you own chickens and you live anywhere that it gets below 32 F (0 C) then you will have experienced the fun of hauling chicken water. Well, no more for me! Adam craftily created a DIY chicken water heater. The water heater only required a few simple materials and the best part?! NO electrical knowledge necessary, short of being able to plug a cord in an outlet.

If you want to make your own chicken water heater we saw the idea somewhere online (This is why we should bookmark regularly) but ended up needing to modify it to suit our needs.

Chicken Water Heater

How to make a DIY water heater for your chickens

Supplies and Tools

Concrete Block
Concrete Paver
Extension Cord*: One with a flat socket area works best
Pluggable Light Socket*
Light Bulb(Start with 40 Watt): And yes it has to be one of the old school, electrical hogging, hot masterpieces of bulb work. The new fangled LED, while great for energy savings, does not get warm enough to do squat
Hammer
Flat Head Screwdriver or a Masonry Chisel*(If you are fancy)
Duck (duct?) Tape: Probably the best choice, we couldn’t find our roll so I think we used some packing tape
Metal Chicken Waterer*
4 Kids (optional): To “help” with the shopping

How to make a DIY water heater for your chickens

Step 1 Get Chiseled

Alright, I completely missed this step. I may have been wrangling one of the kids, cleaning out the laundry room, or making some sort of food. In this family of 6 it feels like someone is always eating. Luckily Adam takes care of dinner, but I tend to handle the snack portions of the day. Anywho, I asked for him to explain this step. Here is how he notched out a section of block so the extension cord can poke through:

I used a masonry chisel (because we have one), but a large flathead screwdriver will do the same thing. Just take patience when doing it. It’s not the kind of thing where you hammer a few times and you’re done. Spend about five minutes slowly making the shape, and you’ll ensure you don’t break the cinderblock as a whole.

Who knew we had a masonry chisel?!

How to make a DIY water heater for your chickens

Step 2 Make a Mix Tape

Dry fit the block over the extension cord and onto the paver. Note where the extension cord sits then do this very, very technical maneuver. Tape that sucker onto the paver.

I know that seems a little rigged, but this is for chickens…

Step 3 Plug and Play

Now plug in your extension cord and set the paver in a nice level place inside your coop. What’s that you say? Your extension cord is too short?! Roll that back up and make another trip to Lowes for the correct length. Now that your paver is in the coop and your cord is plugged in, place the cement block over the cord. If you chiseled enough space the block-paver combo should sit nice, flush, and fairly level.

All you have to do now is put a bulb in the socket and plug it into the cord. If the light comes on you are mostly there!

We have a metal waterer that covered the entire hole making sure no water could accidently pour into the hole holding the electric components. However, I am a nervous nelly with electricity so I made sure to check the fit, how hot the chicken waterer was getting, how hot it was inside the block, etc. I think you really should monitor it too! I personally want my chicken fried by KFC and not by accident.

How to make a DIY water heater for your chickens

Tips

We had to play with the bulb size and placement to get it warm enough to keep liquid water when temps dropped to 15 F (-9 C)

The very edge of the water still seems to freeze from time to time, but the heater keeps the water warm enough that the chickens are able to peck through it with no problem.

Surprisingly, even the little bantams were able to reach the waterer. The redneck chickens seem to have giraffe necks.