I saw a how-to for creating beach glass from Elmer’s Glue and food coloring on Pinterest. While lovely, I wanted to create a more permanent sea glass finish for some cake stands (NOT FOOD SAFE FINISH please don’t sue me if you eat off this and get sick) I was making. That way they could be gently washed and I wouldn’t have to worry about moisture making the finish tacky or white. After, oh so many attempts…. I came up with a good working finish. Thank goodness glass plates are cheap at Goodwill. On to the tutorial:

Supplies
Translucent Glass Paint/Stained Glass Paint (A watered down enamel did not work)
Glass Frosting Spray Paint
Water or Glass Paint Thinner w/ a container to mix them in
Soft brush or Foam Brush
Clear Glass Items

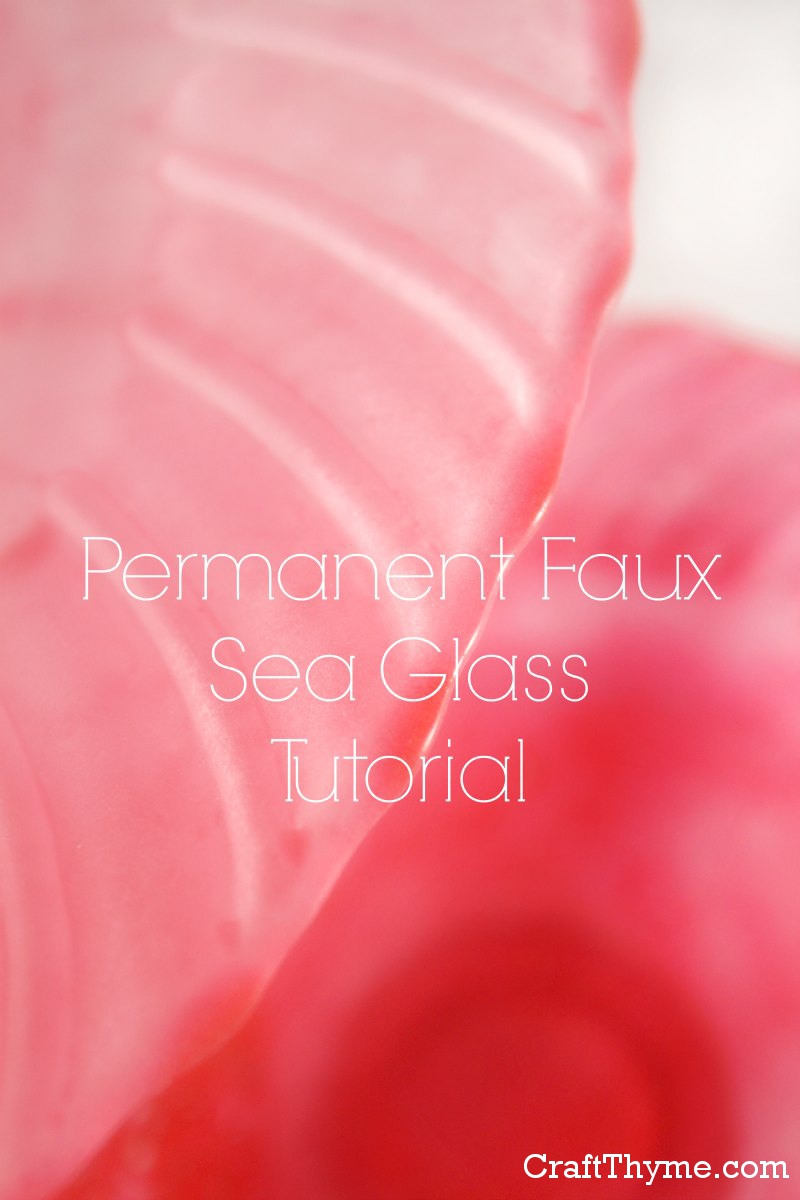
You do not see the stiff paint brush in this picture… You see a foam brush.
Step 1 Clean & Paint
Clean your glass well. Did you get it clean? Good clean it again, wipe it down with rubbing alcohol and try not to touch it. I may sound a little crazy here but if you want your paint to adhere clean the glass. Depending on the paint you have chosen you may water it down with water or a specific thinning agent.
Why am I watering it down? Because you want to achieve a nice thin even coat of transparent to translucent paint. The thicker the paint the more brush strokes showed. The more brush strokes that show the less it looks like sea glass and the more it looked like a hot mess. You can still see some drips and mess ups if you look closely in these photos. The key is multiple coats of thin paint.
Oh and some paints say to dry of oh… 20 days… Um hell no. Ain’t nobody got time for that. Usually you can bake them for a faster finish, but read the directions for your particular paint.

Step 2: Spray Paint Against All Directions
Take the frosting spray…. Now I know you are supposed to be well away from the object etc when spray painting. Ignore all that. You want a THICK coat. Get in close with that spray bottle! You want it to pool in the niches and look glossy and wet before it dries. This will insure a white textured finish akin to actual sea glass. And if it just looks frosted when done, get closer and spray more!

Step 3: Use As Is
That is really the only steps to making a more permanent beach glass finish, suitable for hand washing. I went and finished mine with a little E-6000 glue. Just simply attached my plates to a cup and candle stick to make two cake plates in two shades of pink. The frosting spray says nothing, zip, zero, zilch about being food safe. So I plan to use a paper doily under any food, just to be safe.

Notes:
Spray Away!, Hand Wash, and not food safe! Otherwise you should be good to go.
The key is piling on the frosting spray!

I know this isn’t from yesterday but I’m pretty certain this is what I have been looking for everywhere. You say you can hand wash them: do you think it is something that will hold up in the outdoors? Due to the nature of my project, I wonder if it will hold up to weathering.
I honestly don’t know how it would weather… My guess is the sun, freeze, and thaw would eventually cause the finish to crack. If you test it out please let us know how it goes!
How pretty! It would be nice if they could come up with a paint that is food safe, but as long as everyone knows not to eat directly off of these, or for a vase or candlestick, this is a beautiful look. Thanks for sharing this at What We Accomplished Wednesdays! Have a super week!
Hugs,
Deborah
I know. I’d like to find a foodsafe way to create them… Gonna have to mull that one over. Thanks for dropping by!
Great idea! I am so impressed. That is so pretty and so simple. It would be easy to adapt this to any room with any color. Great!
So glad you like it. I promise it is super easy.
[…] Craft Thyme: Faux Sea Glass Tutorial […]
I really love this – such a great idea and tutorial. You could make these for holiday themed stands in whatever colour suited your décor. Fabulous!!
Thanks so much for linking up at the Inspiration Monday Party this week! I was so excited to guest host and to get to see so many fabulous new projects and blogs! Have a great week:)
Krista @ the happy housie
Thanks so much for dropping by! Glad you enjoyed the tutorial.
Wow! Had no idea this could be done! They look amazing! Love that color! Would love it if you would link this up to Give Me The Goods Monday: 1 Party, 4 Blogs! http://rainonatinroof.com/2013/07/give-me-the-goods-monday-19/
Jenna @ Rain on a Tin Roof
Thanks for the invitation!
This is a great tutorial! I love how it turned out! Thanks for linking to Let’s Connect Thursday!
Thanks for dropping by. Glad you liked it!