Posted on 4 Comments

Dyeing Bottle Brush Trees Really Works

Red and white dyed bottle brush trees for Christmas

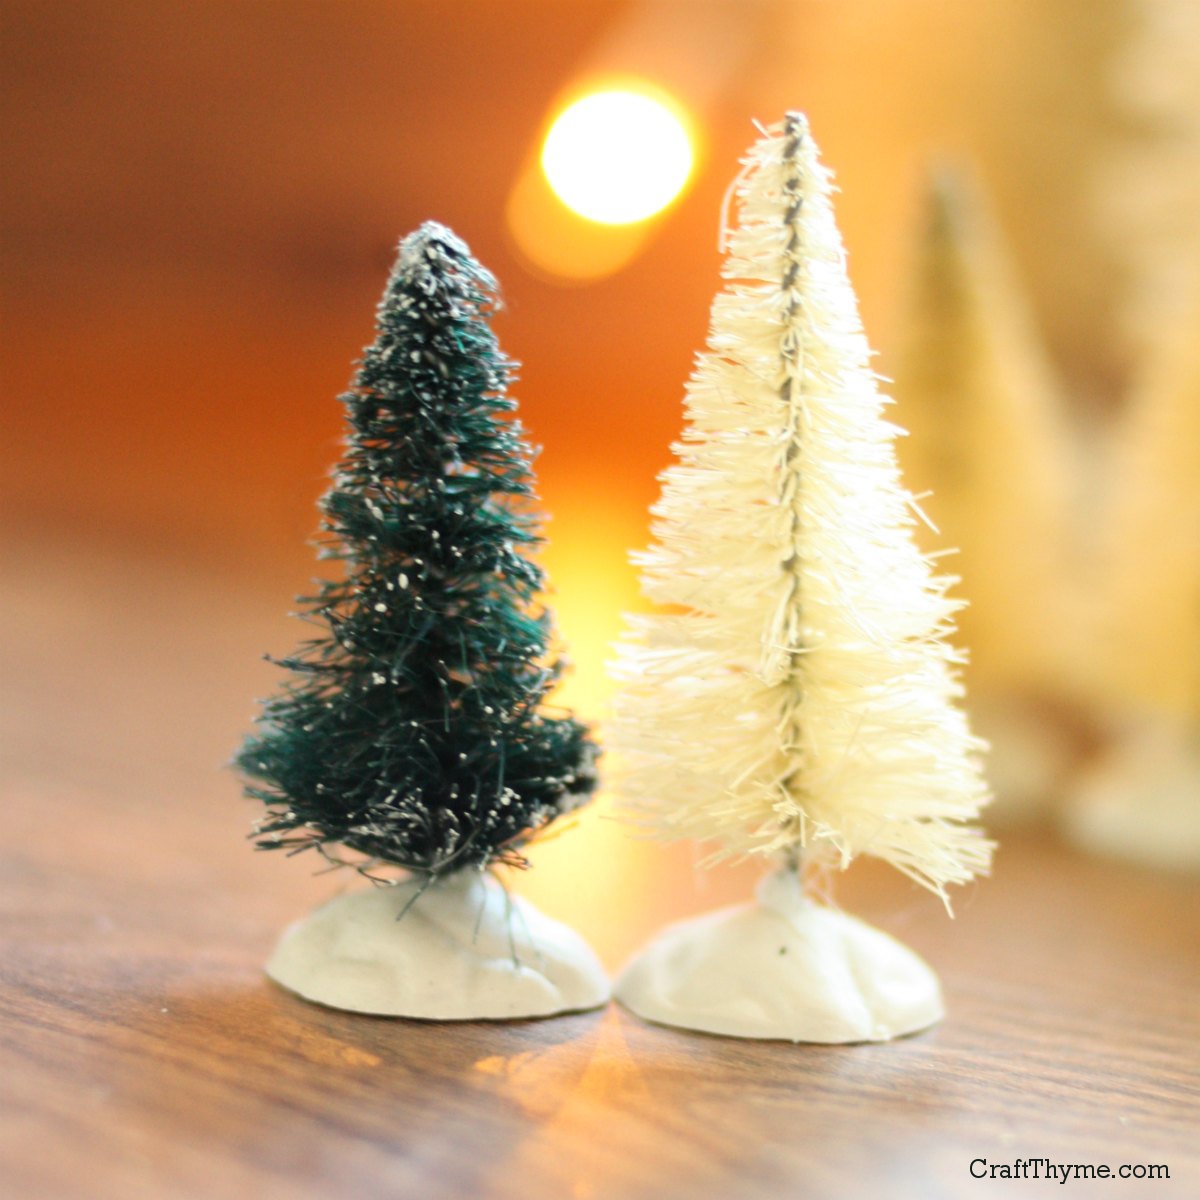
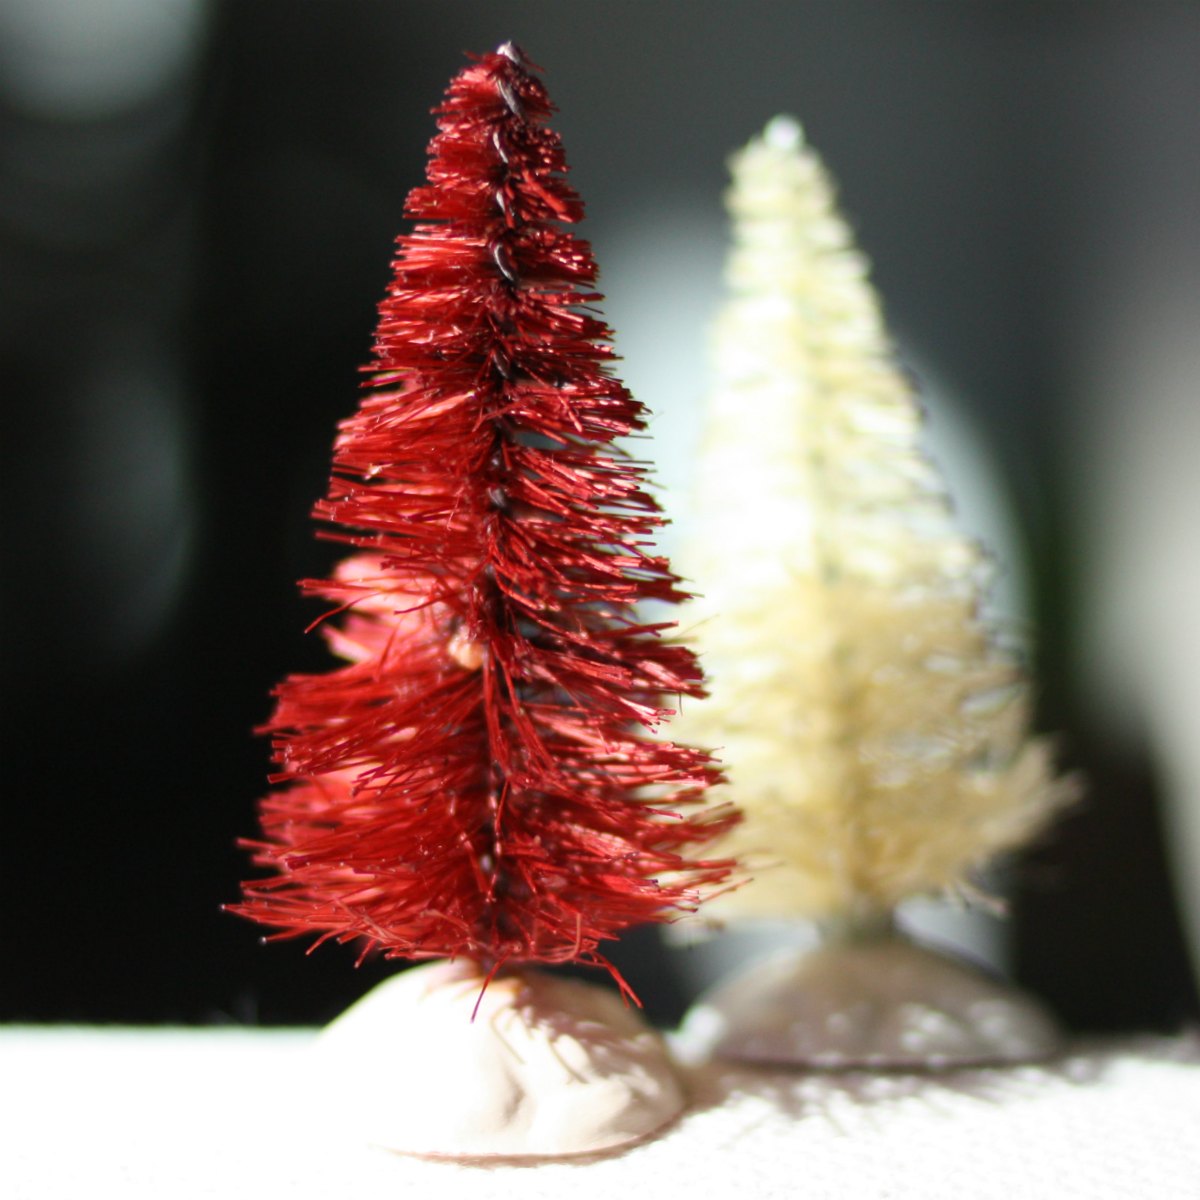
I have to admit I was as surprised that dyeing bottle brush trees worked just as well as bleaching them.  The process goes hand in hand so if you have green Christmas trees you want to dye lighter or different colors check out how to bleach them first.  If you already have light colored trees to dye then read this handy how to.  You can make any color but I chose red to go with my Christmas decor.

DIY how to tutorial on dyeing bottle brush trees


Supplies

Step 1

Prepare the dye bath.  This step always seems easy BUT invariably I end up getting dye on my skin, or making a bad color, or boiling the water instead of warming it…  I didn’t bother with salt or basically directions.  I’m a rebel like that.  Just mixed some dye and warm water.

Preparing a dye bath for bottle brush trees


Step 2 Dying to Dye Them

Put trees in dye.  Swish LIGHTLY (see notes for why it needs to be lightly).  I let mine sit about 30 minutes. I hope this is pretty self explanatory

Dip dyeing bottle brush trees


Step 3 Rinse and Repeat.  Well just rinse and set them to dry

I am hoping I don’t really need to write text for this step.  It says it all in the title.Detail pictures of red and white dyed bottle brush trees


Notes

Here is what happens when you use a freshly bleached (wet) tree and then over swish.  The ‘needles’ got over saturated.  It basically looks like my cat hacked it up.  You can still redeem this tree when dry.  But that requires lots of combing and re-wetting stubborn areas to dry in a nice way.  Honestly, don’t do this.

Also got your dye very hot?  Then yeah if you have cheap plastic bases you may end up warping them a bit.

Dyeing bottle brush tree fail

Other than that you have some great bottle brush trees in any color you need for Christmas and other holidays.

Red and white dyed bottle brush trees for Christmas

Enjoy these articles? Get biweekly updates by joining my mailing list (no spam, no way, no how)

*These are affiliate links.  I only get money from these links if you decide to buy.  I was not compensated to mention this product and spent my own money purchasing, testing, and using similar items in developing these tutorials.

See more great DIY, Decor, & Crafts at these link parties: My Romantic Home, The Pin Junkie, Dream A Little Bigger

Posted on 8 Comments

Holy Sh*t: Bottle Brush Trees Really Bleach

Before and after bleaching bottle brush trees

I have recently read a number of ‘How To Bleach Bottle Brush Tree’ tutorials.  All of them had a theme, grab some cheap bottle brush trees, throw some cap-fulls of bleach in water and glorious vintage looking trees shall emerge!!!

Kinda

Bottle brush trees are not cheap and It takes a crap ton more bleach than anyone says.  BUT the vintage glorious-es-ness that appears is amazing. Now see how to really bleach bottle brush trees.

Before and after bleaching bottle brush trees


Supplies

  • Bottle Brush Trees (Try Googling sisal trees too.  Honestly I got mine at Kmart (nope, they aren’t paying me).  I couldn’t beat 21 trees for $12.99 even online)
  • Bleach
  • Water
  • Sink or Bowl to bleach them in

Step 1

Fill up a sink or bowl with warm/hot water.  The warmer water bleaches faster.  Faster, being relative.  This process is gonna take a couple hours.  Throw in the trees, if you have ones that are made of a material that will bleach then they are going to sink as the soak up water.  Throw in two cups, that’s right two CUPS of bleach.  Don’t pussy out here with a couple cap-fulls.  Let’s get this bleaching party started. Gently stir the trees around so they are evenly submerged.  Gently.  You don’t want a matted mess to deal with later.

First bleach bath for bottle brush trees
These dark trees really do turn cream. Trust me I was a freaking shocked as you when it worked.

Step 2

After letting the trees set for about 20 minutes the water will turn a lovely color of ick.  Drain all that out and repeat step 1.  Oh hell yeah I said 2 MORE cups of bleach.  We are bleaching trees here people.  Not coddling them.  Let this mixture set for 30 min to an hour.  Depending on the tree, they bleached fully white in that time frame.  Well except one… I had one dud tree that refused to bleach fully.  That puppy is red now, but that is another story…

Process of bleaching bottle brush trees
I am naming the color ‘ick’

Step 3

Rinse the trees out.  Lightly rub the trees to remove any stuck on fake snow if your trees had them on it. Lightly shake the trees upside down to remove extra water and fluff the fibers.  Set them aside to dry and marvel that an internet tutorial actually worked!

DIY bleached bottle brush trees

Enjoy these articles? Get biweekly updates by joining my mailing list (no spam, no way, no how)

See other great DIY, Crafts, and Decor at these link parties: Craftberry Bush, Twigg Studios, Dream A Little Bigger

Posted on 8 Comments

Easy Advent Calendar Garland

Detail of the easy advent calendar garland

Although today is the first day of December it is not too late to make an easy Advent Calendar.  I whipped up this awesome collection of treats just using small boxes, ribbon, and wire.  As a child, the Advent Calendar I remember fondly was a simple felt Christmas tree.  Each day I got to remove an ‘ornament’ from the date and place it on the tree.  On the 24th the star went on top.  The boys are finally old enough that I wanted to institute some traditions of my own, starting with an Advent Calendar.Tutorial on creating an easy Advent Calendar Garland

Supplies

(Spoiler there isn’t a bunch of how to pictures, I am trusting you to use your brains on this one)

  • Small Boxes 12- 4″ x 4″ & 13- 3″ x 2″ (I have a Christmas Day Box if you realize that adds up to 25)
  • Various Ribbon
  • Wire (to hang boxes on)
  • Permanent Markers (colors to match ribbon)
  • Goodies to stuff in the boxes
Detail of Easy Advent Calendar Garland
Honestly, please tell me we don’t need the usual step by step photos on this one… Please…

Step 1: If You Saved Money & Bought Flat Boxes

If you have cash take the boxes that are pre-assembled.  If you didn’t, grab a beer and start folding.  Maybe catch up on Sherlock or Dexter.  Continue folding.  Stop to put on lotion because the paper has dried out your hands. Continue folding.  You get the idea….

Step 2: Divvy Up The Loot

I bought cheap little things like Hershey’s Kisses, marbles, couple little Hot Wheels, etc.  I made sure there was two of everything (since this is supposed to be fun and not a fight between siblings) and put some thought into days.  For example, I got two small craft kits and made sure to pick a weekend box so I could do the craft with the boyos and packed a special Christmas Morning box to finish it off.  Genius Moment!: I penciled the date in on the bottom of the boxes.Detail of the easy advent calendar garland

Step 3: If You Got To Skip Step 1

Ha ha ha.  If you skipped step one, then this is your payback.  Now tie tiny bows on all the boxes. Drink wine and catch up on the Daily Show.  Congratulate yourself on nominally watching some educational ‘news’ while crafting.

I tied a simple bow on each one.  This was on purpose (not just laziness/ beer) as the boys could each grab one side of the bow and untie it together. Take a moment to bask in the present-opening, brotherly-love scene I played out in my head. In actuality it played out exactly as I pictured which was damn good!

The key to uniformity of the garland is to pick coordinating ribbon.  I did a mix of bakers twine and satin ribbon in red and white.

Step 4: Marker Your Territory

If you have lovely handwriting, then I am envious and you can just go write in your numbers.  I cut out a 0-9 stencil using my Silhouette and created my numbers using red and gold permanent markers

Step 5: Ho Ho Hanging

String a selection of presents on the wire and hang.  I simply strung the wire under the bows.  I left some of the packages off and used extra ribbon to tie them in place staying nominally in day order.

More Details of the Advent Calendar Garland

Finale

We just pull off the correct box in the morning.  Then let the boys finish untying it and watch them get super excited about tiny trinkets.  Later I just tie the empty box back in place, which, is a hell of a lot easier than trying to move an elf around each night.  Bonus: Tie a special colored ribbon around that box of the day!

Advent Calendar Garland as part of a larger Christmas mantel
This is not my final Christmas Mantel. Though I will have a tutorial for the bleached/dyed bottle brush trees this week.

Enjoy these articles? Get biweekly updates by joining my mailing list (no spam, no way, no how)

See more great DIY and Decor at these link parties: Dream A Little Bigger, Craft-O-Maniac, By Stephanie Lynn

Posted on Leave a comment

Gingerbread Cake: Last Minute Holiday Baking

One thread you’ll notice if you read here long is that I am consistently completing tasks at the last minute. I loathe being late, but I can’t say I manage to get things done weeks in advance. As usual I needed a last minute Holiday recipe and ummm… Well last year I recommended my chocolate dipped pretzels, which, would have been wonderful IF I had reviewed my recipe. Yeah, I burned chocolate… again.

Since this happens a lot I have a fall back recipe. I think the recipe originally started with one I found in a magazine, but I have tweaked it until it makes a nice moist semi-sweet cake that looks like this:

You can bake in a large bunt pan, but I like to bake them in mini-loaf pans and give them as small gifts. As cakes go this one seems to rise well, not stick, and are predictably tasty. Best part they make a great breakfast treat if there are any left over :).

Recipe

Dry ingredients:

  1. 2 & 3/4 cup Flour
  2. 1 tsp Cinnamon
  3. 2 tsp Ginger
  4. 1 tsp Baking Powder
  5. 1 tsp Baking Soda
For additional spice you can also add 1 tsp nutmeg.
Creamy ingredients:
  1. 1 & 1/4 cup Shortening
  2. 1/4 cup Packed brown sugar
  3. 1/4 cup White sugar
  4. 2 Eggs
  5. 1 cup Molasses
Liquid:
  1. 1 cup Water

Directions:

Mix all the dry ingredients together in a bowl. In a separate bowl use a hand or stand mixer to whip the shortening until fluffy. Then fully cream in the brown and white sugar. Once completely whipped mix in the eggs and molasses. Then mix the dry and liquid into the creamy ingredients.

It works best to alternate 1/3 dry with 1/3 water. Just mix until everything is incorporated. Try not to over mix.

Bake at 350 degrees for 35 minutes for small loaf pans or 50 minutes for single cakes. I spray the pans with non-stick cooking spray. I tried traditional greasing with flour but had it stick a few times. Let it cool at 15 minutes and turn out to finish cooling after that.

For Added Sweetness

It is easy to make a simple lemon glaze to pour across the top.

  1. 1 cup Powdered Sugar
  2. 2 tbsp Lemon Juice
Optional candied ginger for garnish.
Mix the sugar with vanilla and lemon juice. If watery add more sugar and if still dry add water until liquid enough to pour. Pour over the cakes and top with crystallized ginger. Let dry to form a hard glaze then wrap cakes to keep moist.
Enjoy!
Posted on 1 Comment

White and Silver Christmas Tree

My Christmas tree coordinates with the adjoining Snowy Woodland Mantel. However, I had to add a little more shimmer as you can see here.

Perhaps you have noted the diminutive size of this particular tree. Make no mistake, we carefully selected our special tree. We might have been the ONLY people out looking for our own perfect “tiny” tree. Certainly Lowe’s or Home Depot has expanded their tree selection to include some live tabletops in the last few years, but if you really want that elusive size above table-top but below 6 feet you are going to have to seek out a small grower.

Luckily for us we live in the land of tree farms. Neither Patrick nor I had visited one since our childhood, but we had someone mention a good one to visit and we set out in the early morning to gather ourselves the perfect tree. And oh what fun! I’m not sure I can ever go back to the supermarket tree.

Does anything say holidays like cutting your own tree on a crisp misty morning?

The morning consisted of visiting Santa (with better results), eating candy canes, and drinking hot cider and chocolate. Boyd Mountain Tree Farm offered activities for the kids (free), Santa photos (free), and refreshments (free). Seems they really just wanted to sell you a tree, garland, or wreaths. How refreshing! We wandered the mountain, picked one and they cut, baled, and loaded your tree. You can of course saw that puppy yourself if you want, but we weren’t feeling that rustic.

McClain was enamored with his first candy cane. Patrick and I were amazed by the tree baler that ties them right up.

Upon getting it home Patrick loaded it up in the tree stand and McClain and I decorated. We used just silver, white, and the crystal ornaments I made (tutorial here). Without a real tree-topper in the right colors (or the right size) I improvised and cut a snowflake topper out of metallic paper. I thought it went nice with the mantel snowflakes.

I can’t believe I got my two year old to listen when I said be gentle with the ornaments! To bad he ignores every other command.
Details of the store-bought and hand-made ornaments.

Best part about the tree? When McClain points at it in the evenings and says “Light! Light!” We switch it on and he adds “Ahhhh!” I see our Christmas traditions already being created!

“Ahhh!”

Well this pretty much completes my tour of Christmas. If you would like to see the rest of the holiday decorations then check these out.

Snowy Woodland Tablescape or my simple place setting redo in Red and Silver

Snowy Woodland Mantel

Crystal Ornaments

Or take the Whole Home Tour 2011

Metallic Frosty Tree

We would love to know who stopped by to see our tree! Please leave a comment below.