[sam id=”1″ codes=”true”]
Do you want to know how to make your own decorative wooden planter boxes or raised beds? Well then let me give you this How To Make Raised Beds tutorial. But first a little background! I have never done raised bed gardening before. My family had always preferred to till or double dig a garden plot. So when faced with the hard-pottery like surface of my yard I assumed it would be a year or two before I could remediate enough soil to plant a nice vegetable garden. We have been more focused on attempting to get some grass to grow and beds mulched before the entire yard became a pile of weeds.
I am sitting at work when this text comes through:

Adam came through with planter boxes. Not just some crappy raised beds! No I was getting full, wooden, decoratively accented, planter boxes. You might ask why we are about to get, yet another, Adam tutorial. Well let’s face it folks, spreading mulch and planting 10 billion strawberries just doesn’t make for that great of a tutorial! Which is all I have done the last few weeks, mulch, weed, plant, repeat. Good for the soul, not so good for the interwebs fame. On to the tutorial:
How to Make Raised Beds or Wooden Planter Boxes

Material List
(Yet again furnished by Adam someone who actually makes note of these things)
- Lumber:
6 – 2″ x 8″ x 12′ untreated lumber. Unit cost: $8.05 Total cost: $48.30
2 – 2″ x 8″ x 10′ untreated lumber. Unit cost: $6.63 Total cost: $13.26
1 – 2″ x 4″ x 8′ untreated “cull” (second) lumber Discounted cost: $0.94 - Metal Conduit: 10 – 10′ x 1/2″ . Unit cost: $2.30 Total cost: $23.00
- Compression Coupling: 5 pack 1/2″ Unit cost: $2.16
- Conduit Tube Straps: 25 pack 1/2″ Unit cost: $3.75
- Wood Screws:
1lb pack of 2-1/2″ exterior wood screws Unit cost: $8.47
2 – #10 x 1 Wood Screw 10 Pack Unit cost: $1.18 Total cost: $2.36
Total Material Cost: $102.24 (99 square ft of garden space)
We can totally get into a discussion about treated versus untreated if you want. Personally I would rather be on the safe side. You can use expensive cedar etc if you like but I would read the analysis in this article about Raised Beds and False Economies from Northwest Edible and make a decision on the material you want to use. We went with the cheaper, yet more often replaced version.
Cut List
- Lumber:
2 – 2″ x 8″ x 12′
2 – 2″ x 8″ x 9′
2 – 2″ x 8″ x 3′
4 – 2″ x 8″ x 6′
10 – 2″ x 8″ x 10″
- Conduit:
8 – 6′
2 – 9′
2 – 3′ - Cull lumber:
7″ sections to act as joining block in bed corners
Step 1: Cut Me Right Back Down to Size
I might just have aged myself with that title… However, the first step is to make all your cuts, if you didn’t get the home improvement store to do it already. As I mentioned in the matching Wooden Trellis post, it might be a good idea to get them to cut it. Otherwise you need specialty blades and safety goggles for the conduit especially. Please be careful and cut responsibly. I don’t want anyone to lose a finger and/or sue us. You decide which one worries me the most.
Step 2: Sides, Sides, Everywhere sides
Assemble each side as follows. Screw two decorative end pieces to each end of the lumber. They should be flush at the bottom, 1.5 inches on the side, and stick up 2.75 inches above. As Adam had to explain to me an 8″ board is really only 7.25 inches. Hence the 2.75″ height on the 10″ cut end caps. Trust me I argued the math on that one before he reminded me about the measurements of dimensional lumber. You can see the edge spacing a bit better in the next couple of pictures if my verbal description didn’t make sense. Note: He even made the screw holes into nice satisfying triangular shapes.
After you have all the wood joined, take your matching pieces of conduit and strap them down with the conduit tube straps. Pick a height you think looks good. Adam wrestled with the idea of making nice wooden joins to hold the conduit. I reminded him that A) it would rot that much quicker and B) this was meant to hold dirt and plants. Not survive the scrutiny of furniture design. No one was going to come take points off for using straps… The plants would cover the interior anyway! My logic won the day and made the project much easier and faster.

Step 3: Screw It
Take your sides and overlap each piece the 1.5″ you left and screw them together, or take your cull lumber and use it as a block to join each side by screwing from the inside to the outside. What is the difference? Option 1 results in extra screw holes on the outside but is easier to hold in place and screw. Option 2 leaves no new holes on the outside but really takes two people to hold all the pieces together and make a join. We actually joined them together both ways. The road facing side has the pretty joins as I was home and able to help at that point.
REMEMBER, you are going to want to screw the pieces together very near the final destination. Like within inches!!!! You are only going to want to scoot and shimmy these to make them square when all assembled.

Step 4: If I’m Lining I’m Crying
This next step is purely optional. My yard is not level, not even close to level. And I personally wanted as much of the box to show as possible, which means not burying it in the yard. We could have leveled the ground but who the hell has time for that? Or you can take some landscaping fabric and staple it to the interior. I am sure the idea of landscaping fabric is not new BUT I felt pretty smart figuring it out on my own. I took the 3 ft wide section and cut it into 1/4 sections that were 7′ to 13′ long. Then I stapled the hell out of it along the interior bottom of the wood. Why?! Because usually I loathe landscaping fabric with a passion but I didn’t want all the dirt to wash out of the un-level areas. It does have its uses. Note: I made sure not to go to far into the box either in case an intrepid root want to attempt to penetrate the godawful dirt below.
Once you have everything together and fabric stapled you will need to kind of shimmy all of into perfect square. This is a great time to argue about actually square versus what looks square in your yard. It is even a more excellent time to keep readjusting the square after looking at it from various angles and arguing some more. I bet you can guess this is about the part in the process that I came home. I have the unique ability to complicate a project in less than .002 seconds. Call it my DIY super power.

Step 5: Fill ‘Er Up
We bought soil (see the aforementioned craptastic clay lot we own) and it was my job to fill the beds. We did throw in some lovely clay soil at the corners and to hold down the landscaping fabric. Why? Because we were planting some trees at the same time and it was so dang windy that day. Seemed like a good place to dump it and hold it down. On top of that I poured bag after bag of garden soil and mixed in some compost. Note: The soil will settle so make sure to fill it slightly higher than you want for the final level.

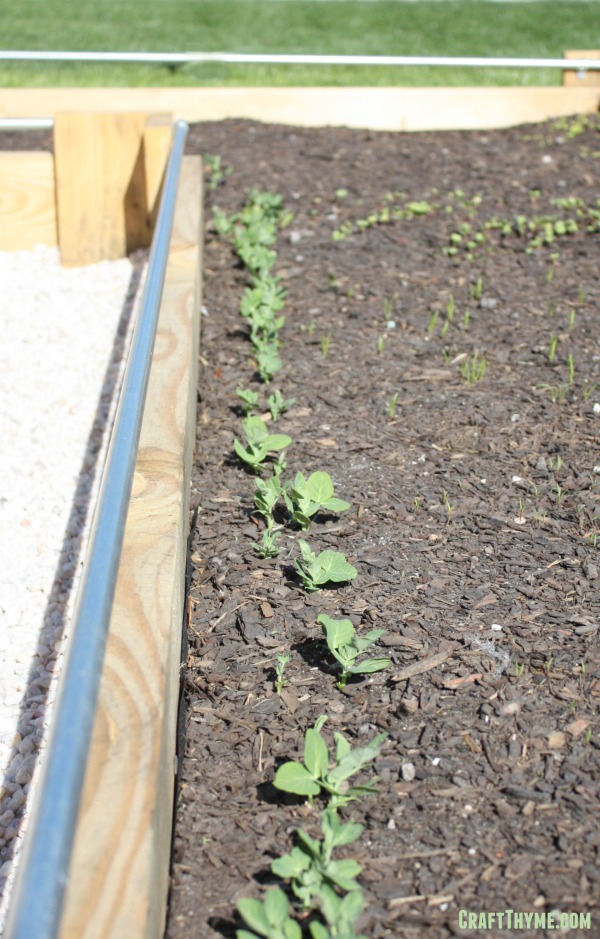
The kids were so excited to plant seeds!!! And I have been pleased by how weed free and easy to maintain they have been. It has not hurt that I get compliments by all the joggers and walkers that pass by! Hopefully I’ll have a nice small harvest to show for all this work!

what are all the dimensions of your raised beds?
The central square is 6′ x 6′ and the outside beds are an “L” that was 3′ wide and 12′ on the outside of the “L” and 9′ on the interior of the “L”.
[…] How to Make Raised Bed or Wooden Planter Boxes – Craft Thyme […]
This looks so good! I made one of these last year but not as nice as yours. I’m sure you will enjoy it!
Thanks! So fair I am loving the raised beds. The soil is so loose and easy to weed.