Welcome to June, the month where gardens and homesteads are in full swing! As the summer heat begins to ramp up, it’s time to roll up your sleeves and get to work. But don’t worry, we’ve got you covered with our ultimate June garden and homestead to-do list. Whether you’re a seasoned green thumb or just starting out, this list will help you stay on top of all the tasks you need to complete to keep your garden and homestead thriving for USDA zone 6 and zone 7. So grab your tools and let’s get started!
Let’s get started with checklists suitable for zones 6a, 6b, 7a, and 7b and specially targeted towards the mountainous regions of North Carolina, Tennessee, and Virginia.
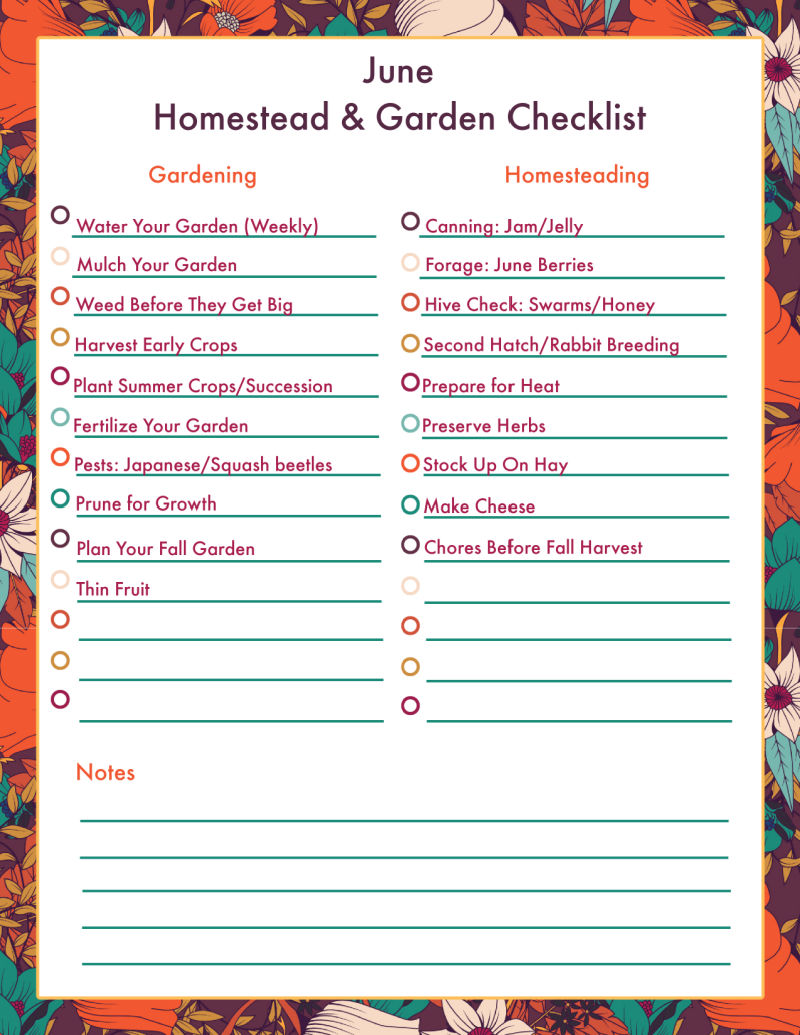
June Urban Homestead and Garden Chore Checklist
Gardening Checklist:
Water your garden – As the weather starts to warm up, make sure to keep your plants hydrated by watering them regularly. They should have a good root system by now so make sure to not overwater. A rain gauge can help you monitor for at least 1 inch of rain per week.
Mulch your garden – Mulching can help to conserve moisture in your garden, reduce weed growth, and regulate soil temperature. Consider adding a layer of mulch around your plants in June if you did not do so in May or were waiting for seeds to sprout.
Weed your garden – With the warmer temperatures and increased rainfall, weeds can quickly take over your garden. Stay on top of them by weeding regularly. See number 2 as a way to really cut down on how much weeding you need to do
Harvest early crops – Depending on what you’ve planted, some of your early crops may be ready for harvest in June. Be sure to pick them promptly to encourage continued growth. It also may be too warm for cold weather crops. Remove lettuces, brassicas, and other crops that are bolting to make room for #5
Plant summer crops – June is a good time to plant heat-loving summer crops like corn, tomatoes, peppers, and squash. If you already planted once set this is the time to plant more for succession harvest
Fertilize your garden – If you haven’t already done so, apply a balanced fertilizer to your garden to give your plants a boost. We like a slow release organic fertilizer
Monitor for pests – Keep an eye out for pests like Japanese beetles. Check for early squash and cucumber beetles before the lay yellow eggs. If you spot any, take action to control them before they cause serious damage. For organic control you can use Japanese beetle traps (Our chickens also love to eat Japanese beetles). We walk around with a small jar of alcohol and knock any squash beetles into the alcohol. Instant death!
Prune your garden – Prune any dead or damaged branches from your trees and shrubs, and deadhead spent blooms from your flowers to encourage more growth. If you are doing espalier or intensive orcharding make sure the new growth doesn’t get out of hand.
Plan for fall – Believe it or not, June is a good time to start thinking about your fall garden. Consider what you plan to plant (cool-weather crops like broccoli, cauliflower, and Brussels sprouts) and order seeds. A lot of seeds will start to go on sale in June and July.
Thin Fruit – While peaches are pretty good at thinning themselves (Peach drop) you may need to thin apples, pears, and plums to get larger, quality fruit, and reduce limb strain of smaller trees.
Urban Homestead Checklist:
Jam/Jelly Time – Nothing beats homemade berry jams! This June, grab your water bath canner and start preserving those delicious fruits. Not only is it a great way to enjoy your harvest year-round, but it’s also a fun activity to do with friends. Make an afternoon canning session.
Forage for fruit – Have you tried foraging for Juneberries or Serviceberries yet? They’re in season, and they make for a tasty snack or a unique addition to your homestead recipes. Just be sure to properly identify any wild fruits before eating them! In other words, if you don’t 100% know what it is do NOT eat it.
Hive Checks – If you’re a beekeeper, now’s the time to check your hives for swarms and honey. Even if you’re not a beekeeper yet, it’s always good to learn about these fascinating creatures and the role they play in our ecosystem. While we aren’t beekeepers (yet) here is a handy guide.
Second Hatch/Breeding – For those who raise quail, rabbits, or chickens for meat, it’s important to plan ahead for the hot weather that’s coming. Start a new hatch or complete rabbit breeding before the summer heat hits, so you can ensure a steady supply of protein for your family.
Prepare for Summer Heat – Make sure all your animals have access to shade and plenty of water during the hot summer months. Consider adding shade cloth to your greenhouses or high tunnels, or installing fans to keep your animals cool and comfortable. In the mountains, I rarely have to add fans for the animals as they have access to forest and shade, but we absolutely have to add them to the greenhouse.
Preserve Herbs – With cooler weather herbs like cilantro and basil in season, it’s the perfect time to collect and dry them for tea and cooking. You can also freeze your herbs for use throughout the year.
Plan for Fall/Winter – While the summer is in full swing, take some time to plan ahead for the fall and winter months. Stock up on hay and other feed for your animals, and order any necessary supplies in advance. Don’t forget to take advantage of seed sales, too!
Catch up on Chores – With a slower garden month in June, it’s the perfect time to catch up on any homestead chores that may have fallen behind. Mend clothing, build infrastructure, try out a new skill like basket making or leather working, or even brew some beer or make cheese if you have goats in milk! We have goat envy for sure.
Background floral used with permission from https://www.freepik.com/
Get ready for summer on your urban homestead with our June to-do list! From making delicious berry jams and foraging for fruit to checking on your hives and planning for fall, we’ve got you covered. Plus, catch up on chores and try your hand at new skills like basket making or leather working. Keep your livestock happy and healthy with shade cloth and cooling methods, and stock up on hay and feed while it’s plentiful. With our tips, you’ll be ready for whatever homesteading adventures come your way!
As spring turns into summer, it’s time to turn your attention to your urban homestead and garden. For those residing in zones 6a, 6b, 7a, and 7b, May marks the start of a busy gardening season. This is THE busy season when it comes to gardening and homesteading with garden, livestock, and general maintenance piling up! With a little planning and elbow grease, you can ensure your homestead and garden are productive and beautiful all season long. From sowing seeds to maintaining your compost pile, there are plenty of essential tasks to tackle this month. In this article, we’ll cover some of the key May garden and urban homestead chores to help you make the most of this exciting time of year.
Let’s start with some gardening and homesteading checklists and then move on to resources to help you get the most out of your urban homestead and garden. This is a big month, with a big list, don’t get overwhelmed and check off what is applicable to your garden and urban homestead.
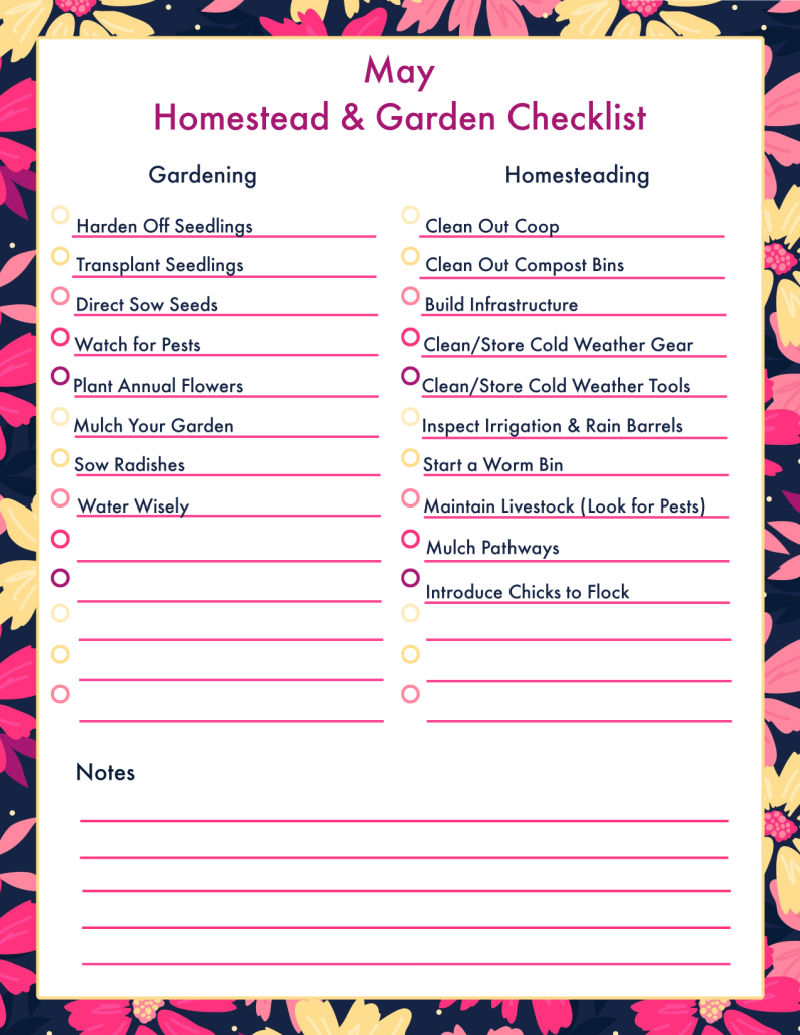
May Urban Homestead and Garden Chore Checklist
Gardening Checklist:
Harden off seedlings – Gradually expose indoor seedlings to outdoor conditions over the first two weeks before transplanting. This helps them adjust to the outdoor environment and reduces transplant shock.
Transplant seedlings – By Mother’s Day weekend, it’s typically safe to transplant seedlings outdoors in most regions. Make sure to plant them in nutrient-rich soil and provide adequate water and sunlight. You may think you can plant before Mother’s Day, but as my Great-Granny always said: ‘No’.
Direct sow seeds – Sow 1/2 to 1/3 of your corn and bean seeds directly into the ground to ensure a succession harvest throughout the summer. Also, consider sowing a second group other succession veggies like beets and carrots.
Watch for pests – Keep an eye out for common garden pests like cabbage worms, aphids, and squash vine borers, which can damage your plants. Consider using natural pest control methods like companion planting, neem oil, or insecticidal soap.
Plant flowers to attract pollinators – Flowers like marigolds, zinnias, and cosmos attract pollinators like bees and butterflies, which help to fertilize your plants and increase yields. Marigolds also help deter pests and make your garden look pretty.
Sow radishes – Sow radish seeds in between your other plants to help fill in empty spaces and deter pests like cucumber beetles. Radishes are fast-growing and can be harvested in as little as 30 days.
Fertilize your plants – May is a good time to fertilize your plants with a slow-release fertilizer to provide them with the necessary nutrients for growth. You can also top dress with compost as you plant.
Mulch your garden – Apply a layer of mulch around your plants to help retain moisture, suppress weeds, and regulate soil temperature. I switched to pine straw for my beds. No weeds (from hay or straw) and according to several agricultural extensions the needles do not significantly acidify your soil! We use a wood mulch on flower beds and pathways that aren’t brick.
Water wisely – As the weather heats up, it’s important to water your plants deeply and infrequently to encourage deep root growth. Consider using a soaker hose or drip irrigation system to conserve water and reduce evaporation. Seedlings are at their most tender and usually need some additional moisture to establish good root systems.
Urban Homestead Checklist:
Clean out coop – If you didn’t get to this in April give your chickens a fresh start for the new season and make sure they have a clean and healthy environment.
Clean out compost bins – turn and mix your compost to ensure proper decomposition and make room for new materials. We usually use 90% of our compost when prepping my beds. This is a great time to clean them out and repair any issues before filling them again throughout the growing months.
Build infrastructure – take advantage of the mild weather and build new trellises, raised beds, or fencing before the summer heat sets in.
Clean bedding and pack away clothes – pack up your winter clothes and bedding to make room for summer items. This is a wonderful time to line dry blankets and get that fresh spring smell into all your items before packing them away.
Store winter tools – put away snow shovels, sleds, and other winter tools to free up space in your shed or garage. Don’t be like us and end up with a pile of dirty sleds behind the house in June.
Start a worm bin – create a worm composting bin to help reduce food waste and create nutrient-rich soil for your garden. It will be warm enough to get worms shipped to your house if you don’t have a local supply
Check irrigation systems – If you didn’t get to this in April, inspect and repair any leaks or clogs in your irrigation system before the summer heat sets in. You will need the irrigation in May or June to get that garden rooted deeply enough to handle smaller droughts of rain.
Mulch Paths- apply a layer of mulch to well used pathways to keep weeds at bay and reduce mud during spring rains.
Start moving chicks outside – Depending on the temperature and when you got your chicks it may be time to start introducing them to the flock. Once they have enough feathers for warmth we move them to a sectioned off area of the run so they can see the flock for a week or two before learning to free range with the rest of the chickens.
Maintain your livestock – If you have goats, bees, chickens, or other small livestock this is the time to check for mites, deworming, etc. Pests start coming out of the woodwork this time of year.
See Link Below for a Free Printable PDF version. Background imagery used with permission by https://www.freepik.com/
May is a busy time for urban homesteaders and gardeners, but with a little planning and effort, you can ensure a bountiful harvest and a healthy, thriving homestead. Use this checklist and resource list to help guide your efforts and make the most of this exciting time of year. Happy gardening and homesteading!
As spring settles in, it’s time to turn your attention to your urban homestead and garden. For those residing in zones 6a, 6b, 7a, and 7b, April marks the start of a busy gardening season. With a little planning and elbow grease, you can ensure your homestead and garden are productive and beautiful all season long. From sowing seeds to maintaining your compost pile, there are plenty of essential tasks to tackle this month. In this article, we’ll cover some of the key April garden and urban homestead chores to help you make the most of this exciting time of year.
Let’s start with some gardening and homesteading checklists and then move on to resources to help you get the most out of your urban homestead and garden.
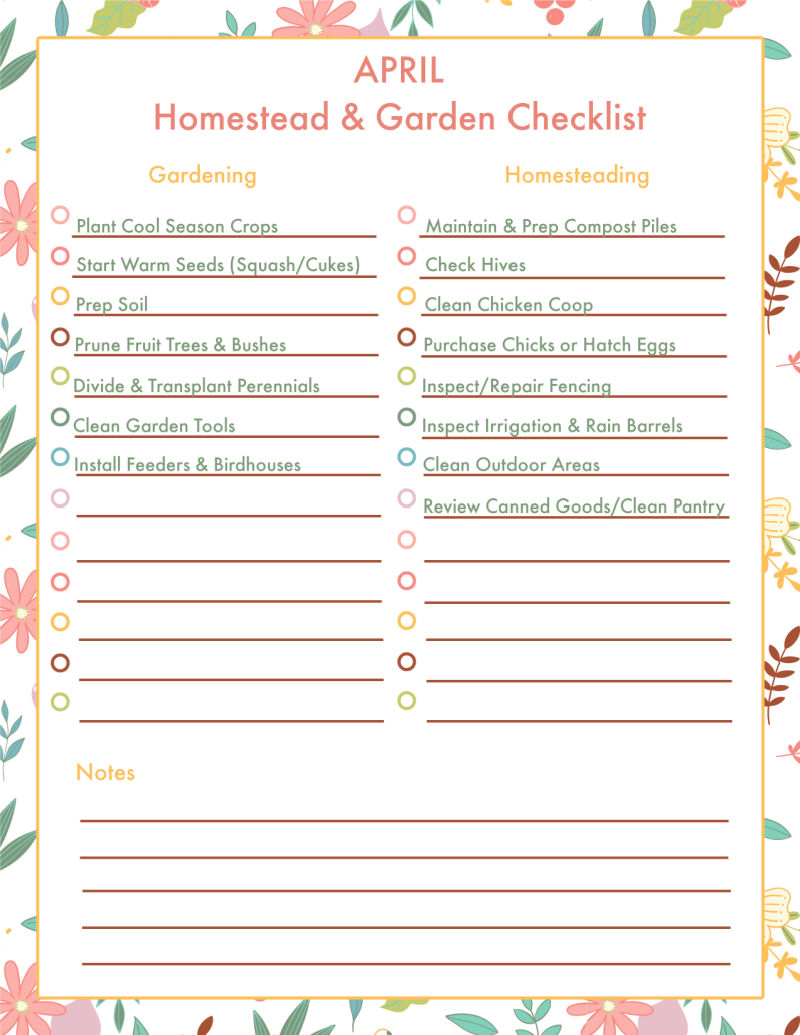
April Urban Homestead and Garden Chore Checklist
Gardening Checklist:
Prepare your soil – Remove any weeds and debris from your garden beds and add a layer of compost or organic matter to improve soil health. If you have left last years seeds and leaves to sustain wildlife now is the time to clean it all out
Plant cool-season crops – April is the perfect time to sow seeds for cool-season vegetables such as peas, lettuce, and spinach. If you live in the mountains consider row covers to assist with late frosts. No matter how warm it gets and how much you want to plant those tomatoes outside… DON’T. You will regret it.
Start fast growing warm weather crops – If you have managed to hold out this long, it is finally time to start your fast growing warm-weather vegetables like squash and cucumbers. They only need 4-6 weeks to be ready to plant out (Just in time for Mother’s Day!)
Prune fruit trees and shrubs – Prune any dead or damaged branches from your fruit trees and shrubs to promote healthy growth and a bountiful harvest. Be careful not to prune out limbs or remove plants that haven’t leafed out yet. Some species like figs and paw paws leaf out much later.
Divide and transplant perennials – Divide and transplant overcrowded perennial plants like day lilies, hostas, and irises.
Clean garden tools – Clean and sharpen garden tools to ensure they’re ready for use. If you are anything like us, its also a good time to sort out that piled up garden shed or greenhouse.
Install birdhouses and feeders – Set up birdhouses and feeders to attract beneficial birds to your garden.
Urban Homestead Checklist:
Maintain your compost pile – Keep your compost pile well-maintained by adding a balance of “green” (nitrogen-rich) and “brown” (carbon-rich) materials and turning it regularly to ensure proper decomposition. If it has been sitting all winter this is a great time to get it stirred back up and finished off in time for planting in May.
Check on your bees – If you’re keeping bees, now is the time to check on your hive and make sure your bees have enough food and space to thrive. We aren’t bee keepers but we suggest taking a class from Oxx Beekeeping (often at Organic Growers School) and reading more here.
Clean your coop – If you’re raising chickens or quail, be sure to clean out their coop and nesting boxes to keep them healthy and happy. We like to take down window covers, do a full clean out of the run/coop, and inspect for any pests at the end of April to give them chickens and quail a nice healthy place for the summer months.
Purchase and Brood Chicks or Hatching Eggs – This is the time that eggs and chicks are plentiful. You will find chicks for sale at local feed and seed stores, on craigslist, and on mail order. Its a little late to order chicks, but you can find some hatcheries that ship throughout May OR start prepping your list for fall orders. Hatching eggs can be found on facebook groups, craigslist, and Ebay, just note that hatch rates are lower after eggs have been bounced through the mail.
Inspect and Repair Fencing – This is the time of year where your small livestock want to get out and graze and your predators are waking up and looking for food. Make sure fencing is secure and undamaged as all animals start roaming further from dens and coops.
Inspect irrigation and Rain Barrels – Review your irrigation/collection system and make any necessary repairs or adjustments. Specifically look for freeze/thaw damage at taps and connectors
Clean Tools and Outdoor Areas – It will finally be warm enough to start really gardening, lounging outside, and making use of your outdoor areas. Prep for warmer weather by cleaning hammocks, outdoor furniture, and tools. It will make the most of warm days without giving you the latitude to plant those warm weather starts too early!
Clean out jars and review the pantry – Make plans for what you want to preserve this year, what you ran out of, and what canned goods you still have left over. Adjust your planting plans accordingly so you don’t end up with those 15 extra cans of pickled okra this year.
See Link Below for a Free Printable PDF version. Background imagery used with permission by https://www.freepik.com/
When to plant: Reaganskopp Planting Calculator: See when to start seeds indoors, outdoors, and for succession planting. All you need is to know your average last frost date
Which Chickens to Get: Use our years of chicken owning experience to pick out the perfect chicken breeds for an Urban Homestead.
Garden Tool Maintenance: We are using this great guide from EcoGardener to get all our tools back in shape this year.
April is a busy month for urban homesteaders and gardeners in zones 6a, 6b, 7a, and 7b. From preparing soil for planting to starting seedlings indoors, there are plenty of tasks to tackle to ensure a successful growing season. Other essential chores include planting cool-season crops, mulching garden beds, watering plants, and harvesting early crops. It’s also important to monitor for pests, prune fruit trees, and maintain compost piles and garden tools. With proper planning and care, you can set up your urban homestead for success and enjoy the bounties of a thriving garden throughout the season.
Remember, gardening and homesteading is a process and it’s important to take it one step at a time. Don’t feel overwhelmed by this list – just focus on the tasks that are most important for your garden and take the time to enjoy the process. With a little effort and attention, you can create a beautiful and productive garden that will bring you joy throughout the growing season.
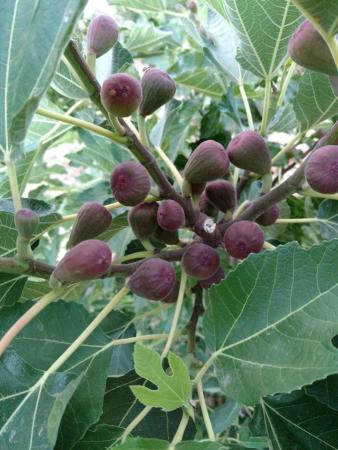
Can you grow figs in zone 6 or zone 7? Absolutely! I have tips to grow a variety of figs, outdoors, in zone 6 and 7 climates from personal experience. For those of you in even colder (4 & 5) zones I have some techniques to help grow fig trees that are proven to work. For those of you unfamiliar with fresh figs, they are an amazingly sweet, succulent fruit that can be grown on fig plants that are kept as trees, bushes, or espalier. Fresh figs do not ship well, so you may not have a chance to enjoys the nuanced flavor of fresh figs unless you grow them yourself. With a little bit of planning you can have hundreds of fresh figs for drying, canning, baking, jam, and other uses. Let’s jump in to fig growing tips!
In order to keep figs, growing outside in cold climates, you need to look at a few factors, site selection/root preservation, water, pruning, and variety selection. If you live in a climate that is just tooooo cold for figs, don’t worry I have tips/variety selections for pots. Let’s get started:
3 S’s (Site Selection for Figs)
The number one tip for growing figs in zone 6, zone 7, and colder climates is site selection. I keep 3 S’s in mind
South
Sunny
Sandy Soil
Of the three, finding a sunny, south facing location is absolutely key to making a fig happy and the keeping roots survive over the winter. South facing, sunny locations, help to create a warm microclimate that better matches the native, warm climates of Turkey, India, and the Mediterranean. Figs appreciate well-draining soil, but I have found my fig plants do just fine in clay soil too. They do seem to grow a bit slower in super hardpacked clay, but what doesn’t? Just one of the joys of the southern US.
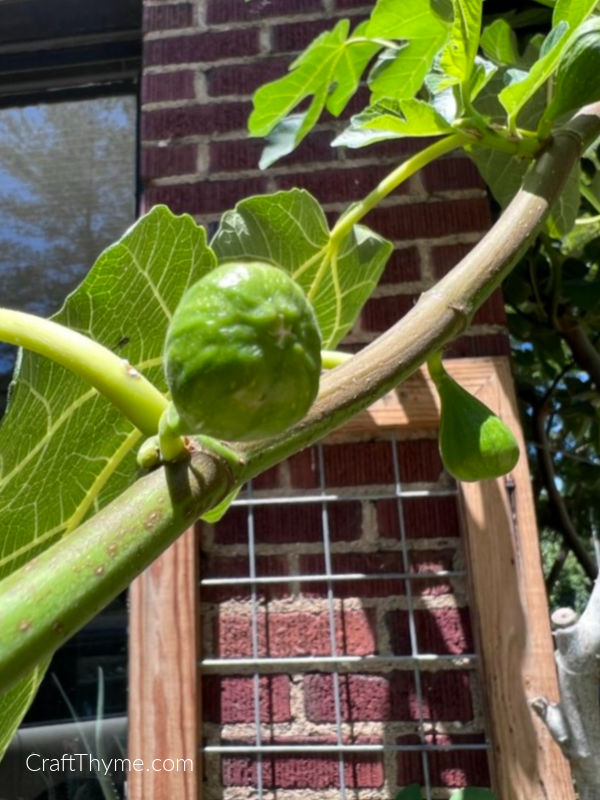
If you want to up your site selection game, it is even better if you can find a sunny, southern location, near a wall. Walls (especially cement, brick, or thick surface) acts as a heatsink. A heatsink, during the winter months, will help regulate heat and keep warmth near the root base of the fig by absorbing the warmth of the sun throughout the day and re-radiating the warmth at night. Preserving the root base is the most important part of keeping figsin cold climates. Even if you have a massive cold snap that kills all the limbs, figs can regrow and produce fruit from the root base in a single year.
The oldest fig is sited on a warm southern wall.
Liquid Diet (Water Needs of Figs)
Fresh figs are a plump juicy fruit. In order to make fruit with a high water content, figs, will suck up lots of water. IMPORTANT: This does not mean water your figs all the time. Figs are specially adapted to more arid climates. This means, the roots should not be constantly wet, and you also shouldn’t plant a fig near your water line… It will seek it out. In growing my figs I do not need supplemental water, unless I am newly establishing a planting. If you live in a wetter zone 5, 6, 7 don’t worry. I live in a pretty wet climate, I just made sure that my figs aren’t planted in a low lying area where water pools or stays super damp (like behind my garage).
While we are on the topic of diet, Figs do well with only light fertilization. In fact, I have found I am more likely to get giant leaves and less fruit if I give a fig too much nitrogen. So frankly, I don’t. Why waste my awesome compost on a tree that does worse with it? If you have poor soil or sandy soil I suggest topping with a good compost each spring. Only add more fertilizer if the growth slows or leaves show signs of nutrient deficiency otherwise like the infomercial “set it and forget it”.
Cut Them Out (How to Prune Figs)
Hear me out: Pruning figs is both important and not important all at once. Figs produce two crops a year. The first one (called Breba) grows on the previous year’s wood. This harvest is smaller and in early summer. So if you prune all your limbs in the fall, you are not going to get much of a breba crop. However, in my experience the breba crop is not much of anything in cold weather climates. We have variable last frosts, and strangely hot and cold springs in zone 6 & 7 in the mountains. So at most I’m only getting a few figs and would rather have nice tame trees. If you live in a more stable climate then maybe a Breba crop would work better for your figs. In which case, ignore everything I said and very carefully prune old growth in the spring.
The second ‘main’ crop of figs happens in late summer/early fall on new wood. This means you need to be selective on pruning new growth. That being said, I keep my figs trimmed because I have my main “big boy” right beside the house (well away from my water line :)) and he grows like whoa… I need to be able to walk around him and harvest the figs without climbing a 10ft ladder. Some of my secondary figs I want to keep more as bushes and less tree like, so, I let the roots send up shoots and I top off the branches when they get about head high. One I grow along a wall and trim back the limbs that grow outward. Long story short, trim as you like, but make major cuts when the fig is dormant (all the leaves have been shed). Also, before you go “cleaning out dead wood” in the spring WAIT. Figs, in colder climates, leaf out well after a lot of other plants… I cannot tell you the number of times I have thought limbs were dead and then ended up sprouting leaves.
Main Crop of Baby Figs
Variety is the Spice of Life
Now for my favorite part of this article, varieties adapted for cold weather. Over the years, growers have developed fig varieties that are better suited for colder climates like zone 5, zone 6, and zone 7. Or varieties that do better in containers that could be brought inside in very cold climates. If you do grow in pots you will need a cool location to stash the pots during the winter so they can have a dormant time. I keep mine in an unheated greenhouse. Please note, all varieties listed are self pollinating as most cold climates do not have the necessary fig wasp for pollination. Now on to the varieties (all Ficus carica), here are a few options below:
Chicago Hardy (Zone 5 (Sheltered),6,7,8,9,10) The most well known of the cold weather figs, Chicago Hardy was thought to be brought over my immigrants from Sicily, Italy to Chicago, Illinois USA. This brown fig does exceptionally well dying back to the roots and re-growing year after year.
Celeste (Zone 5 (Sheltered),6,7,8,9,10) Lighter brown/purple fig with sweet flavor. Makes a good bush variety. Does not do quite as well with constant dieback so see the tips/tricks for helping overwinter figs.
White Marseilles (Zone 6,7,8,9) Brought over from France and a favorite of Thomas Jefferson this greenish to yellow fig is sweet and does well outdoors in cold climates. While I purchased a Celeste fig, I am fairly certain this is what I am actually growing as my “big boy”. The fruit stays green and I look for ripeness when they start to hang down. Delicious, these are also good for using in cooking as they won’t darken the color of whatever you are making.
Brown Turkey (Zone 6,7,8,9,10) We are fairly certain this smaller brown fig is what my mother grows. Supposedly, the fruit is less tasty compared to other varieties. We have not found this to be the case. It produces TONS of small brown figs that make excellent jam or quick bitesized snacks.
Dr. Monticello (Zone 6,7,8,9) This fig was brought over from Italy via Dr. Sam Monticello’s grandmother when she immigrated to Kansas and Missouri. Supposed to have a richer flavor the Celeste
Letizia (Zone 6,7,8,9,10) Amber to Dark brown fig brought over in the early 1900’s from Marche region of Italy. It was grown in a semi-protected garden area in Pennsylvania and propagated. Smaller than a Chicago hardy but produces a more solid breba crop. Young trees need more protection until established.
Violette de Bordeaux/Negronne(Zone 6,7,8,9) Smaller purple fig with dark purple to red flesh. This is also a fig that does well in containers.
Violette de Bordeaux aka Negronne Fig (image courtesy of Threefold Farm)
Fig Container Varieties
The following aren’t great for cold climates but they are all proven/bred specifically to be productive in containers.
Petit Negra/Negri (Zone 7,8,9,10) Although this one doesn’t do quiet as well in cold, it remains small and does great in containers. With deep purple to black fruit it can be kept small with good production.
Fignomenal (Zone 8,9,10,11) Why is this one listed? This fig is especially created for containers and indoor growth. In theory you don’t need to let it chill and can just bring it indoors as the weather cools. I am growing this one, but it is my first year, so I cannot comment on production and if it really does well with no chill periods
Little Ruby (Zone 7,8,9,10) Good grower of tiny bitesized red figs. I won’t go into all the reviews I read, but it looks like it isn’t quite as sweet but does have a deep ‘fig’ flavor.
Little Miss Figgy (Zone 7,8,9,10) This dwarf fig is a great bush type fig. It can be used for ornamental purposes but will also grow small brown figs with red centers in containers.
Now that we know how to site, prune, care for, and pick a fig variety for our cold climate it is time for a few tips and tricks for making them even more cold resistent in marginal zones like 5, 6, & 7.
Mulch: You will want to layer a good few inches of mulch around the roots in fall. Don’t bury them so deep that you run the risk of rot, but three to four inches will act like insulation. I read about folks adding a foot of mulch. Maybe this works in much colder/dryer climates, but for a damp zone 6 you run the risk of essentially composting the roots over the winter.
Low Water: This is incredibly important for container plants. Do not irrigate in-ground figs during the winter. And only water pots sparingly while the fig is dormant. Let the top 2-3 inches go dry before watering again.
Ignore all this advice and go full insulation: In zone 6b and zone 7a with a good south facing site I have never had to do a full on insulation. However, folks have had success keeping figs outdoors as far as zone 2-3 with trenching and/or insulation. I personally, have trouble picturing a great harvest simply due to the length of time it takes to ripen a main crop of figs, but please feel free to educate me in the comments below. Here are two comprehensive tutorials on insulating figs and trenching/burying figs (an old Chicago tradition).
Harvest Time (Harvesting Fig Fruits and Leaves)
Once you have a fig that is growing for a two to three years you are going to find that you have a LOT of figs. Harvesting is a cinch.
Ripe Fig Fruit: Depending on the color of fruit you may need to look at a couple of factors to decide on peak ripeness. For green/white fruits I look for when the fruit swells and starts to hang down from the branch. For Brown and Purple fruit you can gauge ripeness by the deep color. In both cases if the fruit looks pretty ripe and it is about to rain pick it! Ripe fruit will split quickly if it rains. Split fruit is immediately attractive to bugs and mold, so, as soon as the fruit splits grab it! Fruits on the counter will last a day or two, you can stretch the lifespan in the fridge a couple more days, but figs need to be eaten or processed pretty quickly.
Note: If figs have started to ripen you can bring them in and let the process finish. If they are still green they will NOT finish ripening. I prefer peak ripeness. Lightly press the flesh to see if the fig is ‘ripening’. If softer then it has started. If very soft you are probably near/at peak ripeness.
Fig Leaves: Fig leaves are edible! These can be harvested throughout the growing season. You can easily sun dry them for tea (it makes a nice coconut flavor to tea) or blanch them and use them like grape leaves.
Green Fruits: Inevitably in cold climates you will be left with green fruit at frost time. You can pick this fruit and use it in recipes.
Preserving the Harvest
Now that you have your ripe fruit, green fruit, or leaves you may want to make it last. I have linked some articles with recipes for preserving/using figs. We LOVE to make ripe fig jam in late summer to tide us through to fall.
Fig Jam: We used this recipe last year. The flavor was divine but it was a little runny. I might look at adding a tiny bit of pectin or maybe some citrus zest.
Dried Figs: I love to simply halve my figs and plop them in my handy Ronco food dehydrator (Oh yeah I can’t make that shit up) until they are like fig jerky. Here is probably a better way to do it…
Fig Leaf Tea: When I prune my figs I let the leaves dry in the sun (They dry quickly) and then crush them up to add a coconut/tropical flavor to herbal tea.
Pickled Green Figs: At the end of the season you will most always have some green figs left over that didn’t ripen in colder climates. I am going to try this recipe for pickled green figs right before my first frost.
See I really do dry figs in a Ronco Food Dehydrator
Do you have a favorite type of fig or fig recipe? If so, please share in the comments below:
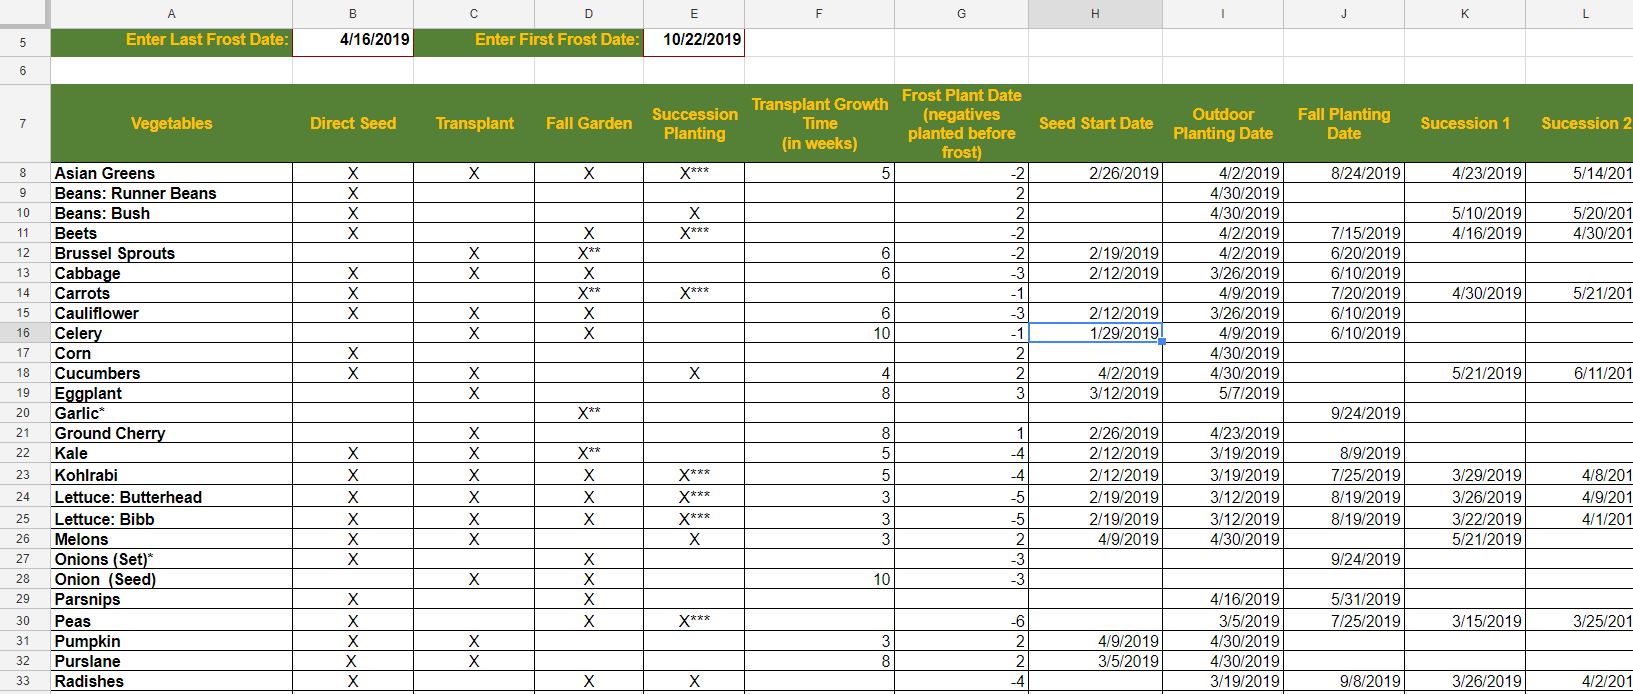
A few years ago I wrote a guide on how to figure out when to start your seed and made a free seed starting online calculator. It needed an update… Badly… I am pleased to introduce the new (also free) Temperate Seed Starting & Planting calculator. Simply put in your first and last frost dates for your region and over 40+ of the most popular vegetables, herbs, and flowers will automatically calculate when you should plant your seeds.
New In This Seed Starting & Planting Calculator
There are a lot of little things but the major updates:
Succession Planting Calculation
Fall Planting Calculation
More Vegetables
Additional Planting Information
But Wait There’s More!
I love sounding like an infomercial! No truly there is more. With only two dates, you can now calculate when to start seed indoors, when to plant seedlings or seed outdoors, when to plant seeds for a fall yield, and dates for succession planting. All in one sheet! I also added a second sheet with planting details such as seed depth, seed spacing, ranges for harvest, and sun needs. I find it useful to have all those details handy when I get seed from seed swaps or order from companies (ahem… Baker Creek) that assume I just know when to plant this and that. I have a good memory… But not that good!
Are You an Old School Seed Starter?
Lots of people still like paper and pencil and that’s okay. In my previous guide to calculating seed start dates I outline exactly how to calculate all the seed starting dates by hand. (Linked for you convenience) You can still use this free seed starting calculator to see the number of days before frost, days to harvest, and days for succession planning to use in your calculations.
So How Do I Get/Use this Seed Starting & Planting Calculator?
Research your average last and first frost date. I like to Google “Average Frost Dates (Insert your location)” and look at a few sources to get the latest weather patterns. However, if you live in the United States and do not want to research the Farmers Almanac website has a search page for that. (Again linked for you convenience; Cause I am awesome like that)
Insert those dates into the appropriate boxes
Follow the planting dates! They should work for most temperate climates. If you are approaching the arctic or tropical zones will need to use techniques to either extend your season or shield cold loving crops from the heat.
Yes, it is that easy but if you want a little more information about how it works behind the scenes and what you can play with here you go:
Dates for succession and fall planting are triggered by the X for (wait for it) in the Fall and Succession planting columns. They are calculated by the first frost date, days of harvest, and recommend succession planting dates. If you want longer times between successions you can change the time in the second Planting Tips sheet. I mention it, because succession planting dates are much more subjective depending on the actual days to harvest, and how much of a crop you want to get. I just can’t eat that many beets or lettuce and would never want to plant them at such small intervals, but technically you CAN!
I also think it is important to note that crops that don’t make good fall candidates are set to be harvested 45 days before first frost. Generally, those warm weather crops just seem to start lagging when the sun decreases and cooler temperatures appear, but you could technically push the growing season longer. I’m also very conservative and have cool weather crops harvesting 2 weeks prior to frost for fall and succession planting. Why? Because if you happen to have a cool autumn their growth will be stunted and you can run the risk of not getting a final fall crop. There many ways to extend that fall crop with row covers, tunnels, cold frames, etc. However, this sheet is meant to calculate growth in open ground or open raised beds.
Why a Free Seed Starting & Planting Calculator?
Honestly, I couldn’t find a calculator or excel sheet that did it all. A number of gardening websites offer utilities to calculate seed starting dates OR succession planting OR fall planting, but not all of those dates in one place. The seed starting utilities also tend to forget about first frost when figuring succession days. So yep, I thought I could make something better, and so I did.
All I ask in return is that if you find this free seed starting and planting calculator useful that you share this post with others on social media or comment below. Also if you want me to include additional vegetables, flowers, or herbs comment below! I’ll see what I can do!