Posted on Leave a comment

Online Permaculture Design Certificate Week 1

Snippet of the online permaculture design certificate coursework week 1

If you have been following along with our website then you will know that I (Brianna) have started taking my Online Permaculture Design Certificate (PDC) through Oregon State this week.  Boy what a week…  I chose this course because it was accredited through the North American Permaculture Institute and it looked like a thorough Permaculture Design Certificate course.  The instructor was well regarded and the course work went well above the 72 hour minimum.  And Oh. Yes. It. Will. go past that minimum…

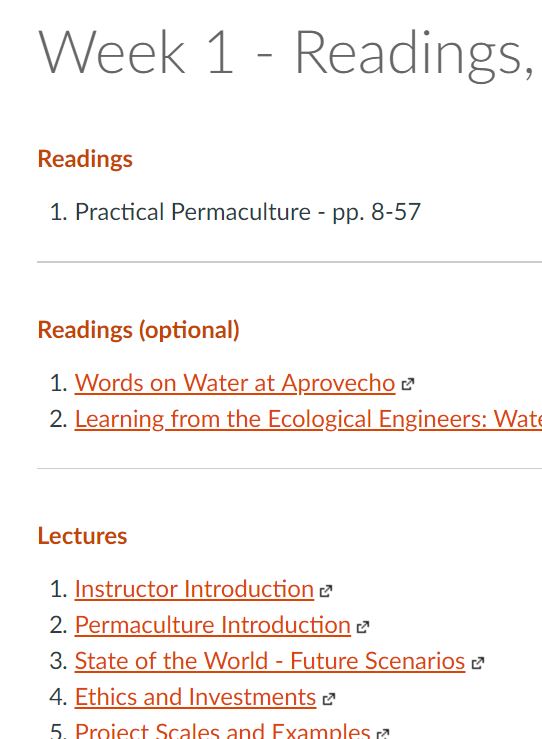
Week one started with an overview of the course and structure itself.  They had a unique suggestion for storing all your designs as slides so you have a final presentation when the course is complete.  Then right into the readings, lectures, supplemental readings/lectures, quiz, and homework.  Yeah, all the things just like a regular course.  If you were thinking this was just going to be a gimmee /”fun” course think again.  It is going to take well more than 10 hours a week to finish all the work.

Online Permaculture Design Certificate Week 1

Week one of the online Permaculture Design Certificate covered topics such as, but trust me, not limited to:

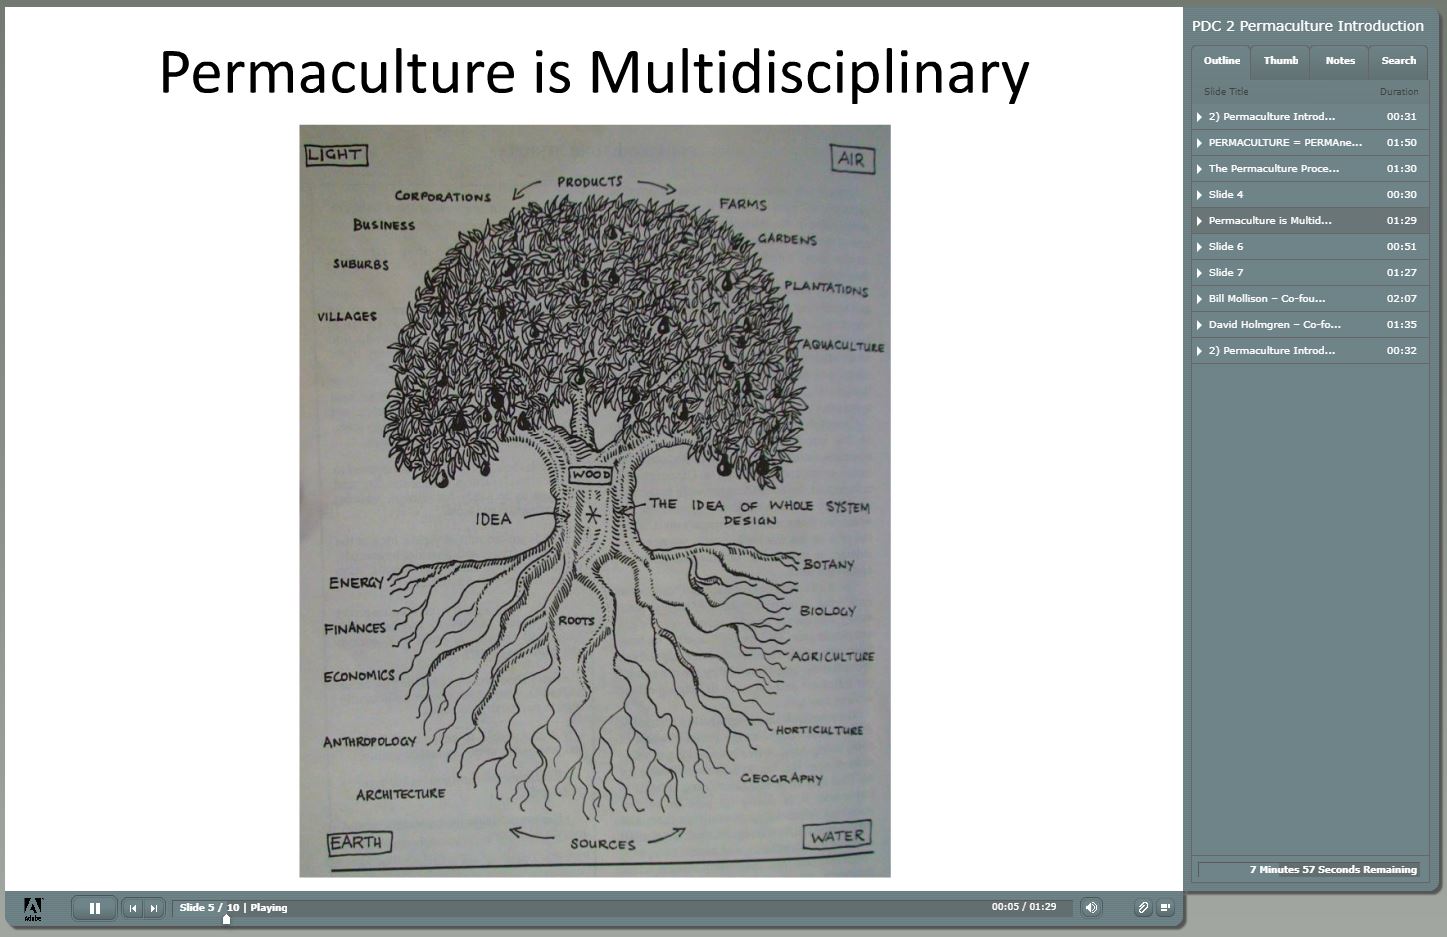
  • Permaculture Principals
  • Permaculture History
  • Watershed
  • Deforestation impacts
  • Beavers
  • Site Mapping
  • Topography
  • Core General Model
  • Contour Maps

And much, much more.  The quiz was lengthy and NOT multiple choice :( .  I had to write a paragraph for each question and actually look up some of the answers. However, it WAS open book for anyone panicking when I said quiz.

Snippet of the online permaculture design certificate coursework week 1
This is only the top 1/4 of the list…

After that I set into the real meat of the course introducing my chosen site for my 10 week design.  We will be selecting a single site and working on a complete permaculture design for the rest of the course.  When I am done, I should have an entire presentation, maps, and proposal for my chosen site.

Since, I have already done our home I decided to work on a friends’ property (I am sure I will tweak ours).  They purchased the .41 acre property almost a year ago.  Just a 10 minute drive to Asheville, if feels urban enough, but without the tiny yards and ridiculous prices.  They have graciously allowed me access to the property for the course and agreed to act as my clients.  I am hoping to design something they might implement in the coming years, but if not, that is totally okay too!

On that note, I immediately found that I picked a bitch an unusual site when I started the first part of my homework.  Watershed mapping…  Guess whose property is directly in the center of two watersheds…  This one…  So extra mapping was required.

One of my slides on the watershed area

As a side note: The property you pick needs to be accessible.  Additionally you will be giving the classmates and instructors the address during this online permaculture design course.  There is a good reason for this information as your classmates will be peer reviewing your work, so it is expected they will look up the general location, climate, topography, etc.  So if you are cautious about privacy pick a location that is not your own.

Snippets from my site introduction for my online permaculture design certificate

Sprinkled through this post are some examples of the work I created this week.  On the whole I am very pleased with the quality of the lectures and coursework.  I hope the rest of the class is as thorough, but I am a bit stressed about getting it all done each week!

For those of you following along

Posted on Leave a comment

Online Permaculture Course Overview

Example of some of the video content and slides for the course

The time is here! I started my Permaculture Design Certificate online course through Oregon State University last night.  Just a reminder I am not paid or affiliated with this course other than I wanted to take it! If you recall from my intro, I am going to (HOPEFULLY) document my work throughout this online permaculture course so that others can follow along and see if this type of course might be good for you. As a reminder, I am doing this course as this is the first step to becoming a certified permaculture designer and eventual instructor. Bonus though, this course alone will allow me to offer professional permaculture services using the appropriate Permaculture name! Yippy! There are PLENTY of knowledgeable instructors in the field who don’t go the whole certification route, but as a supporter of education I want to work through the official certification over the next few years.

That being said, the loose plan for these posts is as follows:

  • Post an Intro to the Course
  • Give an online permaculture course overview of the coursework (That’s what is happening today!!!)
  • On Monday’s give an overview of the work I did. My assignments are due Monday mornings, so I hope to be able to recap in a post each evening.

So what is the online Permaculture course from Oregon State looking like so far?

First impressions are that the interface is pretty robust. If you have never taken an online classes before it might be a bit intimidating, but if you just keep clicking around you will eventually find all your modules, course content, discussion forums, and syllabus. Plus there are a number of links and discussion forums for help.

Intro screen for my online permaculture certificate course at Oregon State University
So many links, but really just clicking on Modules will get you where you need to go


I, being an old school student, started with the Syllabus! I am sharing a snippet in the picture below to give you an idea of the content, but I do not want to give the instructor’s course content away in total. I am working on my own poultry raising courses as we speak and it takes an incredible amount of time to generate course content. I want to be respectful of this instructors time and work, so, if you want the whole syllabus then I guess you will need to sign up for the course ;)

Syllabus for the Online Permaculture Certificate course at Oregon State University

Anyway, my initial impressions of the course overview were as follows: excitement then overwhelmed then ‘let’s do this’. It is a large amount of work. Even more so when you start reviewing the homework and details of each week. I have zero concerns I will ‘get my money’s worth’ out of this course. I do have concerns that 10 hours a week will not be sufficient! In which case I’ll just do the usual and buckle up buttercup. I’m not afraid of some hard work! Edit: When I went to the website to link to this article Oregon State had changed the course details from 8-10 hours per week to 10-17 per week.  This makes much more sense than the original estimate.

After reviewing the syllabus I took a tour of all the side menus and figured out there are about 100 students in the course, but that we are broken up into small units (15-25 members) with dedicated Teaching Assistants (TAs). Our TAs have already in introduced themselves and from the looks of the introductions they have all taught Permaculture Design Certificate courses before. So, it is cool to have knowledgable mini-instructors. They sound much more versed in the subject of Permaculture than a lot of my TAs in their chosen subjects in Undergrad.

After doing an overview of the whole course I checked out the rest of the course content to see what would be expected and got into the details of…

Week 1: Site Selection and Watershed Mapping

I’ll go into details of what work I did week one, next Monday, but I noted that the general layout of coursework is similar for each week.

Each week, the instructor supplies video lectures, discussion forums, quizzes, textbook reading, and homework sheets. These are not required to be done in any timeframe other than by the next Monday. However, it is required that you log in and join the forums on at least a couple days. I assume this is to keep everyone from procrastinating until Sunday each week.

Details of the Online Permaculture Course

From the looks of things it appears that each week will break down to something along the lines of this:

  • Video Lectures: 1-2 hours
  • Textbook Reading: 1-2 hours
  • Quizzes: 30 mins
  • Discussion Forums: 1-2 hours
  • Homework: 5-10 hours (This varies by week as the first homework will be much shorter, but I imagine doing actual site drawings and overlays will take quite a bit of time)
Example of some of the video content and slides for the course
Here is an example of some of the video lectures. Complete with slides just like college used to make ;)

The course also provides the following:

  • Special Discussion Forum: to ask the instructor questions and also a
  • Facebook Group: for current and past students to discuss permaculture. I requested access to the FB group but have not gotten in yet.
  • Supplemental Readings/videos: They expect you to have access to the course after you take it and can use this info to further research
  • Logins to other sites: There appears to be some logins to horticulture sites and other info for students to access for free.

It was really important to read the first homework sheet, as well as, the course intro as it talks about the specific maps and write-ups you will need to generate in the first week BUT more importantly put in some notes for the rest of the course. They give you a heads up that you will need PHYSICAL ACCESS to the site you will be designing in the first set of lessons. This is important to know at the beginning because you use the same site throughout the course. I had gleaned that based on my course overview, but this is a super important fact if you are not using your yard. Which spoiler alert: I am not using our yard. I have a couple of friends that have generously allowed me to design their property. It is slightly outside the city and larger than our space. It still has a lot of semi-urban/suburban features, which, is my specific permaculture interest. Plus they have agreed to treat this as a full design and answer site questionnaires etc. (Thanks! Trevor & Justine) I will outline the details in the subsequent weeks.

Homework from my online permaculture course
Oh homework… At least the kids were impressed by the amount of reading I have to do this week.

Overall, I am pretty impressed and a bit intimidated by the course. I believe I have a pretty good grasp of the permaculture principals and design concepts from a lot of self study and Andrew Millison’s free Introduction to Permaculture course, but it looks as though this course will make me practice (a LOT) and flesh out my understanding to a much higher level. I am really looking forward to the coursework and the online format seems to be created in a thoughtful way to really help facilitate your learning. I was very concerned that I wouldn’t get as much from an online environment, but I think the instructor access and thoughtful course layout has put those concerns to rest. Now to get cracking on all this homework!

For those of you following along

Posted on Leave a comment

Online Permaculture Design Course

Happy polish and brahma chickens

Because full time out of the house job, full garden, chickens, and four kids is not enough I finally did it! I signed up for a permaculture design course accredited by Permaculture Institute of North America. I have always wanted to take a permaculture design course (PDC) but lacked the resources to make it happen. Resources being time, location, and money. I was very excited to find an this online PDC (also sometimes called a permaculture design certificate) through Oregon State University. After hemming and hawing because it still costs a lot of money… and still costs a lot of time, but flexible time… I signed up with Adam’s encouragement. The online nature of the course will allow me to do it on the evenings and weekends when the kids are in bed. FYI- this is not an ad, I haven’t even taken the course yet!

Happy polish and brahma chickens
Why not insert some happy permaculture chickens. Who doesn’t want to see that?!

Oregon State University has a free certificate program as an intro to permaculture I took this spring. From that course I was able to finish a first plan for our Urban Permaculture lot you can see here. I enjoyed the instructor and introduction to permaculture enough that I THINK I’ll get good value from the course. If nothing else finishing a permaculture design course is the first (in a lot of) steps to being certified as a designer or eventual permaculture instructor.

So why am I talking about my course? I rarely document personal stuffs on Craft Thyme, but I thought that a follow along as I go through this ten week course would probably be pretty interesting to those looking at potentially doing a permaculture design course. Especially, if you are looking at an online version. Plus 10 WEEEEEEKKKKSSSSS. I need something to keep me accountable for all the time it is going to take to work through the course material.

Can anyone be sad when looking at a sunflower?
Just a happy sunflower to also brighten your day! This is just one of the many volunteer plants I have growing in my urban permaculture microfarm.

Oregan State’s Online Permaculture Design Course

Let’s start with the course information:

  • Course Dates: 9/24/2018 – 12/7/2018
  • Time Needed: 9 to 10 hours a week. It is recommended you do not take a PDC less than 72 hours worth of instruction and time. So at 90-100 hours this more than meets the minimum.
  • Weeks: 10 Weeks. A lot of permaculture design courses happen in intesive 2-3 week blocks. I am hoping the longer time witll give me more time to digest the topics and practice techniques since I will lose a bit on the personal instruction a face to face might cover.
  • Instructor: Andrew Millison
  • Topics Covered:
    • Observation and analysis of the natural processes of a site
    • Design principles and methods
    • Dynamics of water systems, soils, gardens and trees
    • Urban permaculture
    • Apply an ethically based whole-systems design approach
    • Use concepts, principles, and methods derived from ecosystems, indigenous peoples, and other time-tested practices
    • Learn about regional planning, ecology, animal husbandry, appropriate technology, architecture, and international development
  • Textbook (affiliate link): Practical Permaculture for Home Landscapes, Your Community, and the Whole Earth. Oddly enough Adam had purchased this book for me this spring. I took it as a sign ;)

Sounds pretty excellent to me! Plus you are guaranteed to have a completed site plan by the end of the course with lots of one-on-one instructor and peer interaction. The timing is great as I don’t have a large fall garden planted or a lot of plans to build anything major. Summer is winding down and the kids are back in school, which leads to a much tighter routine. So now I just have to wait 3 more weeks to get going!!!! Check back on the 25th and I will update each week as we go with the links below:

For those of you following along

Follow along as I work through a fully online Permaculture Design Course (PDC) held by Oregon State University.

Posted on 23 Comments

How to Build a Hugelkultur Raised Bed and Why You Should

Roma tomatoes that did not crack due to hugelkutlur raised beds

Every fancy gardening website extols the virtues of raised beds. I personally, resisted them for years but a combination of hugelkutlur and raised beds changed my mind! Before, we get into how to build a hugelkutlur raised bed, let’s discuss the why you should build a hugelkultur raised bed.  Also, we can answer the all important question:

What the hell is Hugelkultur and how the hell do you say it?

The easiest definition of Hugelkultur (hoogle – cult – er) is it is a hilled bed where the center of the bed is large trunks of wood and debris covered in dirt.  I added that stab at pronunciation because one time I asked readers how to pronounce diatomaceous… 80+ helpful comments later I decided to edit the article and never ask for help on that score again ;).

But back to hugelkultur; There are a lot of benefits to this traditional style of hugelkultur beds, such as cost, size, soil warmth, etc, but for me the aesthetics just weren’t what I was looking for.

2 year old hugelkultur raised beds full of basil, peppers, kohlrabi, and tomatoes
I just like a nice sharp edge.  Especially when I have neglected my trimming and weeding… This hugelkutlur bed is untidy at the end of the summer but still going strong! No watering needed.

Why Your Raised Beds should be a Hugelkultur Raised Bed

I have always been resistant to raised beds. My vegetable gardens growing up always were in-ground. I can recall the tilling and dirt clod smashing needed to prep a garden from very early years. As a side note, I can’t, to this day, explain why may parents insisted on having a garden growing up. It wasn’t their “thing” and we always spent summers angrily hoeing and yelling at groundhogs. At one point there was an incident where we electrocuted an opossum. Which, while an awesome display of electricity was not exactly the intended result. It did, however, keep the F’ing groundhogs at bay for some time. Till we finally realized the fried opossum had grounded the whole apparatus out. Which resulted in the loss of All. The. Corn.

Also groundhogs can suck it.

However, back to my garden, I was resistant to raised beds due to the added cost of whatever material you use to surround the bed, then the cost of dirt, the labor of construction, and the constant fight to keep the beds from drying out. I know lots of other gardeners who feel the same way.  With all that against raised beds how can building a hugelkultur raised bed change everyone’s minds?

First, there are ways to prep raised beds for less. So much so, we wrote about it right here! Also, let’s be frank: Raised beds look good. As a permaculture enthusiast I shouldn’t give a twit about “looks” and focus on functionality but my artistic background just wants to make beautiful things. Raised beds are easy to edge, weed, fertilize, decorate, etc. But the watering. Oh the watering… Raised beds can be like a terracotta pot and need watering on a daily basis (twice daily?). Ain’t nobody got time for that.

Modified hugelkultur raised beds that need no water but grow herbs, raspberries, and other vegetables
I maaaayyyy have let this hugelkultur raised bed get a little crazy. I have not watered it all summer but it is packed with lemon balm, basil, sage, and fresh fall raspberries.

Hugelkultur raised beds saved me from that fate of standing around with a hose and it can save you too! A lining of spongy wood and chips soaks up the water, then, releases it back to the dirt and plants slowly. Added bonus of a hugelkultur raised bed is the fungal cultures they bring. I attended a soil scientist’s (what a cool job title) class this spring at Organic Growers School and learned so much about how microorganisms and fungus assist the health of your plants. BUT that is a topic that needs its own series of posts. What was most important is that, outside of seedlings and a month of drought I haven’t watered my raised beds. During the drought I didn’t water the established perennials in these beds AT. ALL. I feel like an infomercial but damn… It is kind of amazing.

Have I sold you on having a hugelkultur raised bed? I bet we have! Now what? You got to build those puppies!

How to Build a Hugelkultur Raised Bed

We have detailed articles on building regular raised beds and fancy ones (Linked for your convenience). We even talk about how to fill and prep those raised beds for less. But if you are lazy, like me, here is a quickly tutorial on how to make a hugelkultur raised bed.

Step 1: Build some Raised Beds

Not some of those ridiculous 2 inch raised beds either… We are going to need some deep old boxes to make a good hugelkultur raised bed. I suggest building them at least 6 inches deep and actually follow my own advice. Though it doesn’t always look like it. On the below hugelkultur raised beds we had this brilliant idea to level them in the landscape and then spent an entire day digging only to end up with one of the sides being buried about a foot into the ground.  However, they are damn level.

Raised beds leveled in a sloped landscape.
This took a whole lot of digging!!!!

Step 2: Wood is Good

Depending on how deep your bed is, you are going to fill the bottom 1/3 to 1/2 with wood matter.  Deeper beds can take more wood matter and still have room for lots of dirt. In our deeper beds we used old logs we found in a wood pile, then branches (some of them fresh), then tiny sticks the kids picked up in the yard.

Modify hugelkultur to make a water-wise raised bed

Step 3: Chips Aren’t Just for Snacking

Even if you have a low raised bed you can follow this step. Our top layer was simple ground wood chips. These break down fast but hold water well. I even use wood chips in the bottoms of large containers so I do not have to water the containers as often.

That’s really it, just add dirt on top. But I make it seem a lot more complex and fancy in this in-depth tutorial about prepping beds for less.

It all sounds so great, amiright? But I bet you are wondering how these hugelkultur raised beds held up in the long run. Well, I’d be happy to say they have held up fabulously! The pictured beds above are two years old and going strong.

I plan to pressure wash the wood in the fall and stain, to help protect them, but as for fertility, water retention, and general upkeep?! I can not complain. Honestly, they still look good and grow like crazy.  I’ve been neglectful in keeping up with the harvest (and weeds) due to the rate of growth, even in the heat of summer.

But if that isn’t enough for you then let’s take a second to check out these tomatoes… Certainly, these are a variety of heirloom Roma’s which are resistant to cracking, but LOOK, like really LOOK, no cracking! Through days of no water and days of deluge every evening I have managed to get tomatoes that aren’t cracked. I have never, in ground, or regular raised beds, managed to make that happen without a lot of TLC.

Roma tomatoes that did not crack due to hugelkutlur raised beds
See Ma?! No cracking!

Tomatoes crack when water isn’t regulated. Guess what regulates the hell out of some water?! A Hugelkultur Raised Bed, That’s what! Anything that keeps me from having to babysit my plants will earn a place in my gardening secrets list.

So if you want to reap the benefits of good soil culture and water retention all while maintaining aesthetics then I think a hugelkutlur raised bed should be in your near future.  If you try this techniques please let me know in the comments how well it works for you!

How to make hugelkultur raised beds and why you should make them

Posted on 4 Comments

THE List of Perennial Berries for Your Yard

THE Perennial berry list with over 30+ berries you can grow in temperate climates

It started with a friend pointing out a sale on blueberries. Our response: “Oh we have 13 blueberry bushes”. Their response was, “Oh, they also have raspberries.” Check.

Blackberries?
Check.
Strawberries?
Check.

How many berries do you grow?

Here at Craft Thyme we have 14 types of berries currently growing on our property! Mostly because we love berries. And just for the record I am calling berries anything with small fruits. We aren’t being all scientific and taxonomic up in here.

Yes, it may be shocking but there are well over 14 different types of perennial berries you can grow in temperate zones. Best part perennial berries are pretty much the gardeners best friend. They are easy, fit in even small yards, resist tons of pests, require little care, and show up again and again. Other than potentially fighting off the neighborhood kids or birds your crops are kind of a given. Especially on some of these lesser known varieties, which seem to have better luck with the wildlife.

So what type of perennial berries can you grow in your garden space? Here is a list of perennial berries. Below are the ones I am currently growing and a further list of more uncommon berries worth exploration! All in all I have researched dozens of varieties of berries and listed 29 perennial ones below. I’m also kinda wordy so I had to highlight a few of my favorites with some affiliate links in case you want to buy some for yourself!

Perennial Berries

THE Perennial berry list with over 30+ berries you can grow in temperate climates: BlackberriesBlackberry: (Zones 4-9) I picked up a thornless unnamed variety of blackberry in 2004 and planted it by my back porch. I did literally nothing. It had sun and whatever rain fell. I never fertilized it, I sometimes cut out dead limbs in the spring and wove new vines in the stair railing. But that, folks, was that. In three years I had vines running 10 feet up my stairs and so many blackberries I couldn’t eat them all. It smelled like a winery under the bush from the multitude of fermenting blackberries. From that random purchase I was hooked. Every house I have owned is left with a thornless blackberry somewhere. Arapaho and Apache have been some of my easy favorites.

THE Perennial berry list with over 30+ berries you can grow in temperate climates in your own backyard: Fruiting RoseFruiting Rose aka Rosa Rugosa (Zones 3-9) I’m not sure this counts as a berry, but we just planted one of these roses. They are supposedly pretty maintenance free, unlike the typical fancy rose, and make delicious, vitamin C packed rose hips.


THE Perennial berry list with over 30+ berries you can grow in temperate climates: StrawberriesStrawberries (Zones 3-9)


Blue Berry High Bush (Zones 4-7) THE Perennial berry list with over 30+ berries you can grow in temperate climates: Blueberries


THE Perennial berry list with over 30+ berries you can grow in temperate climates: and in your own back yard!: Low Bush BlueberriesBlueberry Low Bush (Zones 2-8) Yes, blueberries as groundcover do exist. Lowbush blueberries range from 6″ to 2′ tall, though you can trim them to keep them very low to the ground. In our local mountains you can find many of these wild low blueberries for natural picking. However, I purchased a named cultivar. What name? Who knows, I have the tag somewhere but I am wAAAAAAAy behind documenting my garden journal for this year. *sigh* Anywho, we are trialing these by the pond next to the cranberries since they like similar conditions.

THE Perennial berry list with over 30+ berries you can grow in temperate climates: Goji BerriesGoji Berries (Zones 3-10) Why? Well they aren’t exactly my taste, but hey everyone else in the world counts them as a superfood, so I have a couple plants knocking about the yard. Small bushes with little upkeep so there they stay.


THE Perennial berry list with over 30+ berries you can grow in temperate climates: HoneyberryHoneyberry (Zones 2-7)


THE Perennial berry list with over 30+ berries you can grow in temperate climates: MulberryMulberry (Zones 4-9) FYI a groundhog will eat each and every leaf off a mulberry tree if you happen to have it in a pot they can knock over… Just saying… Oddly it will survive this defoliation, so there is that.


THE Perennial berry list with over 30+ berries you can grow in temperate climates: ElderberriesElderberry (Zones 3-8) Hey, guess what?! Groundhogs like these too! We got a few berries last year, but added more plants this year. I have them in a shady location to help deal with excess rainwater runoff. Since they aren’t in the sun I don’t ever expect to have scads of these berries, but what I do get I plan to make an extract to use in cocktails. Cause we live in Asheville, and that’s the hispter kind of shit you do.


THE Perennial berry list with over 30+ berries you can grow in temperate climates: RaspberriesRaspberry (Zones 3-9) This might be my husband and mine favorite type of berry. Do you know raspberries quit ripening when you pick them? So yeah, if you want the taste of an amazing, sweet, fragrant raspberry unlike any you have had in the grocery store you are going to need to grow your own. On that note, I’m not a huge fan of proprietary plants. It just irks the shit out of me when you try and slap a trademark on life. That being said, I am also a sucker for clearance plants. A couple of years ago I picked up a trademarked thornless raspberry called Raspberry Shortcake… Yes, I hate myself sometimes too… Anyway I stuck this plant in the dirt and got lots of green leaves. It was a cute, tiny, compact, thornless bush, but it was just a bush. No raspberries to be seen. Only reason I haven’t dug the damn thing up was because I had other things going on in the yard. So it stayed there. Staying compact, looking cute, and doing nothing. Then this year! Holy mother of berries. We get two complete handfuls of the largest, firmest, and juiciest raspberries I have ever seen every. single. day. For almost a month now! It has outperformed my traditional vines but untold amounts and has had virtually zero pests and literally no love from me. I will be seeking these out and adding them all over the place from this point on.

THE Perennial berry list with over 30+ berries you can grow in temperate climates: CranberriesCranberry (Zones 2-7) I was chocked to learn you can grow cranberries without a bog!  So much so I wrote a whole post about how to grow cranberries here.


THE Perennial berry list with over 30+ berries you can grow in temperate climates: Serviceberry or JuneberryServiceberry aka Juneberry (Zones 4-8) Finally tasted these this year and they are amazing!  Sweeter and larger than a blueberry.


THE Perennial berry list with over 30+ berries you can grow in temperate climates: Little known lignonberriesLignonberry (Zones 2-8) It looks like a tiny boxwood. Which is really kind of a selling point in my humble opinion.


THE Perennial berry list with over 30+ berries you can grow in temperate climates: BoysenberryBoysenberry (Zones 6-9) This crossed plant is a new one for us this year. I’m hoping we love it as much as all our other berries. So far growth has been easy peasy.


THE Perennial berry list with over 30+ berries you can grow in temperate climates: Kiwiberries aka Hardy KiwiKiwiberry (Zones 3-9) Not on my easy list. I know I said berries are easy… But really not this one. I have an entire article about kiwi berries, but they take years to produce, are super specific on site needs, and frankly are a challenge for me as an experienced gardener. If I ever reliably crack the kiwiberry nut I’ll let you in on the secret. Until then just be prepared for a challenging plant.


Nanking Cherry (Zones 3-6) Cherry or Berry… You decide cause Adam and I certainly can’t agree. He said this should be in a post about fruits. I said, well not much of anything, I just typed what I wanted anyway. ;)


These are the berries I might plant in the future, but haven’t yet purchased:

  • Seaberry aka Sea Buckthorn (Zones 3-8)
  • Aronia/ Chokeberry (Zones 3-7) Favorite permaculture podcasters just couldn’t like the taste no matter how hard they tried. So, I kinda put these low on my list.
  • Currant (Black, Red, White) (Zones 2-9) Let’s just sum up all the currants, gooseberries, and jostaberries in one fail swoop. I want them. I know from trips to the British Isles that I love the taste. Guess which plants you can’t ship to North Carolina… At one time our state was really into white pine timber and these plants can help spread disease to white pines so we still can’t have them shipped in. I found one local person with red currants for sale but they wanted 25! TWENTY-FIVE! dollars for a teeny-tiny plant. I. Can’t. Even….. So yeah, totally wish I had paid my $25.
  • Gooseberry (Zones 3-8)
  • Jostaberry (Zones 3-8)
  • Jujube (Zones 5-10)
  • Goumi (Zones 5-9)
  • Wintergreen (Zones 3-8) Soooo want to add these to our forest area. Once I have finished my eradication of poison ivy these are going in.
  • Sand Cherry (Zone 3-6)
  • Highbush Cranberry (Zones 3-7)
  • Autumn Olive (Zones 4-8)
  • Chokecherry (Zones 2-7)
  • Wineberry (Zones 4-8) Some consider this Asian native invasive. Berries are often photgraphed as the have a jewel like quality.
  • Salmonberry (Zones 5-9)
  • Huckleberry (Zones 7-9)

I couldn’t resist throwing in a couple non-perennial berries.

  • Groundcherry: Not a perennial but super tasty berry I grow each year. The sweetest ones will be after the husk has fallen to the ground. If you can grow tomatoes then you can grow groundcherries. they are usually smaller and need only light staking. I let them kinda just hang off my raised beds and sprawl.
  • Strawberry Spinach:  I have been tempted to try this one as you can eat the greens and it makes a small semi-sweet red berry.

So what berries have we missed?! I know there are a lot more blackberry/raspberry hybrids like tayberry, but was trying to stick to mostly true types! Please add your favorite perennial berries in the comments below.

THE Perennial berry list with over 30+ berries you can grow in temperate climates