Posted on 5 Comments

Egg & Poultry Tracking Spreadsheet 2024

Hey Poultry Enthusiasts! ?? Ready to take your egg-tracking game to the next level in 2024 without breaking the bank? Look no further! We’re thrilled to present the latest edition of our free Google Spreadsheet – your all-in-one solution for keeping tabs on your clucky companions’ eggcellent exploits. Whether you’re raising chickens, quail, or ducks, our user-friendly tracker lets you log everything from egg sizes and colors to expenses and profits. It’s like a cozy nest for all your poultry data! ?? We’ve been at this since 2018, and this year, we’ve jazzed it up with a EZ-tracking update, if you only want to track total eggs. Already a fan? Skip to the bottom for the freshest version. New here? Dive in, follow us on Instagram, YouTube, Facebook, or Pinterest, and share the egg-love with your fellow feathered-friend enthusiasts. Let’s make this year’s egg tracking as sunny-side-up as it gets!

What All Can I Keep Track Of?

There are four main areas you can keep track of for your flock:

  • The Poultry (Chicken, Quail, and Ducks)
  • The Eggs
  • The Expenses (There are many)
  • The Income (Not nearly enough)

The Poultry

As with previous years you can log as much or as little information about your flock as you want. Highlights include birth, deaths, lay dates and notes for ducks, chicken, and quail. The only required field is a date for laying if you want the hens of all species to average correctly. Don’t worry about perfection, I sometimes can only get a lay date within a couple of weeks depending on how many pullets I have going that year.

The Eggs

Shooooo, folks really have opinions on this area. Track by size, color, species OR skip it all and just put your total eggs by day. We aim to please everyone in this area.  So we added a Easy (EZ) option to simply track a total number of eggs per day.  It also has an Easy Stats page that pares down all the detailed goodness if you want to keep it simple and sharp and will total your eggs, expenses, income, and profit by the year, month, and week: AUTOMATICALLY!

Wow This Is Overwhelming, Where do I start?

First scroll down and make a copy of the sheet into your own Google Drive. Then follow the instructions on sheet one. Summaries and charts are automatically created from entering your chickens and eggs in the various tabs. Don’t worry if you still need help, we have a handy guide from 2018 that still gets you going: Directions on how to use the chicken tracker We also will assist folks (when time allows) via comments or Facebook/Instagram chat. Please remember we don’t make money doing this and we work full time outside of this website.

Can I get an Excel/Paper/Other Version of this Egg Tracker?

Please keep asking in the comments below, but for right now the free version is only available via Google Sheets. If we ever have enough interest we will make other options for a small fee.

Can I Use This Egg Tracker For My Small Business?

ABSO-FREAKING-Lutely. While we cater to small backyard flocks, we firmly support small farm businesses and homesteads! Please let us know if you use this poultry tracker for your small business. We would love to support you on social media and make changes to assist you. Farmers are the backbone of our food supply! We just ask that no one packages this sheet up and sells it for a profit or posts it as their own work. We make this for free so everyone can enjoy so be kind and don’t take credit for our work.

What’s New for 2024?

The Easy Option!  We heard you and offered an EZ total so that you can track a simple “total egg” count in the first column of the egg tracker.  We also made a Easy Stats sheet that gives you a much smaller view of just eggs, income, and expenses.  You still get the breakdown by year, month, and week, but without all the clutter of statistics you don’t care about!

How Do We Get Our Copy?!

Click the link below and you will be prompted to make a copy to your Google Drive. Make the copy and then run with it. Please note, I only give copy access to the Poultry Egg Tracking Spreadsheet. This avoids someone accidentally messing the entire sheet up.

Need More Help?

We made this handy YouTube video on how to use the tracking sheet:

How Can I Make You A Millionaire for Your Awesomeness?

If you like/use the tracker we simply ask that you spread the word about the free poultry egg tracker to others and send in suggestions via comments. Each year we try to incorporate what readers want to see. You are free to use it for personal or business use. Just don’t try to sell it as your product because that makes you a meanie, not nice person. If you really NEEEEED to give us compensation check out our Support Us page!

Download your free Google Spreadsheet to track egg production for your flock. Track chickens, ducks, quail, sizes of eggs, plus profit & loss!
Posted on Leave a comment

Brrr-proofing Your Birds: How to Winterize Your Chicken Coop and Quail Aviary

As the days grow shorter and the air turns crisp, it’s that time of year again – winter is just around the corner. For backyard poultry keepers, it’s essential to prepare your chicken coop and coturnix quail aviary for the chilly months ahead. Winterizing your coop and aviary ensures that your feathered friends are kept warm, safe, and healthy throughout the cold season. In this guide, we’ll walk you through the process, from creating a supply list to important tasks and valuable tips to keep in mind. Learning how to winterize your chicken coop or how to prepare your coturnix quail for a long cold spell is easy, peasy, lemon squeezy.

Supply List for Winterizing your Chickens and/or Coturnix Quail:

Essentials for Prepping Your Chicken Coop for Winter:

*Affiliate Links Below*

  1. Insulation Materials: Gather straw, hay, or other insulating materials to make your coop and aviary warm and inviting.  We use fine ground pine chips (meant for livestock) and line the nesting boxes with untreated grass germination mats.  I keep meaning to make a video on how to make these low cost liners!
  2. Sand for Coop Floor: Add sand to the coop floor for moisture control and easier cleaning.  Think of it as cat litter for chickens.
  3. Gloves: I think this one is self explanatory…  Poop….Protect your hands during cleaning and maintenance tasks.
  4. Rake: Keep your coop and aviary clean and debris-free with a trusty rake.  Its like a cat litter scoop, but giant sized, if you use sand in the floor of your coop.
  5. N-95 Mask: Guard against dust and excrement particles with an N-95 mask while working in the coop and aviary.  Cause I don’t want poop lung to be a thing.

Nice-to-Have Supplies for Winterizing Your Poultry:

  1. Heated Waterers: Keep water liquid and accessible to your chickens and quail in freezing temperatures. Do I have these?  No, because I am cheap.  And work from home so its easy to switch waterers in and out.  We used to have a homemade one, but retired that for a real one, over time. I got nervous about potential for fire. If you want to make your own here is a link to our previous tutorial.  Build at your own risk.
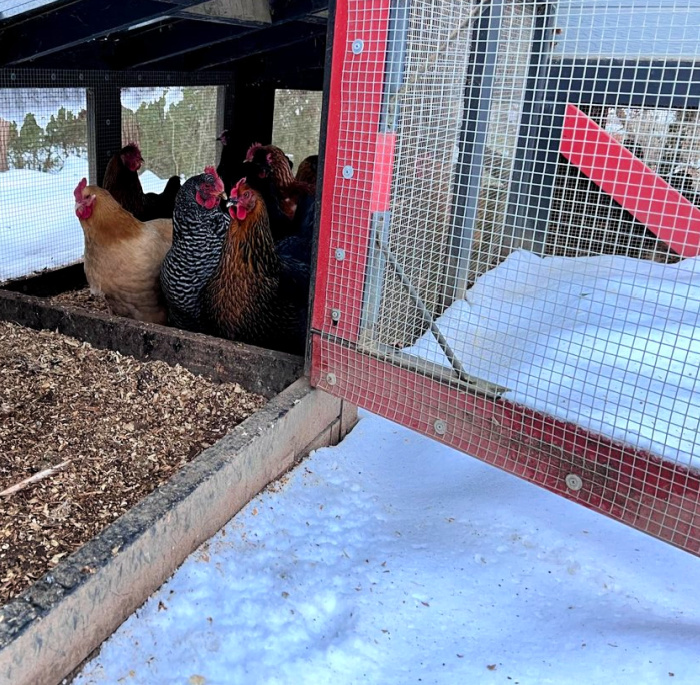
  2. Tarps or Plastic Sheeting: Create windblocks and protect outdoor runs from chilly winds and precipitation. See below on NOT sealing your chicken coop in the winter.  DO NOT SEAL.  I repeat DO NOT SEAL.
  3. Extra Feed and Supplements: Ensure your birds are well-fed and nourished throughout the winter.
  4. Lighting: We do not supplement the light our chickens receive so we get very few eggs over the winter.  If you desire eggs over the winter you may want to consider adding additional light

Tasks for Preparing Your Quail & Chickens for Winter

  1. Deep Cleaning: Start your winter preparations with a thorough cleaning of the coop and aviary. Since your animals will spend more time indoors, maintaining a clean and sanitary environment is crucial.  I mean who wants to be locked in with a pile of your own poop?
  2. Wind Blocks and Shelter: Install wind blocks using tarps or plastic sheeting to protect your birds from cold drafts. Ensure that the coop and aviary have sufficient insulation to maintain a comfortable temperature. Your quail will 100% ignore all your efforts, sit out in the open with a dusting of snow across their feathers…. but you will feel better knowing you tried.
  3. Health Check: Before winter sets in, inspect all your birds for any signs of pests, diseases, or health issues. Address any concerns promptly to ensure your flock is in top condition.  In my case, I have 2 quail that get poop stuck to their feet.  Even when I keep everything nice and clean.  I watch their twos and clean it off before it becomes poop balls.  I assume these 2 quail pay attention to their hygiene about like my middle school sons.

You can watch our Youtube video on how we achieve all these tasks:


Tips For Keeping Chickens & Quail Healthy All Winter Long

  1. Ventilation is Key: Avoid sealing the coop too tightly. Proper ventilation helps maintain good air quality and reduces the risk of respiratory issues. The best way to describe it.  Imagine your hot wet breath in a sealed cold area.  All the moisture would condense on the cold walls.  Now imagine all that cold wet air circulating above your poop…  Yeah….
  2. Cleanliness: Chickens tend to hide in the runs and coop whenever snow falls or weather is inclement.  This leads to additional poop.  Keep an eye out and potentially rake out the coop and runs more often.  Quail will often get poop stuck to their feet as it will not dry as fast in colder/damp months.  Keep an eye on wood chips and change out regularly
  3. Collect Eggs Frequently: Prevent eggs from freezing and cracking by collecting them regularly.  Even if they do not lay often noone needs a cracked frozen egg thawing all over your aviary floor or chicken nesting boxes.  If this seems real specific…  It is.
  4. Monitor Your Local Alerts:  We often receive alerts of avian flu being passed from wild birds in the fall and winter.  Keep an eye out on times you may want to keep the chickens inside a secure location

Creating a Cozy Home:

To create a warm and cozy environment for your feathered friends, you’ll want to focus on insulation. Straw or hay provides excellent insulation for the coop while maintaining breathability. Layer it thickly on the floor and in nesting boxes, and replace it regularly to maintain warmth and cleanliness. For the quail aviary, consider adding extra straw to the ground to create a soft, insulating bed.  I also add boxes and additional hidey holes for them to use.  REMEMBER: do not seal your coops or aviary.  It is important that airflow be maintained.  A sealed environment will collect moisture from the respiration of chickens and quail.  Damp air and cold is just a recipe for upper respiratory infections.

Winterizing with Tarps and Plastic Sheeting:

Winter winds can be harsh, and precipitation is no friend to your coop and aviary. To keep your birds cozy and dry, create windblocks using tarps or plastic sheeting. Attach them to the coop’s sides and cover outdoor runs. This simple step will make a world of difference in keeping the cold and wet weather at bay. Yes I am going to say it again: Create windblocks but do not create an environment that seals in dampness.  We are striving for dry as possible all winter long.

Nurturing Your Flock:

Your birds will sometimes need extra nourishment during the winter months.  It takes calories to maintain body mass in the cold. Consider increasing their feed, and don’t forget to offer supplements. Oyster shells are a great source of calcium for laying hens and if they aren’t laying over the winter then they can replenish the calcium in their bodies.  Extra grains and protein can help your birds stay healthy and warm during the colder days.  The focus should be on a quality protein high food.  We like to offer some suet as a treat as well so they can have some extra fats in their diet. Since we treat the winter as a rest break from laying we really try to give the girls some quality nutrition during this time.  I’m looking into starting a fodder system to increase their access to fresh greens during the winter as soon as out home renovation is complete.

Heating and Lighting:

While it’s tempting to add heaters to your coop, it’s best to avoid them. Overheating can lead to respiratory issues and fire hazards. Instead, rely on good insulation and wind protection. To maintain egg production, add supplementary lighting to extend daylight hours and keep your hens happy. As we mentioned, we allow our chickens to rest through the winters and take the few eggs they provide.  However, it is up to you.  Each chicken is born with the total amount of eggs it will lay, so, you really can’t up the limit, it is more when they will come out.  Since we tend to keep a long term mixed age flock, it makes sense to give them rest breaks so they lay longer during their lifespan.  If you are only keeping layers for a year or two then it makes sense to light them over the winter.

Conclusion:

With the right supplies, tasks, and tips, you can ensure your chicken coop and  coturnix quail aviary are ready for the winter months. Keeping your birds warm, healthy, and happy will make the colder season a breeze. If you have any questions on this how to winterize article please let me know in the comments.

So, don’t let winter catch you off guard – get your coop and aviary ready for the snow and frost, and enjoy a cozy, stress-free season with your beloved flock and quail. Cleaning and prep in fall means less time running around in the cold for both you and your chickens & quail.  I learned the hard way that giving your chickens winter protection in the middle of a storm is NOT fun.  For you or the chickens :) so don’t procrastinate and get your flock ready for winter today!

Posted on Leave a comment

Maximizing Your Homestead: A May To-Do List for Peak Productivity

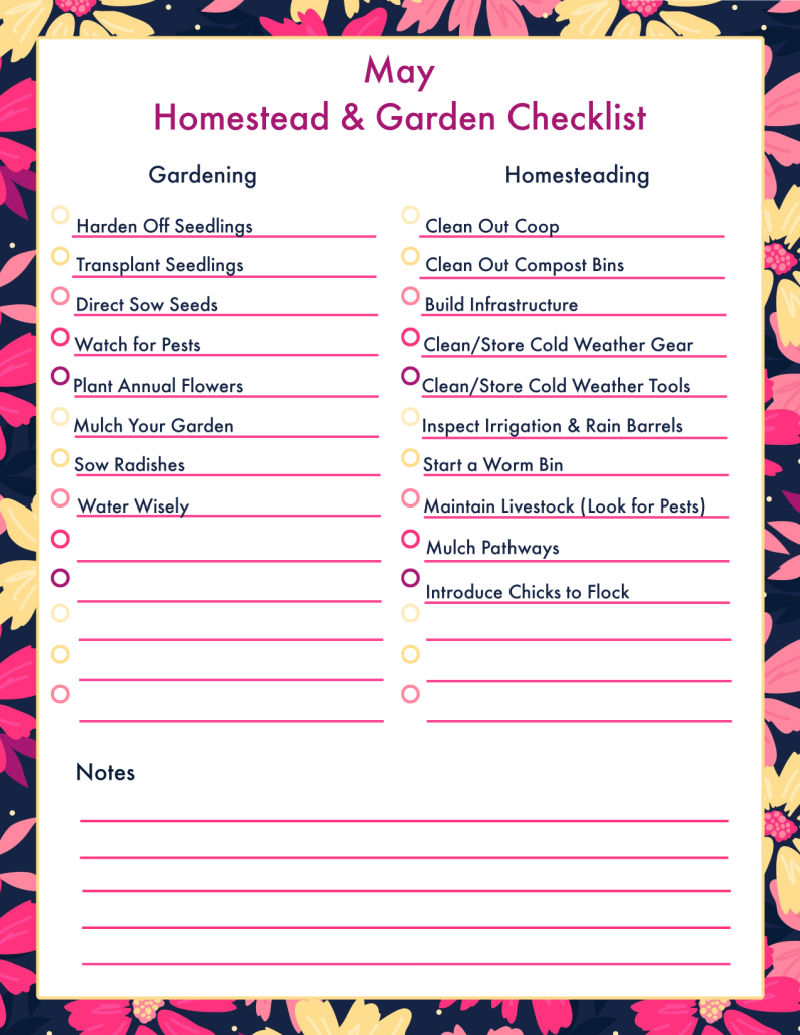
As spring turns into summer, it’s time to turn your attention to your urban homestead and garden. For those residing in zones 6a, 6b, 7a, and 7b, May marks the start of a busy gardening season. This is THE busy season when it comes to gardening and homesteading with garden, livestock, and general maintenance piling up! With a little planning and elbow grease, you can ensure your homestead and garden are productive and beautiful all season long. From sowing seeds to maintaining your compost pile, there are plenty of essential tasks to tackle this month. In this article, we’ll cover some of the key May garden and urban homestead chores to help you make the most of this exciting time of year.

Let’s start with some gardening and homesteading checklists and then move on to resources to help you get the most out of your urban homestead and garden.  This is a big month, with a big list, don’t get overwhelmed and check off what is applicable to your garden and urban homestead.

May Urban Homestead and Garden Chore Checklist

Gardening Checklist:

  1. Harden off seedlings – Gradually expose indoor seedlings to outdoor conditions over the first two weeks before transplanting. This helps them adjust to the outdoor environment and reduces transplant shock.
  2. Transplant seedlings – By Mother’s Day weekend, it’s typically safe to transplant seedlings outdoors in most regions. Make sure to plant them in nutrient-rich soil and provide adequate water and sunlight.  You may think you can plant before Mother’s Day, but as my Great-Granny always said: ‘No’.
  3. Direct sow seeds – Sow 1/2 to 1/3 of your corn and bean seeds directly into the ground to ensure a succession harvest throughout the summer. Also, consider sowing a second group other succession veggies like beets and carrots.
  4. Watch for pests – Keep an eye out for common garden pests like cabbage worms, aphids, and squash vine borers, which can damage your plants. Consider using natural pest control methods like companion planting, neem oil, or insecticidal soap.
  5. Plant flowers to attract pollinators – Flowers like marigolds, zinnias, and cosmos attract pollinators like bees and butterflies, which help to fertilize your plants and increase yields. Marigolds also help deter pests and make your garden look pretty.
  6. Sow radishes – Sow radish seeds in between your other plants to help fill in empty spaces and deter pests like cucumber beetles. Radishes are fast-growing and can be harvested in as little as 30 days.
  7. Fertilize your plants – May is a good time to fertilize your plants with a slow-release fertilizer to provide them with the necessary nutrients for growth.  You can also top dress with compost as you plant.
  8. Mulch your garden – Apply a layer of mulch around your plants to help retain moisture, suppress weeds, and regulate soil temperature.  I switched to pine straw for my beds.  No weeds (from hay or straw) and according to several agricultural extensions the needles do not significantly acidify your soil! We use a wood mulch on flower beds and pathways that aren’t brick.
  9. Water wisely – As the weather heats up, it’s important to water your plants deeply and infrequently to encourage deep root growth. Consider using a soaker hose or drip irrigation system to conserve water and reduce evaporation.  Seedlings are at their most tender and usually need some additional moisture to establish good root systems.

Urban Homestead Checklist:

  1. Clean out coop – If you didn’t get to this in April give your chickens a fresh start for the new season and make sure they have a clean and healthy environment.
  2. Clean out compost bins – turn and mix your compost to ensure proper decomposition and make room for new materials.  We usually use 90% of our compost when prepping my beds.  This is a great time to clean them out and repair any issues before filling them again throughout the growing months.
  3. Build infrastructure – take advantage of the mild weather and build new trellises, raised beds, or fencing before the summer heat sets in.
  4. Clean bedding and pack away clothes – pack up your winter clothes and bedding to make room for summer items.  This is a wonderful time to line dry blankets and get that fresh spring smell into all your items before packing them away.
  5. Store winter tools – put away snow shovels, sleds, and other winter tools to free up space in your shed or garage.  Don’t be like us and end up with a pile of dirty sleds behind the house in June.
  6. Start a worm bin – create a worm composting bin to help reduce food waste and create nutrient-rich soil for your garden. It will be warm enough to get worms shipped to your house if you don’t have a local supply
  7. Check irrigation systems – If you didn’t get to this in April, inspect and repair any leaks or clogs in your irrigation system before the summer heat sets in.  You will need the irrigation in May or June to get that garden rooted deeply enough to handle smaller droughts of rain.
  8. Mulch Paths- apply a layer of mulch to well used pathways to keep weeds at bay and reduce mud during spring rains.
  9. Start moving chicks outside – Depending on the temperature and when you got your chicks it may be time to start introducing them to the flock.  Once they have enough feathers for warmth we move them to a sectioned off area of the run so they can see the flock for a week or two before learning to free range with the rest of the chickens.
  10. Maintain your livestock – If you have goats, bees, chickens, or other small livestock this is the time to check for mites, deworming, etc.  Pests start coming out of the woodwork this time of year.

See Link Below for a Free Printable PDF version. Background imagery used with permission by https://www.freepik.com/

Resource List for May:

  1. Printable PDF of this Checklist
  2. Use our Seed Starting Calculator to ALSO plan out your Succession Planting 
  3. Looking for a new Infrastructure Project?  We have Composting Fence v1 and Composting Fence v2 OR a nifty goat wire trellis tutorial
  4. Here is a lovely article from The Living Farm on how to harden off your seedlings in 7 days or less!

May is a busy time for urban homesteaders and gardeners, but with a little planning and effort, you can ensure a bountiful harvest and a healthy, thriving homestead. Use this checklist and resource list to help guide your efforts and make the most of this exciting time of year. Happy gardening and homesteading!

Posted on Leave a comment

Spring into Action: Essential April Garden Chores for a Blooming Season

As spring settles in, it’s time to turn your attention to your urban homestead and garden. For those residing in zones 6a, 6b, 7a, and 7b, April marks the start of a busy gardening season. With a little planning and elbow grease, you can ensure your homestead and garden are productive and beautiful all season long. From sowing seeds to maintaining your compost pile, there are plenty of essential tasks to tackle this month. In this article, we’ll cover some of the key April garden and urban homestead chores to help you make the most of this exciting time of year.

Let’s start with some gardening and homesteading checklists and then move on to resources to help you get the most out of your urban homestead and garden.

April Urban Homestead and Garden Chore Checklist

Gardening Checklist:

  1. Prepare your soil – Remove any weeds and debris from your garden beds and add a layer of compost or organic matter to improve soil health.  If you have left last years seeds and leaves to sustain wildlife now is the time to clean it all out
  2. Plant cool-season crops – April is the perfect time to sow seeds for cool-season vegetables such as peas, lettuce, and spinach.  If you live in the mountains consider row covers to assist with late frosts.  No matter how warm it gets and how much you want to plant those tomatoes outside… DON’T.  You will regret it.
  3. Start fast growing warm weather crops – If you have managed to hold out this long, it is finally time to start your fast growing warm-weather vegetables like squash and cucumbers.  They only need 4-6 weeks to be ready to plant out (Just in time for Mother’s Day!)
  4. Prune fruit trees and shrubs – Prune any dead or damaged branches from your fruit trees and shrubs to promote healthy growth and a bountiful harvest. Be careful not to prune out limbs or remove plants that haven’t leafed out yet.  Some species like figs and paw paws leaf out much later.
  5. Divide and transplant perennials – Divide and transplant overcrowded perennial plants like day lilies, hostas, and irises.
  6. Clean garden tools – Clean and sharpen garden tools to ensure they’re ready for use. If you are anything like us, its also a good time to sort out that piled up garden shed or greenhouse.
  7. Install birdhouses and feeders – Set up birdhouses and feeders to attract beneficial birds to your garden.

Urban Homestead Checklist:

  1. Maintain your compost pile – Keep your compost pile well-maintained by adding a balance of “green” (nitrogen-rich) and “brown” (carbon-rich) materials and turning it regularly to ensure proper decomposition.  If it has been sitting all winter this is a great time to get it stirred back up and finished off in time for planting in May.
  2. Check on your bees – If you’re keeping bees, now is the time to check on your hive and make sure your bees have enough food and space to thrive.  We aren’t bee keepers but we suggest taking a class from Oxx Beekeeping (often at Organic Growers School) and reading more here.
  3. Clean your coop – If you’re raising chickens or quail, be sure to clean out their coop and nesting boxes to keep them healthy and happy.  We like to take down window covers, do a full clean out of the run/coop, and inspect for any pests at the end of April to give them chickens and quail a nice healthy place for the summer months.
  4. Purchase and Brood Chicks or Hatching Eggs – This is the time that eggs and chicks are plentiful.  You will find chicks for sale at local feed and seed stores, on craigslist, and on mail order.  Its a little late to order chicks, but you can find some hatcheries that ship throughout May OR start prepping your list for fall orders. Hatching eggs can be found on facebook groups, craigslist, and Ebay, just note that hatch rates are lower after eggs have been bounced through the mail.
  5. Inspect and Repair Fencing – This is the time of year where your small livestock want to get out and graze and your predators are waking up and looking for food.  Make sure fencing is secure and undamaged as all animals start roaming further from dens and coops.
  6. Inspect irrigation and Rain Barrels – Review your irrigation/collection system and make any necessary repairs or adjustments.  Specifically look for freeze/thaw damage at taps and connectors
  7. Clean Tools and Outdoor Areas – It will finally be warm enough to start really gardening, lounging outside, and making use of your outdoor areas.  Prep for warmer weather by cleaning hammocks, outdoor furniture, and tools.  It will make the most of warm days without giving you the latitude to plant those warm weather starts too early!
  8. Clean out jars and review the pantry – Make plans for what you want to preserve this year, what you ran out of, and what canned goods you still have left over.  Adjust your planting plans accordingly so you don’t end up with those 15 extra cans of pickled okra this year.

See Link Below for a Free Printable PDF version. Background imagery used with permission by https://www.freepik.com/

Resource List for April

  1. PRINTABLE PDF of This Checklist
  2. When to plant: Reaganskopp Planting Calculator: See when to start seeds indoors, outdoors, and for succession planting.  All you need is to know your average last frost date
  3. Which Chickens to Get: Use our years of chicken owning experience to pick out the perfect chicken breeds for an Urban Homestead.
  4. How to Use Incubators: We have a few guides on our YouTube Channel
  5. Garden Tool Maintenance: We are using this great guide from EcoGardener to get all our tools back in shape this year.

April is a busy month for urban homesteaders and gardeners in zones 6a, 6b, 7a, and 7b. From preparing soil for planting to starting seedlings indoors, there are plenty of tasks to tackle to ensure a successful growing season. Other essential chores include planting cool-season crops, mulching garden beds, watering plants, and harvesting early crops. It’s also important to monitor for pests, prune fruit trees, and maintain compost piles and garden tools. With proper planning and care, you can set up your urban homestead for success and enjoy the bounties of a thriving garden throughout the season.

Remember, gardening and homesteading is a process and it’s important to take it one step at a time. Don’t feel overwhelmed by this list – just focus on the tasks that are most important for your garden and take the time to enjoy the process. With a little effort and attention, you can create a beautiful and productive garden that will bring you joy throughout the growing season.

Posted on Leave a comment

Top 5 Chicken Breeds for Urban Homesteads: A Guide to Choosing the Perfect Chicken for Your Backyard

Are you looking to start a small flock of chickens on your urban homestead? We’ve got you covered! After years of experience, we’ve tried and tested various breeds and have found some of the best chicken breeds for urban homesteads. We’ve also come across some breeds that are not suitable for small urban homesteads, like cinnamon queens (aka Divas). In this article, we’ll share our top 5 chicken breeds for urban homesteads, along with some honorable mentions.

Our selection is based on factors such as their ability to stay confined or small free ranging, friendly temperament, and egg-laying capability. We understand that most urban homesteaders are looking for egg-laying chickens that can produce for several years. Because we aren’t looking for processing chickens we weighed these heavily on temperament.  I’m not above culling a chicken, but I prefer almost pet-like for my main flock.  I keep quail for meat since they are easy and fast to turn over.  

Here are the main factors that we consider when choosing chicken breeds for urban homesteads:

  • Temperament: We look for chickens that are friendly and get along well with other chickens.
  • Egg Laying: We consider the number of eggs per year and the number of years they keep laying.
  • Space Needs: Some chicken breeds need more space than others.
  • Size: Smaller breeds are better suited for small spaces, as larger breeds require more space.

So without further ado, here are our top 5 chicken breeds for urban homesteads, carefully picked to suit your needs.

Top 5 Chicken Breeds for Urban Homesteads

Orpington


The Buff Orpington is a personal favorite of ours and is the lead chicken of our flock. These chickens are known for their docile and friendly personalities, as well as their solid light brown egg-laying capabilities. Despite being a larger breed, they are comfortable in confined spaces and won’t stray too far if free-ranged. They may even become your new lap chicken! The only drawback is their size, which may be a concern if you’re tight on space.

  • Temperament: Friendly and docile, great lap chicken
  • Egg laying capability 200-280 per year
  • Space needs: Can be confined or free-ranged, but larger in size
Buff Orpington and Barred Plymouth Rock

Plymouth Rock (aka Barred Rock)


The Plymouth Rock is a smaller heritage breed that lays large light brown eggs. Despite being one of America’s oldest breeds, they fell out of favor for heavier layers. However, we prefer chickens that can lay eggs for years and our Plymouth Rock girl still lays every 2-3 days during the summer months, even at 5 years old. They have a curious and inquisitive personality and are happy to follow you around the yard. Like the Orpington, they’re comfortable in confined spaces and won’t roam too far if free-ranged.

  • Temperament: Inquisitive and curious, great lap chicken
  • Egg laying capability: 200 per year
  • Space needs: Can be confined or free-ranged, but larger in size

Australorp


Australorps are smaller black chickens known for their docile and gentle temperament. They’re great egg layers, capable of producing up to 200 eggs per year, even in cold or dark conditions. They’re content to stay close to the coop and won’t venture too far if free-ranged. Their smaller size makes them a good option for those with limited space.  I haven’t had the best luck with super sweet, pet-like australorps, but their egg laying capability MORE than makes up for their little more wary nature.  Plus they get along well with the other chickens.

  • Temperament: Docile and gentle: does not mean lap chicken in this case.
  • Egg laying capability: 200 per year
  • Space needs: Can be confined or free-ranged, smaller in size


Australorp hiding amongst the Svart Hona.

Silkie


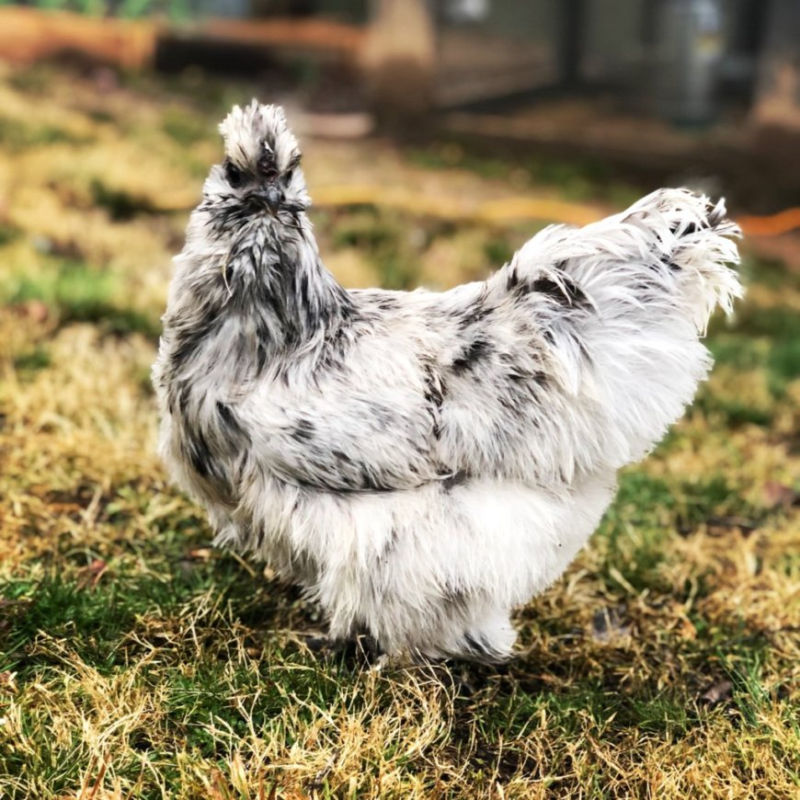
Silkies are a unique and fluffy breed that make great pets. They have a calm and gentle temperament and are known for their broodiness (i.e. tendency to sit on eggs and hatch chicks). Silkies are not the most prolific egg layers, with an average of 100-120 eggs per year, but their friendly personality and charming appearance more than make up for it.  They are a bantam breed, meaning they are small in size, making them great for urban homesteads with limited space. Plus who doesn’t want a chicken with an extra toe and black skin?

  • Temperament: Calm and gentle, great pet
  • Egg laying capability: 100-120 per year
  • Space needs: Can be confined or free-ranged, smaller in size


Bantam Cochin

If you’re looking for a chicken breed that’s not only cute but also friendly and easy to care for, the Bantam Cochin might be the one for you. These fluffy little chickens are a smaller version of the standard Cochin, but they make up for their size with their personality. They are gentle, calm, and very friendly, making them great for families with children. They are also excellent foragers, which means they can find much of their own food if given the opportunity to free-range.

  • Temperament: Gentle and friendly, great with children and other pets.
  • Egg Laying capability: 150-200 per year
  • Space needs: Can be confined but prefer to free-range
  • Size: Small
Bantam Cochin being all kinds of broody

Honorable Mentions:

  • Welsummer – The Welsummer is a medium-sized breed known for their dark brown, speckled eggs. They are friendly and easy to handle, making them great for families with children. Welsummers do well in confinement but also enjoy free-ranging. If you’re looking for a breed that is both beautiful and practical, Welsummers are a great choice.  Our Wellies are super smart and the best at catching bugs and pests
  • Buckeye – The Buckeye is a medium-sized breed that is good for both egg laying and meat production. They have a friendly disposition and are easy to handle. They do well in confinement but also enjoy free-ranging. If you’re looking for a breed that is versatile and low-maintenance, Buckeyes are a great choice.  Also it was the first breed developed by a woman
  • Brahma – The Brahma is a large breed known for their calm and friendly demeanor. They are good egg layers but are also used for meat production. Brahmas do well in confinement but also enjoy free-ranging. If you’re looking for a breed that is both gentle and productive, Brahmas are a great choice.  Who doesn’t want a gentle giant wandering around the yard?
  • Cuckoo Marans – The Cuckoo Marans is a medium-sized breed known for their dark brown eggs. They have a friendly disposition and are easy to handle. They do well in confinement but also enjoy free-ranging. If you’re looking for a breed that is both attractive and productive, Cuckoo Marans are a great choice.  They are pretty human focused and easier to find than their darker egg laying cousin the, French Copper Maran.
Sunbathing Welsummers are the best

Chickens to Avoid if Less Experienced:

  • Easter Eggers/Americanas/Araucanas – These breeds are known for their colorful eggs, but they can be flighty and difficult to handle. They also tend to be loud and may not be suitable for urban settings. If you’re looking for a breed that is easy to care for and docile, Easter Eggers, Americanas, and Araucanas may not be the best choice.
  • Olive Eggers – Similar to the Easter Eggers, Olive Eggers can be flighty and difficult to handle. They are also less consistent in their egg laying than other breeds. If you’re looking for a breed that is both unique and easy to care for, Olive Eggers may not be the best choice.

Chickens We Won’t Raise Again on Our Urban Homestead.

  • Svart Hona (or other land race breeds) – These breeds are not as common and may be harder to find. They are also known for being more difficult to handle and may not be suitable for beginner chicken owners. If you’re looking for a breed that is both low-maintenance and easy to care for, Svart Hona chickens and other land race breeds may not be the best choice.
  • Hybrids like Cinnamon Queens – These breeds are often marketed as good egg layers, but they can be prone to health problems and may not live as long as purebred breeds. They also tend to be more flighty and may not be as friendly as other breeds. While they can be good for egg production, they may require more attention and care than other breeds.
Svart Hona’s are pretty but meant for large open spaces!

In summary, there are many chicken breeds to choose from, each with their own unique characteristics and advantages. When selecting a breed, it’s important to consider factors such as temperament, egg production, size, and suitability for your specific living situation. By doing your research and selecting the right breed for you, you can enjoy the many benefits of raising chickens, from fresh eggs to enjoyable companionship.

Are you looking to start a small flock of chickens on your urban homestead? We've got you covered! After years of experience, we've tried and tested various breeds and have found some of the best chicken breeds for urban homesteads.