I have a confession, I have never been a huge fan of modern art. Having studied the theory and history behind a larger portion of 20th century art I have an appreciation for the merits… but the aesthetics… meh, not my thing. Let me tell you, that was not a popular opinion in art school. However I have a modern house, with industrial decor. This has changed my viewpoint. It takes a lot more work to integrate a classical oil portrait with our furnishings. In fact, I felt like we needed some modern color in our rather neutral decor instead of some classical portraiture.
If you follow me on Pinterest (you should!) then you would have noted the love affair I am currently having with concrete. I was reading a post about making a faux concrete counter top using a product called feather finish when I came up with the idea to make some modern art that would incorporate concrete finishes. Color and concrete say what?! Adam was confused when I tried to explain, but luckily he was the kind to just go with it.
A few Michael’s coupons and a trip to Home Depot later you have my DIY take on modern art.
Modern Art: Concrete Style
Supplies:
Gold Leaf Sheets* or a Gold Leaf Kit*
(which includes the sizing and sealer)
Adhesive* (also called Sizing*
)
Feather Finish* (HINT: Ardex has partnered with Henry to make a feather finish you can get at Home Depot, but here is my Amazon Affiliate link if you want the real thing shipped to your door)
Step One: Lay it out there
I picked out four pre-stretched canvases (we had some on hand and used a 40% off coupon to grab the others) I laid them out for the space. There is a fourth around the corner not shown in the above picture. It is an awkward space, as the windows are not centered, so I used the two smaller canvases to fill out the area. After deciding a layout I thought would look good I laid them out on the table in a similar, but closer, fashion.
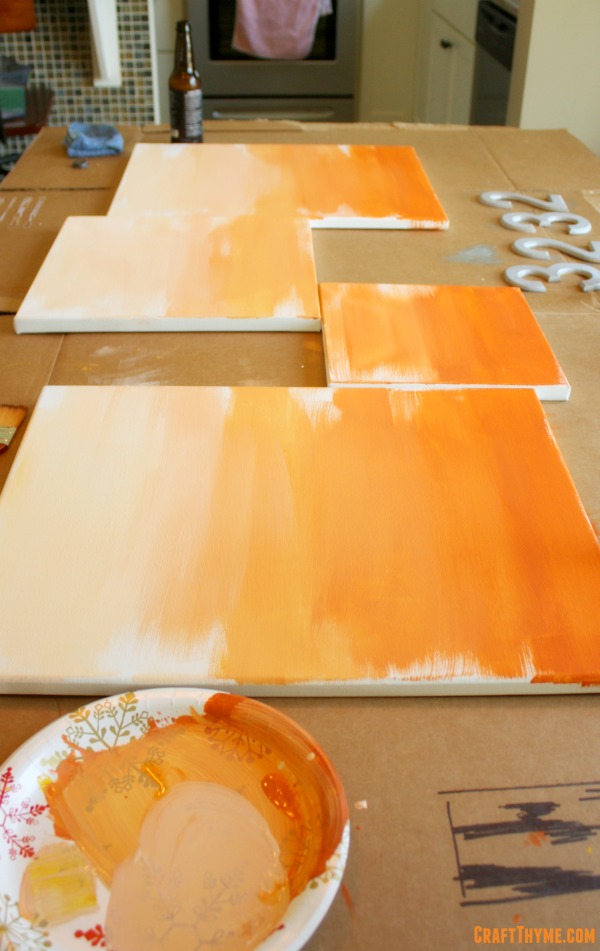
Step Two: Om Om Om Ombre
I started with a base ombre of 4? colors. I tend to just add paint mix and repeat so four is just a guess from looking at the finished product. These particular colors were a base orange mixed with a touch of blue (to darken) and then yellow & white (to lighten). I wanted a rather choppy look and did not bother to blend wet edges well. If you want a very smooth ombre pre-mix all your colors so that you can blend in the wet edges.

After the ombre was dry I brushed some black in feathery horizontal strokes. This step is not shown, but really just consists of slapping some black on the canvas and moving it left and right till it feathers out at the edges. You can practice on a piece of cardboard to figure out how much paint and pressure you need.
Step 3: Concrete Answers
I probably should have planned this step out better but I was just so damn excited to work with a new medium that I went right to mixing up the feather finish. I followed the directions which were 2 parts mix to 1 part water. I thought “Hey! Let’s make this easy, 1 cup water to 2 cups feather finish!” Okay, huge mistake. I made about 100 times more than I needed and it was quickly too thick to do what I wanted. Check out the huge amount:

So my suggesting is to just mix it the consistency of pancake batter. You are using this for decoration not construction strength. After re-mixing my feather finish I used a very old putty knife/multitool to feather the concrete on in bands that matched the style of the black paint.
Step 4: If You Like It Then You Better Put Some Gold On It
I took a step back and was really feeling the look, but wanted to tie some of the other room finishes into the final piece of art. In comes the left over gold leaf I had from the lamp shade redo. I thought it would tie that and the wallpapered bookcase into the open concept dining room. I laid out the sizing (If you need gold leafing tips you can read more here) in the same pattern as the paint and concrete. Once it had set I laid on the gold leaf and covered the areas with sealer to keep the leaf from tarnishing later.

All in all, I love the color and texture mix. It adds visual interest and ties the various spaces together in the first floor of our home.

