This string art project… Well I need to fess up. I was the assistant! However I watched the painstaking process and tied lots of little knots. Use this ‘how to string art’ as a guide so you can skip all the mistakes we made. The final project was much easier than our initial attempts.
We recently moved into a new house, and have been so focused on making sure all the essentials are in that any artwork has been neglected. Yes, I chose to be able to have a shower curtain rod and blinds over something pretty on the walls. Where are my priorities?! We have been working hard to blend our family structure and Adam wanted to make each of the kids a special name decoration for their rooms. In comes lots of string! On to the project:
String Art Children’s Names

Materials Needed:
- Base for Nails(2.5-3 ft long): You can use wood, if you really are insane and like nailing hundreds of tiny nails. Our suggestion: Foam Insulation or Double Layered Foam Board
- Paint: For the Base
- Lots of tiny nails as known as Wire Nails*
- String: Embroidery Floss*
was cheap, easy, and came in tons of colors. 3-4 skeins are needed per name.
- Print Out of Letters (2.5-3 ft long)
Step 1: All about the Base
We tried wood. Painted lovely planks. Then started nailing, and nailing, and hammering, and nailing some more… And here was the final result:
Oh yeah, that is one letter… Just one letter! and we had four children’s names to complete. I had the idea to use something else. Searching the web turned up cork as an alternative. Have you priced out that much cork? Oh. hell. no. Cork was not going to work. We had mostly resigned ourselves to weeks of nailing when taking the kids to the craft store I spotted some foam board. While it was not thick enough as is, I said “Hey! Let’s laminate this together.” Adam look dubious, but I took the sheets home, cut out rectangles, and sprayed adhesived those beotches together. Of course they curled up, but I remedied that by laying lots of heavy art books on top of the panels over night. Who says I never use my art degree?
Though after doing all that we realized the giant panels of foam insulation at home improvement stores would work just as well. Doh!
Of course the finish of the panels is very plastic looking. So we just took some paint and rolled it on. Then dry brushed the surface a bit to give it some brush marks and texture. Much better and looked like the original wood panels.
BONUS: The panels were so lightweight they could be hung using command strips
Step 2: Just Lay It All Out There
Yes, we had to print out the letters a bunch of times. Basic math seemed to be beyond us (even though one of us has a math degree) and the letters were either too big or too small. Once we had the font the right size we cut them apart so work with the panels and letter spacing a bit.

Step 3: Nail’er? I barely even knew her.
I know in the above fail-photo the nails were driven through the paper. Unless you like the idea of pulling out 100’s of tiny pieces of paper DO NOT do it that way. Simply take one nail and poke small indention around the outside of your letter. Remove the letter and then press the nail into the foam. Then repeat, and repeat, and repeat. Keep pushing nails until your fingers are bloody tips. Get smarter about it and use the hammer to lightly push them through.

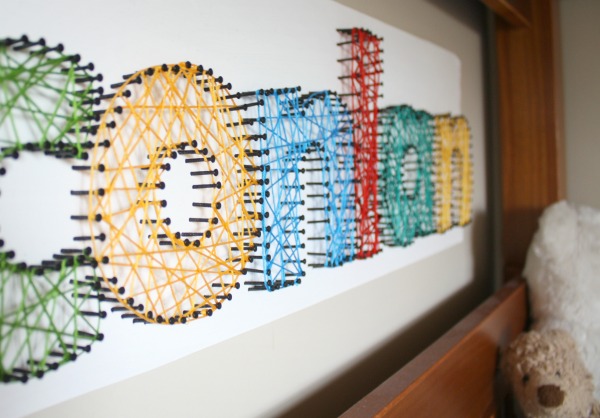
Step 4: String them Up
This is the fun artistic part! Weaving the string can take many forms. We chose a random pattern, but you can carefully lay out the string to make all types geometric forms. You can look at my craft board on Pinterest to see some other string layouts. For fun we let the boys pick out their colors. We may or may not have influenced the selection a bit… The hardest part of wrapping all the string is just making it look consistent and tying the tiny knot at the end. That was my job!
The final signs were hung over beds and on doors to give each child a nice piece of personalized artwork.


