I know the traditional harvest decorations are corn and pumpkins but what about apples. Specifically golden apples. Ever heard of the goose that laid the golden apple? Yeah, this tutorial is kinda like that, but I’m not laying anything and we are making an golden apple… With letters… So basically not the same at all… Anyway on to the tutorial:

Supplies
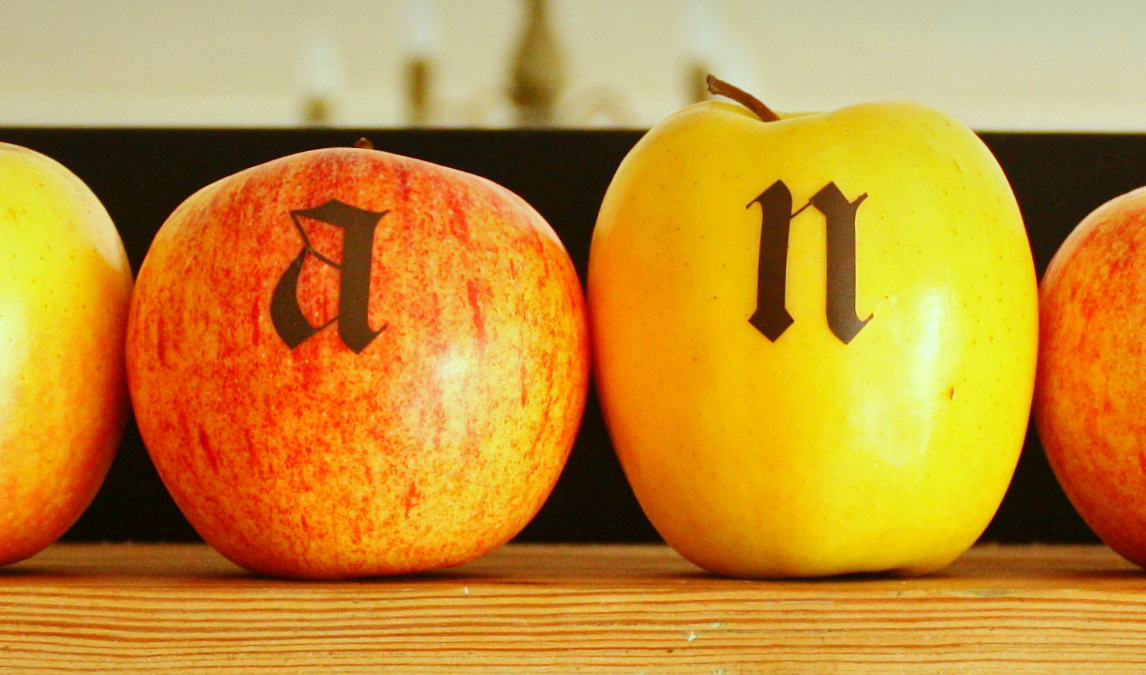
Vinyl Letters* (I have a craft machine that cuts vinyl but any vinyl letters will work)
Fresh Apple
Step 1: Set up the Setup
This is going to seem like a no-brainer tutorial but there are a couple tips you can use to make this go a lot smoother. First, measure the length of your apples. Measure a few of them and get an average. Because you will need to either cut or buy vinyl letters that fit. So don’t just measure one and assume all the letters are going to look good. (I can’t imagine how I learned this trick)
While you are measuring set the apples in there final location, because guess what?, they are fruit. A natural product. So is every apple going to sit nicely in your display? No.

Step 2 Vinyl: Not pleasant on your thighs in summer and not pleasant to adhere
Do not get me wrong. I love vinyl, but I also worked as visual manager and spent a few years of my life adhere vinyl decals to everything. Once you have worked with a 10 ft vinyl decal it becomes easier. That being said trying to adhere a flat decal to a rounded object, without a lot of bubbles and distortion is tricky.

Remember to look at how your apples are sitting so you can get all the letters in line.

Step 3: Bring on the Shine
Take your apple and spray it with metallic spray paint. What?! You can spray fruit?! Yeah fruit turns out lovely and inedible. Please tell me you wouldn’t dream about eating an apple covered in regular spray paint… Please.
The smooth surface of the apple takes the paint really well. I just did two quick coats, let it dry fully and got a really nice shiny surface.

Step 4: Peel
Don’t peel the apple! Just peel off the decal to let the apple color show through. For my thanksgiving mantel I only wanted one golden apple accent so I only painted the ‘T’ and peeled the vinyl away. I spelled the rest of the word using brown vinyl I left in place on the other apples.
You can see the completed Thanksgiving Mantel Here (11/6)
Enjoy these articles? Get monthly updates by joining my mailing list (no spam, no way, no how)
Just found your webpage and so love all your crafty ideas. I would like to use the golden apples on a door wreath or candle arrangement. Do the apples last longer covered in the paint?
They certainly seem to. Apples tend to last pretty well anyway.
Jumping over from Craft-O-Maniac Monday to tell you: I LOVE it. It seems so easy, and the results are so stunning! Now I want a vinyl cutting machine!
The vinyl cutting machines are awesome. I have made things for the office, friends, and myself. It was worth the investment. BUT, if you don’t have one you can get all kinds of vinyl letters in the craft stores that work well.
umm, didn’t the goose lay a golden EGG? Ha, love the apples.