Thanksgiving, for me, is about food, family, and giving thanks for all my friends and loved ones. Plus it is the calm before the Christmas bonanza. My mantel decorations are simplistic to reflect that. Plus I like to have a nice clean look before the gobs of Christmas Decorations begin.
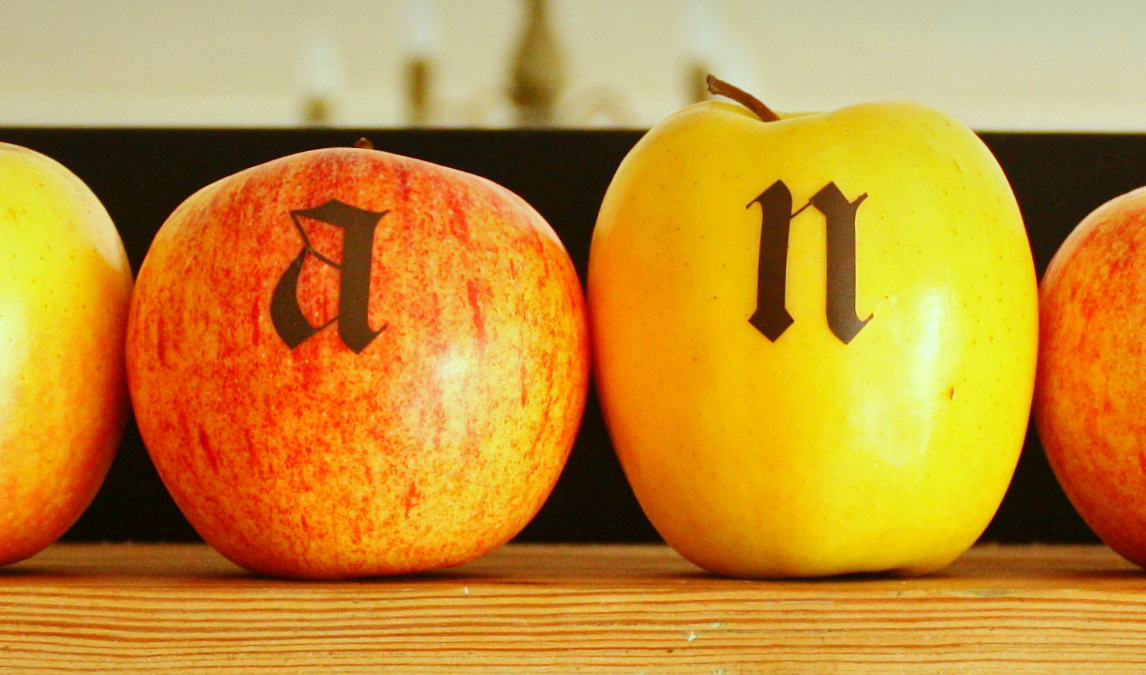
Do as I say, in the apple tutorial and line up your letters. Not as I do :).
Thanksgiving is still about Fall for me. I want to reflect the warm browns, russets, deep reds, and last golds of the season before giving over to the cold, crisp winter. Plus I have a fruit decor obsession.
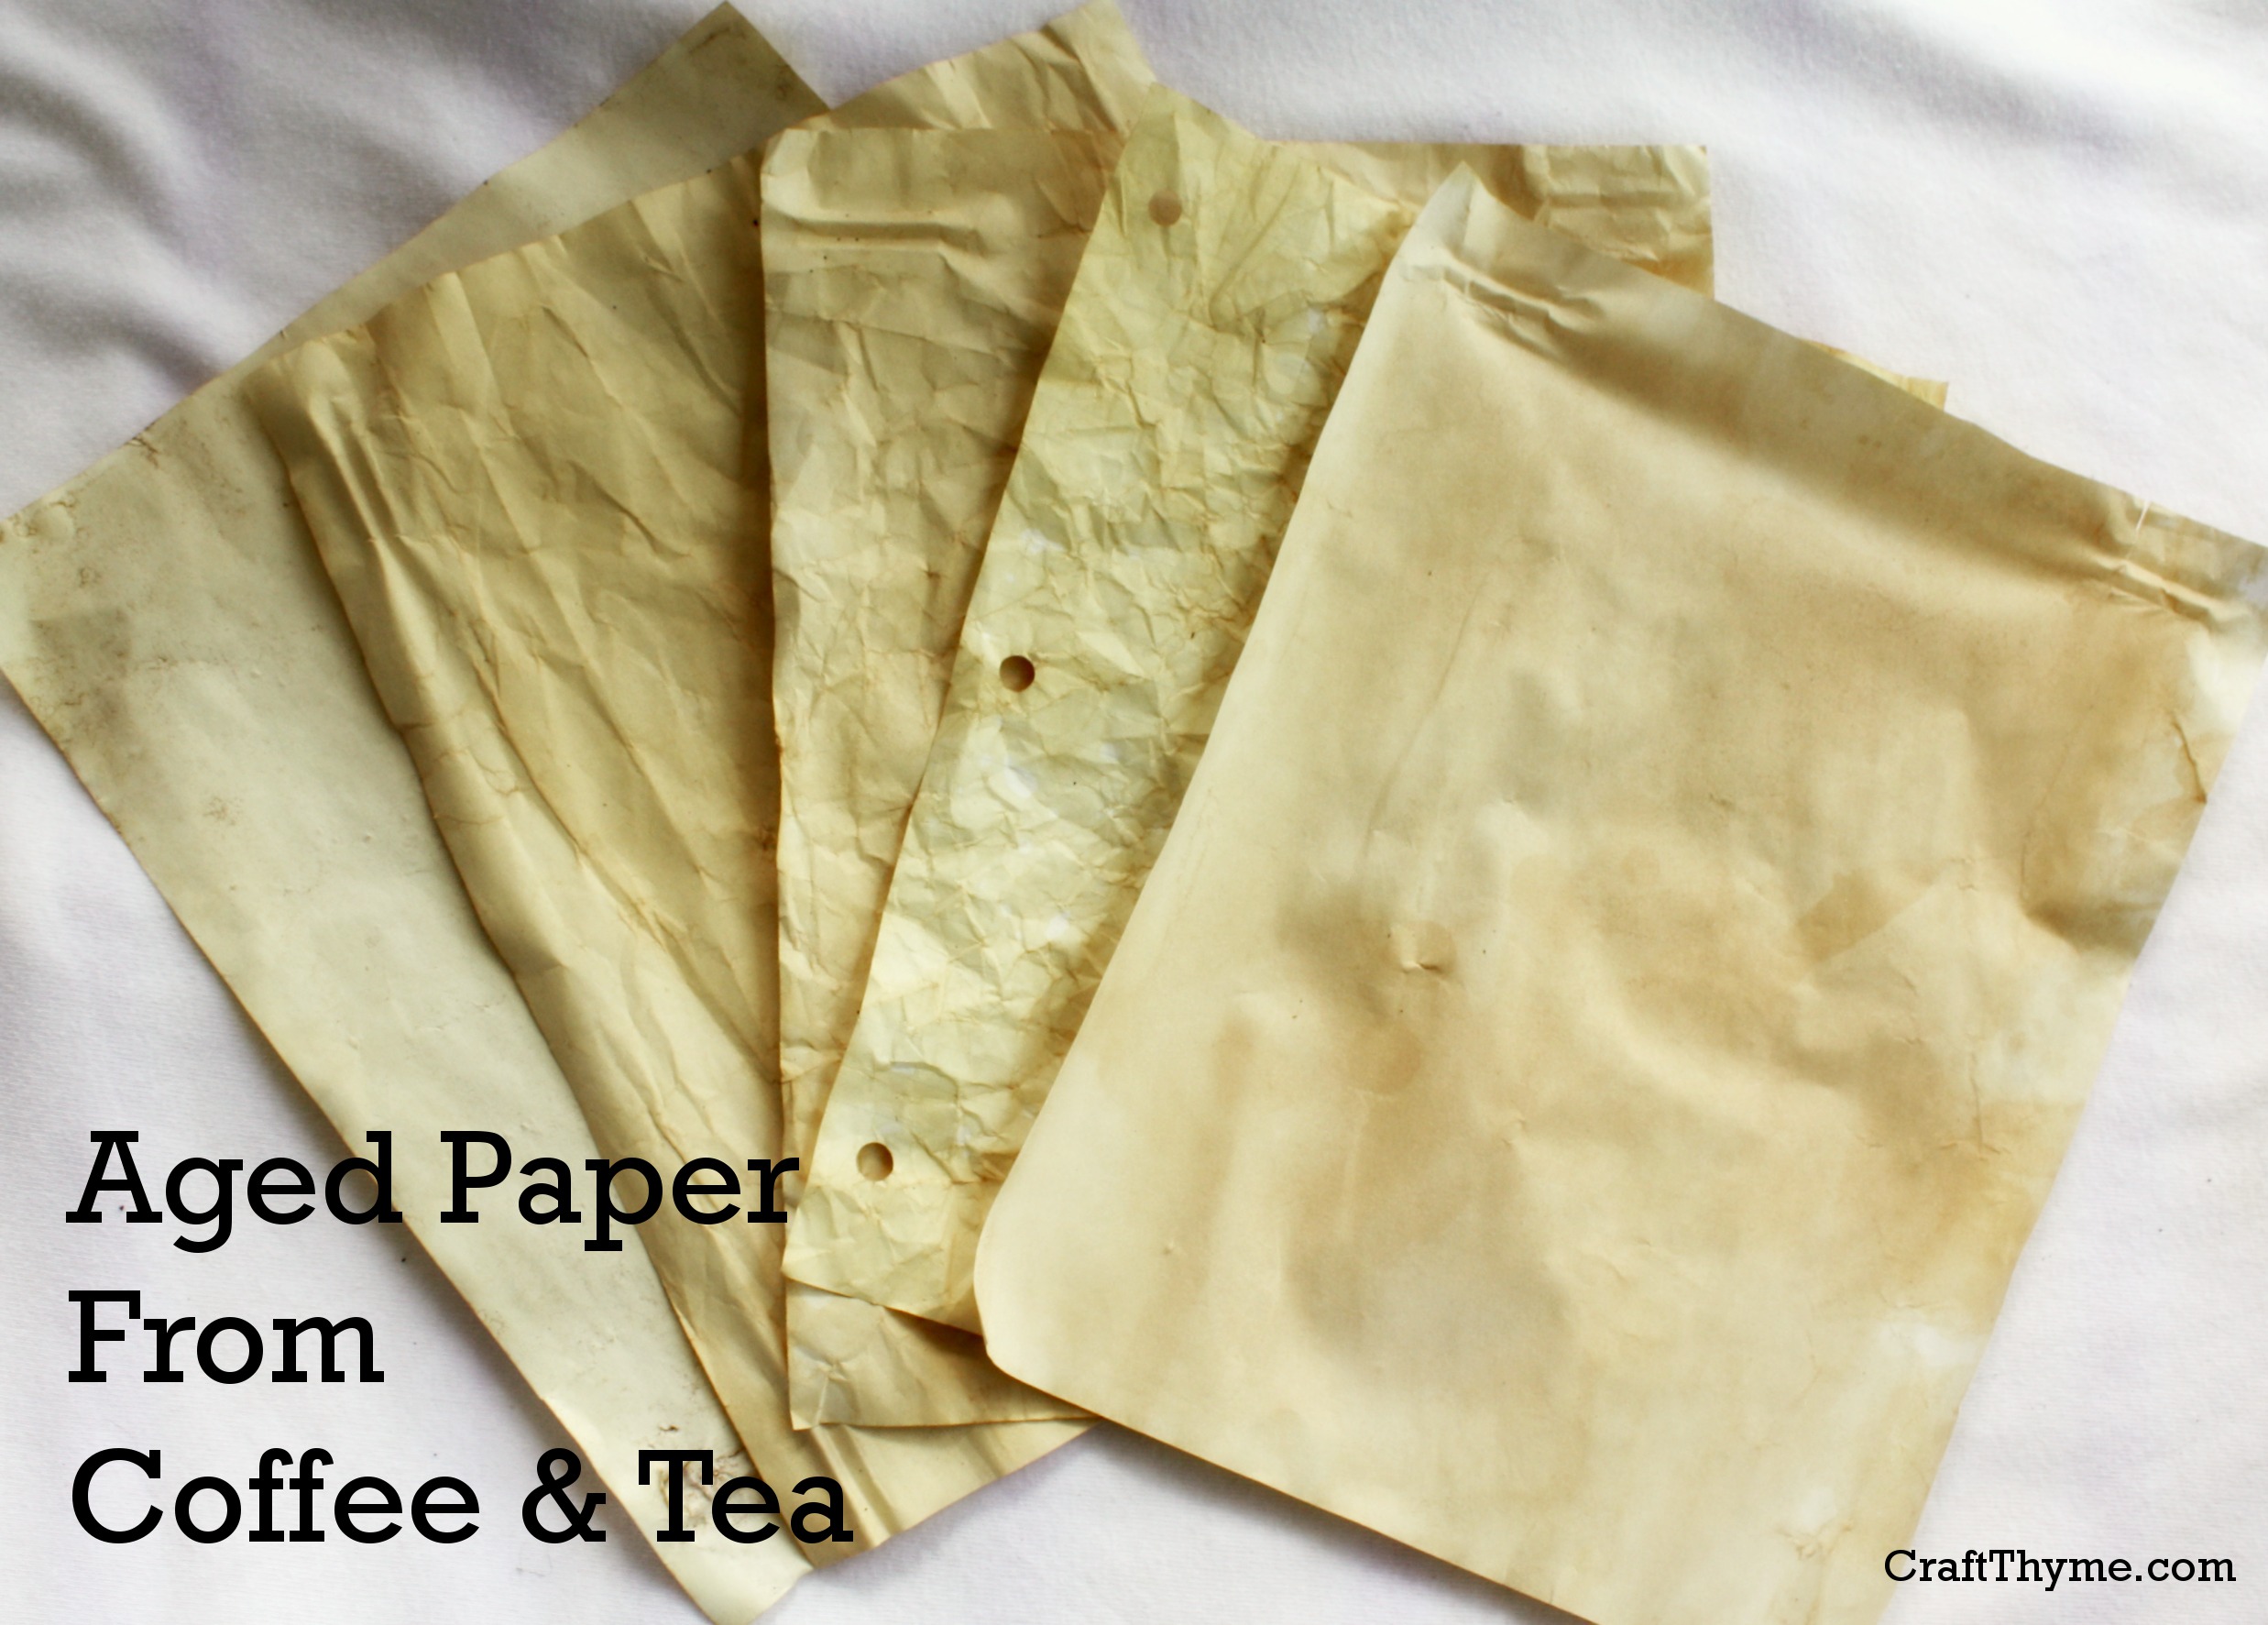
Told you all those aged papers would come in handy
So enjoy the last days of fall and relaxation before the excitement of Christmas.
Tutorials Used:
Golden Apples
Aging Paper with Tea or Coffee
How To Easily Cover a Book
Just keeping it simple.
Enjoy these articles? Get biweekly updates by joining my mailing list (no spam, no way, no how)
I know the traditional harvest decorations are corn and pumpkins but what about apples. Specifically golden apples. Ever heard of the goose that laid the golden apple? Yeah, this tutorial is kinda like that, but I’m not laying anything and we are making an golden apple… With letters… So basically not the same at all… Anyway on to the tutorial:
Supplies
Vinyl Letters* (I have a craft machine that cuts vinyl but any vinyl letters will work)
This is going to seem like a no-brainer tutorial but there are a couple tips you can use to make this go a lot smoother. First, measure the length of your apples. Measure a few of them and get an average. Because you will need to either cut or buy vinyl letters that fit. So don’t just measure one and assume all the letters are going to look good. (I can’t imagine how I learned this trick)
While you are measuring set the apples in there final location, because guess what?, they are fruit. A natural product. So is every apple going to sit nicely in your display? No.
Step 2 Vinyl: Not pleasant on your thighs in summer and not pleasant to adhere
Do not get me wrong. I love vinyl, but I also worked as visual manager and spent a few years of my life adhere vinyl decals to everything. Once you have worked with a 10 ft vinyl decal it becomes easier. That being said trying to adhere a flat decal to a rounded object, without a lot of bubbles and distortion is tricky.
See that tiny piece on the ‘T’? Yeah I had to adhere that decal twice to get it straight.
Remember to look at how your apples are sitting so you can get all the letters in line.
This is what I meant about in line. I am ATTEMPTING to get the ‘A’ and ‘N’ about the same level. Except I kinda failed. You have been warned… Do a better job!
Step 3: Bring on the Shine
Take your apple and spray it with metallic spray paint. What?! You can spray fruit?! Yeah fruit turns out lovely and inedible. Please tell me you wouldn’t dream about eating an apple covered in regular spray paint… Please.
The smooth surface of the apple takes the paint really well. I just did two quick coats, let it dry fully and got a really nice shiny surface.
Step 4: Peel
Don’t peel the apple! Just peel off the decal to let the apple color show through. For my thanksgiving mantel I only wanted one golden apple accent so I only painted the ‘T’ and peeled the vinyl away. I spelled the rest of the word using brown vinyl I left in place on the other apples.
I wanted a variety of aged papers to cover books for my Thanksgiving Mantel. Not having any walnut ink on hand, but having plenty of old coffee grounds (One needs to appear slightly perky at work after blogging all night) I thought why not give it a try. It just grew there and I tried tea as well. Enter the tutorial on aging paper with coffee and tea:
Supplies
Got Paper?
Got Coffee or Tea?
Got Water?
You are good to go.
Coffee Steps
Mix some old coffee grounds in a shallow pan with hot water. Put the paper in and stir and press the coffee grounds around the paper. I let mine sit for a couple minutes to suck up the brown and then pulled the sheet out grounds intact and laid it on a old towel. If you look at #3 I had some cheapo kids clothes hangers I used to hand up each sheet to dry. The extra coffee brushes off when the paper is fully dry.
Tea Steps
Um… See coffee but leave it in longer and scrunch/squish the old tea bags onto the paper periodically. You can see in #4 how wrinkling the paper makes such a difference from #2. Not necessarily better, just an option for further aging the paper.
You can see how I used these papers on my Thanksgiving Mantel.
Enjoy these articles? Get biweekly updates by joining my mailing list (no spam, no way, no how)
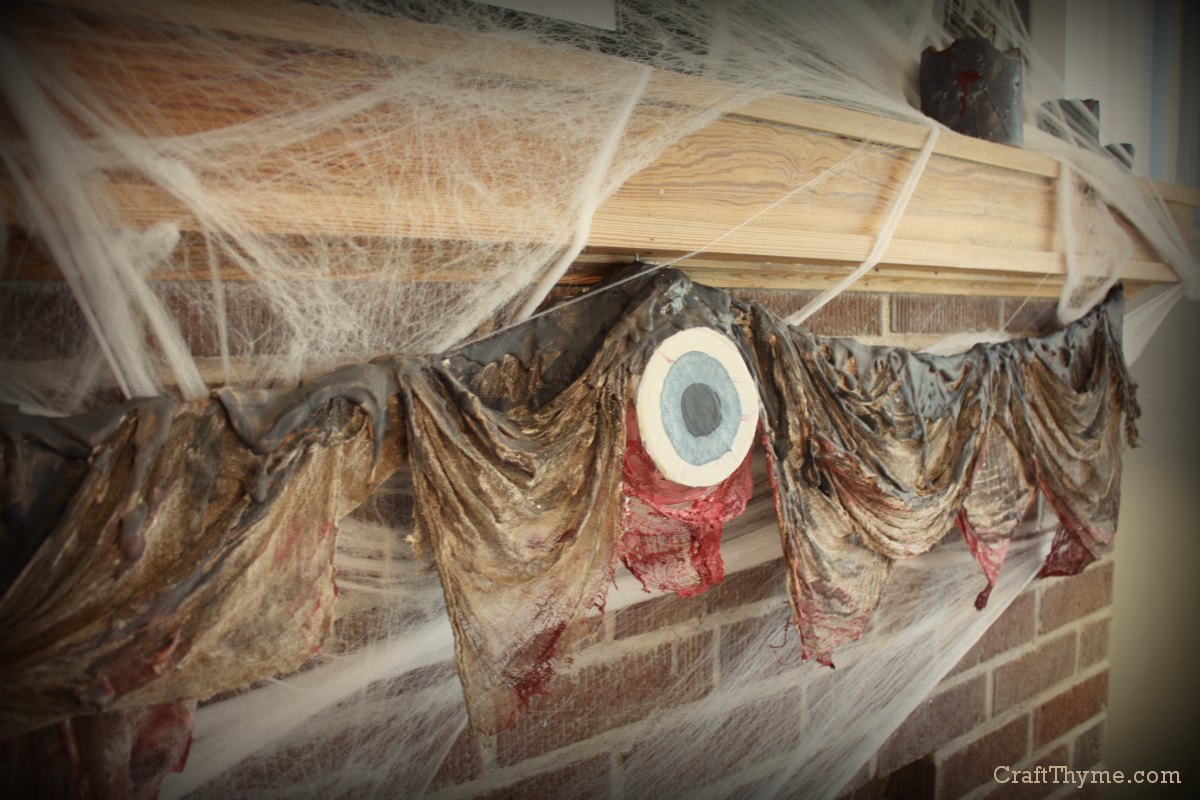
I have stated before that I usually like the ‘prettier’ halloween. Glittered skulls, pretty potions, mystical & magical versus ghouls and gore is more up my alley. However, this year I just wasn’t feeling it. I even had ravens, black tulle, and lots of green glitter all ready to go. Instead I opted to make a huge mess with paint and plaster.
I think once you have a giant eye attached to your mantel, you kinda have to continue with the theme.
In comes spider webs and zombie candles. Lots of spider webs…
And lots of zombie candles…
Best part? My kids and husband didn’t even bat an eyelash at the giant evil eye. I think they are immune to Mama’s decorating insanity.
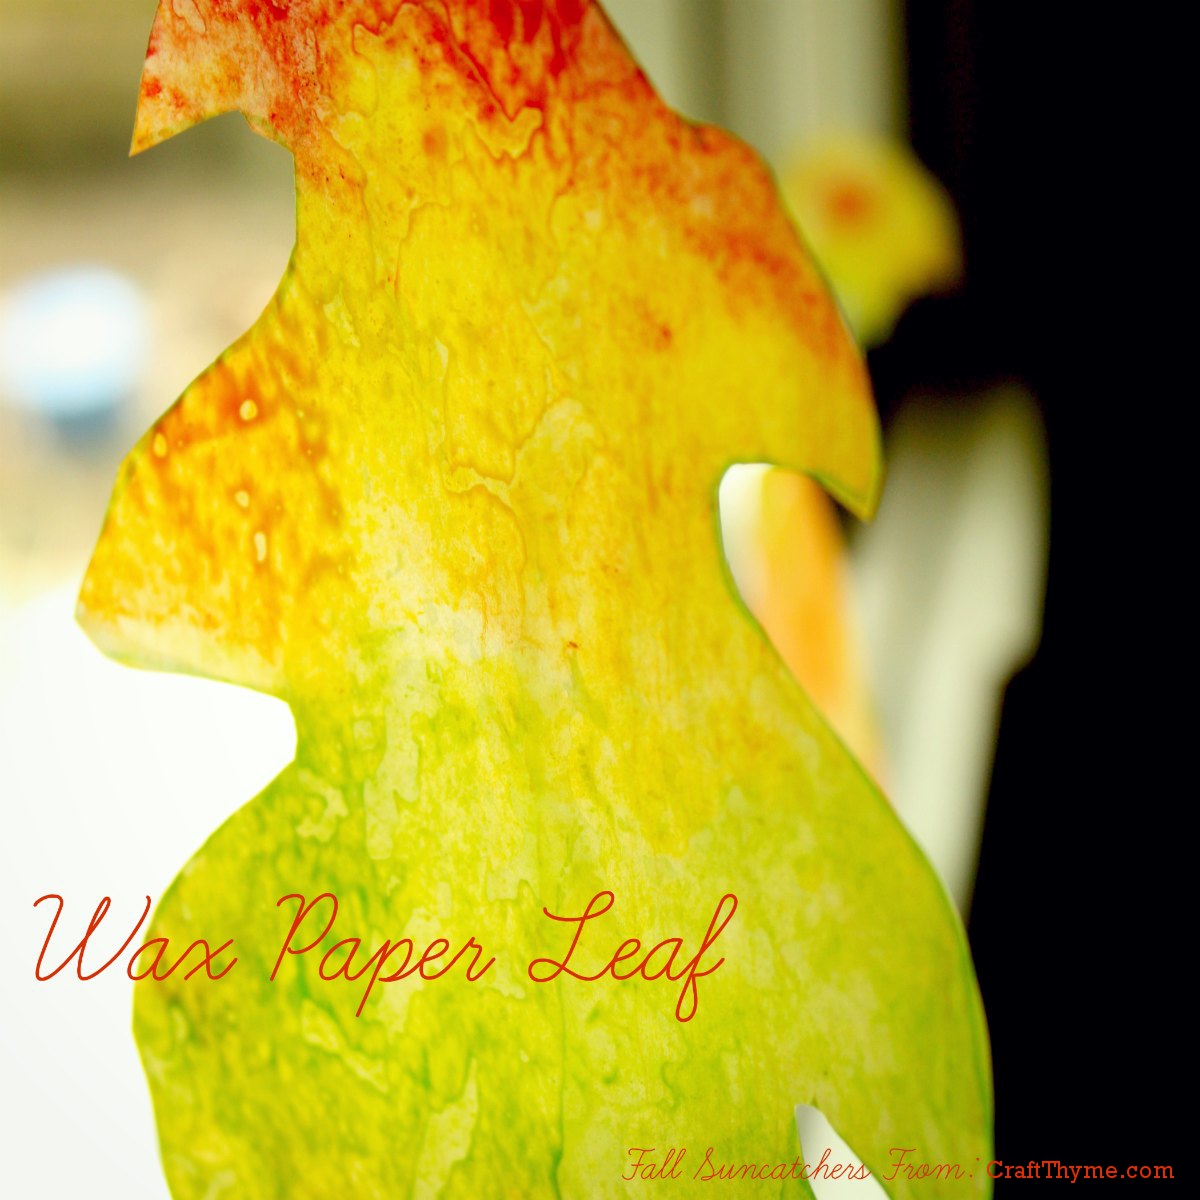
Last week I had the pleasure of doing my first first ever craft guest post at The Experimental Home. I wanted to keep it kid friendly and Autumn themed to blend with both of our website missions. Laura graciously invited me to share these fall leaf sun catchers while making an awesome Spider Tutorial for Craft Thyme:
My guest post and can be found at The Experimental Home in it’s entirety, but I have now added the instructions here as well.
First, I wanted to touch on one awesome thing I learned! I can craft with my kids and collaboratively we can come up with something pretty awesome. So often I regulate ‘kid crafts’ to the refrigerator, but when we work together we can come up with decorations I would be proud to showcase at an adult dinner party.
So thanks to McClain & Conlan! You made these autumn sun catchers awesome!
Conlan is not shown. He was pitching a hissy that his brother had 4 colors and he only had 2. Oh sibling love.
Now on to the instructions!
Supplies Needed:
Crayons(broken works too; I hate feeling wasteful) Grater Wax Paper Iron Old Towels (optional if you are neat and tidy)
Step 1: The Great Grate
Did I mention the kiddos are 1 & 3? Yeah so… I grated the crayon. We had little paper plates left over from a party which made it easier for them to pass the colors back and forth. To get an ‘Autumn’ feel I limited them to orange, red, yellow, and light green. Luckily they didn’t even notice Mama was limiting their creativity in the name of aesthetics.
Step 2: Sprinkles and Fights
Pull off a nice large sheet of wax paper. You’ll note it is laying on a pile of old towels. We will get to that in a minute. Let the kids sprinkle crayon shavings all over the paper. Watch the kids get in a squabble over the green, then over the red, then separate the colors and consistently repeat ‘share’ over and over. Give up and hand them each a set of shavings. Relax and sip coffee.
Step 3: Strike While The Iron Is Hot
When the kids are done spreading the crayon gratings about, lay another piece of wax paper on top, scoot them back, and gently iron (Parents only). The boys thought the way the color melted and instantly spread was magical. Please Note: If you are doing this craft yourself a little crayon goes a long way.
Because the crayon does have a tendency to spread I always iron on old towels so if any leaks out of the wax paper I don’t have to worry about stains.
Step 4: Mama Craft Completion
The boys were done crafting, but I finished up by tracing the leaves. Just an FYI: permanent marker works great on wax paper. While, the ran around like crazy kids outside I cut out and hung the leaves from fishing line along the dining room window to create a nice collaborative fall display.