Posted on 3 Comments

How To Make Alcohol Ink: Walnut Style

Recipe for permanent walnut alcohol ink

My How To Make Alcohol Ink tutorial is popular. However, many of you wanted to learn how to make a permanent alcohol ink.  Honestly, I am not a scrapbooker so it took some research into various alcohol inks to find a good formula.  While this recipe for walnut colored permanent alcohol ink is not quite as concentrated as commercial alcohol ink it gives a nice finish and is another option to age paper.

Now when I say permanent alcohol ink I want to clarify.  This walnut alcohol ink can stain a dark brown.  It stuck to wood, paper, fabric, soft plastic, paperclay, and skin.  Oh skin…  My hands were dyed brown for 5 days…  It did not dye hard plastic, metal, or glass as well.

On to the walnut alcohol ink recipe:

Recipe for permanent walnut alcohol ink

Supplies

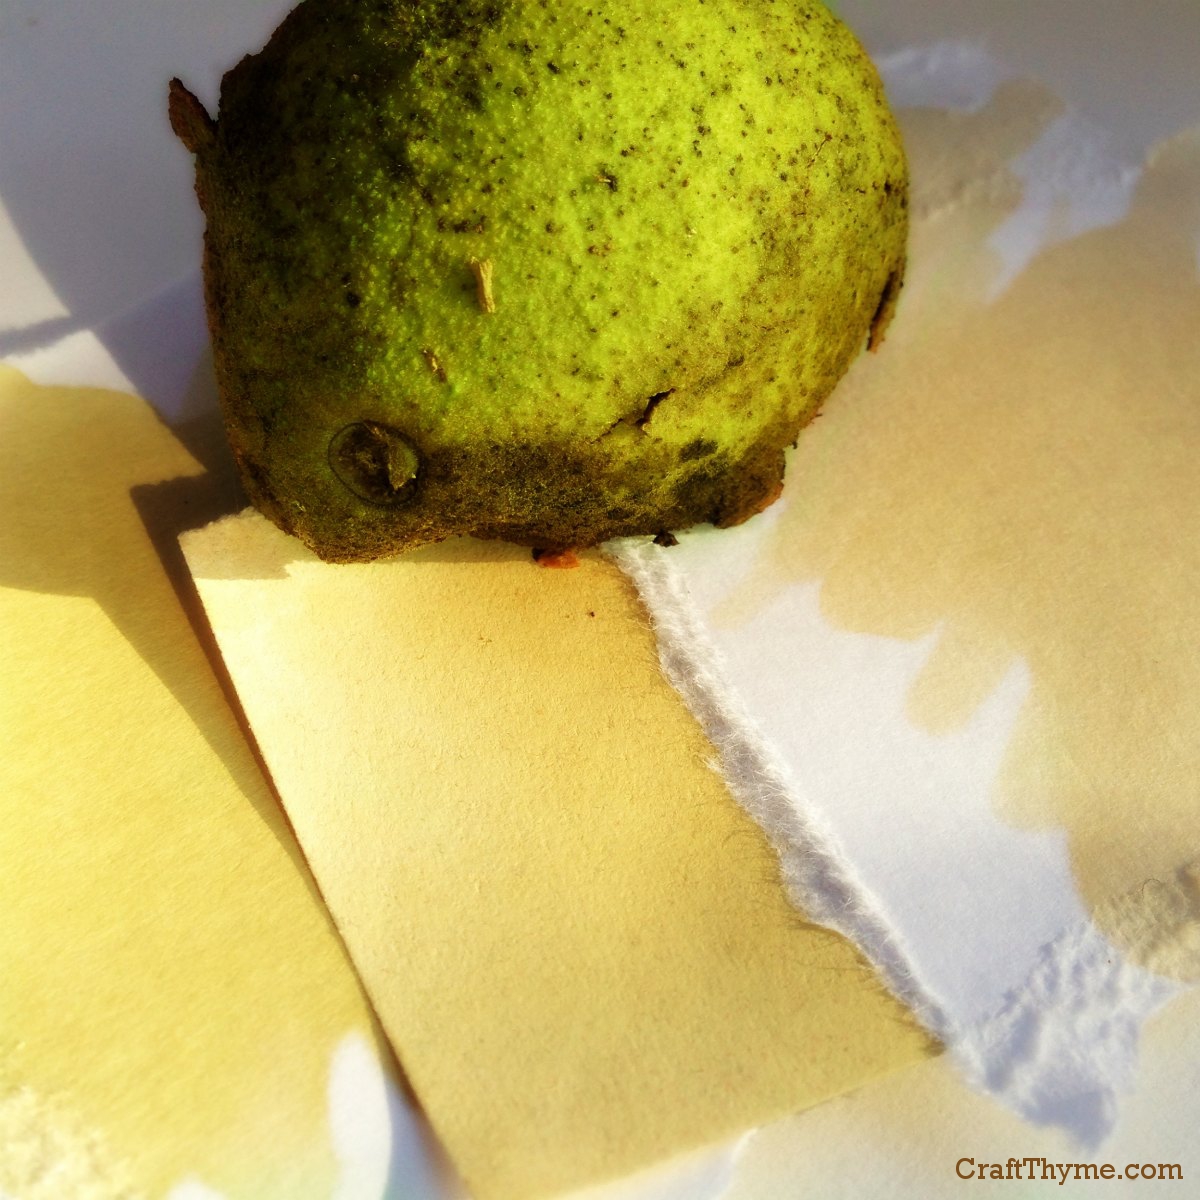
Walnut Hulls (surprisingly the wet green hulls made a darker brown.  Dried black walnut hulls still made a nice brown)

Rubbing Alcohol (90% concentration works better)

Filters (plain coffee filter and funnel worked fine)

Glass Jars

Rubber Gloves (why, why, why must I always forget gloves?)

Black walnut hulls are supplies for creating the base of walnut alcohol ink

 Step 1: Pretend You Are A Squirrel

Gather up black walnuts.  In Western North Carolina walnuts are everywhere.  The Fall is a particularly good time to find the hulls but you can find dried bits of hull under the trees all year around.  Once you have gathered the walnuts tear the hulls into small bits.  You can see that I separated the green hulls from the drier brown ones.  The green make a darker shade of brown in less time, but dry hull can achieve a very nice color as well.

Walnut hulls torn into bits to make alcohol ink
Now would be a good time to remember gloves if you don’t want a walnut fake tan

Step 2: Shake What Your Mama Gave You

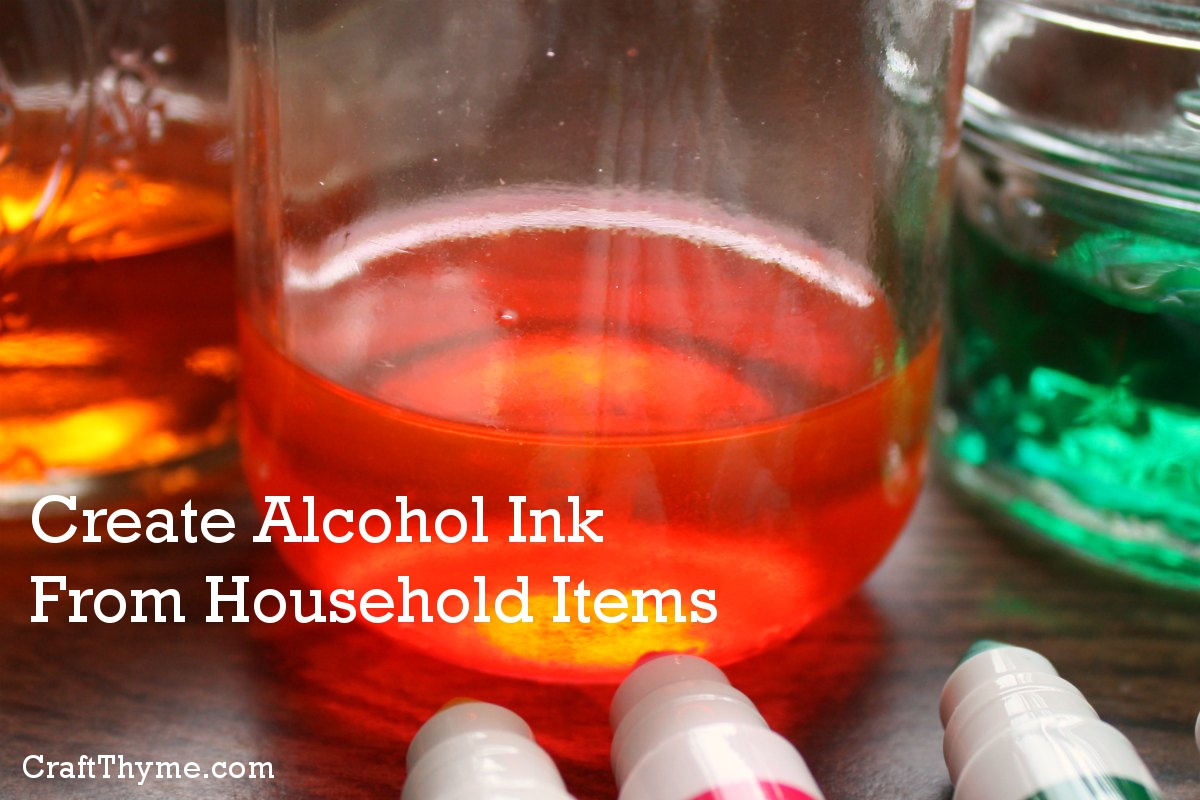
Cover the hulls in alcohol, cap the jars and give them a good shake.  Let the mixture sit and shake some more. Basically rinse and repeat.  I let mine sit for about an hour for the test strips shown in the top photo.  However, letting the ink sit longer gets a darker more concentrated color.

First few minutes of alcohol leaching color from walnut hulls
I swear the green makes the darker ink in the long run. Though this picture doesn’t appear that way.

Step 3: Try Not To Strain About Filtering

Like the filter set up?  I found an old funnel, stuck in a coffee filter, and poured in my mix.  Once it was clean of all the particles the ink was ready to paint, dip, and/or spray.

Filtering completed permanent alcohol ink

If you want bright colors check out my Original Guide to Alcohol Ink or Permanent Bright Colored Alcohol Ink.
Enjoy these articles? Get biweekly updates by joining my mailing list (no spam, no way, no how)

See other great DIY and Decor at these link parties: Craftberry Bush, The Pin Junkie, My Romantic Home

Posted on 119 Comments

How to Make Alcohol Inks

How to make alcohol inks

Making alcohol ink or dye from household items is super easy.  I use the alcohol ink to dye crepe paper for a nice vintage look.  Honestly this is so easy I almost think it is silly to have a how to article.  But since I am whipping these up all the time I thought I’d give you a quick run down.  You can also see my tutorial on how to make Walnut Alcohol Ink.

How to make alcohol inks
As McClain says: this tutorial is “Easy Peasy Lemon Squeezy”

Supplies

  • Alcohol:  I like the high proof stuff myself ;) Joking aside, I use the 91% isopropyl alcohol if I can find it because it dries faster and for dying crepe paper changes the texture the least.
  • Glass jars: Plastic is fine but will tend to stain forever.  FOREVER.
  • Old/Cheap Markers OR Food Coloring:  I have tried a number of different pigments from watercolor to paint but they tend to not dissolve in a way that I found to fit my needs (in other words they made a craptastic mess)alcohol ink supplies

Step 1

Pour some alcohol in jars.  If using markers uncap and stick in alcohol let sit for about 30 minutes.  You can speed the process by stirring the marker around in the alcohol.  If using food coloring start with 1 to 2 drops of your color. If mixing colors you may need to add alcohol if you want a pastel color.

making alcohol ink
Only hard part here is waiting for the color to come out of the markers

Step 2

That’s it.  Color in alcohol = done.  Feel free to celebrate with a drink of ethyl alcohol (as known as spirituous liquor). Edit: apparently some people in the world don’t understand chemistry humor. So let’s clarify: isopropyl alcohol = baddy bad. Ethyl alcohol = tasty. Make sure to use common sense when having a whisky sour, glass of wine, or beer. Never drink & drive and always enjoy in moderation!

Notes

More markers per jar = a brighter dye.  The nice thing about using markers is that if you happen to have the washable type then it will not stain your hands.  However, you could just stop and put on some gloves like someone that has sense.

These alcohol based inks are perfect for dyeing paper products.  You can see these dyes in action on how to dye crepe paper without loosing the crepe texture. 

If you are looking for a way to make alcohol ink for use on plastic, metal, or glass SORRY!  I have tried so many formulas and none of them work quite as well as the commercial variety you can see here (warning an affiliate link ahead).  If I ever come up with it you will be the first to know!!!

*