To create my Dr. Seuss inspired trees I had to dye cotton balls. It got me thinking, there are a ton of household items that you can dye. Here is my quick tutorial on dyeing cotton balls plus 9 10 other household items (meaning things you can pick up at the grocery store).
1. How to Dye Cotton Balls
Supplies:
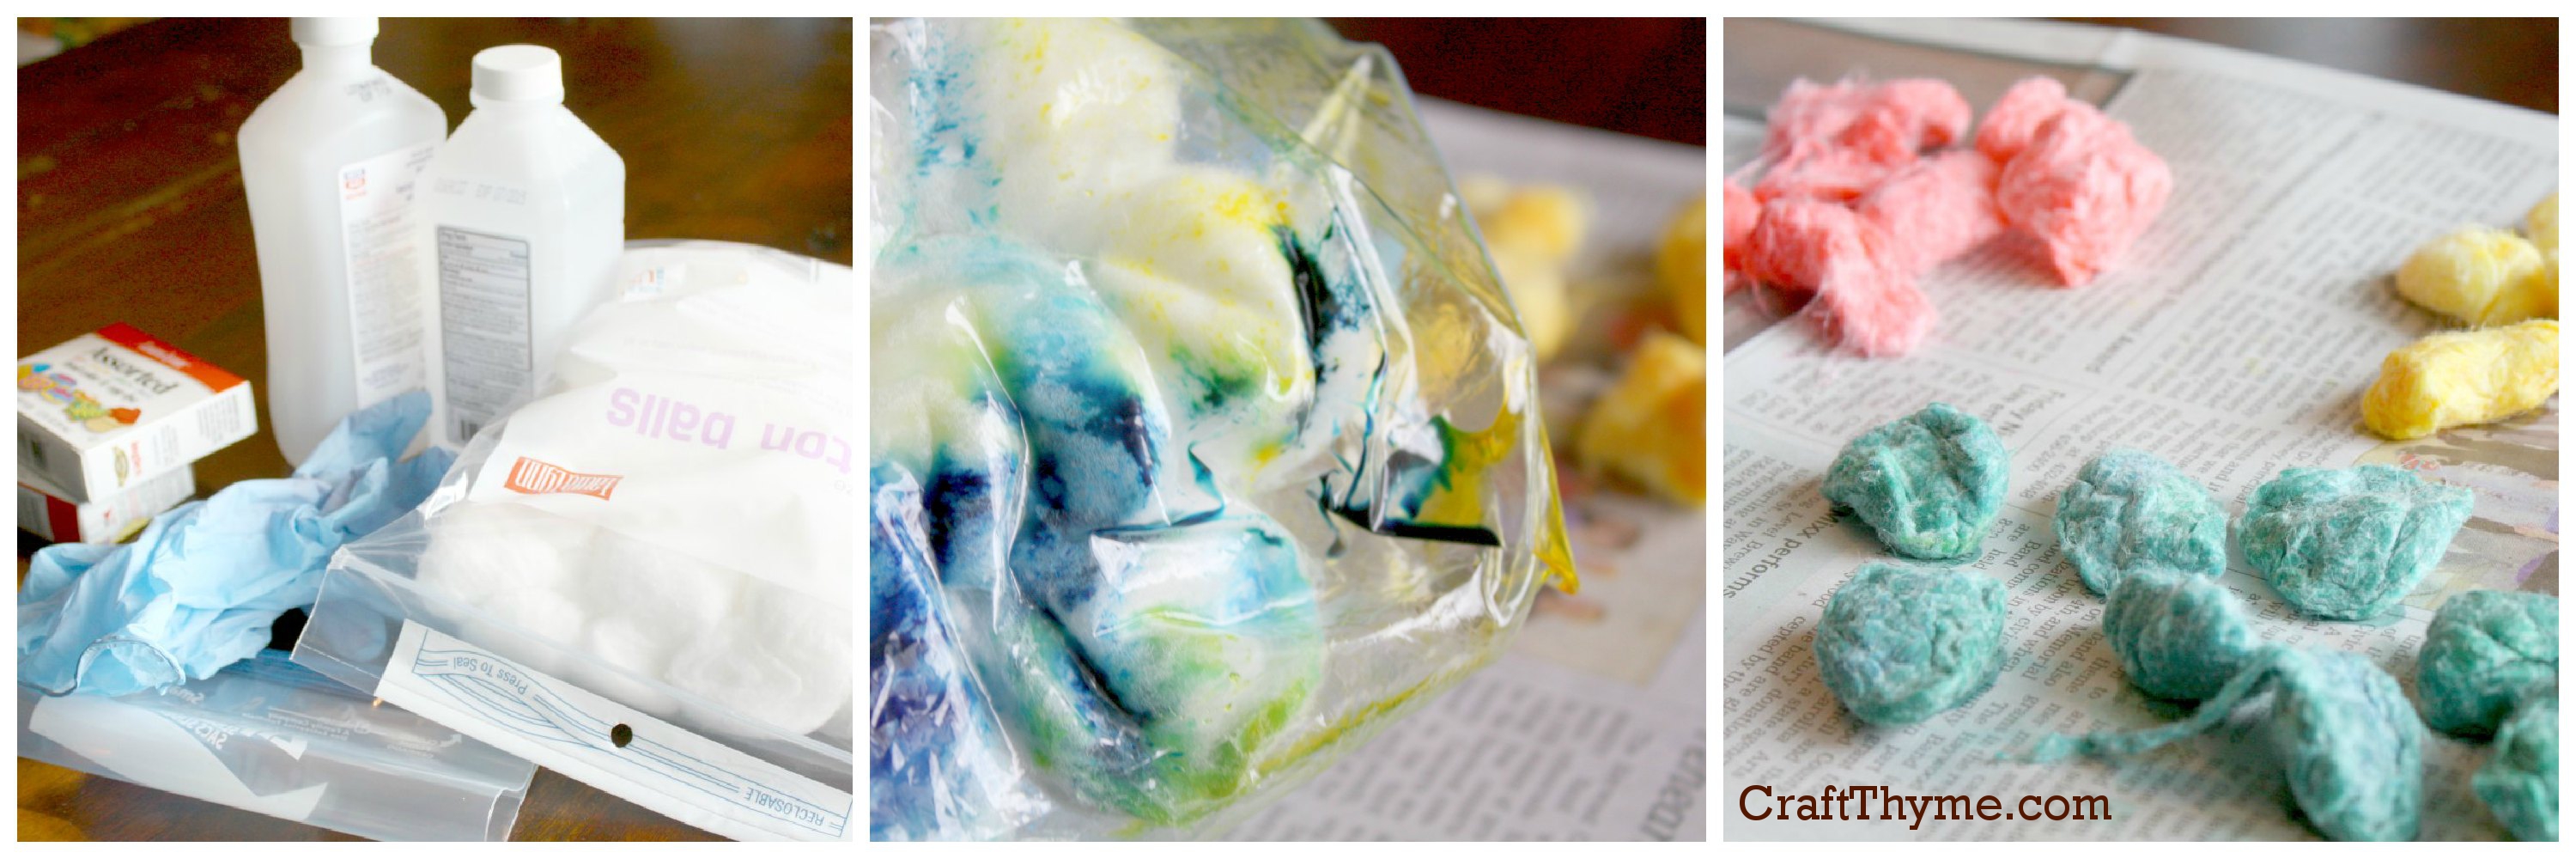
Rubbing alcohol, food coloring, cotton balls (duh), and a plastic baggy. Gloves and newsprint are a nice bonus.
Steps:
Throw cotton balls into a baggy with a few drops of food coloring (I was trying for a turquoise in the middle picture… Needed way more blue) and a splash of alcohol. Remove the air from the baggy and squish the cotton balls around until the are evenly colored. Pour them out on a newspaper to dry. When dry you can fluff the cotton which will reveal the white making the colors much lighter. You can see the final product on my Dr. Seuss inspired tree centerpiece.
My youngest son turned 1 last week. I’d love to say I had it all together, realized that Dr. Seuss’ 100th birthday was occurring and picked the perfect theme for Conlan’s First Birthday. Alas, I would be lying… I wanted a Dr. Seuss themed birthday for McClain’s first (two years ago) and ordered the licensed plates, napkins, etc. The decorations came exactly one day after his party and were promptly shoved in the basement. I got my Dr. Seuss theme on the second go-around.
To complement the purchased party items I made a few decorations. Some Seussian-like trees for the wrapped box centerpiece and hand-dyed crepe paper ruffles.
While, I imagine that very few people will need to recreate the trees I think I may just give a run-down on how to make them next week. It might be fun to do something whimsical like that for Christmas.
Balloons and Streamers! Can’t have a birthday without them.
The guests (adults and kids alike) enjoyed the balloons. They made great decorations in the colors of red, white, turquoise, and yellow & doubled as entertainment. Everyone seemed to enjoy the basic snacks and of course a color themed cake. Conlan, seemed to enjoy all the extra attention.
Okay… Maybe Conlan enjoyed the balloons more. Oddly, he was not smiles about the cake.
While, the Dr. Seuss theme looked great and added nice color pops to the family photos (yes, I keep my friends off my blog) I did manage to miss getting one awesome picture. The cake smash! Why? Because Conlan was totally NOT about it. He stuck one hand in, and looked at me to wipe it off. Patrick gave him a taste of the icing, and he promptly made a face like it tasted horrible. Clearly he is missing some important sweet-tooth gene I should have passed to him. Anyway, enjoy one more photo of decoration details and scroll down for the connected tutorials.
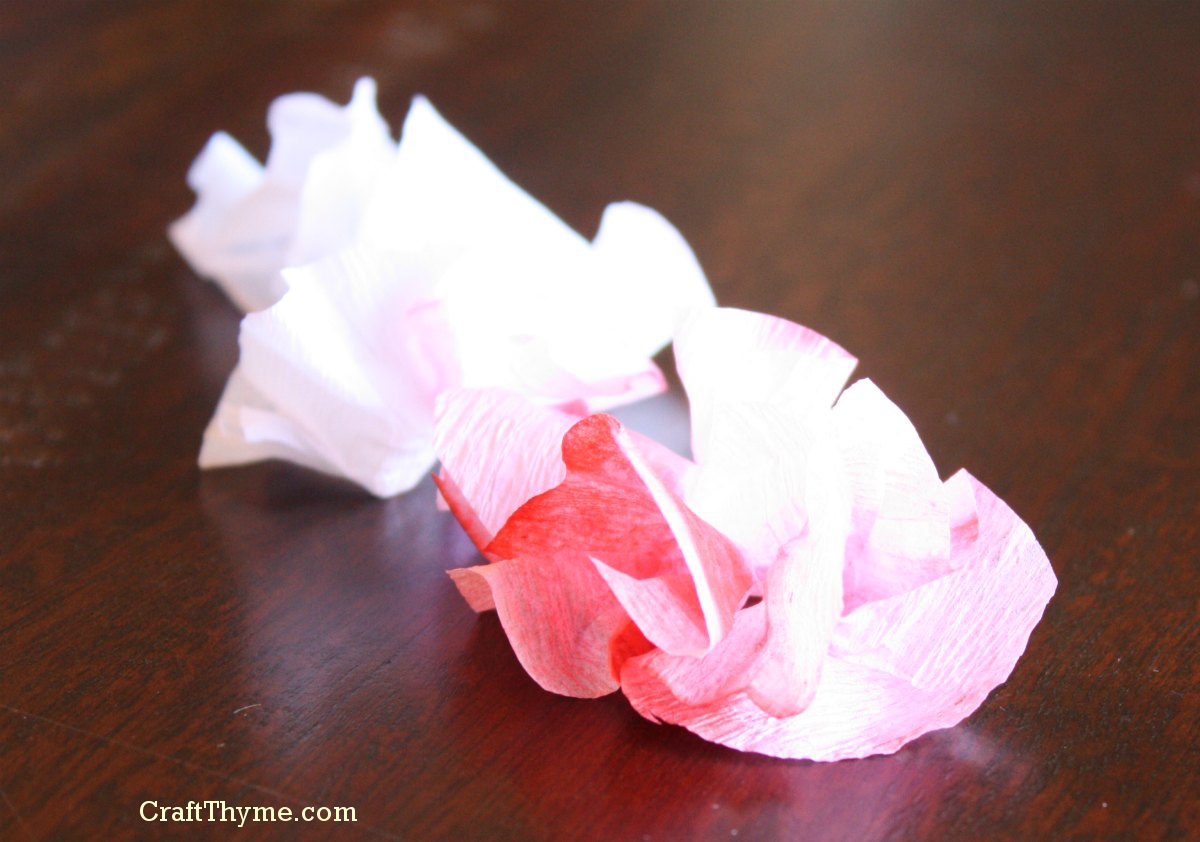
The following is a quick and easy tutorial on creating faux cherry blossoms from crepe paper. I have followed the rather tedious tutorials on making different crepe flowers before. Yes, they look lovely… But with two small children underfoot I will sacrifice a bit of my accurate-compulsive tendencies artistic integrity to make a final arrangement that beautifies my space. And doesn’t take 30 damn hrs to painstakingly cut tiny petals. So read on for Quick and Easy Cherry Blossoms:
Supplies (For some reason I always want to type ingredients here…)
Shown: Glue Gun with glue sticks (don’t run out!)
Crepe Paper
Scissors
Floral wire that matches your branches (this is optional)
Not Shown: Branches
Spray Paint
Step 1
Take your crepe paper and accordion fold it up. In this picture I am using two shades of hand dyed crepe paper (You can see the tutorial here). I make it as thick as I can still cut because I hate cutting. Cutting, to me, is just a process to get through before the fun begins in crafting. So thicker = less cuts.
I know you are surprised, but I am also one of those people that will die carrying in 4,000 bags of groceries instead of making two trips. So go ahead fold that puppy up thick!
Step 2
Cut out a circle-like shape. Trust me here, no need to go get a compass. As long as it ends up kinda rounded you are all good. I thought about using a circle punch (might have given up trying to find it in the basement) but I like the more organic shape in the end.
That lovely variegation is why I go to the trouble to hand dye my crepe paper. But for even quick and easier methods just go buy a couple shades of pink.
Step 3
Here is where the magic happens! Take your petals to the bedroom… Just Kidding! The magic I am discussing is what makes crepe paper so nice for creating organic items like flowers. Pull lightly on the outer edges of the petals. The crepe will stretch a bit and ruffle; making for a more realistic looking shape.
And here you can see what I meant by only needs to be kinda circular. Such an amazing cutting job.
Step 4
Take your super-technical-amazing-implement, in this case a pen and wrap the petal around the bottom to make a cup shape. You may have done the exact same thing on a pencil eraser as a kid to make tissue paper crafts. I couldn’t find a regular pencil in the house so a pen worked just as well.
Step 5
Technically at this point you are done. The flowers look pretty just laid on objects. You can see inspiration by clicking here. However, to fully assemble a branch you will need, well… A branch. For mine I used some old maple limbs from the yard that I spray painted white. Since they didn’t have a lot of small limbs I made extra places to glue the flowers with matching white floral wire. Again you can see the final result here. Simply use a tiny dab of hot glue and stick on a flower.
Notes:
To make thicker flowers that look fully open try gluing two smaller flowers together. Also for tight buds twist the petals tightly together around the pen. I was able to make 40 or so flowers in less than half an hour. It is always a race to see who will finish first. Me with the craft or Conlan with his nap, so, I know this one was quick and easy. I hope you all enjoyed.
Enjoy these articles? Get periodic updates by joining my mailing list (no spam, no way, no how) or subscribing to my RSS feed.
 Supplies: