Posted on 6 Comments

Color Mixing for Kids: St. Patrick’s Day Activity

Color mixing with food coloring is a fun activity for kids and adults

Do you have kids at the age to learn colors and color mixing? Do you need a rainbow activity for St. Patrick’s Day? Do YOU need an activity, using household ingredients, that will teach both colors, color mixing for kids, scientific theory, and potentially cause 4 boys six years and under to pause for more than 10 seconds? You don’t? Good for you for making that life choice that shrinks the human population. For the rest of us breeders read on!

Color Mixing Activity for Children

Mixing color activity for children
Let’s not ask why we have so many pint glasses from so many breweries…

Supplies

Coffee (optional)
Husband (Can I say optional? This post certainly wouldn’t have happened without him)
Kids (Needed unless you just love color)
Way too many pint glasses for adults to own (regular glasses will do)
Liquid Food Coloring*(Yellow, Red, Blue)
Water
Paper Towels*
Post-it Notes* or Scratch Paper

Step 1 The Set-up

Groggily slug down coffee while the kids tuck in breakfast and vaguely note that husband is exclaiming that today we will “Science”. Watch as Adam starts setting out 7 glasses, fills 4 with water, and raise eyebrow as he hands you paper towels.

Joking aside, line up the seven glasses and fill every other one 80%-90% full with water. Since we aren’t doing rocket-surgery (yes, you read that correctly) I think we can combine all the set-up in one step. Fold 6 paper towels lengthwise twice. Set out your droppers of food coloring and call over the kids.

Step one in a color mixing activity for kids
Picture just in case anyone needs help folding paper towels. See optional coffee above if this step is hard to complete.

Step 2 Paint the Town Red

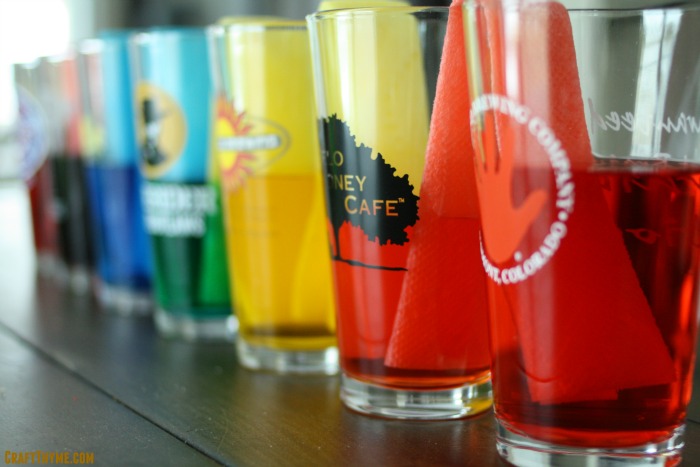
I’m not sure there is anyone in the world who doesn’t like to watch food color mix into water. The kids will love to come watch. In the glasses of water drop 6 drops of red in the first glass, 8 drops of yellow in the next water, 6 drops of blue in the following, and 6 drops of red in the final water glass. Your line up will be: R0Y0B0R

Step 3 Patience and Hypothesis

You are going to take your wicking paper towels and place them from glass to glass as seen in the next photo. Adam could weigh in on why the paper towel needs to be a certain length, as I never read the original info on this activity. Suffice to say it is better if it touches near the bottom of both glasses.

Our small children immediately got ants in their pants because the process takes a bit for the colors to start moving. This is the perfect time to grab some post-it notes and teach kids about having a hypothesis. First, we discussed what they thought might happen. I may have mentioned the words water and cohesion and then realized that was a little nerdy even for my kids. So we decided that maybe the colored water would magically move. IF that happened we took guesses on what color each glass would turn. I stuck the sticky notes down in front of the empty glasses and wrote everyone’s guesses. Found out that no one knew what colors mix to make secondary colors… I have failed my art degree yet again!

Color wicking and mixing in a child friendly activity

Step 4 Free Play

Let the kids go play, use their imaginations, etc. Not very moment needs to be structured with activities! About the time someone is getting annoyed that someone else is smacking them with a lightsaber, ‘borrowing’ their toy car, or knocking down their carefully crafted block tower it will be time to look at the results. Even though they were in plain sight the whole time, the kids were so excited to see that the water had moved and mixed colors. They simply had forgotten to look!


Color activity for children
These are not photoshopped! I was so surprised this color mixing activity worked so well.

Side Notes

I found it incredibly interesting that each of them had thought they guessed all the colors correctly. I had to show them their initial guesses on paper… I sense that I may not be the only person who will have to be right in this household.Color mixing with food coloring is a fun activity for kids and adults

Color mixing activities for kids

Posted on 3 Comments

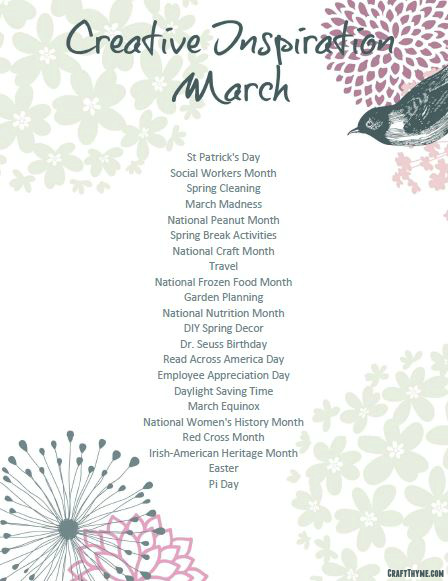
Creative Inspiration for March

Creative Inspiration for March 2016 free printable

Whether you are a blogger, office worker, or artist we all need a little creative inspiration from time to time.  Maybe you need a kick start for a writing a blog post or help picking out topics for Pinterest. Perhaps you want to plan a dinner party or come up with a fun themed Birthday.  Whatever your need it helps to have a jumping off point.  For this reason, I came up with this list of Creative Inspiration for March 2016.

Do you know what is better than a list?!  A pretty list!  Oh yeah, you also get to learn things like March is National Crafts Month*, Dr. Seuss would have celebrated his 112th birthday, and you better jump on planning that garden. How is this creative inspiration?  Maybe you can pin images of garden plans, create a Cat in the Hat lesson plan, or treat yourself to a new craft machine. Hint, hint babe, I may need the Silhouette Mint* to jump start my creativity in March.

Creative Inspiration for March

Creative Inspiration for March 2016 free printable
Just click this image to download your free printable Creative Inspiration for March pdf file

Remember creative inspiration comes from taking a beginning idea and coming up with an even better concept.  Personally, I want to forget that we, as American’s, have the godforsaken time change, but I can get all inspired to come up with lots of travel pins for Craft Thyme’s Pinterest account (You have followed us right?).  I am hoping to come up with some rocking Spring decor items.  Apparently, this is the month everyone starts pinning such things. So take this creative inspiration for March and please let me know what it inspires you to make. Comment below or email me, I would love to hear from you.  Oh, and one last thing to inspire you a lovely March Quote:

March brings breezes loud and shrill,
Stirs the dancing daffodil.
~Sara Coleridge

Posted on 6 Comments

Rustic Terracotta Pots

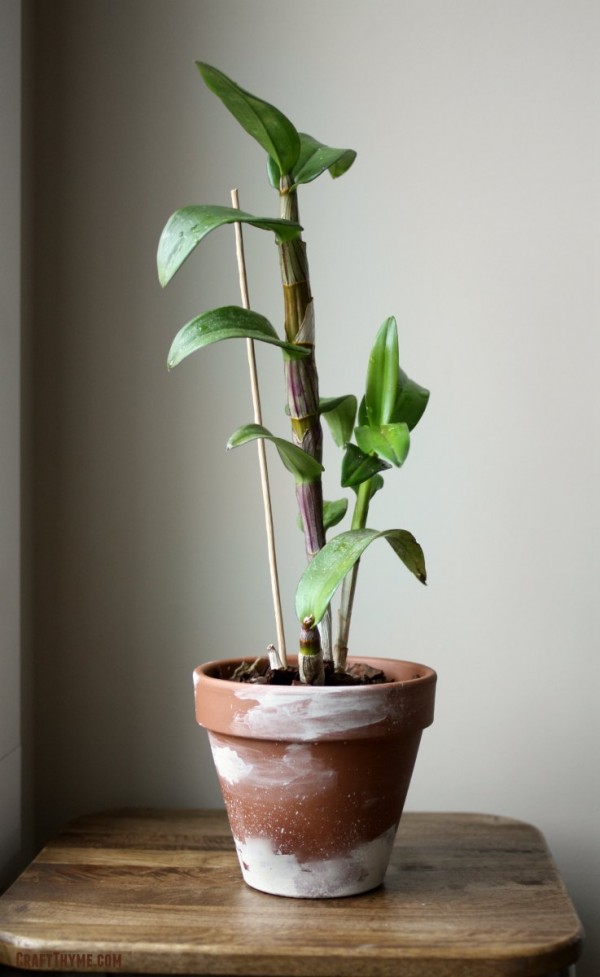
Orchid in rustic terracotta pot

As luck would have it I am in the gardening mood and four free orchids were available at work.  Two of them came in lovely, rustic, aged terracotta pots.  Two of them in plastic.  Last time a I checked plastic cups are not the most attractive or healthy means to display an orchid.  I loved the look of the rustic terracotta pots, but in reality even the two pretty pots were to small for the plants they were holding.  So what is a person to do?  I don’t have time to soak and cover four pots so they organically mineralize and grow moss.  I decided to take my hand at creating faux aged garden pots.

After some practice, playing around, and testing I came up with the following how-to:

How to Faux Finish Terracotta Pots for an Aged, Rustic Look

aged terracotta pot with orchid

Materials Needed

  • Terracotta pots
  • Cream acrylic paint
  • Plaster of Paris (Optional if you have matte paint)
  • Old toothbrush: I guess you could use a new one, but seems like a waste to me.
  • Sponge or paint brush
  • Plastic cups (2)
materials needed to faux finish pots for a rustic look
As you can see here I had some old semigloss white and some cream ‘mistake’ paint I found at the hardware store.


Step 1: Making Matte Paint

Here comes my world famous guestimate instructions.  First, take around 1 ounce of water and put it in a plastic cup or whatever you will be using to mix paint.  Then take a couple of spoonfuls of plaster.  Mix with the water till it makes something around the consistency of pancake batter.  Then pour in some paint.  I would guess and try to keep a 3 paint to 1 plaster ratio.  Now that I have told you that ratio it is time to ignore it, because you are attempting to make two types of paint.  One thick and one watery.  I started with the same base on both paints and then added more water to one and a little more plaster to the other.

Step 2: Painting

I looked at my first pots for reference and made a few changes.  First I took the old toothbrush and dipped it in the wetter paint.  I laid the pot on a suitable surface.  Meaning I laid out an old Christmas paper plate, and when that didn’t prove large enough to handle the paint splatter I put more cardboard underneath.  Of course this was after cleaning the table of paint splatters… Just run your thumb along the bristles 3-4 inches above to give it some splatter.

I looked at the original pot for reference.  The water marks happened in bands of white mostly focused on the bottom.  I took a sponge brush and lightly dipped it in the thick paint and started brushing around the pot.  I also dribbled some water in the wet paint and let it wick a bit to give it a more realistic look.  I find it is easier to start lighter and add more.  I also went back and added more paint on top of the previous areas so it would have a thick dimension like the source material.

techniques for aging pots with faux painting

Notes and the Final Look

  • The paint dries super quickly on the terracotta.  Which is great for layering and a PITA when you are trying to feather it out.
  • I have had no issues with water harming the finish.  That being said these are indoor orchids.  I water them in the sink and set them back in their various places.  I have not subjected the finish to the turmoil of actual weather.  Though, I assume a natural finish would slowly replace the paint.  In fact… I may need to give that idea a go.

After I replanted the orchid this was the final look:

Orchid in rustic terracotta pot


Posted on Leave a comment

Easter Table Setting: Florals

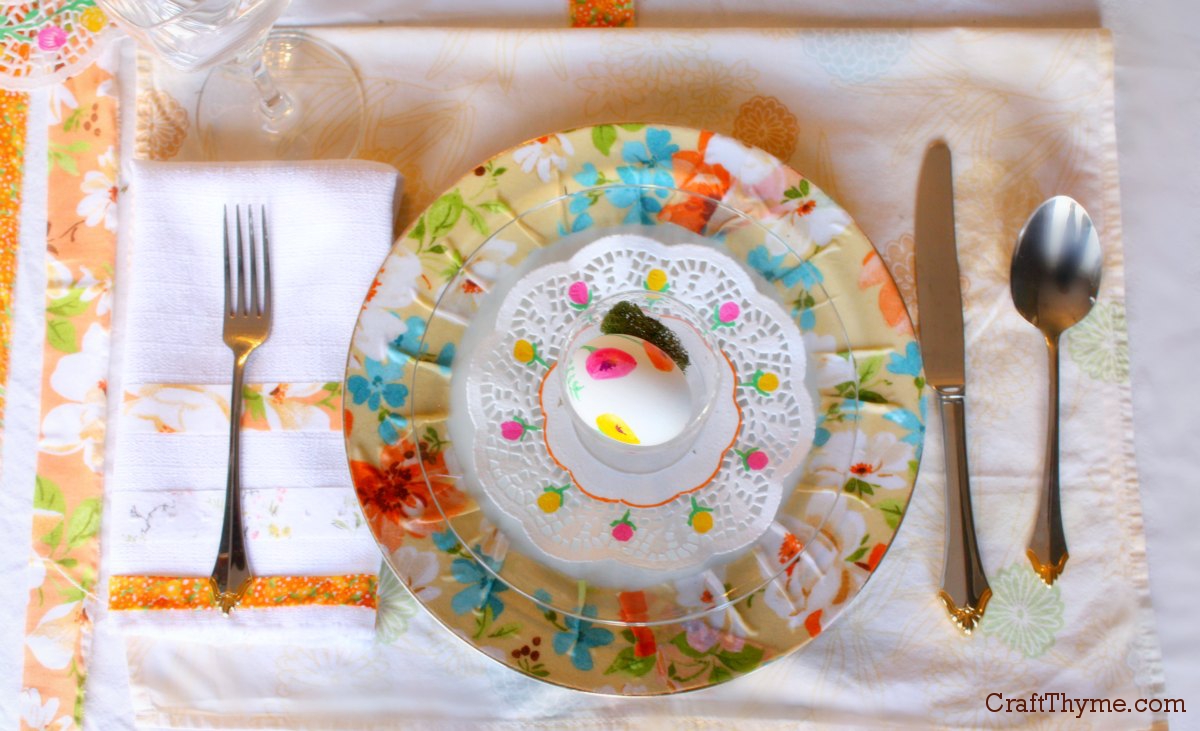
Decorated table setting for Easter

I always have a ton of ideas when it comes to creating any table setting.  Easter is no exception.  It is more a case of me trying to stick with 1 theme and make a cohesive look for any of my crafts and decorations.  This year I settled on a floral theme.  Initially, when I thought of florals; I thought pink!  Well let’s be frank, for me, a little pink goes a long way.  So bring on a fresh new color for Easter.  Orange!

Easter Decorations and Table Setting

Obviously, these Easter place settings used my hand-made chargers, no-sew napkins, and patterned Easter eggs.  However, I always have to add some details.

DIY Floral Table Setting


I wanted to layer a number of patterns to create a bohemian feel.  Strips of various floral patterned fabric dressed up white table cloth.  While I quickly colored the floral part of various paper doilies to complement the colors already used in the fabrics.

Decorated table setting for Easter

I also tried to bring in a little spring green, white, and tan to balance out the colors.

Floral Easter Place Setting

I am pleased that the table setting and Easter decorations came out Spring-like and feminine without resorting to a pink bonanza.  Here is one more shot of some of the details.  Below that are all the accompanying tutorials for creating your own DIY Easter decorations.

Easter decorations and decorTutorials

Enjoy these articles?  Get periodic updates by joining my mailing list (no spam, no way, no how) or subscribing to my RSS feed.

Posted on 6 Comments

How to Make No Sew Fabric Napkins

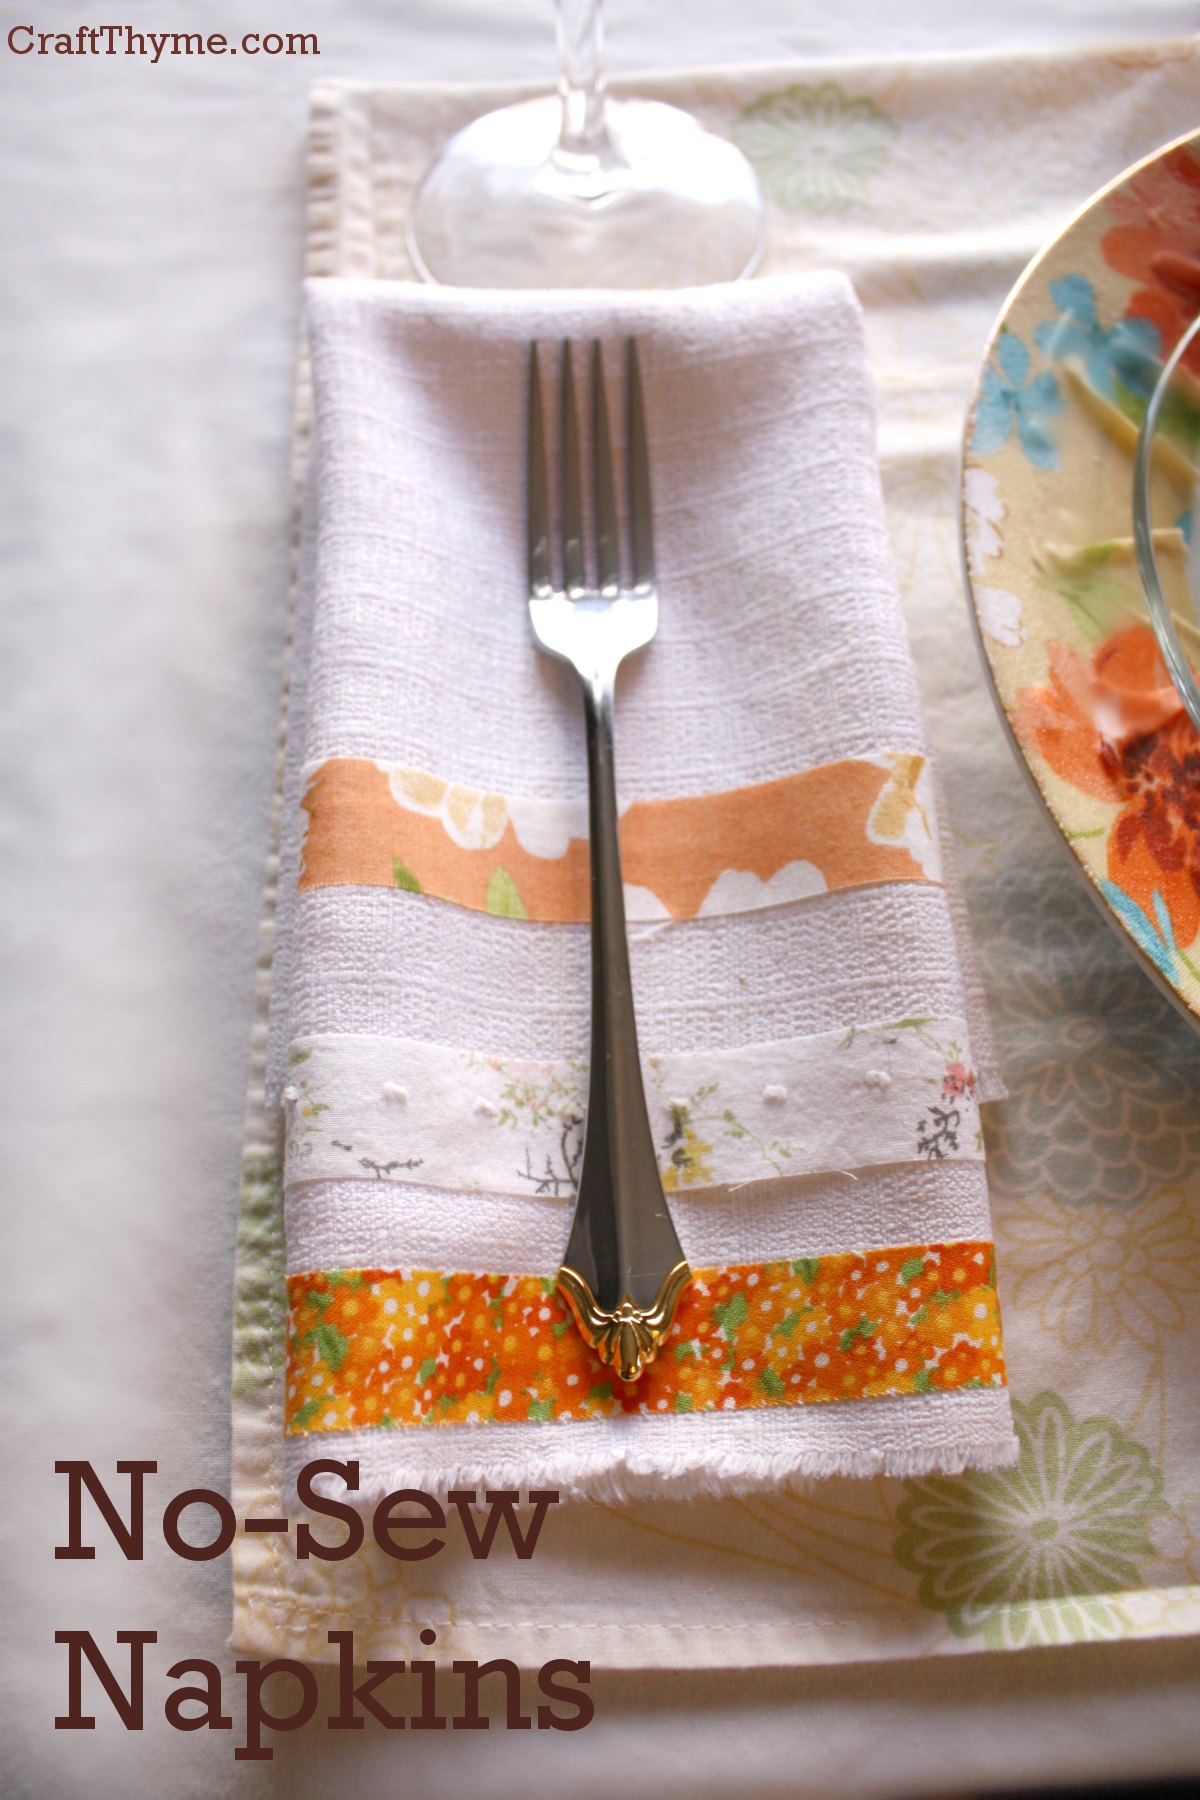
No Sew Fabric Napkins

Fabric napkins always add a bit of ambiance to any table setting.  However, the cost of pretty embellished fabric napkins can add up quick.  My solution?  Make your own no-sew, embellished fabric napkins!  You could absolutely sew these napkins, but 1.  I hate dragging out the machine and 2.  not everyone sews. On to the tutorial:

No Sew Fabric Napkins


Supplies

No Sew Napkin Supplies
We will get to the purposed of that red and orange striped towel in a minute.
  • Fabric Squares: I have used a faux linen here.  You could also use a cheap plain fabric napkin.
  • Fabric strips: 17-20 inches in length and .5-1 inch in width
  • Heat’n Bond iron on adhesive
  • An iron
  • A towel An ironing board

Step 1 Prepare the Fabric (not shown)

I am going to save you the boredom of seeing a picture of me me cutting a 17 inch square of fabric.  Just remember if you aren’t going to hem the fabric pick a tight weave that you can fray a little bit of the ends.  If you are new to buying fabric look for a one that doesn’t have tons of strings hanging off the cut end.  Also cut some thin strips of fabric.  If you do not have excess/scrap fabric laying around, then I suggest just buy some of the tiny quilting samples (like the 1/8 yard).  You do not need a lot of fabric at all.

Step 2 Lay Out the Heat Bond

Laying out Heat'n Bond
I promise I will explain the towel in a second.

Lay out a one tiny strip of Heat’n Bond.  Make sure to start and end the strip right inside the fringe.  I know it is hard to imagine this almost transparent item will do anything, but I can promise it will!  Finally, lay one strip of colorful fabric over the top.

Step 3 Irons Away

Iron setting the heat'n bond
And now to that ugly beach towel!

Alright here is where I tell you, in the immortal words of Genesis’ Jesus He Knows Me , do the following directions as “I say, don’t do as I do.”

Here is where you should read the directions on the Heat’n Bond.  Iron carefully etc.

However, I have had mighty good results with throwing a towel down, cranking up the iron and slapping it together.  The ugly beach towel is a lot easier to grab than finding out where exactly I have stuffed the ironing board in the basement.

So step 3 really just consists of ironing.

Step 4 Trimming

Finishing no-sew cloth napkinsFinally, just trim the excess fabric to the edge of the fringe.  If any area doesn’t feel secure you can always tuck a little more Heat’n Bond under the fabric and iron.

Notes

Yes these are washable!  The fabric may fray more (though I like the look) and if you dry them with heat some of the Heat’n Bond may loosen.  I am so lazy that I keep some Heat’n Bond by the iron to fix no-sew items or torn hems on pants.

Thursday these napkins will get used to create the perfect in a full Place Setting.

Enjoy these articles?  Get periodic updates by joining my mailing list (no spam, no way, no how) or subscribing to my RSS feed.