Posted on 19 Comments

Fall Table Decor

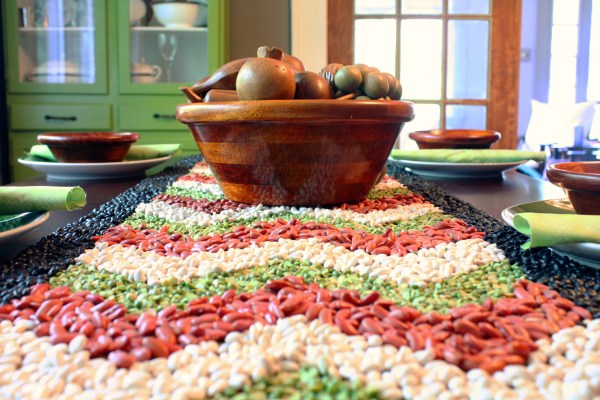
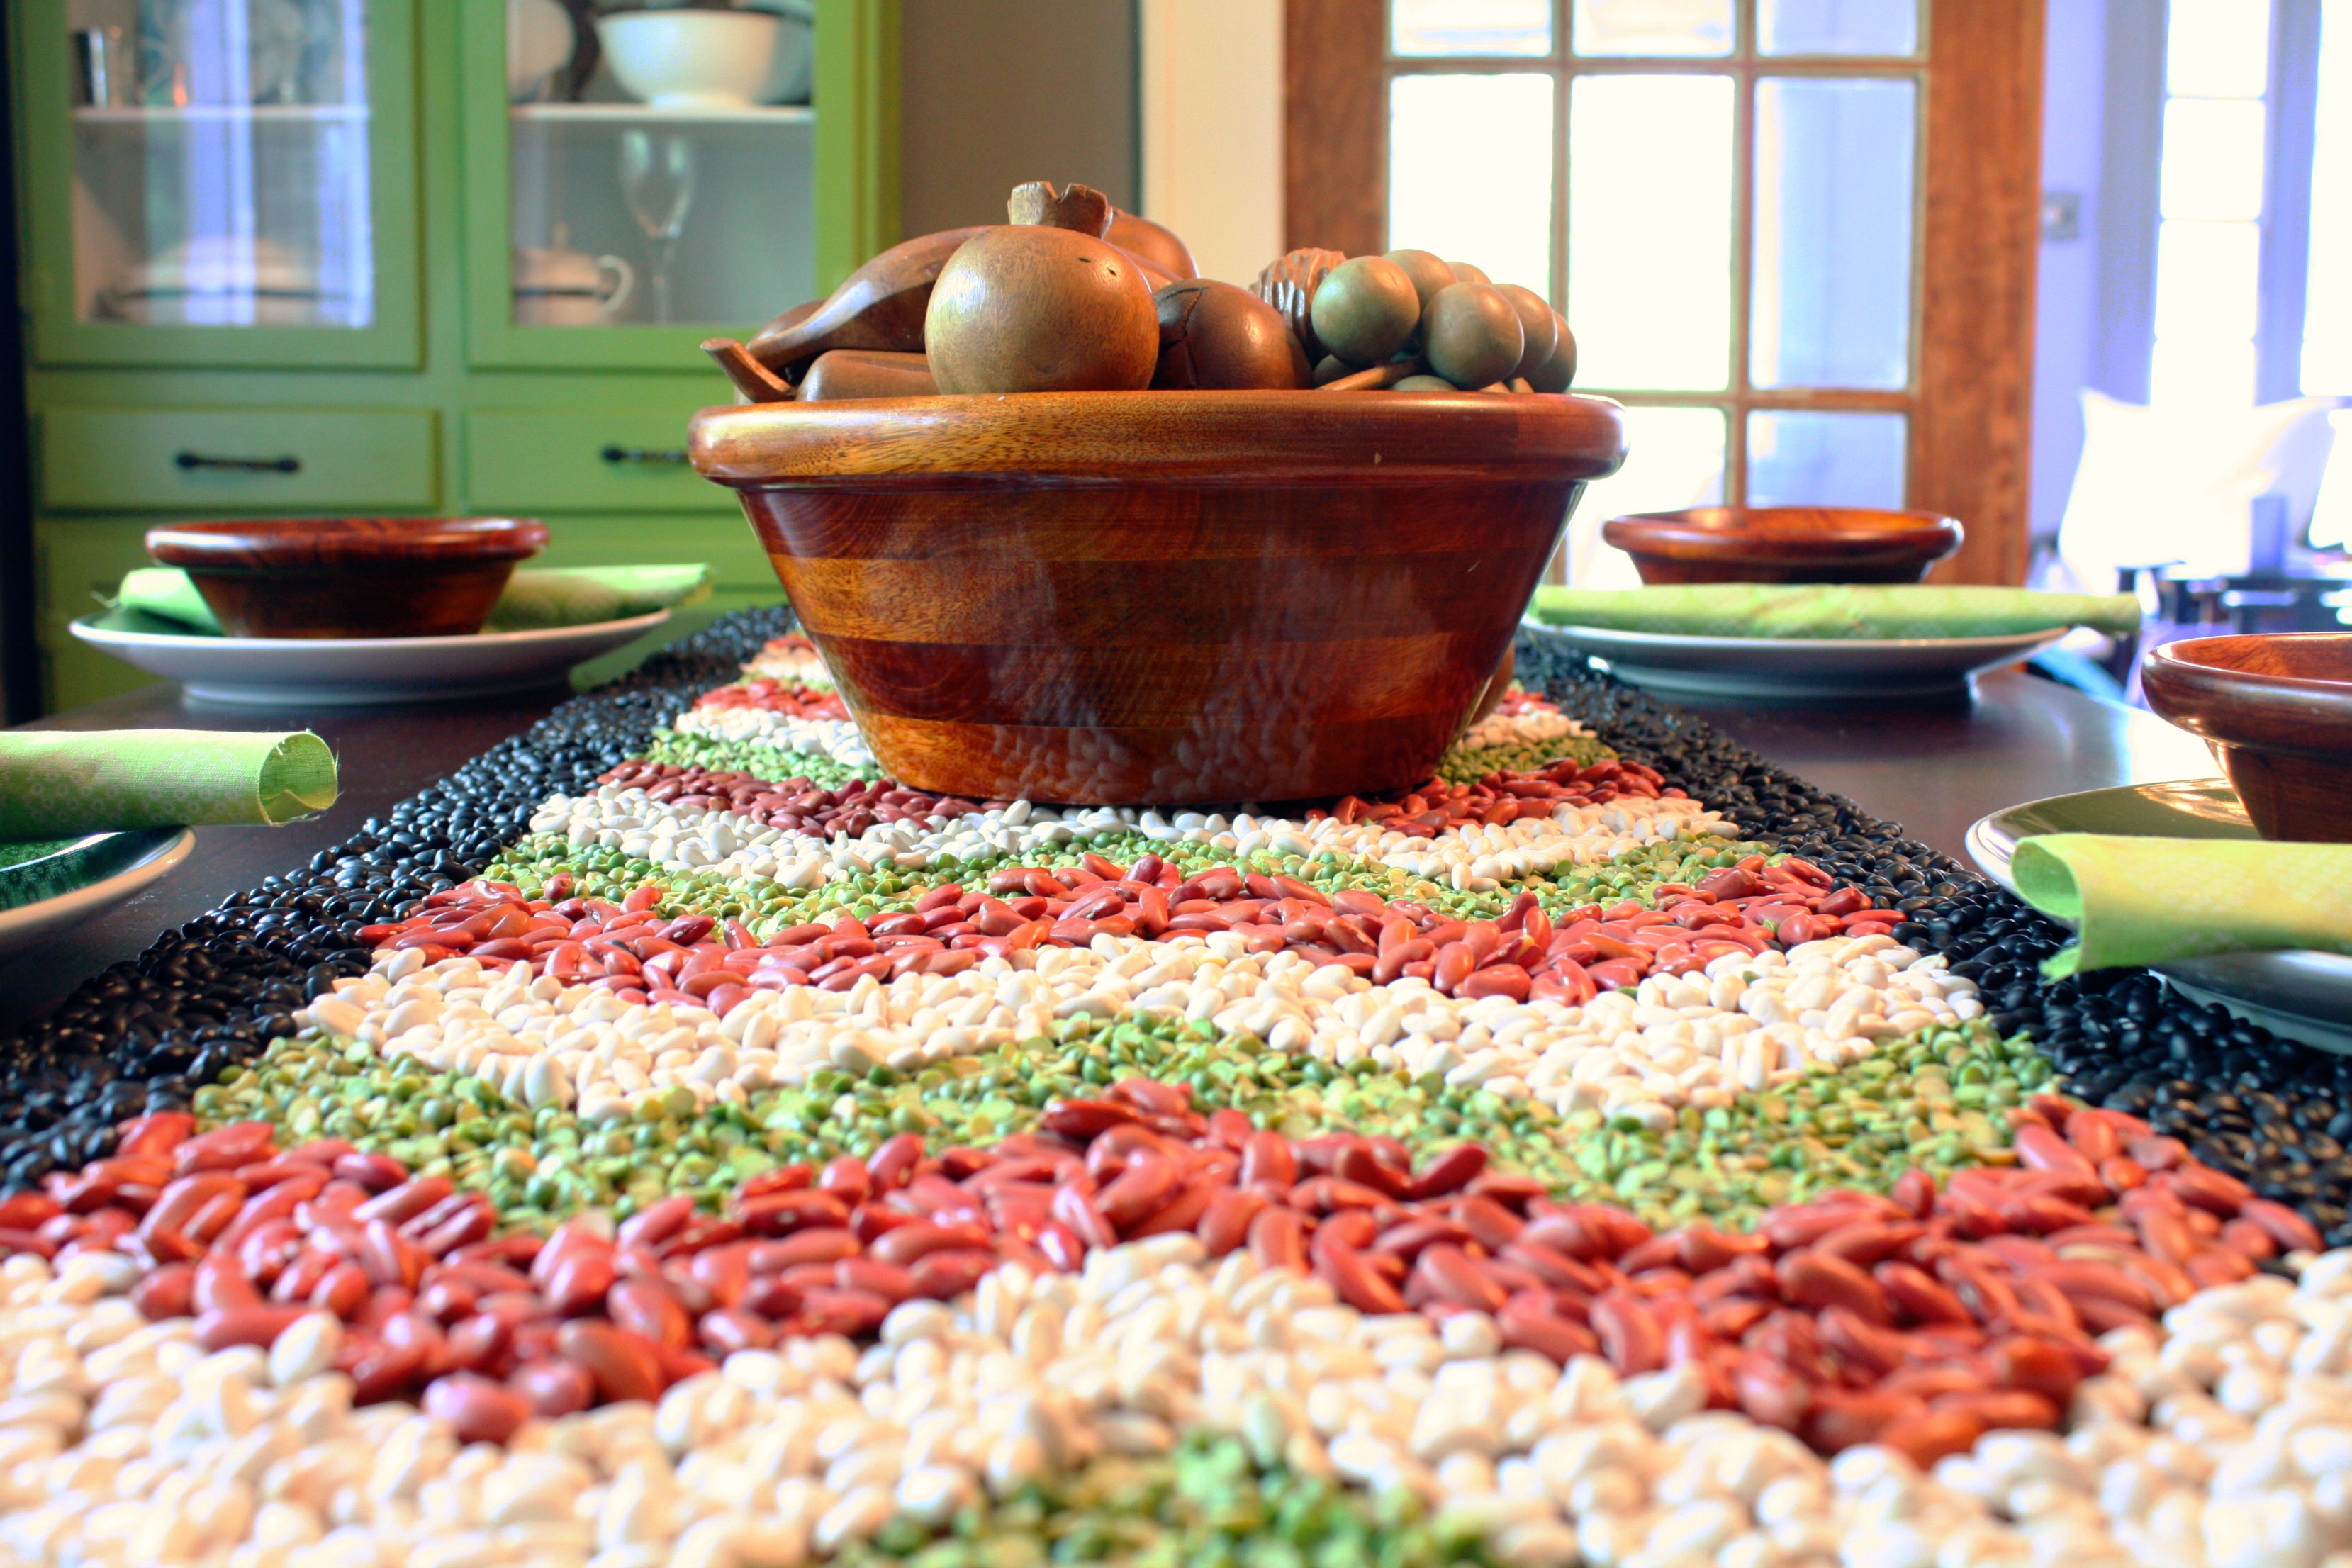
fall table decor featuring a chevron bean table runner

Autumn seems like a time for relaxation. The cooler weather forces an end to the constant outdoor activity but it is before the bustle of Christmas. Fall is a time to just let it go. Therefore my table is simple, clean, and easy.

The main show piece is a chevron table runner made from beans (click here for the tutorial).

See I can have a serious craft post from time to time.

The centerpiece is an assortment of carved wooden fruit. My grandparents lived for a time in Thailand, and brought back and assortment of hand carved furnishings and decor. I managed to snag a double set of the fruit. So much cooler than old-school wax ones.

Wooden fruit hand carved in Thailand

Simple wooden bowls and green accents match the runners. Perfect from the green transition of summer to the ruddy browns of fall.

Fall table decor details featuring pea green and ruddy browns

Enjoy these articles? Get biweekly updates by joining my mailing list (no spam, no way, no how)

Enjoy other great DIY, Crafts, & Decor at these link parties: By Stephanie Lynn,  The Pin JunkieCraftberry Bush, Craftionary, The Jenny Evolution, Peek into My Paradise, Tidy Mom, My Romantic Home, Simply Sweet Home, The Stitchin’ Mommy, DIY Vintage Chic, Twigg Studios, I Should Be Mopping The Floor

Posted on Leave a comment

Dr. Seuss Inspired Trees: A Centerpiece

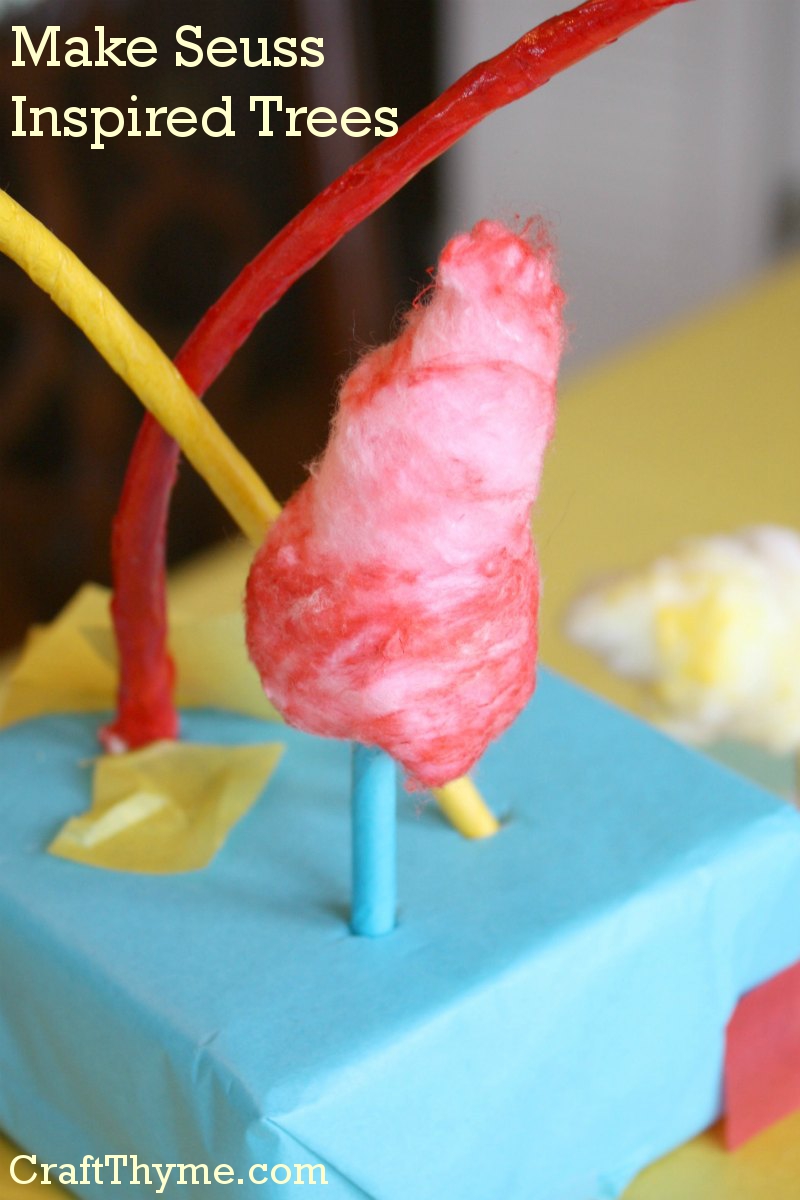
How to make Dr Seuss inspired trees

Want to make Dr Seuss inspired trees?  Then you have found the most esoteric tutorial on the web.  Hopefully this how-to will answer your extremely specialized questions.  I debated making a tutorial on how to create Seuss like trees, but I personally wanted to recreate the pointy-one in the first picture as some sort of whimsical Christmas decoration.  Plus I put some time in making these for Conlan’s Dr. Seuss themed first birthday, so why the hell not?

How to make Dr Seuss inspired trees
One of the most random tutorials on the web.


Supplies:

  • Dyed Cotton Balls (You can see a tutorial on how to dye them here)
  • Wooden Dowels or Bamboo Skewers
  • Styrofoam (Or something for a base)
  • Modge Podge (or thinned white glue)
  • Tissue Paper (Traditional Dr. Seuss colors are Yellow, Red, and Aqua/Turquoise)
  • Optional: Hot Glue

Step 1 Bending Dowels

Step 1 Bend Dowels


Soak wooden dowels or bamboo skewers in water.  I threw mine in a pot the night before: That means around 8 hrs of soak time.  This will make them supple enough to bend into curvy shapes.  You can see in the above picture that I just stuck mine in my, rather dirty, heating vent grate to dry.  You WILL break a few and some may split a bit.  I saved the broken pieces to make short trees, while, the splits can be trimmed off and will be covered in the next step.

After they were dry, I stuck ends into the bases to make sure that I had enough and to get an idea of the final placement.

Step 2 Adding Embellishment

Step 2 cover trunks
Holy Hell! I swear that is glue peeling off my fingers… Not some horrible skin disease.

Dr Seuss’ illustrations of trees have color and curves and the magical element of poof.   To color the “trunks” cut a strip of tissue paper and lightly coat the dowel with a little glue.  Then wrap the tissue paper around the dowel.  You can leave a little on both ends uncovered as it will be sticking in the base.

Once covered, I lightly coated the tissue with  gloss Modge Podge to give the trunk a nice sheen and make sure the tissue was nice and stuck.

Step 3 Add Poof

Added the final touches
Pretend you are trying to make some amazing ‘Southern Hair’

Simply take the dyed cotton balls and lightly stretch them into cones, swirls, and puffs.  I then used hot glue to attach 1-3 cotton balls per tree.  To hide the unsightly bases I wrapped them in an extra piece of tissue and simply poked the bottom of the dowel through the thin paper.

You can see the complete Dr Seuss themed birthday party click here.

Related Tutorials:

How to Dye Cotton Balls: It is #1 in my post 11 Household Items You Can Dye: With Tutorials

Enjoy these articles?  Get periodic updates by joining my mailing list (no spam, no way, no how) or subscribing to my RSS feed.

Posted on Leave a comment

Dr. Seuss Themed First Birthday

My youngest son turned 1 last week.  I’d love to say I had it all together, realized that Dr. Seuss’ 100th birthday was occurring and picked the perfect theme for Conlan’s First Birthday.  Alas, I would be lying…  I wanted a Dr. Seuss themed birthday for McClain’s first (two years ago) and ordered the licensed plates, napkins, etc.  The decorations came exactly one day after his party and were promptly shoved in the basement.  I got my Dr. Seuss theme on the second go-around.

Dr Seuss themed first birthday

To complement the purchased party items I made a few decorations.  Some Seussian-like trees for the wrapped box centerpiece and hand-dyed crepe paper ruffles.

While, I imagine that very few people will need to recreate the trees I think I may just give a run-down on how to make them next week.  It might be fun to do something whimsical like that for Christmas.

Dr. Seuss Themed Centerpiece


Dr. Seuss inspired decorations
Balloons and Streamers! Can’t have a birthday without them.

The guests (adults and kids alike) enjoyed the balloons.  They made great decorations in the colors of red, white, turquoise, and yellow & doubled as entertainment.  Everyone seemed to enjoy the basic snacks and of course a color themed cake.  Conlan, seemed to enjoy all the extra attention.

Okay... Maybe Conlan enjoyed the balloons more.  Oddly, he was not smiles about the cake.
Okay… Maybe Conlan enjoyed the balloons more. Oddly, he was not smiles about the cake.

While, the Dr. Seuss theme looked great and added nice color pops to the family photos (yes, I keep my friends off my blog) I did manage to miss getting one awesome picture.  The cake smash! Why?  Because Conlan was totally NOT about it.  He stuck one hand in, and looked at me to wipe it off.  Patrick gave him a taste of the icing, and he promptly made a face like it tasted horrible.  Clearly he is missing some important sweet-tooth gene I should have passed to him.  Anyway, enjoy one more photo of decoration details and scroll down for the connected tutorials.

Dr. Seuss inspired first birthday party


Tutorials to Create This Theme:

Dr. Seuss Inspired Tree Centerpiece

How to Dye Crepe Paper

How to Make Easy Crepe Paper Ruffles

Enjoy these articles?  Get periodic updates by joining my mailing list (no spam, no way, no how) or subscribing to my RSS feed.

See other great decor and inspiration at these link parties: My Uncommon Slice of Suburbia, Lady Bug Blessings, The Gunny Sack

Posted on 8 Comments

Snowy Woodland Tablescape

I created the following place setting and tablescape for tomorrow’s Centsational Girl/Homegoods Holiday Tablescape Contest. Well I created it for that contest and for my own Christmas decorations.

The inspiration for this particular project was the snowy woodlands of Western North Carolina. But enough chit-chat let us take a look and we can discuss more after a few photos.


The idea was to design a tablescape that embodied the spirit of Homegoods based on style, affordability, and creativity. I hope I achieved all three. I actually went to Homegoods/TJMaxx to scope out what they were doing for the holidays. I wrote about their trends here and then went ahead and followed none of them.

While, it was NOT even implied you needed to purchase a product from Homegoods I happened to fall in love with the tiered display item I used as a centerpiece. I’m not even entirely sure what its intended use is, but I loved the fretwork and patina, which immediately put me in mind of the outdoors. Since the cold weather at Christmas leaves us stuck indoors, I thought it would be great to bring the outside in. Live moss, old branches, vines, and fluffy snow decorate mirrors that mimic the cool streams of the mountains. Glass cardinals give a nod to North Carolina (State Bird) and add some pops of color for Christmas. Here are some more details:


You’ll have to be the judge as to creativity and style. However, I can attest to the affordability! Most of the tablescape is constructed with items my son and I gathered while wandering the neighborhood. I already had plates, red glass balls, some mirrors (candle mirrors), and fake snow (from a previous Christmas). I really only purchased the tiered stand, some new napkins, and the glass cardinals. Altogether it was much less than $50 and I have plans to reuse the stand all year long.

If you would like to construct something similar here’s a quick guide to how I created the tablescape.

  1. I laid out the main objects. The white “runner” is a cut open trashbag. I wanted to use the bare wood of the table but protect it from the damp moss and branches. You can see my “helper” supervising in the background.
  2. I wanted an organic centerpiece so I cut the plastic to both wrap around and touch certain place settings. BTW, if you hadn’t noticed there is a two year old helping me create this. So I can attest the main layout doesn’t take long at all.
  3. I took various types of moss, lichens, and branches and laid them to follow the curves of the outline and act as stream banks for the mirrors. In case you worried we only gathered small sections of moss since it takes forever to grow. I wanted to make sure not to denude the neighborhood. Most of the moss will get replanted in a few weeks too.
  4. I filed in the open areas with snow. I tried to mimic the natural way snow lands and melts to let some of the landscape show through.
Not shown: Other steps involved adding my red accents, switching out various colors of dishes. Though I only own one set of fine china, and an everyday set of white and green. So there wasn’t much in the way of trading the plates out. I took the red napkins and twisted them into bow shapes to place in the bowls instead of using traditional napkin rings. While, offsetting the plates to give a modern edge to the tablescape. Finally, I want to note that I had some store bought vines and lichens (from previous crafting projects) that I used on the plates and chair decorations. I figure guests want to enjoy nature without tasting it.
Posted on 14 Comments

Fall Centerpiece Idea

I created some quick, cheap, and easy fall table decorations for my niece’s 1st birthday. Even though I “cuted” them up with bugs I reused them to make a nice, adult autumn decorations after the party. Here’s what you’ll need:

  • Various clear glass vases (Mine were just a few bucks from Goodwill and the Dollar Tree)
  • Fall leaves of assorted colors

Yep, that’s it! I went up to the local library with a bag and grabbed a bunch of red, yellow, and orange leaves off the ground. Then I used the still-green/yellow leaves off of my dying morning glory vine. Separate your pile of leaves into green, yellow, orange, and red. Then I started at the bottom. It is important to curves the leaves around the glass to let the colors show. I actually filled the center with yucky brown leaves from the yard to hold the next layer of leaves up. Then I just went from green to yellow to orange to red.

Just after I finished them

Amazingly they have mellowed nicely and still look good a week later.

Darker colors but still nice

The rest of the decorations I made just using various papers, printer, old school markers, and vegetable oil (rubbing a bit of that on the bugs made them translucent). It made nice, relatively cheap decorations and the crepe paper streamers and balloons just screamed “old-school birthday party”. The bug theme with beetles, caterpillars, butterflies, and dragonflies was chosen to be gender neutral so Mr. Mac could get in on the birthday fun. We celebrated his for the family that won’t actually see him on his 1st in November along with his cousin who turned 1 a couple of weeks back.

Do you have any quick and easy fall or birthday decorations? Please share.