Posted on 15 Comments

How to Save Money at Lowe’s Home Improvement

10 legitimate ways to save money at Lowe's Home Improvement

As avid DIYers we love to save money on all our projects.  Over time we have worked out strategies to save money at Lowe’s.  Personally, I am not comfortable scamming anyone, even large companies, so every suggestion on how to save money is on the up and up!  Also, we are not currently a Lowe’s affiliate so all of these links and suggestions are simply from our own personal experience.  We love all hardware stores, but Lowe’s is so close by that we often use them as a matter of course.

10 Ways to Save Money at Lowe’s

10 legitimate ways to save money at Lowe's Home Improvement

  1.  Email Sign Up $10 off $50 Purchase
    This offer sometimes goes away so you may need to google around to find the current link.  All you have to do is enter your email address and information in Lowe’s website and they should send you a coupon good for 7 days after receipt.  Here is a recent link.
  2. In Store Pickup/Online Sales
    I can not say enough about Lowe’s in-store pickup! There is nothing better than to just walk in, get your order, sign a piece of paper, and walk out.  Especially on busy days like Saturday and Sunday. However, you might wonder how this saves you money at Lowe’s…  Not all Lowe’s stores have the same price.  Oh YES, believe it or not this is sooooo true.  If you have two or more Lowe’s in reasonable driving distance CHECK THEIR PRICES.  I can not stress this enough.  When we were trying to outfit our whole house with roman shades we discovered this little fact simply because no single store had enough inventory to cover the whole house.  We then maximized our orders so that we got the cheapest inventory at each store.  Spent one afternoon picking up all our orders, but it was totally worth the $50+ savings even when looking at gas and time.  Sometimes the online price is cheaper than in-store shelf tag.  Check, check, check!  You can order it online, but they will match that price if it is their store you are viewing online.
  3. Sales
    Can you wait?  Because Lowe’s has weekly sales and they are GOOD.  We tend to stock up on seasonal items especially during their sales.  For example, we just scored tons of suet cakes for the wild birds and chickens for .88 when they usually go for $1.50-$2.50.  Whatever we do not use this winter we will store for next year.  Besides just seasonal items Lowe’s tends to routinely put large appliances, paint, and gardening items on regular sales.  If you are near a holiday, even something as small as President’s day, WAIT.  They will always have a special sale for holidays.
  4. Clearance Racks
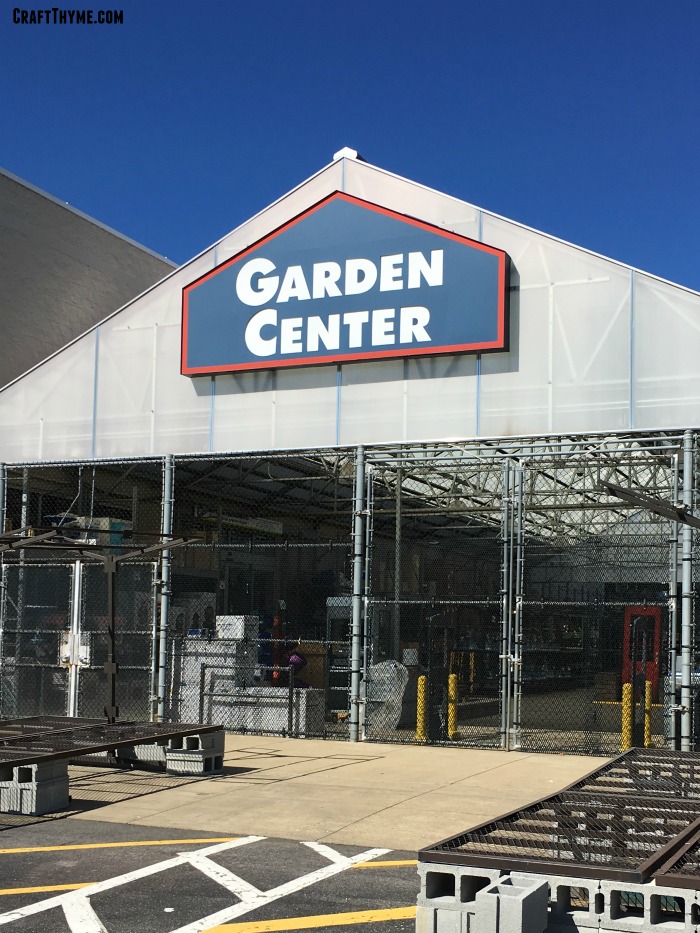
    ZOMG, I can not explain how important these clearance racks are.  You will have to learn the locations in your particular store but usually there is a rack near the paint section, back of gardening, and somewhere near flooring.  Why are these so important?  Because when Lowe’s does clearance they are ready to move it on out.  I calculated that I got close to over $1000 in annuals, perennials, and trees for over 80% off last year.  Simply because they were no longer flowering, frost nipped, or at the end of the season.  Can you shout FIVE DOLLAR FRUIT TREES?!  In my blasted landscape it was a blessing to be able to fill it with some decent vegetation.  Ditto for paint, brushes, light fixtures, etc.  These all make their way to the clearance sections.

    Saving money at Lowe's Home Improvement with clearance plants
    None of the plants cost more that $1.  Like my coffee break?  Gotta have coffee when digging through the Lowe’s clearance racks.


  5.  Price Match Policy
    I haven’t used this often as Lowe’s and competitors are often so similarly priced that it doesn’t seem worth the effort for just a few pennies.  However, when we were shopping for a new washer and dryer it paid to shop around!  Make sure to have good documentation to bring with you as they will want to make sure it is the exact same model for price matching.  Also if the price is a percentage off they will only match to the net price.  So a 20% off deal somewhere else might not mean 20% off Lowe’s price, but the final price will be the same.  You can read all the details here.
  6.  Haggle 
    This one is one of the hardest for me.  Or at least it was, a recent trip to India taught me a ton about haggling!  Anyway, haggling is accepted at Lowe’s and managers/certain salespeople are able to price adjust purchases.  Lowe’s doesn’t have a published competitor’s coupon agreement but that is a great way to start the conversation.  Additionally, never buy a large appliance without haggling a bit, especially, if you are willing to take a slightly used floor model.  If you are like me and not a huge fan of haggling then you can always ask “Is this the best price I can get?”  Be polite and nice and often they will take a little off the price of large purchases.
  7. Lowe’s Credit Card
    I hesitate to mention this one because the savings here is really all rolled into how disciplined you are with credit cards.  Unless you can stick to paying them off in a specified time (for special financing) or in full each month (5% off) then you are really costing yourself money.  That being said, I purchased my first new stove by taking advantage of free financing.  Got a small discount by haggling and then had 12 months to pay it off.  By paying it off in the specified time I got to keep my savings in my savings account earning interest the entire time I paid for the stove.  Just remember these discounts are an either/or scenario.  The 5% does not get stacked with the special financing, and sometimes the special financing will not be zero percent.  Just be really careful when using this tactic.
  8. Military/Veteran’s Discount
    Found this one while researching other ways to save money at Lowe’s.  You can read all about it here, but in general active duty and those on VA benefits always get 10%.  All veterans can get 10% on Memorial Day, 4th of July, and Veterans Day. They extend these discounts to immediate family at times too.
  9. Rebates
    I honestly feel if you buy a can of paint without a sale or rebate you are paying too much.  They often run $10-$15 rebates on paint and larger ones on appliances and tools.  They have a searchable list of Lowe’s and manufacturer rebates, online submission, and tracking of rebates at Lowe’s Rebate Center.  Sure it may take a bit to get the money back but it is certainly worth it and Lowe’s makes it much easier than many companies.
  10. Garden Club Signup 
    If you are in the market for garden supplies Lowe’s offers a separate email signup for garden offers.  They will often notify you of sales and occasionally have exclusive offers such as buy a certain number of plants and get one free.

Add-ons to Saving Money at Lowe’s

While they may not save you cash up front these additional services give you value all for free.  You can read the entire list of Lowe’s Store Services here.

  1. Build and Grow: I can not rave about this enough. We have 4 boys, three at the age to do crafts.  They let you do an entire craft for free.  FREE.  And it is a nice wooden object.  Besides the fact you get to take home things like monster trucks and birdhouses, they also give you a kid sized Lowe’s work apron and a nice fabric, iron-on badge for each project complete.  Adorable and (can I say it again?) Free.  Just remember to sign up in advance because they actually fill up.
  2. Cutting Services:  Sometimes there is a nominal (.05) a cut or threading charge BUT this is so much less expensive than buying things like pipe threading machines. They do all types of cutting services, pipe, wood, blinds, chain.  We have saved a fortune by buying chain, rope, etc in the exact lengths we need.  Additionally carefully placed cuts have allowed us to buy larger and less expensive boards that we can fit in the car.
  3. Design Services:  This is the only item on the list I can not say I have personally used.  Many people rave about Lowe’s in store design services.  If I ever have to remodel I would love to see what a designer comes up with.  If nothing else I could use the computer generated models as a starting ground for my own designs.


I love a good deal and Lowe’s makes it easy to save money and get great appliances, tools, gardening items, and DIY products.  Just remember the big items; always check their sales, website, and clearance sections.  Taking that short time can save you hundreds of dollars if you DIY or garden often.

Ten ways to save money at Lowe's Home Improvement Store

Posted on 6 Comments

Color Mixing for Kids: St. Patrick’s Day Activity

Color mixing with food coloring is a fun activity for kids and adults

Do you have kids at the age to learn colors and color mixing? Do you need a rainbow activity for St. Patrick’s Day? Do YOU need an activity, using household ingredients, that will teach both colors, color mixing for kids, scientific theory, and potentially cause 4 boys six years and under to pause for more than 10 seconds? You don’t? Good for you for making that life choice that shrinks the human population. For the rest of us breeders read on!

Color Mixing Activity for Children

Mixing color activity for children
Let’s not ask why we have so many pint glasses from so many breweries…

Supplies

Coffee (optional)
Husband (Can I say optional? This post certainly wouldn’t have happened without him)
Kids (Needed unless you just love color)
Way too many pint glasses for adults to own (regular glasses will do)
Liquid Food Coloring*(Yellow, Red, Blue)
Water
Paper Towels*
Post-it Notes* or Scratch Paper

Step 1 The Set-up

Groggily slug down coffee while the kids tuck in breakfast and vaguely note that husband is exclaiming that today we will “Science”. Watch as Adam starts setting out 7 glasses, fills 4 with water, and raise eyebrow as he hands you paper towels.

Joking aside, line up the seven glasses and fill every other one 80%-90% full with water. Since we aren’t doing rocket-surgery (yes, you read that correctly) I think we can combine all the set-up in one step. Fold 6 paper towels lengthwise twice. Set out your droppers of food coloring and call over the kids.

Step one in a color mixing activity for kids
Picture just in case anyone needs help folding paper towels. See optional coffee above if this step is hard to complete.

Step 2 Paint the Town Red

I’m not sure there is anyone in the world who doesn’t like to watch food color mix into water. The kids will love to come watch. In the glasses of water drop 6 drops of red in the first glass, 8 drops of yellow in the next water, 6 drops of blue in the following, and 6 drops of red in the final water glass. Your line up will be: R0Y0B0R

Step 3 Patience and Hypothesis

You are going to take your wicking paper towels and place them from glass to glass as seen in the next photo. Adam could weigh in on why the paper towel needs to be a certain length, as I never read the original info on this activity. Suffice to say it is better if it touches near the bottom of both glasses.

Our small children immediately got ants in their pants because the process takes a bit for the colors to start moving. This is the perfect time to grab some post-it notes and teach kids about having a hypothesis. First, we discussed what they thought might happen. I may have mentioned the words water and cohesion and then realized that was a little nerdy even for my kids. So we decided that maybe the colored water would magically move. IF that happened we took guesses on what color each glass would turn. I stuck the sticky notes down in front of the empty glasses and wrote everyone’s guesses. Found out that no one knew what colors mix to make secondary colors… I have failed my art degree yet again!

Color wicking and mixing in a child friendly activity

Step 4 Free Play

Let the kids go play, use their imaginations, etc. Not very moment needs to be structured with activities! About the time someone is getting annoyed that someone else is smacking them with a lightsaber, ‘borrowing’ their toy car, or knocking down their carefully crafted block tower it will be time to look at the results. Even though they were in plain sight the whole time, the kids were so excited to see that the water had moved and mixed colors. They simply had forgotten to look!


Color activity for children
These are not photoshopped! I was so surprised this color mixing activity worked so well.

Side Notes

I found it incredibly interesting that each of them had thought they guessed all the colors correctly. I had to show them their initial guesses on paper… I sense that I may not be the only person who will have to be right in this household.Color mixing with food coloring is a fun activity for kids and adults

Color mixing activities for kids

Posted on 6 Comments

How to Read a Seed Packet

How to read a seed packet
The back of a seed packet can seem intimidating.  It seems silly but if no one has every taught you how to read a seed packet then you could be missing a lot of good information.  A lot of people prefer to buy transplants because seed starting seems difficult. But the truth of the matter is seed starting is easy, offers a cheap way to get lots of plants, and has more variety.  The best part?  The seed packet has all the essential information you need to get going!  Below I outline all the seed packet lingo you will need to interpret to grow your own healthy plants.  As a general note the cheaper seed you purchase at big box stores will have more information, while, specialty seed packets will often include less as it is expected you will know quite a bit about gardening.  In eaither case learning how to read a seed packet will make the whole seed starting process go smoother.

Seed Packet 101


How to read a seed packet or Seed Packet 101

A. Name/ Variety– Usually a common name of the plant and sometimes the Latin version is included. Seems straightforward no? But in reality the variety can be essential to make certain your plant sprouts and thrives.  For example: Oriental Poppies are perennial but California Poppies are annuals.  You would be very disappointed when your California poppies did not show back up the next year if you did not know the variety.

B. Zone Planting – When to plant your seeds.  Ugh, this is the one thing I would always say ignore on your package.  You really have to know your area!  Or google what your actual zone is, as the maps on seed packets are just too vague to know when you should plant.

C. How to Plant –  Most importantly you will need to discern if these seeds can these be planted inside (make your own transplants) or if it needs to be planted directly outside.  Not all vegetables like to be moved so while the packet may not explicitly say you can start them inside it will most often clearly define if it needs to be planted on site.

D. Germination – When your plant should sprout. If you don’t see your seeds coming up fairly soon after the last day of the range you may have an issue.  Make sure you have read the whole seed packet on how to start them (some need soaking overnight etc).  If you think the seeds are just duds you can try googling a germination test.  Most reputable/expensive seed companies will refund or replace bum seed.  Just note, in all my years of growing I have only had the really cheap seeds not germinate and only one incident of the wrong seeds in a packet.

E. Depth to Sow– How deep to plant your seeds. If you aren’t getting germination it may be because you put your seeds to deep or not deep enough.  Some seeds need a little light, some need to be deeply buried.  This measurement does not have to be perfect but aim for a similar depth as suggested

F. Seed Spacing – How far apart to space your seed in a row.  This is NOT the final spacing for the plants that grow from seed.  This number is usually optimized to give you a good germination rate over a row of crops that will be thinned.  Honestly, I use this as a vague guide so I don’t have to thin very much.  I rarely plant in straight rows anyway…  If I have cheap seed I might sow them more thickly.  If I am starting them inside I might ignore this guide completely and just put 2-3 per pot

Diagram on how to read a seed packetHow to Read a Seed Packet: Details

G. Row Spacing –  How far apart to place rows of seeds. If you are planting in rows then this is how far apart the rows should be from each other.  I’m not going to go into why I believe row planting is probably one of the least useful ways to plant a home garden but you can read about the best way to space plants here.  If you are just starting out rows can be great and this gives you the information you need so the plants are not to crowded.

H. Thinning – How many tiny seedlings to cut or pull out.  Seed packets want you to plant extra seed and remove tiny sprouts later.  This is a really good idea for a novice gardener and the seed company!  I’d rather have 5 seeds sprout than none at all.  Once you get familiar with seeds you can cut down the thinning and use less seed. Remember that thinned plants from lettuce, radishes, and beets can be eaten as microgreens if you do not want all those seedlings to go to waste.
I. Days to Harvest –  The most awesome number on the packet!  This is when you can expect to get fruit, vegetables, or flowers.  If your growing conditions aren’t optimal (drought, overly wet, bad soil) expect this to be longer than listed
J. Sell By Date –  Whoa what?  Yep, seeds expire!  Many seeds can be kept for a few years but you want to check the packet and make sure you have fresh seed if you are recently purchasing.  I have seen old seed packets accidentally moved in with new stock.  I always check to make sure they are the freshest I can find.

K.  Extra Info – Details, tips and tricks.  Somewhere you are going to see some tips and tricks about the plant.  It may give you further tips to creating happy and healthy plants or information about harvest and saving seeds.

I personally prefer the more expensive seed (with less info on the packet) because I generally have better germination and healthier seed.  If you want really primo seed and still a good amount of information on the packet here is my affiliate link to my favorite seed store: Sow True Seed.  I also can always find special varieties more suited to my garden and have had wonderful germination rates with these seeds. Plus they will go over how to read their seed packets with you if you are lucky enough to be able to go to their store in Asheville, NC.  However, I started with the packets you can pick up at any big box store.  Nothing wrong with them and great for beginners.  Just make sure to read the whole seed packet and you will have enough information to come out with some good plants.
 Seed Packet 101
Posted on 3 Comments

Creative Inspiration for March

Creative Inspiration for March 2016 free printable

Whether you are a blogger, office worker, or artist we all need a little creative inspiration from time to time.  Maybe you need a kick start for a writing a blog post or help picking out topics for Pinterest. Perhaps you want to plan a dinner party or come up with a fun themed Birthday.  Whatever your need it helps to have a jumping off point.  For this reason, I came up with this list of Creative Inspiration for March 2016.

Do you know what is better than a list?!  A pretty list!  Oh yeah, you also get to learn things like March is National Crafts Month*, Dr. Seuss would have celebrated his 112th birthday, and you better jump on planning that garden. How is this creative inspiration?  Maybe you can pin images of garden plans, create a Cat in the Hat lesson plan, or treat yourself to a new craft machine. Hint, hint babe, I may need the Silhouette Mint* to jump start my creativity in March.

Creative Inspiration for March

Creative Inspiration for March 2016 free printable
Just click this image to download your free printable Creative Inspiration for March pdf file

Remember creative inspiration comes from taking a beginning idea and coming up with an even better concept.  Personally, I want to forget that we, as American’s, have the godforsaken time change, but I can get all inspired to come up with lots of travel pins for Craft Thyme’s Pinterest account (You have followed us right?).  I am hoping to come up with some rocking Spring decor items.  Apparently, this is the month everyone starts pinning such things. So take this creative inspiration for March and please let me know what it inspires you to make. Comment below or email me, I would love to hear from you.  Oh, and one last thing to inspire you a lovely March Quote:

March brings breezes loud and shrill,
Stirs the dancing daffodil.
~Sara Coleridge

Posted on 13 Comments

How to Squirrel Proof a Bird Feeder

How to hang a squirrel proof bird feeder

In my youth, we had bird feeders, and I have found there are two types of families: Those that allow whatever to come and feed and those that fight the squirrels. Adam’s family has perfected the art of how to squirrel proof a bird feeder.  While mine comes from the live and let live bird feeder camp. Adam wanted to hang bird feeders, I thought it was unfair since we have out door cats.  Lazy outdoor cats but small furry predators none-the-less.  Oddly enough Adam’s family squirrel fighting secret also makes the feeders cat proof.  Here are the tips he taught me!

How to Hang Squirrel Proof Bird Feeders

How to hang a squirrel proof bird feeder

Supplies/tools

Bird Feeders*: Bonus points if you pick colorful feeders.  They will add some color in the winter months when all the flowers are gone.

Pulleys*

Nylon Rope*

Hooks*

Lighter

Ladder

Step 1 Gather Everything & Repeat

Get all your supplies and tools, take your ladder and set it under the eave you want to hang the bird feeder from.  Realize your ladder is about 5 feet to short.  Call a friend and have them bring a taller ladder over.  Joking aside, one of the first steps in keeping animals out of the bird feeders is to find a location that is relatively high.  We selected one that allowed us an eye level view from inside but was a good 10-12 feet off the ground outside. Also, thanks to Richard, for the ladder! (And you thought we were joking)

How to hang a squirrel proof bird feeder
A nice boring eave just waiting for a squirrel proof bird feeder

Step 2 and The Secret

The secret is a set of pulleys.  This allows you to hang your bird feeders high, while, allowing for you to easily lower them for refill.  Take your hooks and push them into the wood.  Then hang a pulley from the hook.  You can see the pulleys below.

Step 3 The Tricky Part

The next step is not hard but certainly annoying.  You’ll have to run your line through the pulley, tie it to your bird feeder (leave it empty!!!), and then figure out the height you need to be able to lower it to a level where it is low enough to fill but keep your rope from being so long it drags all over the yard.  In our case we wanted three hung, so we had the added bonus of trying to get them the correct matching heights.  I’m pretty sure we never resorted to yelling, but there was at least one huff had in the process.  “Up an inch. No too high.  Down a little.  No that’s too low.” That is a lot to deal with, while 4 kids run about like crazy fiends and someone else stands outside, on a 12 foot ladder, in 20 degree weather trying to gauge height.

How to hang a squirrel proof bird feeder

Step 4 Hook, Line, and Sinker

You will need another hook to loop the ropes over at the bottom.  We chose one hook because we liked the way the lines looked pulled to one side and they double as perches for the birds.  You could easily add a hook under each feeder and take the line straight down if you wanted the rope to be less noticeable.

Step 5 Tying the Knot

Once all heights have been decided you will want to firmly tie a loop in two places on the rope.  One for where it will hang everyday and one at the end of the rope.  The one at the bottom of the rope will allow a single person to lower the bird feeders and fill them without needing to take them off the pulleys.  When we were completely satisfied with the two heights (which necessitated a second trip to Lowes for more rope) we took a lighter and lightly singed the ends of the rope and knots.  This will keep them from unravelling and coming untied.  BE VERY CAREFUL.  Fire and melty nylon is no fun.  Getting sued because a reader melted a rope to their finger is even less fun.  You have been warned.  You can skip this step and everything will be just fine.

How to hang a squirrel proof bird feeder
I love the added pops of color the feeders add in the winter.

Why This Works

First, for everyone who can not see the obvious, birds fly; cats and squirrels do not.  The high level keeps the birds safe from the cats.  If a squirrel decides to try to run up the ropes they are too heavy for the bird feeder and end up moving it around on the pulley.  The instability makes the squirrel jump off.  So far it has worked like a charm.  The kids love seeing the birds from inside the house.  I have to grudgingly admit I am also impressed.

How to hang a squirrel proof bird feeder