Have you had children? Were you a child? Then you should probably have made bean or macaroni art at one point and you are probably a homosapien. Have been recently gifted with some lovely artwork from my son I wondered if you could transform the homely bean art into something adult and sophisticated. Why yes, yes you can. Enter the Chevron Bean Table Runner.

Thank this is easy? Add a small child to the mix…
Supplies
Beans (various colors, split peas, rice, macaroni, whatever works)
Thick Craft Paper (this is the kind you can put down to catch paint splatters)
Pencil/Pen (to draw design)
White PVA Glue (thin lightly with water or you’ll be using a ton)
Patience
For the Chevron
Ruler
A way to mark 45 degree angles (I used a Triangle)
Step 1: Design

Decide on your design and cut out the length of paper you needed. I went with a straight forward chevron and penciled the pattern onto the paper.
Step 2: Distract Your Children
Sooo… If you have kids and there are tiny objects and glue they will want to help… Stop what you are doing cut them off some paper, add glue, beans, then begin your craft project again.

Then give up and let the kids/cats/dogs/parakeets/slow loris help in the end. Tell me you don’t want a slow loris?

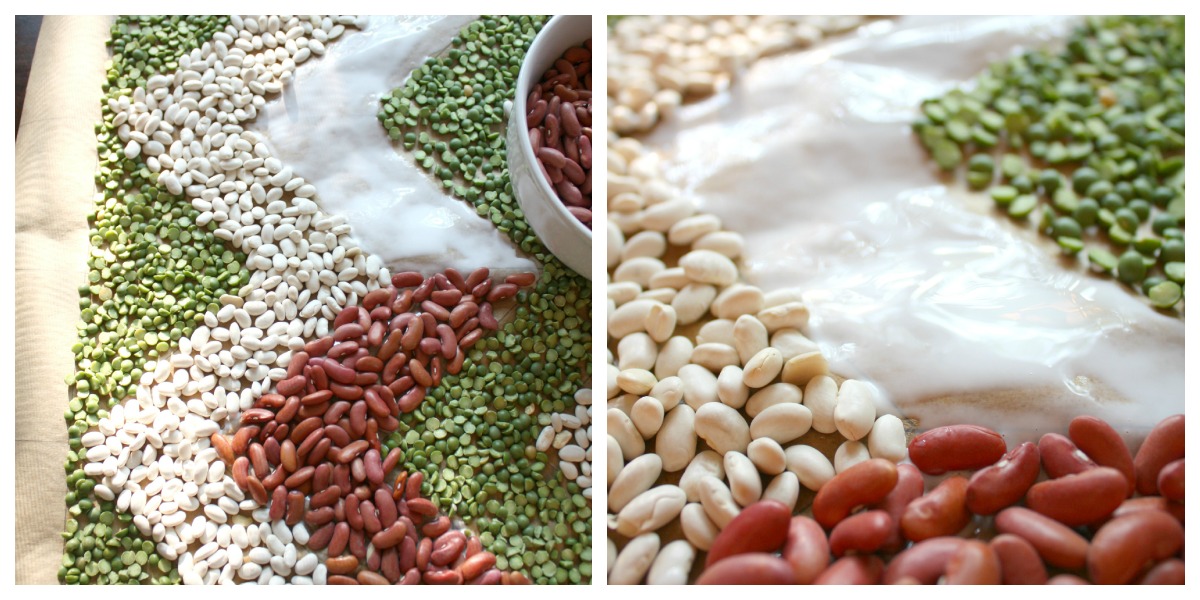
Step 3: Glue beans, and glue beans, and glue beans
The technique matters, because after you put a lot of beans on the project you aren’t going to want to pick it up and shake it like when you are applying glitter. I found putting a thick layer of glue for one color of bean and pressing a single layer of beans into the project worked well. I watered the glue down until it was easy to brush (using an old brush) onto the paper, but not so much that it soaked into the paper. Don’t fill to much space with glue or it will dry before you can get it all filled in.
Allot way more time than you think this will take. Well if you are anal like me and apt to go back and fill in empty spots. Which is my final suggestion. If an area looks bare just dab a bit of glue and press in a few more beans.

Notes
Uh this is pretty straightforward. If it isn’t then feel free to comment or email me for clarification.
Check out my fall table decor to see this bean craft runner in action… Well as actiony as a table runner gets.
Enjoy these articles? Get biweekly updates by joining my mailing list (no spam, no way, no how)
See other great DIY’s, Crafts, & Decor at these link parties: Lambert’s Lately, 52 Mantels, Live Laugh Rowe, Shabby Creek Cottage, The Pin Junkie, DIY Vintage Chic, Today’s Creative Blog, C.R.A.F.T, Craft-o-Maniac, Home Coming
What a pretty table runner! Lots of beans, looks like lots of work. Good thing you had a helper. Looks like lots of fun, and very nice. Love the different colors and the pattern.
Thanks so much. The kids always love helping!
This is such a great idea and it’s wonderful that your little one hit to help. This kind of activity is a nice sensory one that good fit them.
I think it turned out great and involved the kids!
Oh I love this Brianna, although I’m not sure I’m patient enough to tackle so big – but it looks fab!
There was a point in the process where I thought I might have taken on more than I should have, but the end result was worth it.
I used to do with years ago and then the beans would end up scattered on the floor when my kids would pick it apart. You have bought back some wonderful memories.
Such an awesome idea Brianna. Love this Chevron Bean runner. I remember using beans to make art in primary school waaaayyyy back when.
That’s where the original idea came from! Childhood memories…
That turned out really cool! What a clever idea to use it as a table runner. My only concern would be storing it. Could you roll it up? Or did you only intend to use it for one season?
I had long flat shelves in the basement so I was able to use it for two seasons. After that the beans get kind of faded and start peeling off.
Wow! This looks so great. It had to take so much patience!! I’d love if you’d link up to The DIY’ers! http://homecomingmn.blogspot.com/2013/09/the-diyers-29.html
Honestly, the patience just came from having to do such a large surface. The technique was pretty simple and smaller size would be much easier. Maybe a trivet or place-mat would have been a better first project. :)
Fabulous! I love this! And while beans and rice seem fitting for the kitchen table you could do this with just about anything for other table runners. Great idea!
I see how you made the runner, but how did you keep you little helper from eating the beans and/or glue?
I am supremely lucky. Both boys listen pretty well about what goes in their mouths. Now glue all over the table… Thank goodness it is water based.