I always admired a garden trellis covered in beautiful flowering vines behind the mailbox. At my previous house the mailbox was actually located on the neighbor’s property so I was never able to fulfill my garden trellis dreams. Since we have a blasted landscape of barren nothingness at the new house it seemed appropriate to try for that garden trellis. However, a nice trellis is not exactly cheap. In comes the DIY partner with a quick and cheap fix.
I thought it would be nice to mimic the porch railings, especially since we were planning a similar treatment around the god-awful transformer (fodder for another post). After poorly describing, gesticulating, and finally kind of just pointing we were able to figure out a simple trellis design for the total project cost of $11.74! That is on par with the crappy wooden trellises at big box stores. Ours was actually cheaper because we had some left over materials from recently constructed garden beds.
Inexpensive DIY Garden Trellis

Materials:
I had the construction manager, aka. Adam, send me the stats. That is why there is such a nice cohesive breakdown of materials. Not like my usual dash of this, smattering of that…
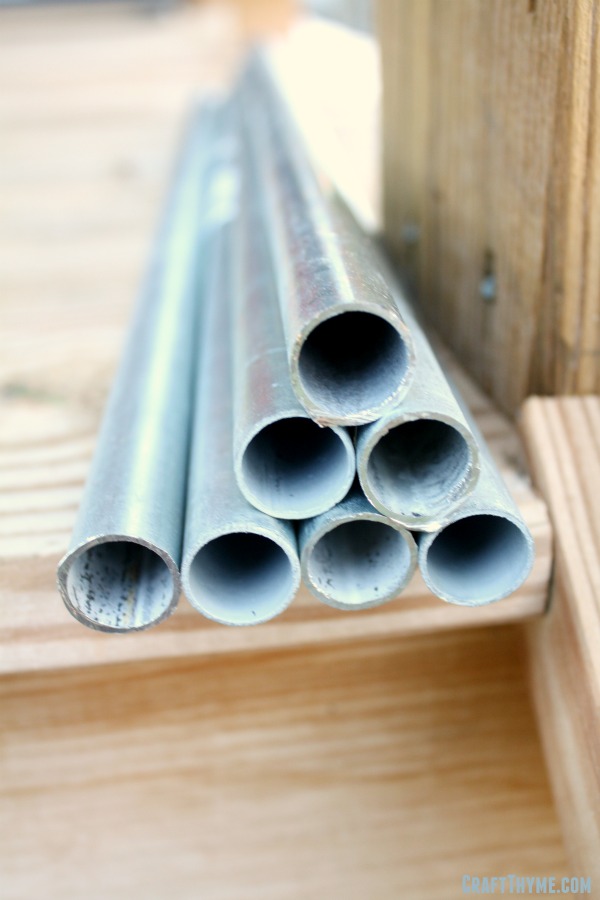
- Metal Conduit: 2 – 10′ x 1/2″ (produced 10 total pieces cut to 22.5″ lengths). Unit cost: $2.30. Total cost: $4.60
- Treated Lumber: (this is not going near our food producing garden beds, so treated lumber it is!) 2 – 2″ x 4″ x 8′ (4 cuts – 2 @ 6′, 2 @ 21″) Unit Cost: $3.57. Total cost: $7.14
- Drill
- Drill Bit: 3/4″ (The conduit is measured by the inside so the outside is actually larger than 1/2″), and phillips-head that fits the screws
- Exterior Wood Screws: we used 8 – 2-1/2″ but any one that will go through the thickness of the 2″X4″ will work
Total Material Cost $11.74

Step 1: A Cut Above
Make all the above cuts. They are simple straight cuts. NOW that being said, I personally, suggest getting whatever home improvement store you buy the conduit and wood from to make those cuts. I will not even discuss how ours came to be cut (though I sometimes wonder about other un-named person’s common sense) for fear of getting sued by someone stupid enough to try that at home. In fact use absolute caution when cutting any material. Do not come crying to me if you end up losing an eye or finger. I always prefer to pay the .25 for extra cuts at the home improvement store. Makes it easier to transport in a small car and no one has to lose a digit in the process.
Step 2: Drill Team
Time to put the drill to use. Take the long sides of the trellis. Measure the distance from the top of the board to the thickness of your 2″X4″. This is not going to be exactly 2 inches. Make a mark as that is where you will join the two sides. Then measure 6 inches down the entire length of the board for 11 places (This should result in 12 marks) Drill holes in marks 2-11. Mark 1 and Mark 12 are where you will place the crossbeams (short cuts of wood). Make sure to drill only 1/4″-1/2″ into the thickness of the wood. You ware not going to want to have an unsightly hole on the outside. If you want longer posts to bury in the ground so that you can see the bottom crossbeam (we buried ours) you could space them every 5-5.5″ instead.
CAREFULLY repeat the same process on the other side. If these do not match up then the join will result in a wonky, non-right angle, trellis.


Step 3: Teamwork
Place all of your conduit in one side of the wood. Get a partner to help you carefully match up the other side. Cuss a bit as conduit fails to easily slide into place, drop some conduit on the ground, make a minor adjustment and have to start the whole fitting together from scratch. Have your partner leave disgusted at being chastised for their inability to line things up properly. Complete the line up and fit in one of the cross braces at the top and bottom. Take your wood screws and place two on either side of the wood (8 attachments total). Make sure to keep the wood at a 90 degree angle. While it will still be a little shakey until you bury the post bottoms this ensures a better join.

Step 4: Dig time
Step back and admire your handiwork. Potentially on such a lovely back drop as your trashcans. Then start digging a hole to place the trellis in. In our case that means cutting through hardpacked red clay, seeded with the most god-awful collection of rocks. You can potentially argue some more over whether your partner is holding their post straight as you backfill the dirt in OR also about whether the entire trellis is even centered around the mailbox.

Once all parties are satisfied with the placement truly stand back and enjoy! Now we just have to find the perfect vine… Suggestions?