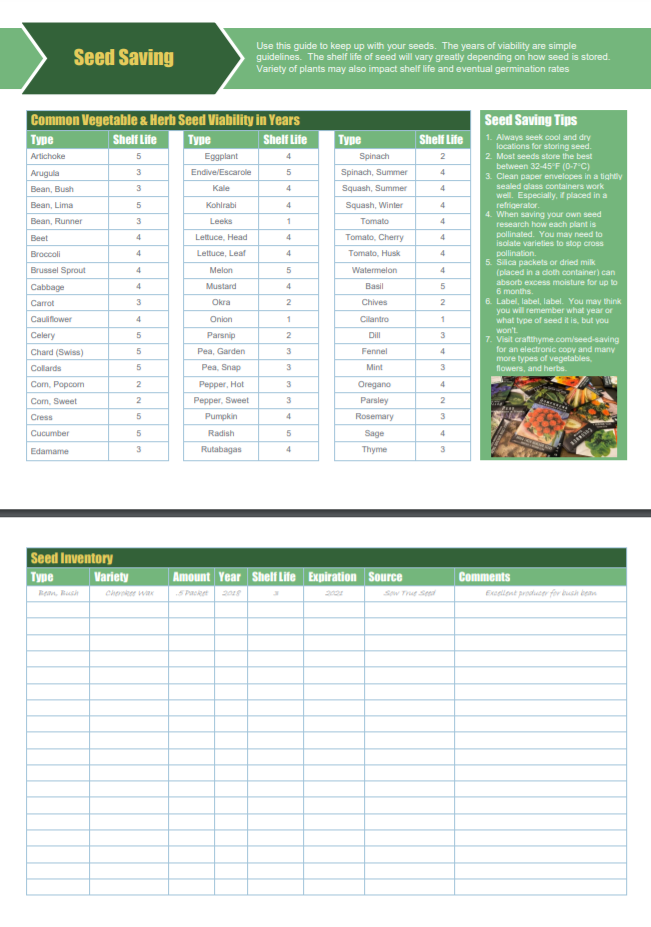
Whether you save your own seeds or buy them in packets it is important to know what seeds you have on hand and how long the seeds are good for in storage. Like most things here at the Reaganskopp Homestead we have a a Google Sheet for seed saving and seed inventories. I know you all are shocked (#sarcasm). As and added bonus we even made a handy dandy printable seed saving chart too! (gasp… paper?!)
But First: Why a Seed Saving Chart?
So what do we mean by “How long are seeds good?”. Well, seeds are only viable for certain lengths of time. Meaning if seeds are properly stored and then properly planted you are likely to get a certain percentage of healthy seedlings after a certain length of time.
I repeat: Properly stored and properly planted
For example, if I take my saved tomato seeds and keep them dry and cool, I can likely still have good germination after three to four years. That means that if you have half a packet of seeds from last year, that you loved, there would be no reason to throw them out and spend more money this year.
But Why a Seed Inventory?
To get the most bang for your seed buck I combined a seed saving chart with a seed inventory. Why? Because you can think you will know what seeds you have, and how many you have, and how long they are good for, and you will be wrong. Then you will see a deal on seeds and end up with about 50 varieties of cherry tomatoes and space to plant out three. Which is even more exciting because out of six family members only you actually eat cherry tomatoes… Or maybe you won’t because you have control when it comes to plants… In either case, it is good to know what you have and when it expires. It makes garden planning a cinch and if you opt for the online version you can reference it when out shopping for seeds.
But wait there is more!
So why do we also have a printable seed saving chart when we usually focus on non-paper solutions? The Reaganskopp Homestead is hosting their first community seed swap and garden planning session. We partnered with a local gardening/homesteading store (Fifth Season Gardening – Asheville) to host the event. Since we are having an in-person seed swap I wanted to have print outs of guidelines for the seed swappers. We made a printable seed saving guide and inventory to take with us.
Spoiler: It is pretty too!
How do you use the Seed Saving Chart & Seed Inventory?
Both the electronic and paper versions are pretty easy. Log your varieties of plants, how much seed you have on hand, and the year you purchased the seed. The electronic version will calculate the expiration date automatically once you put in the year. The paper version will require some addition. I update my sheet once I have everything planted out, so that next spring I’ll have a complete list of what seeds I have left.
How Do I Get a Copy?
Click the link below and you will be prompted to make a copy to your Google Drive. Make the copy and then run with it. Please note, I only give copy access to the Seed Saving Chart and Seed Inventory. This avoids someone accidentally messing the entire sheet up. There is a tab that has examples of use.
If you like/use the Seed Saving Chart & Seed Inventory we simply ask that you spread the word about it to others and send in suggestions via comments. Each year we try to incorporate what readers want to see. You are free to use it for personal or business use. Just don’t try to sell it as your product because that makes you a meanie, not nice person.
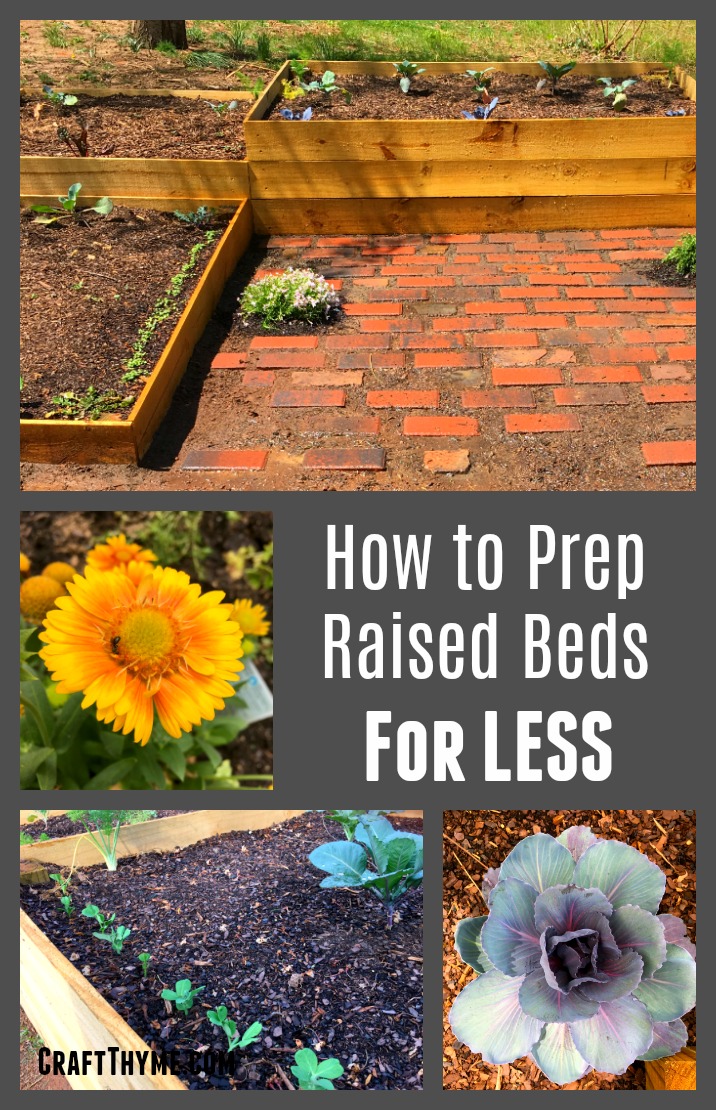
Do you want to know the best way to prep raised beds once you have them built? The soil mixture you use for your raised beds is a hotly contested subject; and everyone has their own techniques. However, we have developed our own unique method that is cost effective (a nice way of saying cheap as possible), retains moisture, and keeps weeds from coming up through the bottom of your bed. I feel pretty secure that our method will give you a good weed free start on your raised garden beds. We have been working with it all summer and despite the groundhog setback the beds have been yielding lots of pretty veggies and flowers. We got the idea from hugelkultur beds (a topic for another post) and tested it out in our newest DIY garden boxes. It is working great! First let us give you the lowdown on some of the problems of raised garden beds and then get onto prepping those beds.
Raised Garden Bed Issues
We can all agree raised beds have a lot of advantages. You have more control of the soil, attractiveness, soil drainage, etc. BUT, in our experience some of the great things about raised garden beds can also be issues.
Raised garden beds can dry out very quickly. Like whoa…
Weeds, especially grass, like to pop in from the bottom/sides
It costs a lot to fill a raised bed
Craft Thyme’s process for preparing raised garden beds addresses all the above issues and helps make the beds virtually weed free! Affiliate links may follow.
Step 1: One of only two times you will hear me say use Landscaping Fabric
As a matter of course landscaping fabric is the devil.
Landscaping fabric is the thong of gardening. It serves a small purpose and is always in the way forever after.
However, in preparing raised garden beds I have found it very useful. Start with a long sheet of landscaping fabric. I try for at least the length of one side of the raised garden bed and fold it in thirds. But if you happen to be folding it outside on a windy mountain day, well you are going to curse and probably cut shorter sheets). Cut along those fold lines to make three strips of landscaping fabric that is about 12 inches wide (Most standard rolls come in 3ft widths. Obviously, cut accordingly if you buy one of those big honking rolls).
Take the fabric and staple the fabric no more than 6 inches high on the wood of the bed. Anytime you hit a corner or have to start a new piece fold the fabric and overlap. More fabric is not bad in this case.
This process is, in my humble opinion, and excellent squat workout. Adam built a lot of beds… Let’s just say I got quit the glute workout. You can staple it lower if you have small beds, but you want to insure that the fabric overlaps the ground below. This will work as a barrier to keep dirt from leaking out of your beds and weeds from poking in on the sides. Remember we are going for weed free raised garden beds!
Step 2: Wrap it up
Take sheets of cardboard or 5-6 sheets of newspaper and cover the entire bottom of the bed. If you have issues with the newspaper blowing around you can wet it down to make it stick to the ground. It should overlap over the landscaping fabric. This will make sure the fabric stays down when you start filling the beds. The cardboard/paper will decompose over time and the roots of plants will be able to go past it to dig in the soil below.
Step 3: Wood is Good
NEXT LAYER! Not sure why I needed to scream that, but it felt right. So the next layer is dependent on the height or your bed. Shallow beds will get just wood chips, deep beds get sticks covered with wood chips, deeper beds get logs, then sticks, then wood chips. Hopefully you get the idea.
The wood acts like a sponge and holds water in the raised bed. I have heard the decomposition of wood can rob the soil of nitrogen, but so far we have been good because the soil is going to suck anyway. Read further to see the discussion on supplementing the soil and how to tackle that going forward.
When gauging the depth of the bed, leave a minimum of 6 inches of room for actual dirt from the top! Cause plants can’t live on wood alone, mushrooms are another story. Few tips for selecting wood:
Old rotting logs are best
Small dry sticks and old leaves will also work
We happened to have a lot of fallen logs and wood chips from tree work we had done in the fall. If you do not have your own; try to find twigs, branches, etc from the neighborhood. It is always easy to collect fallen limbs after a storm. Unless you live in a desert… Or grass lands… If you have to buy bags of wood chips try for the non-colored/Untreated types where available
Step 4: 5 Second Rule (Dirt don’t hurt)
In case I hadn’t already diverged from traditional gardening advice enough… You have two options available for dirt. You can spend a fortune and get the best, compost-ful dirt you can find. Almost every post you will read on the internet will suggest spending as much as possible on dirt. Maybe that is a great way, but I follow the second method: 3 inches of cheap topsoil and the 3 inches of whatever gardening soil is available for sale at the local big box store. I turn a blind eye to the label for this one moment in time and throw whatever horrible bag it is in the bed.
Can you say C-H-E-A-P topsoil?
Trust me these bags are labeled as fertilizer for 10,000 months! Grow an Amazeballs Garden! Etc. They aren’t good, they do not last a quarter as long as they say, and I feel bad, but they are cheap, get your garden going, and give you a base to build really awesome soil in the future. I’d choose gardening some over gardening perfect everyday!
Now What?
That folks, is how you prep a raised garden bed. The landscaping fabric/cardboard and purchased soil insure you start with a weed free bed! Feel free to plant away! If you follow this planting guide your veggies will help shade the ground and keep a lot of new weeds from sprouting.
But wait there’s more…
Couldn’t resist the infomercial appeal. Once you start with this technique you are going to have a couple options to ‘raise’ these beds to a higher level. Get it? You have a small amount of soil on top of a lot of ‘not exactly nutrient rich’ material. The wood material is what is helping keep your beds nice and moist, but it isn’t adding a lot of umph to the growing power of your plants. We combat that by adding organic fertilizer the first year. I also throw every single earthworm I find into the raised bed. You could, alternatively, add lots, and lots of compost throughout the growing season.
In fall I cut all the old annual plants at the base and allow their roots to rot in the soil all winter long. Additionally I rake in mostly composted chicken droppings and/or mostly finished compost and let the bed set. Do not rake it deeply into the soil (a couple of inches or two is perfect. You want to let the earthworms, fungi, and other bugs do most of the work). After the first year, I transition the dirt into a more traditional organic method. I focus on building good soil out of my cheap base which is an entire topic for another post. In short, I add compost as the season continues and by that point the soil is usually healthy enough to support year round planting! In short, though, you can expect to get one good season just out of the crap soil. So go out and get planting! And yes these seedlings and seeds came from my favorite vendor Sow True Seed!
Before our last house I had never planted in raised beds, but let me tell you, it only took one planting season to make me a convert! Now that we (as in Adam) are in the new house we (as in I) had to build new garden boxes. But this time we wanted to figure out how to build a garden box that lasts, while not poisoning our veggies with lots of toxic chemicals from treated lumber OR spending a fortune on cedar. Since we figured out this magic combo we thought we would share our raised garden box plans with you so that you could also save some moola and be able to use the raised beds more than a few years!
Time to get all gardening controversial right out of the gate. Yes, shocking I know, but gardeners can have some very heated controversies. Especially us younger new-comers on the gardening scene who refuse to blindly go all organic. Yep, we scienced the heck out of these garden boxes. First and foremost, not all treated wood is the same. Most of it is complete crap that you wouldn’t want to touch unless you have gloved hands.
Most treated wood = STAY AWAY Veggies!
BUT there is one form of treated wood that would be safe to use. Micronized copper treated wood. While many still argue the safety we satisfied ourselves by reading page after page of research created by many extension agencies and laboratories. The worst issue we could find was that it could potentially release the same amount of copper as a copper pipe water system in your home. Additionally, if for some reason, large amounts of copper were leached into the soil your plants would die well before harvest. I urge you to do similar research for yourself and boldly disclaimer my choices. Basically be an adult, make your choices informed, and don’t sue us later if you do not like the outcome.
SHOOO, well now that all that science and research are out of the way let’s get on with learning how to build a garden box that lasts!
Garden Box Supplies
Fence Pickets
4×4 Posts
3″ Exterior Screws
Fence Pickets: Why are we using fence pickets as garden bed walls??? I know it seems odd because we are going to have to make an extra cut to remove the top piece but, first, they are cheap. Like cheap enough to make it worth the extra cut cheap. Secondly, there are two types of treated wood at our big box store. Despite what common sense would tell you, the treatment referred to as Ecolifeis DECIDEDLY NOT Eco… The other common treatment technique utilizes Micronized Copper Azole (or MCA) and has been tested and used for decades in these applications.
Craft Thyme!
The directions below are to create one, two-layer 4 x 6 foot box. You can modify them to make any configuration you want.
Cut List
4 – 10″ Corner Posts
4 – 48″ Front/Back Bed Walls
4 – 70.75″ Side Bed Walls
Step 1: Assembly Line
We decided to do this assembly line style and do all of the cuts up front. Guess who got to cut too?! Me! I got a new saw for Adam’s birthday and his parents got him this hella cool stand for Christmas. While we can (and have) cut wood old school with a crap saw on the ground, this certainly made the project a lot smoother. Since this is a garden box we made square cuts. While mitering the corners might look lovely, the purpose of these boxes are to hold dirt… So cut time! We start from the square end of the board and then when you are done the dog-eared end of the fence post will be tossed away.
Step 2: Screw It!
Now it is time to screw. The easiest way to assemble is to start with the short end on a flat surface. Lay your 4X4 posts down and place your flat boards on them. Move the 4×4 posts in the width of one board (see the image) this will allow your long boards to sit flush when assembled. Try to get these as straight/square/level as possible. The straighter you have these sides the nicer your finished box will look. However, there is wiggle room with the posts. The end result will have small gaps the corners if your assembly is not straight. This might be less aesthetically pleasing but will still function correctly! I’m kind of the good enough camp… Adam had his level and square out… :)
As you can see here we used a small piece of wood to gauge the space needed.
Screw each board using two screws into the 4×4 post. Repeat for the other short side.
We placed two screws in each board down the post.
Step 3: Time to connect
This is a great time to connect with your loved ones… by having them hold boards, but if you do not have a build partner you are still going to connect, because now it is time to connect those boards! A partner can help hold everything in place, but for either instance find as flat/level of a place and stand up your pre-assembled 4 ft end. Place the end of your board against the corner of the post starting at the bottom. Push it flush against the boards and as level as possible and screw in place. Take the other end of the board and connect it to the other short 4 foot end. Why connect both? Because when you have three sides assembled the structure becomes much more stable and easy to connect your boards.
Here you can see how we joined the edges and why a space was needed to attach the boards flush to the post.
Step 4: Rinse and Repeat
Connect one more board above the bottom layer and then connect the other side in the exact same manner as the first. For added stability we took a small scrap of wood and screwed it in the middle of each long side as shown in the picture. This step was simply to keep the boards nicely aligned. After that your beds are D.O.N.E. A bed this size is not lightweight but I could still easily drag it into place. Keep in mind you might want to build it near your final site if you are not into lifting all that wood.
Here is the optional center bracing. It doesn’t have to be beautiful as it will be covered with dirt.
Step 5: Prepping (but not with a concrete bunker)
How to fill and prep raised beds is a hotly contested topic. No seriously! Gardeners can get their collective yard-work granny panties in a wad over how you fill your beds. I have my method outlined in the next post but for the purposes of making garden beds your last step is to install them. You can choose to leave them on top of the slope or dig down to install them in level ground. (Seriously, my method for prepping raised garden beds is cheap and awesome)
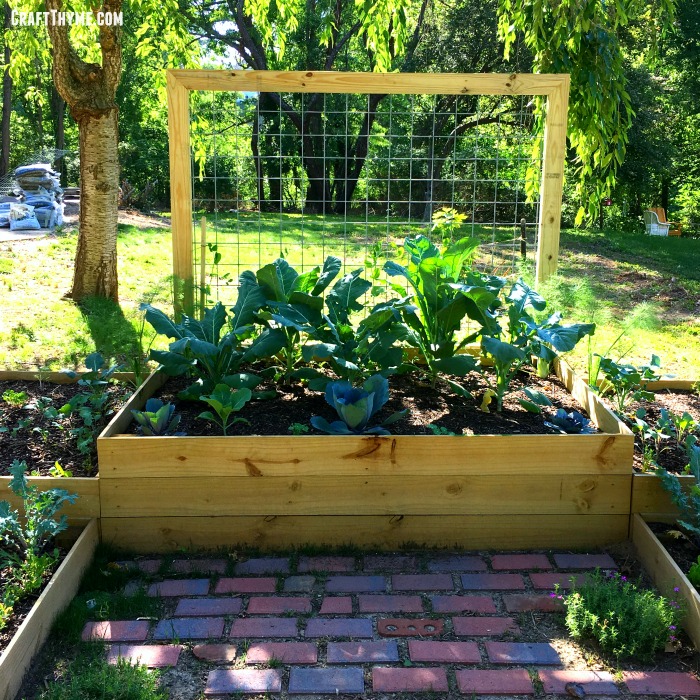
I have done both methods. I also find both attractive. You will see more of the box when simply laid on the ground (Plus it is MUCH easier) but having it level can be important if you are going for a certain look with goat wire trellises as we did in the photo below. This choice is really up to you! Once installed you then fill with planting material and get planting!!!
This took a whole lot of digging!!!! Trellis in the next photo!
Notes: Keeping soil from going through small gaps, soil mixes, how to reduce weeds, water retention, etc is all available in my how to prep bed post! Yeah, I am plugging myself but seriously it is awesome!
Short on garden space? Then a potato tower or potato box may be just what you need and we can show you just how to build a grow tower. We currently have a smaller yard that we have worked hard to create an attractive edible landscape. Growing potatoes in the ground doesn’t exactly conform to the small tidy asethetic we have going on. I had taken a class on intensive gardening and recalled there was such a thing as a potato tower. You can google potato boxes, potato towers, grow towers, and grow bags to get a visual on options. All of these items are ways to grow potatoes in a small spaces, however, some are more aesthetically pleasing than others.
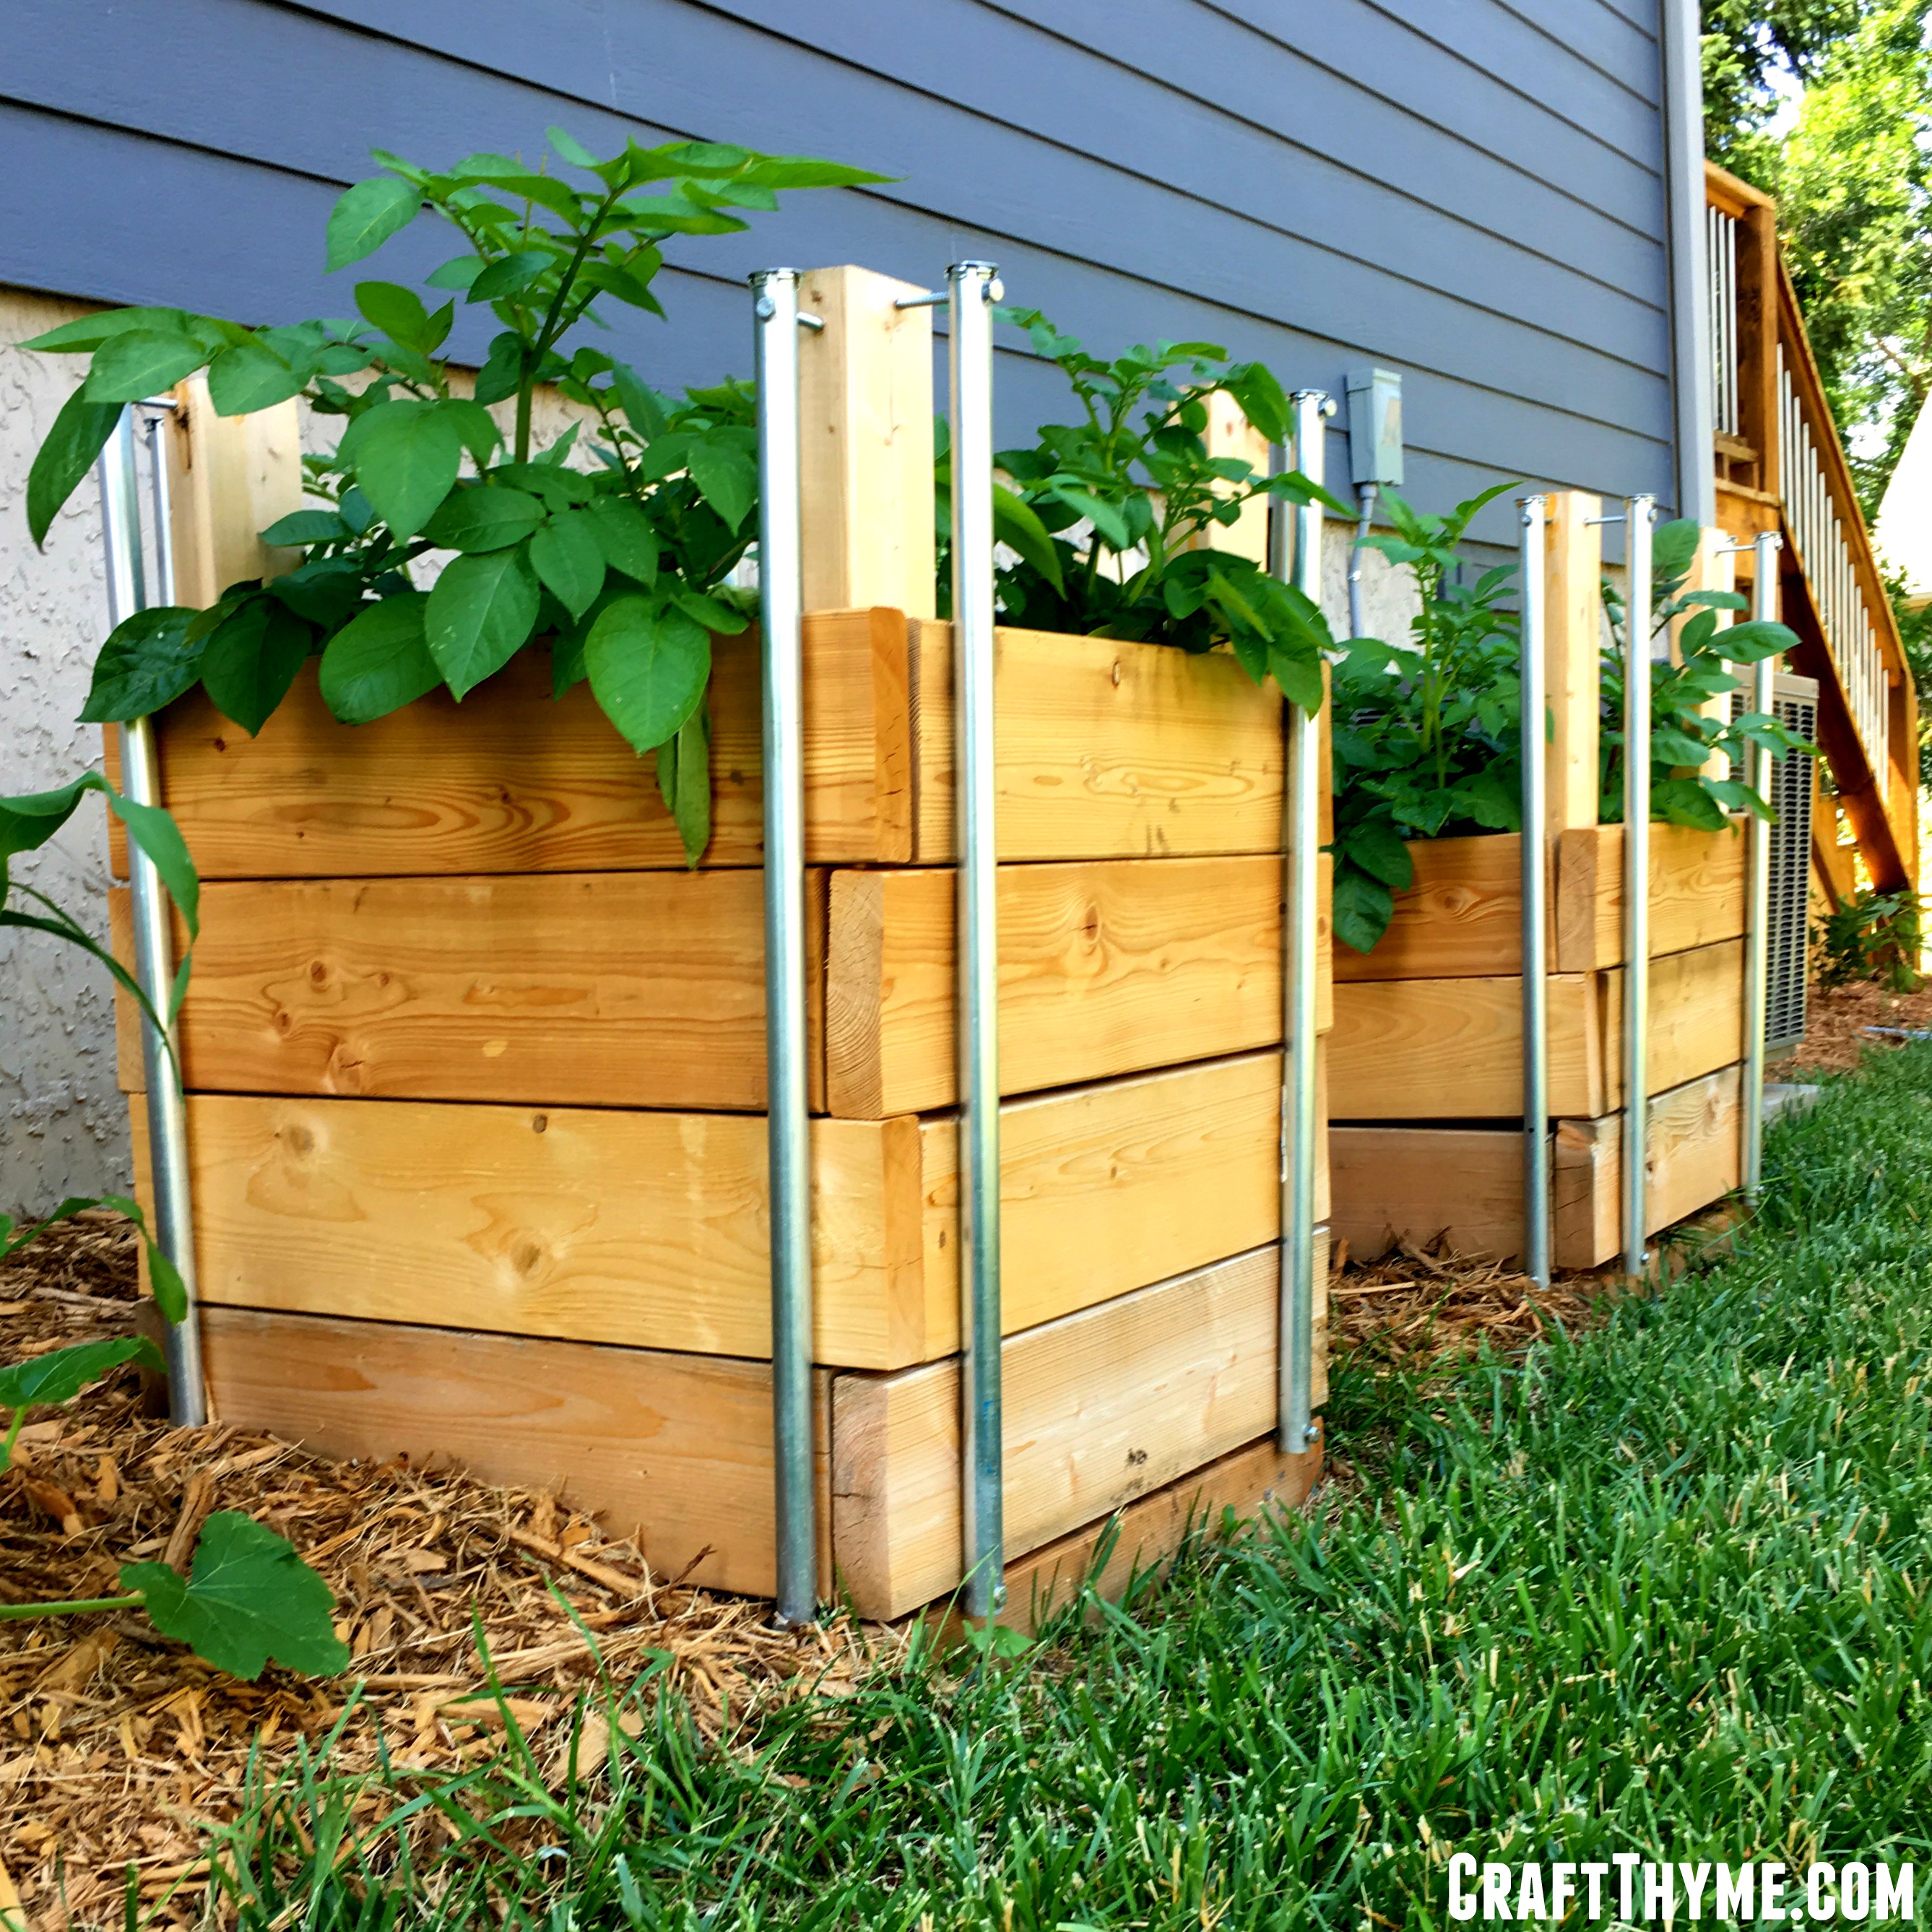
The basic idea of a potato box is you start at a bottom level and plant potatoes. Then as the potatoes grow you add a level of wood, fill in with dirt, leave a few leaves poking out the top, and continue on up. Growing potatoes in this method should yield potatoes all along the buried stems. The drawback to this method is you usually have to screw in each level as you go, buy tons of dirt, and it ends up looking like a plain wooden box. Don’t even get me started on the aesthetics of grow bags… While, we can’t help you with the dirt (it will take a lot), we did design a box with slide in slats, that matched the porch and trellises we have around the yard. Using untreated wood (we aren’t huge fans of tons of chemicals around food we plan to eat), conduit, and some bolts, we made two potato towers that should last a few years.
How to Make a Potato Box
Materials
1 – 2″ x 4″ x 144″
1 – 2″ x 4″ x 96″
5 – 2″ x 6″ x 96″
2 – 3/4″ x 120″ Conduit
16 – 5″ Hex Lag Bolts
2.5″ Wood Screws
1/2″ Drill Bit
Drill
Hammer (may be optional)
Nail set/Hole Punch (may also be optional)
Cut List
4 – 2″ x 4″ x 33″ (From the 144″ board)
2 – 2″ x 4″ x 24″
2 – 2″ x 4″ x 21″
10 – 2″ x 6″ x 24″
10 – 2″ x 6″ x 21″
8 – 3/4″ x 30″ Conduit
Potato Tower Construction
Construction of a potato box is rather straightforward – you’re just going to build a box several times over! But first, we need a frame….
Potato Tower Frame
Lay two of your 33″ boards side-by-side with approximately 14″ between. Use one of your freshly cut 2″ x 4″ x 21″ as a guide (3.5″ + 14″ + 3.5″ = 21″) to make this step a breeze. Once evenly spaced, place one of the 2″ x 4″ x 21″s on top of one end the 33″ lumber and securely fasten with screws. Your finished product should look something like a big U:
Repeat this same process using your two remaining 33″ sections and single remaining 2″ x 4″ x 21″.
Next, connect your two frames using the 2″ x 4″ x 24″ sections you’ve already cut. The 24″ board should fully overlap the existing frame. Once fastened with screws, the resulting frame should be 24″ square around the bottom.
Conduit Slat Bracing
This is by far the hardest part of this project. This is where you put in the work ahead of time to make management of your potato boxes easy. This is where you wonder why you chose this route in the first place. This is where the desire for an awesome look and feel comes together and you realize it was worth all the effort.
Why is this step so tough? In order to use conduit as a bracing mechanism, you’ll first need to drill a through-and-through hole at the top and bottom of each piece of conduit. Prior to drilling, mark your conduit 3/4″ from each end (and make sure your marks are in alignment!).
If you’re using a drill press (highly recommended to make this process a breeze), clamp your conduit to your drill press base and slowly drill a hold completely through the conduit where marked.
If you don’t have a drill press (like us), get ready for some fun…. Using a nail set/hole punch, make a small dent in the conduit where marked. This small dent will allow your drill bit to grab enough of the conduit to start drilling. Manually drilling into conduit is hard work. Even after punching the conduit, starting the hole may be easier said than done. Take your time and don’t rush the process. Wear safety goggles, be patient, and stay safe.
Once you’ve drilled your 16 (gasp!) holes, it’s time to attach them to your potato box frame. Using you 5″ hex lag bolts, begin screwing the conduit to the frame at the BOTTOM of the frame just above the bottom of the U. As you do this, use one of your 2″ x 6″ boards as a spacer. Repeat at the top of the conduit, then repeat for all remaining conduit pieces around the frame.
Make sure not to over tighten the conduit at this step. You need to be able to slide the 2″ x 6″ boards in and out easily. If you did over tighten, back the lag bolts out just a bit and you should be good to go. Test sliding boards in and out of each side to ensure proper installation.
We test fitted all the slats before installing
Slats
If you’ve already cut your 2″ x 6″ x 21″ and 2″ x 6″ x 24″ sections, this step is complete! What do you do with them? Keep reading….
Installing Your Potato Tower
If you have a nice level surface all you will need to do is put your tower on the ground, remove all the slats, and fill the bottom with dirt. The frame and conduit make it nice and sturdy without a lot of fuss. Unfortunately for us we live in the mountains; level surfaces are in short supply. In those cases you may need to dig down slightly and make a level surface. Since we had gone to the trouble to make such pretty boxes we used them to screen our HVAC unit. The location meant that the backside of our boxes were slightly covered. I figured, no big deal, as we were going to fill the first level with dirt. In fact I used some of the excavated soil to begin filling the bottom of the boxes.
Growing Potatoes in a Potato Box
While there are lots of techniques and details for growing potatoes in potato towers we are just going to go over the basics in this post. I highly suggest starting with a quality seed potato (Affiliate links to follow). Luckily my favorite seed store, Sow True Seed, also has seed potatoes! They even taught a potato planting class for free. Love local companies! We pre-sprouted (chitted) our potatoes, which involved setting a bunch of potatoes next to our grow lights a few weeks in advance. Then we simply made sure each piece had at least a few viable sprouts put them in the dirt and covered them up. Just water and go. They have shot up much faster than expected so we have already had to put in a few levels and more dirt. The one drawback of this method is the need to haul in soil. However, my plan is to use the pile the dirt behind the boxes at the end of the year and mix in chicken manure to let it mellow all winter. I figure after a couple of uses I’ll move it to the raised beds and get some fresh soil. Basically making an in-place crop rotation.
The nice piece about using the slide in slats is that we are going to attempt to pull out some potatoes mid-summer. Slide out a slat, reach and and pull some potatoes, replace the dirt and put the slat back. Not sure if it will work as expected but figured that is half the fun of gardening: Experimentation Potato Box Style!
Want to know the trick to maximizing planting space like a pro? Just Say No To Rows and learn how to plant your garden. Yep, I said it. Put the hoe down, the tiller away, and stop with the traditional rows. It is the number one mistake home gardeners make! Why? Because it is labor intensive and more importantly, a waste of useful space that you could be growing food or flowers. Plant spacing is key to maximizing your harvest.
There are a number of techniques out there to plant your veggies and flowers in a non-row method. The biggy you will always hear about is ‘Square Foot Gardening’. I have actually checked the book out of the library and read the whole thing. Personally, I think it was a great guide on spacing plants, but I don’t subscribe to his method of soil creation. Peat is just ick to use most of the time. Not to say I haven’t used it from time to time, but I prefer not to do major applications with peat. ANYWHO, I’ll get off my peat soapbox and continue on to the important stuff. How to plant your garden in a meaningful and efficient use of space. This technique works with raised beds or in ground plots!
How to Calculate Plant Spacing
First thing to do is look at the back of your seed packet. You can read in detail about what you are looking for in my other post Seed Packet 101. Find the information about plant spacing. Ignore the row spacing. I saw you looking at the row spacing! Stop that right now :)
Have you found your number? It could range anywhere from 3″-24″ (3-60 cm) or more! You are going to take that number and divide it in half and place it like spokes on a wheel around your plant. So an eggplant that needs 24 inches would get planted with 12 inches on all sides. I tend to visualize a circle around the plant. Then just lay those circles out in a grid form. Yes, it is that easy!
BUT Wait! There’s More! (Infomercial voice)
There are a couple of things you need to think about before you start planting away. How to weed and how to harvest. Weeds are a fact of gardening life; if you use the above planting method they will be much lighter than traditional rows, but occasionally you are going to need to reach down and pull one out. So guess what that means? Your 6ft X 6ft (2m X 2m) bed? Yeah… You are barely going to be able to reach in the middle. (And yes, I might just have one of those). This is the reason you often see raised beds in 3ft increments. That is the usual distance a human can easily reach from one side. Let us pretend that you ended up with zero weeds, again, you will need to think about being able to reach and harvest your glorious tomatoes and plots of thick spinach. No one likes that smell of rotting squash in the middle of the patch. Yuck! (sometimes I have been known to get lazy on the harvesting)
Perhaps you have a traditional row garden plot. NO WORRIES! You can still use the same space. Divide the area into three foot sections and leave 2-3 ft (1m) pathways between the planting sections. Bonus points if you throw mulch on the pathways to keep yourself from having to weed and hoe the compacted garden paths. BTW, if you noticed I mentioned not tilling at the beginning. Once you have your happy soil you won’t need to be digging these beds and pathways up all the time. I get into more detail on establishing your soil and beds in other posts.
Grid It Out
Let us assume we have a prepared planting soil/space and we know how much space our plants need. The easiest process is to start plunking those puppies in a nice straight grid. Of course this is assuming you have vegetable or flower starts ready to go. Frankly, I plant a lot of veggies and flowers straight from seed into the ground. It gets a little trickier here to get good germination and clear spacing. Frankly, I am willing to waste a bit of seed, especially when it comes to tiny ones like carrots or cabbage. I am just too lazy to carefully plant out 2-3 seeds in each grid space. So I make mini-rows spaced correctly from each other and lightly spread seed down them. Then I just go back and thin the rows by cutting off the un-needed seedlings when they get 2-3 inches high. So why are we planting like this? We can get so many more vegetables in a smaller space. Let us use an example because we love the maths:
We have a 3 ft by 6ft bed (1m X 2m). We want to plant beets (I am the only one in my house but I freaking LOOOOOVVVVEEE beets) The package says row spacing 12 inches and plant spacing 3 inches.
Standard Row Planting: 72 beets (3 rows of 24 beets) Why beets? Because I freaking love beets! This (affiliate links to follow) Rainbow Blend from Sow True Seed is my absolute favorite. Do yourself a favor and order them today! You can plant them throughout the summer. Plus beet greens! Anyway enough about beets…
Grid Planting: 288 beets (plant 12 across and 24 down. Isn’t that number beet-uiful?!)
Straight grid versus offset planting. Both are superior to row planting to get the most in a small space.
The thing about numbers is they don’t usually lie. I used to say numbers never lie and then I worked in Business Intelligence and saw how people massage numbers… But for gardening 288 beets sounds a lot better than 72, well, if you like beets. Additional bonus from planting in this grid method? Whenever the vegetables get bigger their leaves shade the soil cutting off many weeds and maintaining soil quality from erosion. Less weeds = less weeding!
I learned a technique to completely maximize this planting structure. I have used it before but gotten lazy in the last bit and pretty much default to the grid. I often have too many vegetables to use and end up giving loads away so I no longer plant in an offset method. This technique is part of a full biointensive method of planting that is a lot more complicated and involves things like root depth etc. I’m not going there, it is hella fun to plan out and do, but it takes a lot of calculation and work. BUT this small portion is easy to adopt: instead of gridding off your plants you can use those circles to offset each plant squeezing just a few more inches into each bed. Additionally you can tuck in plantings to really cram those plants in there. That means if you have plants that need a lot of space like tomatoes, you can tuck in basil along the edges of the plantings. Personally I love to shove a few flowers, especially marigolds, in any extra room I have. It just makes the vegetable patches that much more attractive.
So what have we learned today? STOP the rows and plant your vegetables in a efficient layout.
Math is on your side and you can get so many more plants in a small place than you can with traditional row crops. Take a grid or offset method to get lots of veggies, but make sure that you remember to leave room for weeding and harvest.