I always have a ton of ideas when it comes to creating any table setting. Easter is no exception. It is more a case of me trying to stick with 1 theme and make a cohesive look for any of my crafts and decorations. This year I settled on a floral theme. Initially, when I thought of florals; I thought pink! Well let’s be frank, for me, a little pink goes a long way. So bring on a fresh new color for Easter. Orange!
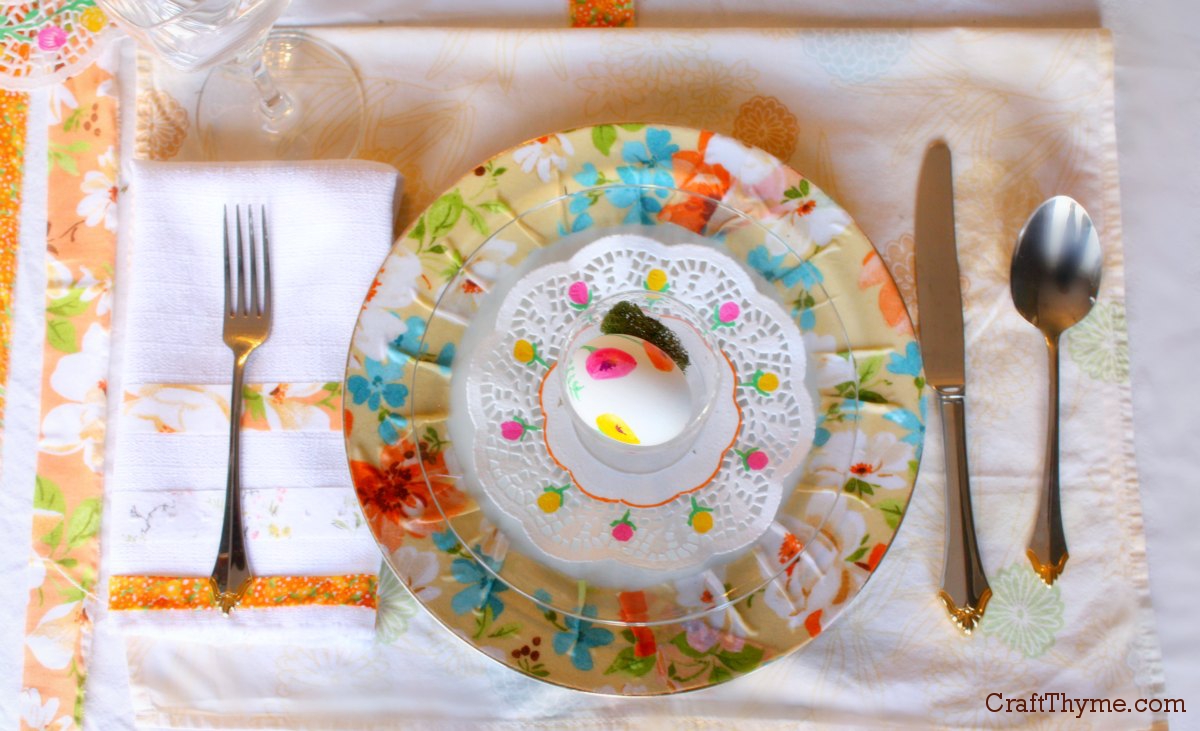
I wanted to layer a number of patterns to create a bohemian feel. Strips of various floral patterned fabric dressed up white table cloth. While I quickly colored the floral part of various paper doilies to complement the colors already used in the fabrics.
I also tried to bring in a little spring green, white, and tan to balance out the colors.
I am pleased that the table setting and Easter decorations came out Spring-like and feminine without resorting to a pink bonanza. Here is one more shot of some of the details. Below that are all the accompanying tutorials for creating your own DIY Easter decorations.
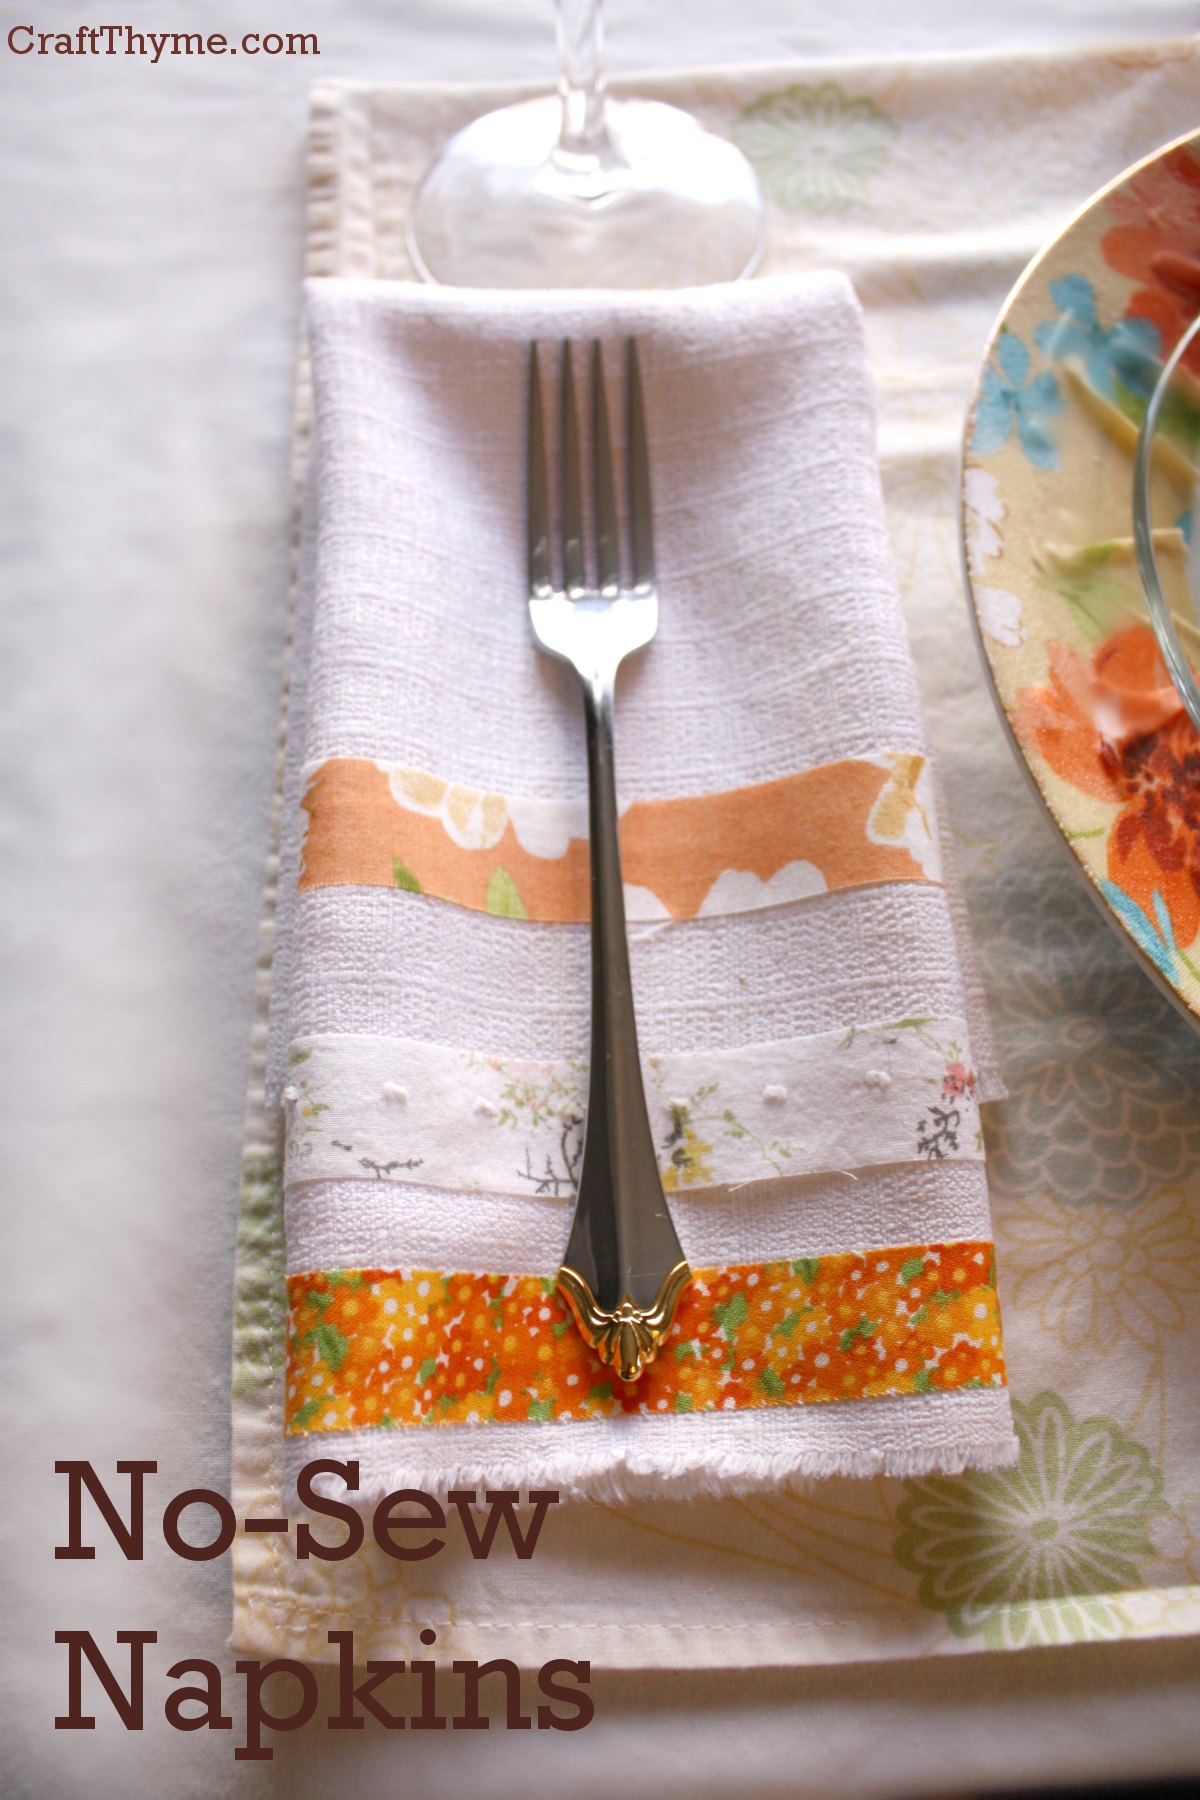
Fabric napkins always add a bit of ambiance to any table setting. However, the cost of pretty embellished fabric napkins can add up quick. My solution? Make your own no-sew, embellished fabric napkins! You could absolutely sew these napkins, but 1. I hate dragging out the machine and 2. not everyone sews. On to the tutorial:
Supplies
We will get to the purposed of that red and orange striped towel in a minute.
Fabric Squares: I have used a faux linen here. You could also use a cheap plain fabric napkin.
Fabric strips: 17-20 inches in length and .5-1 inch in width
Heat’n Bond iron on adhesive
An iron
A towelAn ironing board
Step 1 Prepare the Fabric (not shown)
I am going to save you the boredom of seeing a picture of me me cutting a 17 inch square of fabric. Just remember if you aren’t going to hem the fabric pick a tight weave that you can fray a little bit of the ends. If you are new to buying fabric look for a one that doesn’t have tons of strings hanging off the cut end. Also cut some thin strips of fabric. If you do not have excess/scrap fabric laying around, then I suggest just buy some of the tiny quilting samples (like the 1/8 yard). You do not need a lot of fabric at all.
Step 2 Lay Out the Heat Bond
I promise I will explain the towel in a second.
Lay out a one tiny strip of Heat’n Bond. Make sure to start and end the strip right inside the fringe. I know it is hard to imagine this almost transparent item will do anything, but I can promise it will! Finally, lay one strip of colorful fabric over the top.
Step 3 Irons Away
And now to that ugly beach towel!
Alright here is where I tell you, in the immortal words of Genesis’ Jesus He Knows Me , do the following directions as “I say, don’t do as I do.”
Here is where you should read the directions on the Heat’n Bond. Iron carefully etc.
However, I have had mighty good results with throwing a towel down, cranking up the iron and slapping it together. The ugly beach towel is a lot easier to grab than finding out where exactly I have stuffed the ironing board in the basement.
So step 3 really just consists of ironing.
Step 4 Trimming
Finally, just trim the excess fabric to the edge of the fringe. If any area doesn’t feel secure you can always tuck a little more Heat’n Bond under the fabric and iron.
Notes
Yes these are washable! The fabric may fray more (though I like the look) and if you dry them with heat some of the Heat’n Bond may loosen. I am so lazy that I keep some Heat’n Bond by the iron to fix no-sew items or torn hems on pants.
Thursday these napkins will get used to create the perfect in a full Place Setting.
Enjoy these articles? Get periodic updates by joining my mailing list (no spam, no way, no how) or subscribing to my RSS feed.
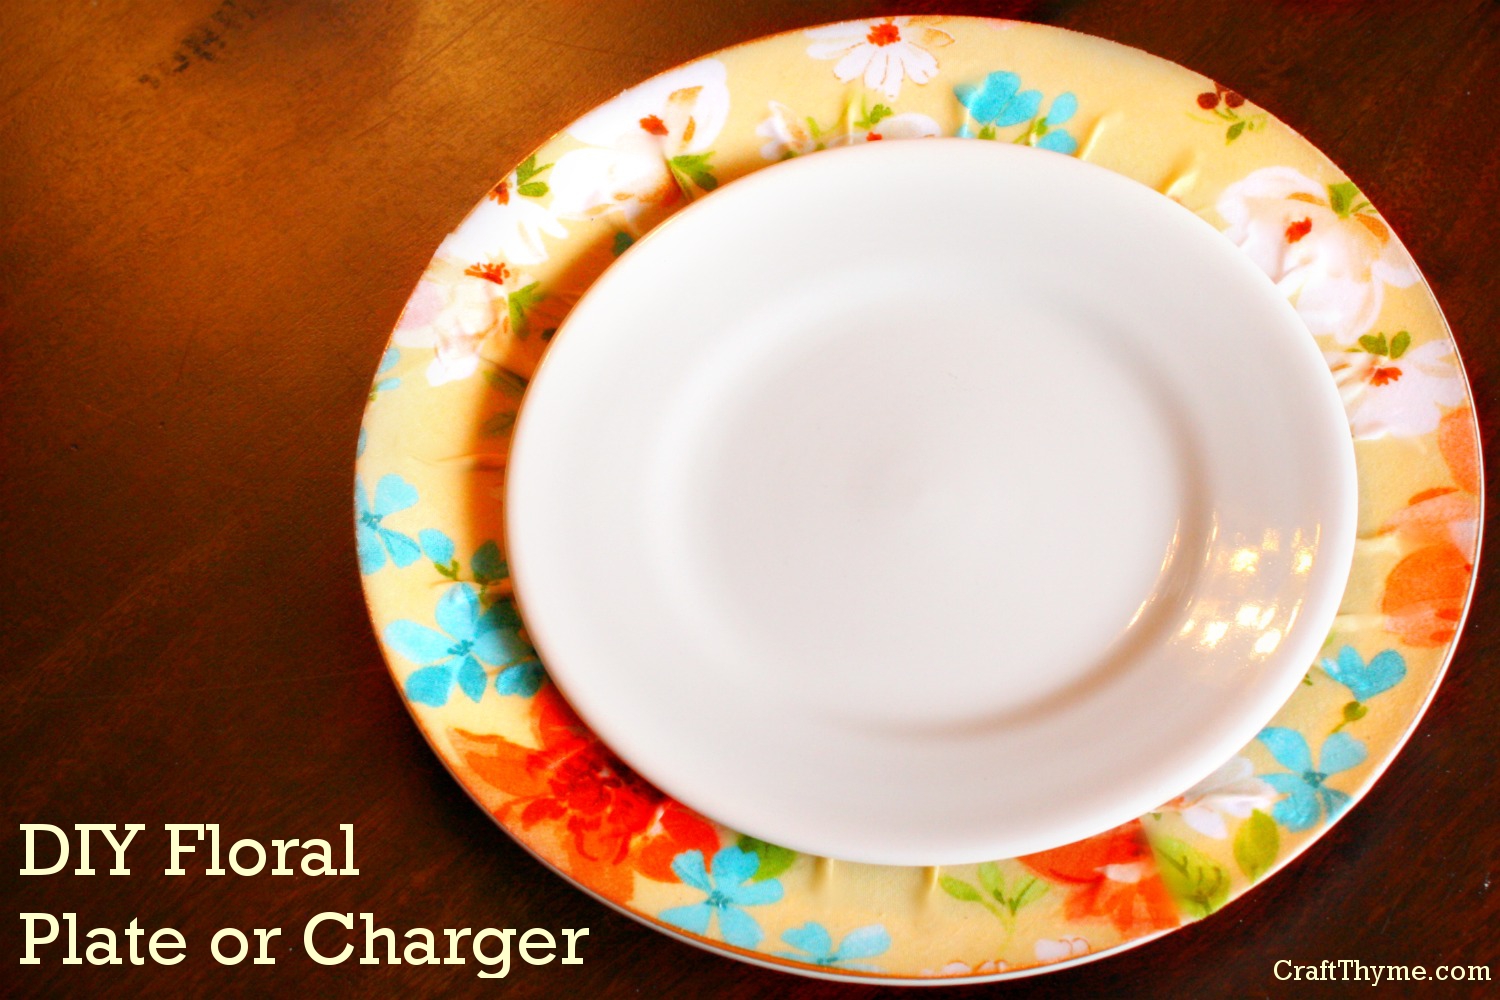
You might ask yourself: What the hell is a charger? Not only will I answer that question, I’ll show you how to make a pretty floral charger for your Easter table setting. While a charger is technically a car and the thing you use to make your cellphone keep working, in this case we are discussing a decorative plate. It goes under your regular plate for decorative purposes.
Basically a charger = a useless plate that you can’t eat off of. But damn do they look good.
Damn that is a mighty fine looking useless plate
Supplies
Plates that can get ruined made awesome (these lovelies we .50 a pop at Goodwill)
Fabric
Decoupage Glue
Something to paint the glue on with (foam brush, paint brush, fingers, whatever)
Ruler
Scissors (I happen to have rotary cutters but as long as you can cut fabric you’ll be fine)
Step 1 Cut Fabric on the Bias
You can see that I am very exact in my measurements #Sarcasm
Decide how large of a fabric rim you want on your plates. Mine had a natural edge so I chose that to be the width of my fabric strips. Use that width to cut multiple bias strips. Why bias? Well… I wanted the very outside edge to lay neatly on the plate and to create a “gathered” look towards the center of the plate. I’m not going to get into a lot of technical fabric mojo here, but bias cuts allow this. If you don’t know what a bias cut is or how to do one, let me google that for you. There are a variety of tutorials that will show you how to do that in a flash.
Step 2 Sticking the Fabric
You’ll note that I put down some old newspaper. Modge Podge is a beotch to scrape off the table.
Note: I thinned my decoupage glue with a bit of water because fabric really soaks it up, and frankly that stuff is expensive!
Take the glue and cover a few inches of the rim. Carefully stretch the fabric along the edge, pressing gently to adhere and smooth. Leave the center all ripply.
Step 3 Getting Messy
I hope the glue really is non-toxic since I basically decoupaged my hand.
Stay with me because this should probably be a video instead of a still photo.
Take the fingers of one hand and form the extra fabric into little gathers, while holding the edge so it doesn’t slip. Now take your other hand and apply glue from the rim to center (a downward motion). This takes a little dexterity, but, no worries!. The glue makes it nice and slippery so if anything slides etc. you can nudge it back into place.
Step 4 Let it Mostly Dry
Yet another photo that looks like I need a manicure and have some flaky skin disease. I promise it is the glue!
When the glue turned mostly clear you will want to take your plates and press down on all the gathers. I did this to make the charger flatter so the dinner plate will set level. I also did this for aesthetic reasons as it gave me an opportunity to smooth out any air bubbles and remove any excess glue. After smoothing the plate I put a second coat of decoupage glue to seal the fabric fully.
Notes
These chargers aren’t washable nor are the meant to be eaten on. With the multiple coats of decoupage glue they are wipeable.
If your strip fabric doesn’t go all the way around just add a second. I cut the end straight and overlapped it slightly right on one of the gathers. With the gathers and pattern it is hardly noticeable.
Regular Readers
I am mixing it up a bit. Usually I post the finished mantel, table setting, etc. first and then add the tutorials. This week we are going backwards! I’ll post the link to the final Easter table setting here when we get to it.
Enjoy these articles? Get periodic updates by joining my mailing list (no spam, no way, no how) or subscribing to my RSS feed.


 Tutorials