Posted on 2 Comments

Easy Crepe Paper Ruffles

Crepe Paper Ruffled Garland

There are thousands of how to’s and tutorials on making crepe paper ruffles.  But really it is easy to make this gathered garland.  Each tutorial out there offers many good tips, like gather foots, pleating etc.   But in reality if you can thread a sewing machine (or con someone into threading it for you) and press the foot you can get a ruffle.  You don’t really even need to be able to sew straight.  It is that easy.  Plus who isn’t thinking about feminine ruffles and dainty pink items on Valentine’s day?

So if you want to make these crepe garlands follow along:

Crepe Paper Ruffled Garland


Supplies

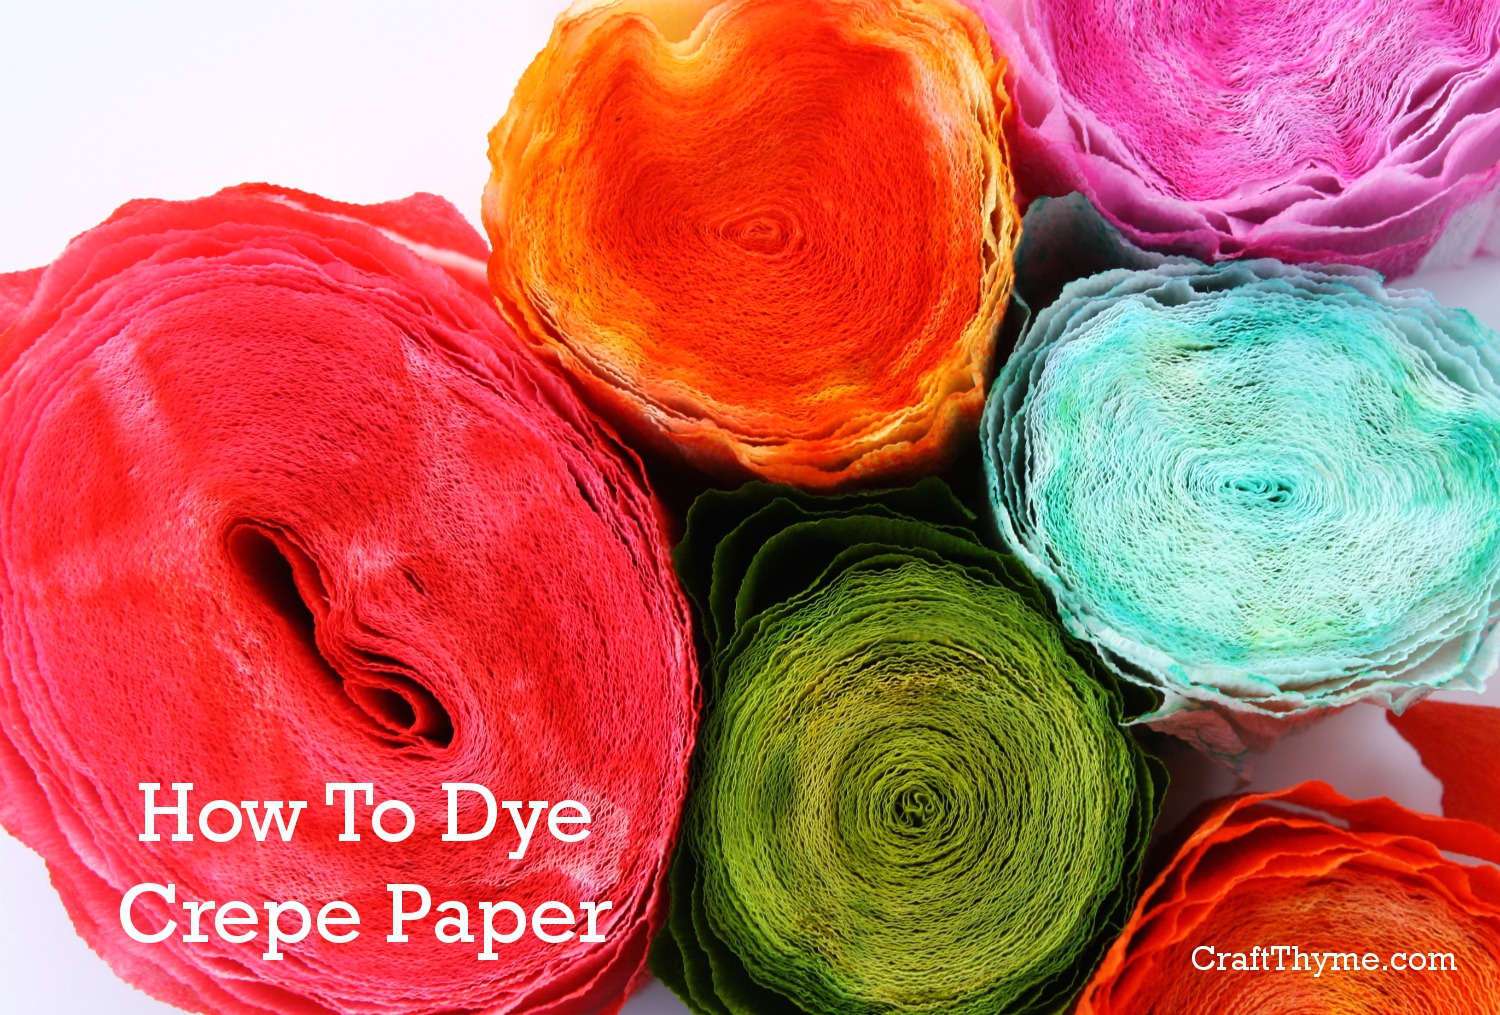
  • Crepe Paper Streamers
  • Thread
  • Sewing Machine
  • Wine/Beer/Mixed drink (Just a suggestion for most crafts)

Step 1

Grab some extra crepe paper streamers.  Especially if you have hand-dyed yours, use some extra at first because you will need to play with two settings on your machine.  One is the length of the stitch and the second the thread tension.  I set the length pretty long and the tension high.  When you get it right the paper will come out the back automatically ruffled as you sew.  The tension will also make your ruffles tighter or looser.  Just pick what you like.

Sewing Machine Settings
I bet this is the most exciting picture you have ever seen in a tutorial.

Step 2

Start the crepe paper a little past the presser foot.  You waste a little paper but it keeps it from getting stuck in the feeders.  Then “Sew, Sew like the wind” (Please tell me someone else is a fan of the Three Amigos).  The last picture demonstrates how to hold two different colors together and sew off the roll.  Doubling the crepe paper makes a thicker ruffle.  I like to mix a light and dark color together.  Yep, it really was that easy.

Creating crepe paper ruffles
Easy as 1, 2, 3.

Variations On The Theme

While, it is very easy to make these ruffled crepe paper garlands.  You still have the option of adding some variation to them.  Here are two different options Fringed Ruffle Garland and Twisty Ruffle Garland:

Fringed Ruffle Garland

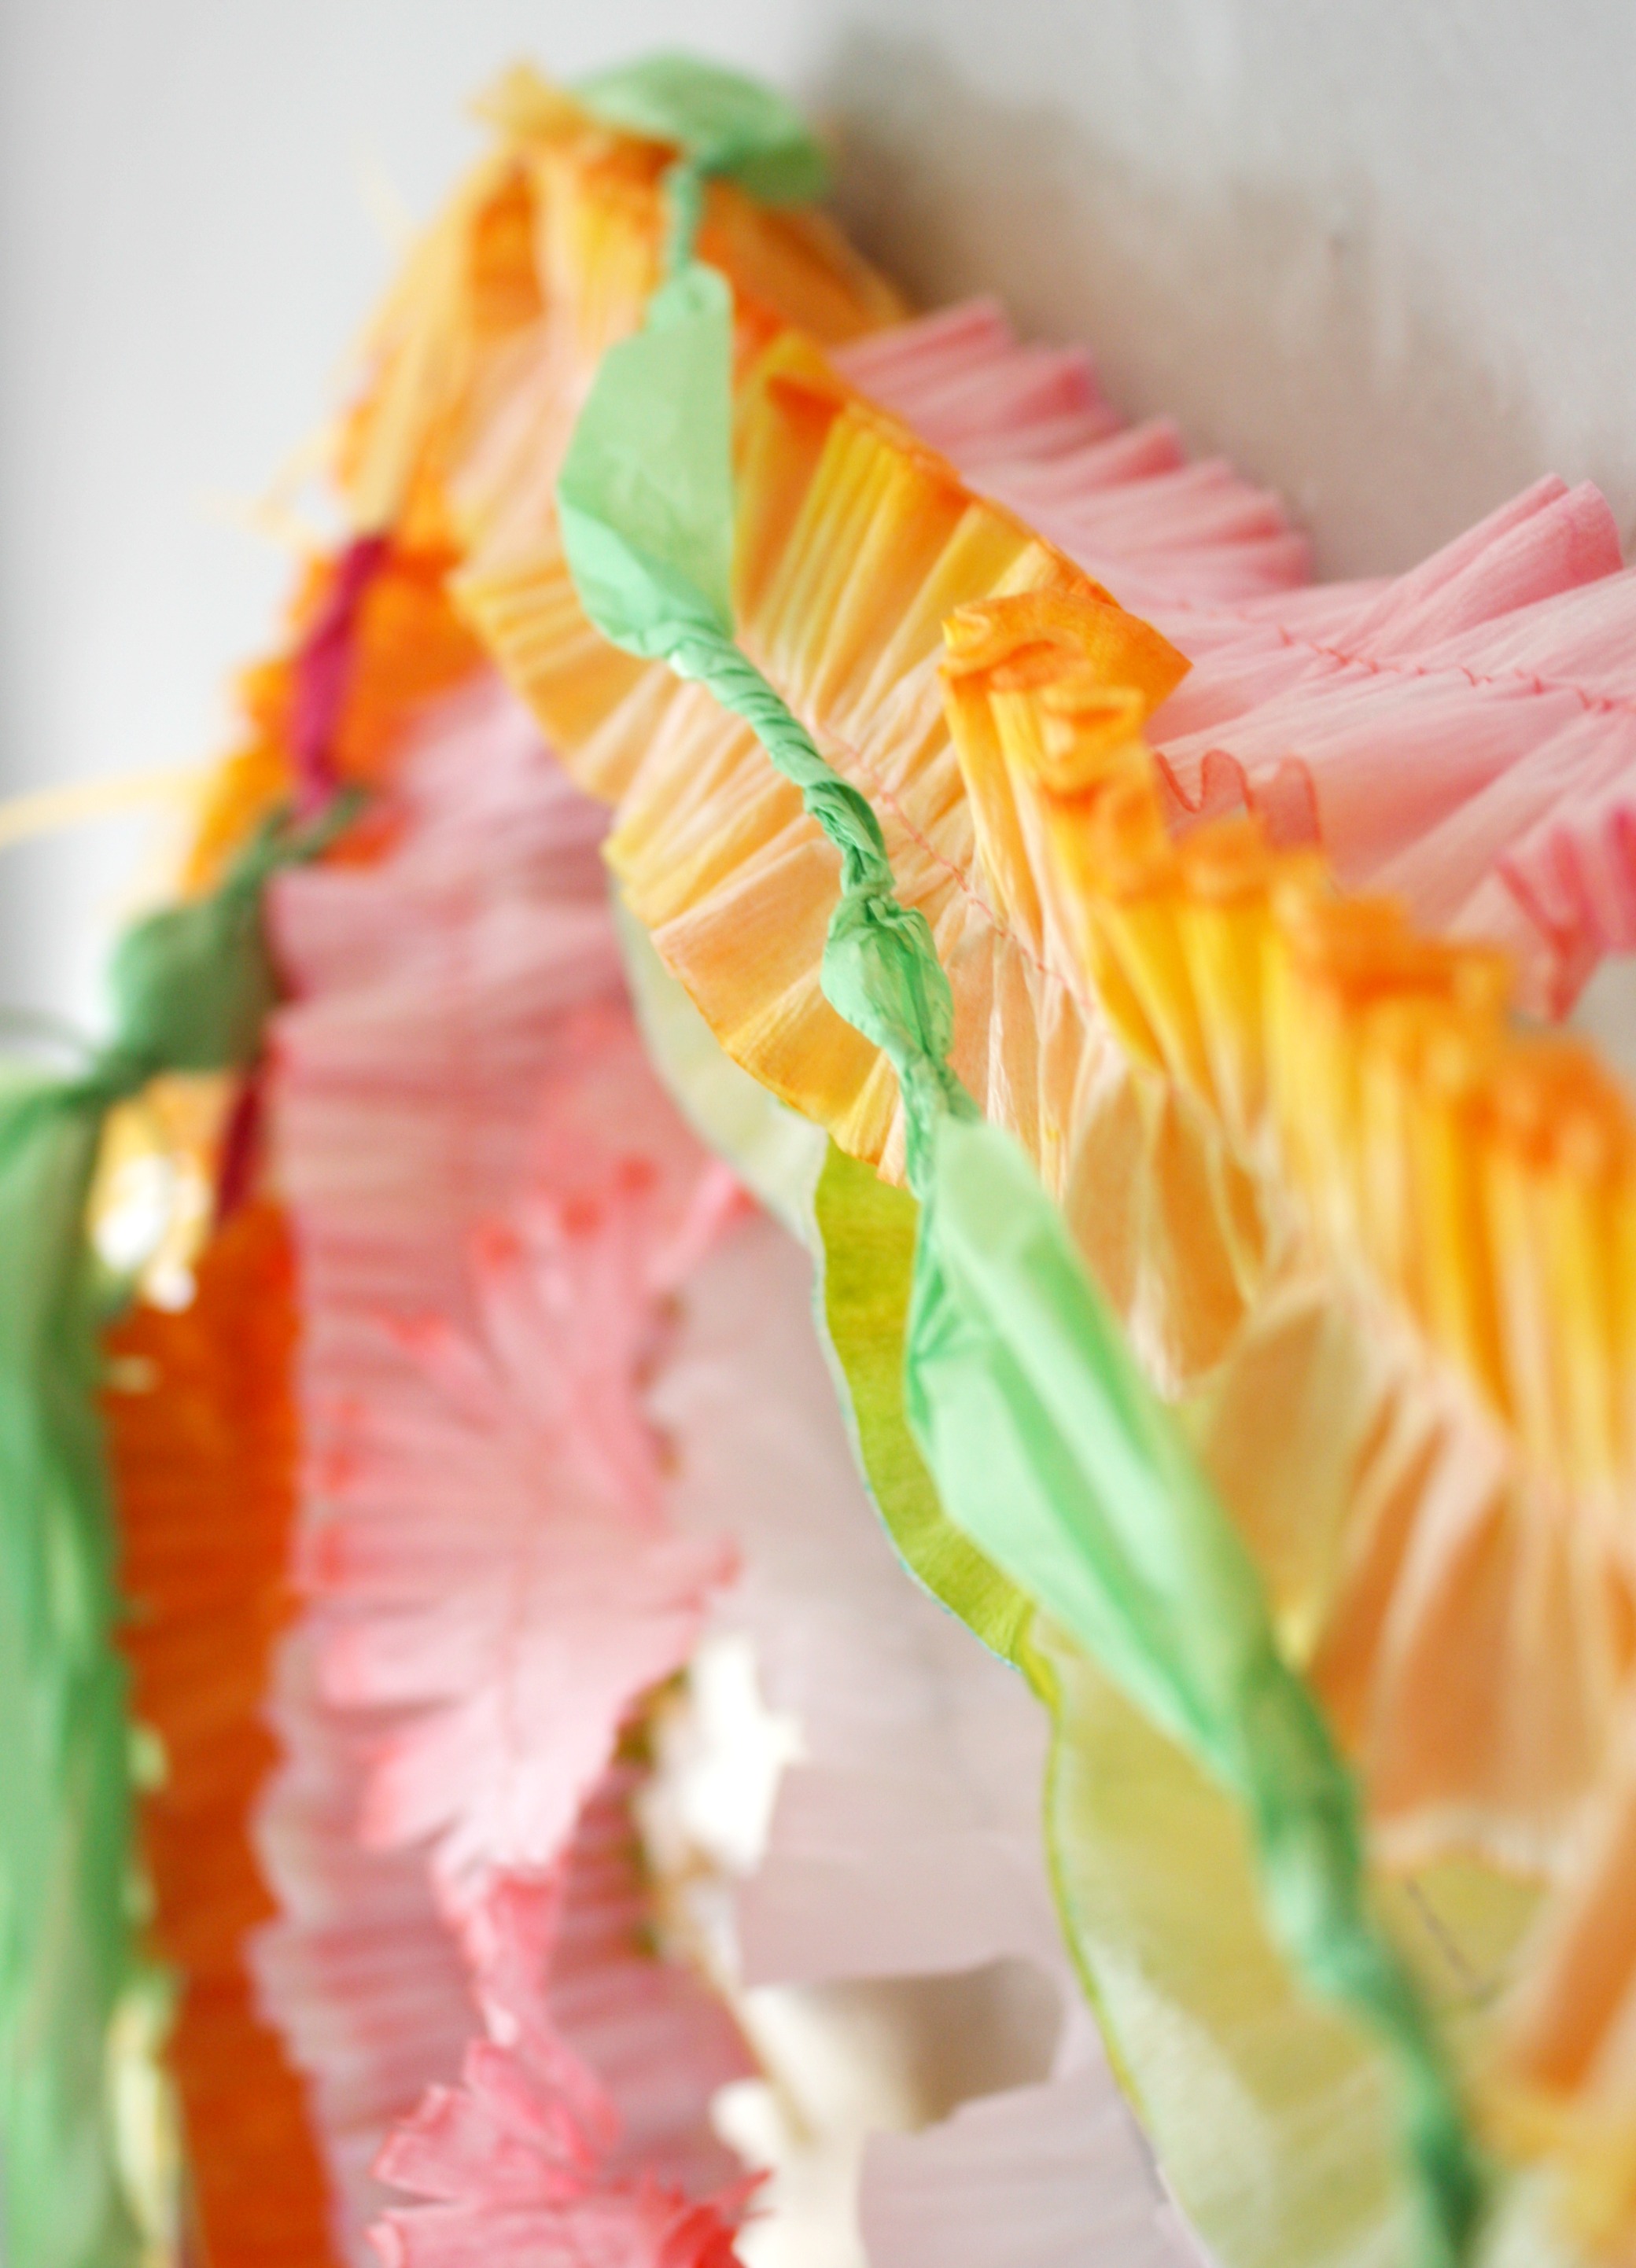
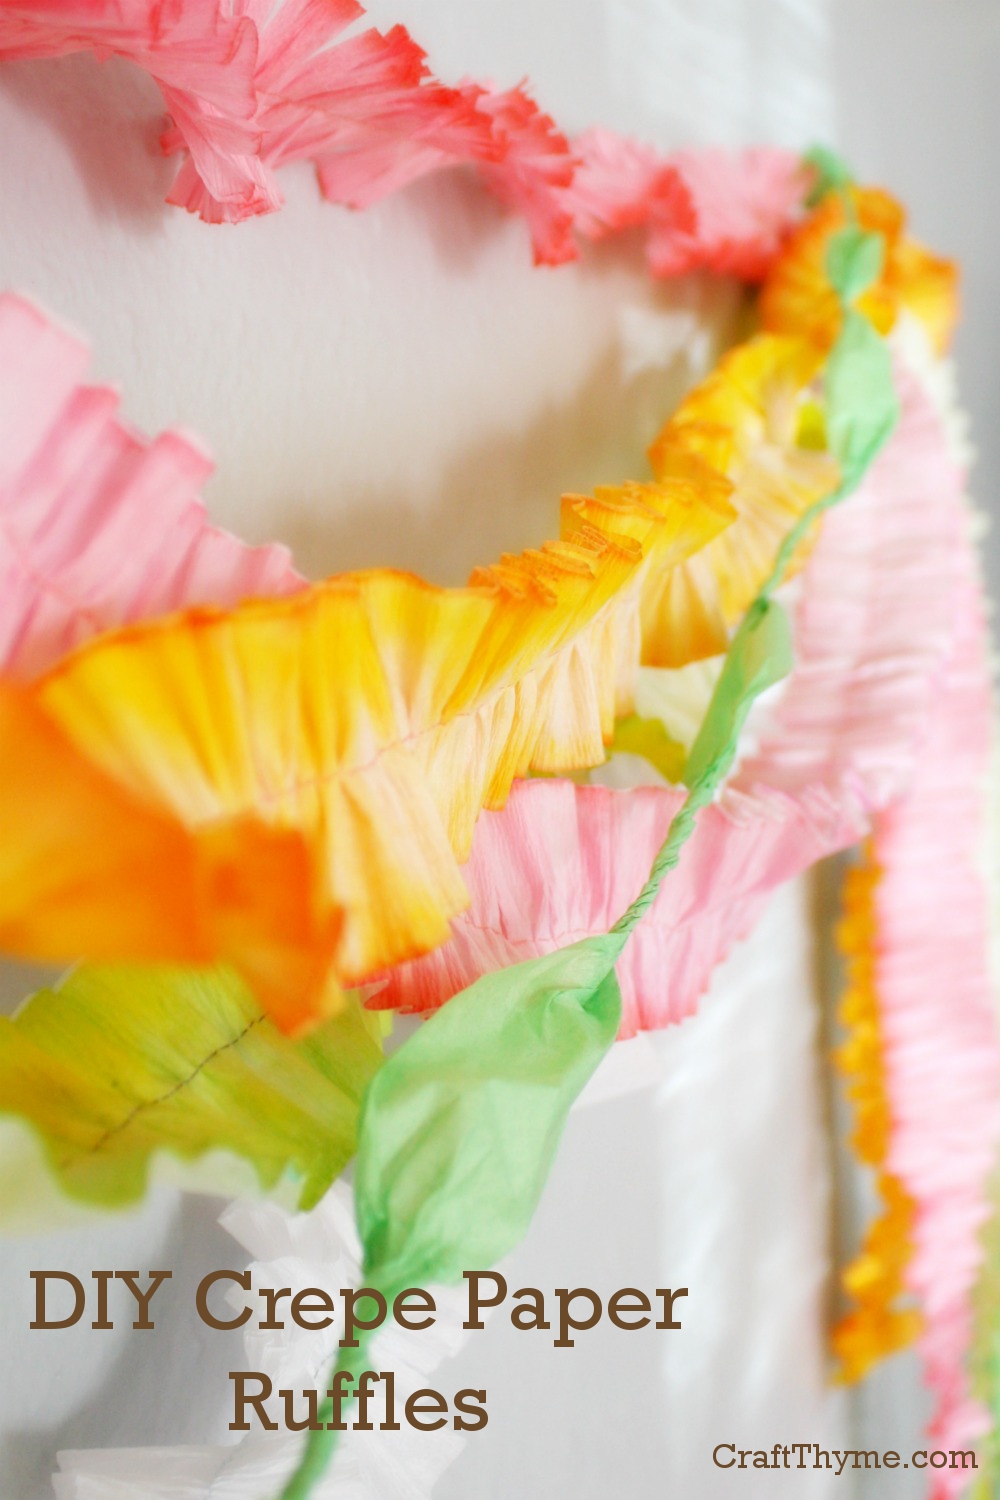
Take the completed ruffle garland and fold it in half.  Make tons of tiny snips down each side making sure to leave the middle intact.  The ruffles will cause some little pieces to be snipped out but it adds an overall fluffiness to the crepe garland.  You can see the completed fringed garland in the first picture, the top one in pink.

Creating Crepe Ruffled Fringe
Yeah those are some awesome fringing scissors. If you are doing more than a few feet they are totally worth the $12 investment.

Twisty Ruffle Garland

Simply move the stitches back and forth as you sew.  This makes the garland automatically twist around when you hang it.

Twisty Crepe Ruffle
This is a good one to do if you happen to not be able to sew straight or you imbibed any of the wine listed in the above supplies.


See it really was easy.  No pulling threads or special presser feet.  Just crepe paper, wine, and someone to thread the dang machine.

Want to see what you can do with all this crepe paper?  Check out the inspiration for this tutorial in my Spring Garland Post.

Enjoy these articles?  Get periodic updates by joining my mailing list (no spam, no way, no how) or subscribing to my RSS feed.

This post was submitted to 504 Main. Where you can find more create crafts, DIY, and recipes.


Posted on 17 Comments

How to Dye Crepe Paper

How to Dye Crepe Paper

I wanted to dye crepe paper streamers so I could get a whole variety of colors and variations in my decorations.  I love color but the brightly dyed store bought colors just weren’t enough for me.  However, pouring paint etc on the streamers tended to make a soggy-fugly mess.  It took me awhile to figure out a process for dying them that would keep the crepe texture.

How to Dye Crepe Paper
Colors! I love Colors!


Supplies:

  • White or Light Colored Crepe Paper
  • Dye– See the recipe here
  • Alcohol: 90% is best (If you want pastel)
  • Um yeah that’s it…  Sometimes crafts don’t require a lot of things.  But don’t mention it.  I’ll take any opportunity to take a trip to the craft store.

Step 1

Make rolls of the colors you want to create.  One large roll of crepe paper is around 150 ft.  I always divide mine into three.  And no it isn’t necessary to be as anal as myself and wrap it so neatly.  That just takes a special kind of crazy.  It will dye if the rolls are fairly tight.

Step 1 assemble rolls
Wow, I can’t believe how anal I am at re-rolling the crepe paper.

Step 2 (For Pastel Colors Only)

Remember this is for pastel colors only!  I repeat pastel only.  Soak each roll in plain alcohol to wet it.  Don’t drench it but go ahead and dampen the whole roll.

Step 2 Wet the Paper
So… you might want to consider covering your work area or putting these on a tray… I have a lovely 70’s counter top that you can see I care for a lot.

Step 3

Now the fun part!  Pour on the dye.  Soak that puppy!  I like to pour it in the middle, then flip it over and do the other side.  Now would be a good time to remember gloves so you don’t stain your hands…  Or just tell your friends it is the newest trend in finger dye.  If you aren’t going for pastel it will take more dye since the rolls aren’t wet to begin with.

Pouring DyeStep 4

This is the hard one!  Wait.  Yeah you have to let it dry.  You can squeeze a a little of the excess out, but gently.  If you squish the roll too much then you risk ruining the crepe texture.  I have been known to stick them on top of heating vents in the winter months…  Usually overnight the alcohol evaporates and you have a nice dry roll.

Final Notes

Here you can see the variation between a pre-soaked pastel crepe roll and direct dye crepe roll.  The paper itself will separate out some of the component dyes…  So in less technical terms: Orange is going to leave splotches of red and yellow.  But they are pretty splotches.

Hand Dyed Crepe Paper
So much prettier than store bought.

Want to see what you can do with all this crepe paper?  Check out the inspiration for this tutorial in my Spring Garland Post.

Enjoy these articles?  Get periodic updates by joining my mailing list (no spam, no way, no how) or subscribing to my RSS feed.

This post was submitted to The Crafty Blog StalkerHouse of HepworthsSnippets of Inspiration, Sugar & Dots, Seven Thirty Three, & Craft-O-Maniac. Where you can find more create crafts, DIY, and recipes.


Posted on 119 Comments

How to Make Alcohol Inks

How to make alcohol inks

Making alcohol ink or dye from household items is super easy.  I use the alcohol ink to dye crepe paper for a nice vintage look.  Honestly this is so easy I almost think it is silly to have a how to article.  But since I am whipping these up all the time I thought I’d give you a quick run down.  You can also see my tutorial on how to make Walnut Alcohol Ink.

How to make alcohol inks
As McClain says: this tutorial is “Easy Peasy Lemon Squeezy”

Supplies

  • Alcohol:  I like the high proof stuff myself ;) Joking aside, I use the 91% isopropyl alcohol if I can find it because it dries faster and for dying crepe paper changes the texture the least.
  • Glass jars: Plastic is fine but will tend to stain forever.  FOREVER.
  • Old/Cheap Markers OR Food Coloring:  I have tried a number of different pigments from watercolor to paint but they tend to not dissolve in a way that I found to fit my needs (in other words they made a craptastic mess)alcohol ink supplies

Step 1

Pour some alcohol in jars.  If using markers uncap and stick in alcohol let sit for about 30 minutes.  You can speed the process by stirring the marker around in the alcohol.  If using food coloring start with 1 to 2 drops of your color. If mixing colors you may need to add alcohol if you want a pastel color.

making alcohol ink
Only hard part here is waiting for the color to come out of the markers

Step 2

That’s it.  Color in alcohol = done.  Feel free to celebrate with a drink of ethyl alcohol (as known as spirituous liquor). Edit: apparently some people in the world don’t understand chemistry humor. So let’s clarify: isopropyl alcohol = baddy bad. Ethyl alcohol = tasty. Make sure to use common sense when having a whisky sour, glass of wine, or beer. Never drink & drive and always enjoy in moderation!

Notes

More markers per jar = a brighter dye.  The nice thing about using markers is that if you happen to have the washable type then it will not stain your hands.  However, you could just stop and put on some gloves like someone that has sense.

These alcohol based inks are perfect for dyeing paper products.  You can see these dyes in action on how to dye crepe paper without loosing the crepe texture. 

If you are looking for a way to make alcohol ink for use on plastic, metal, or glass SORRY!  I have tried so many formulas and none of them work quite as well as the commercial variety you can see here (warning an affiliate link ahead).  If I ever come up with it you will be the first to know!!!

*


Posted on 6 Comments

Crepe Paper Tutorials

Crepe and tissue paper decoration detail

I need some Spring color!  Enter: an array of tissue and crepe paper garlands, tassels, and streamers. For a list of crepe paper tutorials on how to make each and every item shown scroll on down!  Instead of making the regular ho-hum mantel display I thought I would give my entryway some Spring umph.  As an added bonus I set up an area to take some pictures of the kids,using the decorations as a photo backdrop.

Crepe and tissue paper decorations
You’ll note that none of the kids are actually sitting nicely enough for pictures. So I used myself.  Yeah I am really that pale.

Crepe and tissue paper is inexpensive and can be turned into garlands, tassels, streamers, puffs.  Basically it is some versatile shiznit if you want some cheap and fancy looking decorations.  I really wanted a mix of textures and colors.  You can see a bit of the variety in this detail shot.  After making them all, I hung them from some lightweight command hooks.  Easiest thing to make a temporary display, plus crepe paper is so lightweight it takes nothing to hang them.

Crepe Paper Tutorials


Since I basically had a love affair with tissue and crepe paper I have a ton of tutorials to offer:

Crepe Paper Tutorials

In the mean time check out some of the details:

Crepe and tissue paper decoration detail

Enjoy these articles?  Get periodic updates by joining my mailing list (no spam, no way, no how) or subscribing to my RSS feed.

Posted on 1 Comment

10 Ideas For Cheap Organization and Storage Solutions

10 Cheap ideas for organization and storage

Below are 10 ideas to cheaply organize your home. Since the object of organization is not to buy stuff but to organize I have been trying to find ways to repurpose objects I already have hanging around. Plus I threw in a few cheap and/or creative ideas that might require getting a few things, but damn they look good and organized.

10 Cheap ideas for organization and storage

In no particular order:

1. Single Socks

10 Cheap ideas for organization and storage

Get rid of single socks (you know the ones left behind after the sock monster eats one) and make a holder to keep your wrapping/craft paper from unrolling.

2. Mint.com

As we discussed Wed. organization goes beyond your stuff. Get a clear picture of your finances with this free website. It takes a bit to load everything but will calculate everything from net-worth to projected budgets. www.mint.com

3. Baby Food Jars

10 Cheap ideas for organization and storage

Yesterday we made a mounted spice rack with baby food jars. Today we find they are the perfect height for loose bobby pins.

4. Old School Trapper Keeper

I have a magazine problem. Do you? So instead of buying scads of these:

10 Cheap ideas for organization and storage
These are Martha Stewart magazine organizers. You can google them and find a variety of sources. Pretty, but bulky and expensive.

I buy an old school trapper keeper, then yank out the articles/inspiration/recipes I want to keep from each magazine as I read it. Throw them in a labeled folder , such as recipes (like I’m actually going to do any of those), or three hole punch and move on. Sure the racks of magazine containers can be pretty but the single folder takes .1% of the space and is a lot faster since I don’t have to flip through for the article I am looking for.

5. Garden Gear Inside

10 Cheap ideas for organization and storage

Got some unused hanging baskets in the garage? Pour out the dirt, remove the coconut liner, and hang from the ceilings or walls for instant storage. Image courtesy of Centsational Girl via BHG.

6. Google Calendar

Got family members everywhere? Sure a large blackboard calendar or dryerase board is great at home but what about when you’re on the go? Check this calendar from work or your smart-phone. google.com/calendar

7. Dollar Store Cutlery Organizers

10 Cheap ideas for organization and storage

Those random plastic draw dividers made for utensils… Yeah perfect for nail polish, lotion bottles, brushes. The list goes on and on. Just think you could pay $10.00 on Amazon to store your nail-polish or .50 cents using kitchen gadgets.

8. Old Packaging

10 Cheap ideas for organization and storage
I didn’t actually turn that into that, but I’m hoping to. See the tutorial link below.

Sure the discarded cereal box is not the storage solution for everyone… BUT what if you could make it fabulous? Here is a tutorial at Positively Splendid that takes these ugly diaper boxes and makes them faboo! What other free packaging can I turn into chic holders?

9. Goodwill Containers

10 Cheap ideas for organization and storage

Maybe you aren’t into thrifting your footwear, but take a second look at second hand. Glass apothecary jar $1.75 and juice glass .75 cents at Goodwill. Keep in mind I knew I needed containers for Q-tips and cotton balls before I went so I didn’t buy a bunch of glass items that wouldn’t fit.

10. Old Furniture

Sure we have all seen the TV cabinet turned into a craft station or an old dresser made-over into a buffet. But how about these puppies:

10 Cheap ideas for organization and storage
Old tables give a totally new life as bookcases.

Yep, that takes the idea of using old furniture for storage to a new level. Image courtesy of Art Eko.

I hope this gets your creative juices flowing to find cheap or free storage solutions already on hand or right nearby.