Posted on Leave a comment

Dr. Seuss Inspired Trees: A Centerpiece

How to make Dr Seuss inspired trees

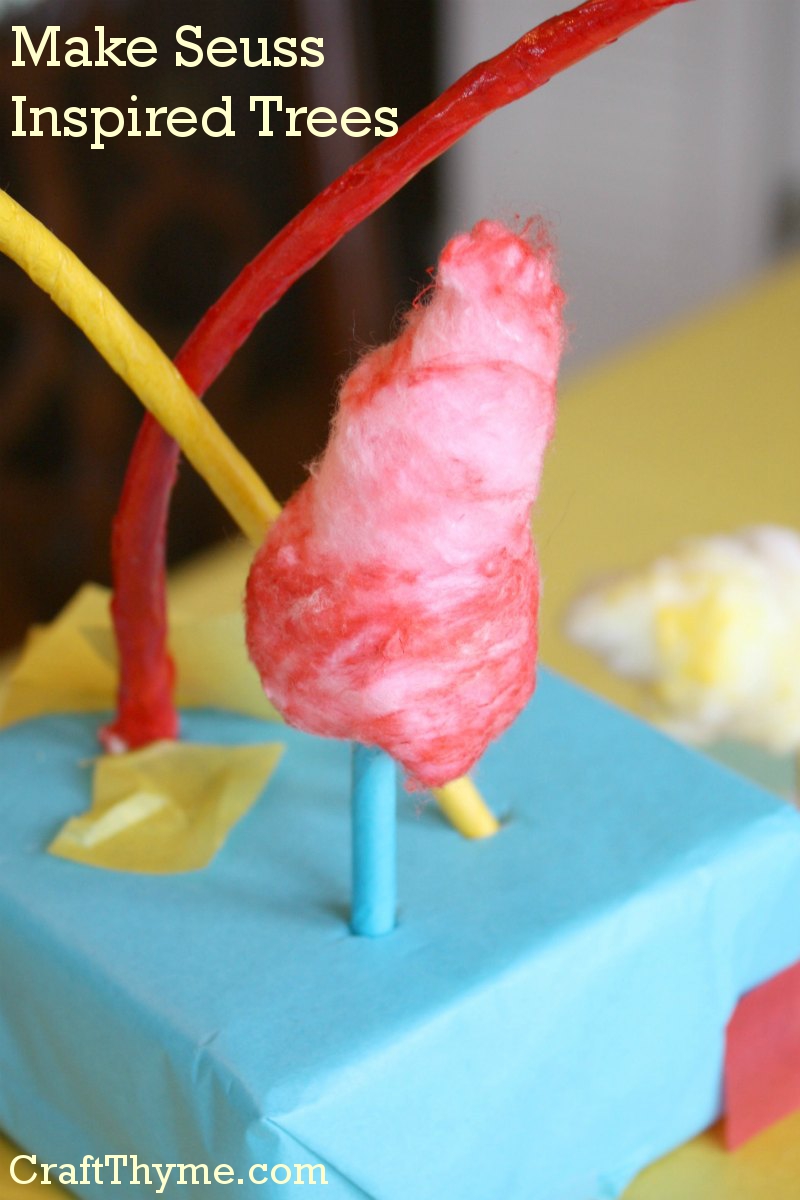
Want to make Dr Seuss inspired trees?  Then you have found the most esoteric tutorial on the web.  Hopefully this how-to will answer your extremely specialized questions.  I debated making a tutorial on how to create Seuss like trees, but I personally wanted to recreate the pointy-one in the first picture as some sort of whimsical Christmas decoration.  Plus I put some time in making these for Conlan’s Dr. Seuss themed first birthday, so why the hell not?

How to make Dr Seuss inspired trees
One of the most random tutorials on the web.


Supplies:

  • Dyed Cotton Balls (You can see a tutorial on how to dye them here)
  • Wooden Dowels or Bamboo Skewers
  • Styrofoam (Or something for a base)
  • Modge Podge (or thinned white glue)
  • Tissue Paper (Traditional Dr. Seuss colors are Yellow, Red, and Aqua/Turquoise)
  • Optional: Hot Glue

Step 1 Bending Dowels

Step 1 Bend Dowels


Soak wooden dowels or bamboo skewers in water.  I threw mine in a pot the night before: That means around 8 hrs of soak time.  This will make them supple enough to bend into curvy shapes.  You can see in the above picture that I just stuck mine in my, rather dirty, heating vent grate to dry.  You WILL break a few and some may split a bit.  I saved the broken pieces to make short trees, while, the splits can be trimmed off and will be covered in the next step.

After they were dry, I stuck ends into the bases to make sure that I had enough and to get an idea of the final placement.

Step 2 Adding Embellishment

Step 2 cover trunks
Holy Hell! I swear that is glue peeling off my fingers… Not some horrible skin disease.

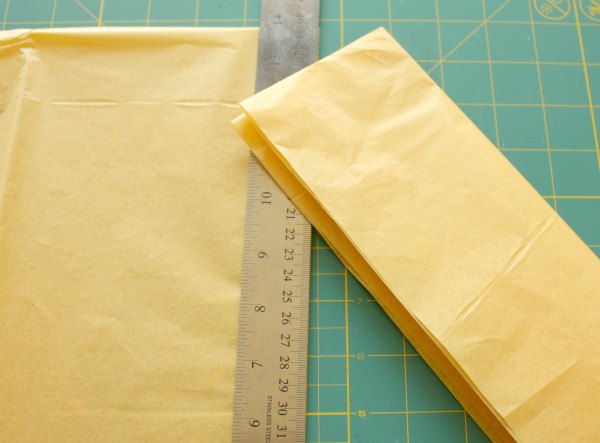
Dr Seuss’ illustrations of trees have color and curves and the magical element of poof.   To color the “trunks” cut a strip of tissue paper and lightly coat the dowel with a little glue.  Then wrap the tissue paper around the dowel.  You can leave a little on both ends uncovered as it will be sticking in the base.

Once covered, I lightly coated the tissue with  gloss Modge Podge to give the trunk a nice sheen and make sure the tissue was nice and stuck.

Step 3 Add Poof

Added the final touches
Pretend you are trying to make some amazing ‘Southern Hair’

Simply take the dyed cotton balls and lightly stretch them into cones, swirls, and puffs.  I then used hot glue to attach 1-3 cotton balls per tree.  To hide the unsightly bases I wrapped them in an extra piece of tissue and simply poked the bottom of the dowel through the thin paper.

You can see the complete Dr Seuss themed birthday party click here.

Related Tutorials:

How to Dye Cotton Balls: It is #1 in my post 11 Household Items You Can Dye: With Tutorials

Enjoy these articles?  Get periodic updates by joining my mailing list (no spam, no way, no how) or subscribing to my RSS feed.

Posted on 1 Comment

How to Make Thick Tissue Paper Fringe

Create thick tissue paper fringe

Creating a thick tissue paper fringed garland add a lot of texture to my Spring Photo Wall.  As an added bonus one single sheet of tissue paper will give you 4-6 feet of garland depending on how puffy you want to make it.  The picture below shows a single sheet of yellow tissue paper turned into the piece of garland:

Create thick tissue paper fringe
If anyone has a shorter name for this project please speak up!


Supplies

  • Tissue paper
  • Scissors
  • Sewing Machine

Step 1

Cut a single sheet of tissue paper into thirds down the long side of the paper.  Because I am lazy I folded mine in half to cut as you can see in the photo.  After cutting the paper into thirds fold each third down the long/lengthwise side.  This makes cutting the fringe much easier.

Step 1 cutting sheet into thirds
I know that is a lot of folding cutting instructions… But basically make each piece as long as possible.

Step 2

This is either the very easy or very time consuming part of the project.  Cutting the fringe.  I stacked all three pieces that were folded in half to cut the fringe.  Sure that is six layers…  But six layers of tissue paper is still pretty easy to cut.  You might not I have some awesome fringe scissors in the photos.  You can cut them one at a time, but for 12 dollars fringe scissors are awesome.  You’ll see that I left a lot of room in the middle.  I’ll explain why in the final step.

Cutting fringe in tissue paper
I’m just going to call these scissors of awesomeness.

Step 3

Unfold the tissue paper till each piece is flat and lay it on the sewing machine with the fringe on either side.  For more detailed directions on gathering you can see the post on making Easy Crepe Paper Ruffles.  But basically if you have a long stitch length and mess with the thread tension the tissue paper will gather itself a but to make the fringe fluffy and thick.  When you get to the end of the first sheet just overlap about an inch and keep going sewing to make as long as a garland as you need.  And then you are done!

Gathering the fringe
I’m lazy so sometimes a little of the fringe gets sewn in the middle. Trust me it doesn’t ruin the effect.

Notes

Sometimes when I was sewing really fast the feeder teeth would rip a little hole in the tissue.  It isn’t noticeable once the garland is done.  The thick fringe hides any lazy mistakes imperfections.

Enjoy these articles?  Get periodic updates by joining my mailing list (no spam, no way, no how) or subscribing to my RSS feed.

See more great crafts and decor at these link parties: Snippets of Inspiration

Posted on Leave a comment

How to Make Elegant Tassels From Tissue Paper

Elegant Tissue Paper Tassels

I spotted some tissue paper, tasseled garland on Pinterest and immediately wanted to make some for myself.  It was pretty plain, just some twists hung together.  But something about the fluttery colored tissue looked so good.  I started thinking about how it would be nice to replicate the tassels but make them more elegant, more like a home decor tassel.  So I came up with a quick way to add a rounded portion to the middle.

Elegant Tissue Paper Tassels


Supplies

  • Tissue Paper
  • Scissors (Rotary cutter speeds this along)
  • Cotton
  • Wire (Only if you really need to reinforce the tissue)

Step 1

I wanted to make a number of tassels in different colors at once so I stacked various colors together and cut long strips about 1/4 to 1/2 inch (and frankly all sizes in between).

Cutting tissue paper to make tassels

Step 2

Take two strips of paper and twist them together to make a tiny tissue paper rope.  Then repeat.

Making tiny tissue paper ropes
Twist and Shout!

Step 3

Make two bundles with about half of your strips.  Twist the middle together.  Uh…  Take a look at what I am talking about here:

Somethings are easier to show than describe

Step 4

Twist the two bundles together, curve them into a loop and tie with one of the tiny tissue paper ropes.  If you want added strength you can twist the two bundles around a wire, but I found they were pretty sturdy without it.

Creating the tassel top


Step 5

Take 1/3 of a cotton ball and roll it in your hands to make a tighter ball.  Gently separate the tissue paper pulling it back so you can get the cotton as close to the underside of the knot as possible.  Then pull the tissue around the cotton to cover it and secure with the second rope.  You can leave the rope ends or trim them off.  I also tended to straighten the bottom of my tassels after they are complete by trimming them a bit.

Creating the puff portion
Yeah, I consider the puff to add elegance. I mean we are discussing something made from tissue paper… how elegant can it get?


Notes

Pushing the bottom rope up gently will make the ball portion a bit more rounded.  You can get one tassel per half sheet of tissue paper.  Plus you can see the tassels in more detail at my Spring Garland Photo Wall post.

Enjoy these articles?  Get periodic updates by joining my mailing list (no spam, no way, no how) or subscribing to my RSS feed.

This post was entered at Shabby Creek CottageSomewhat Simple, Craft-o-Maniac, & Today’s Creative Blog.  Visit there for more great DIY’s, crafts, and recipes.

Posted on Leave a comment

Simple Garland: Twisted Tissue Paper Puffs

Twisty tissue paper garland

Want to make a cheap, quick and easy garland?  Then enter tissue paper.  The green garland in the picture is the one we are going to learn how to make:

Twisty tissue paper garland
Okay, so technically there are two green garlands in this photo… Focus on the bright one.


Supplies

  • Tissue paper
  • Scissors

Step 1

Cut long thin strips out of the sheet of tissue paper.  I made mine around 2 inches in thickness.  Feel free to eyeball it, you are going to be twisting it anyway.  So no cutting judges will be out to check your work.

Cutting strips of tissue paper
Do as I say and not as I do. An astute observer might note I cute these on the shorter side. It still works but you have to attach a ton more pieces together.

Step 2

If you folded the paper because you are lazy to make the strips quicker to cut then unfold each piece until it is a single thickness.  Take one end and begin to twist the paper through your fingers.  Gross, but useful tip: If you lick your fingers the twist will take tighter.  I mean you could probably dampen them with a sponge, but really…

Strips of tissue paper
If there was ever an action shot. This is it. #sarcasm

Step 3

Every 6 inches or so leave a gap in the twist of about two inches.  This will make the puff part.  When you come to the end of the strip overlap another piece by about 1 to 2 inches and twist it in.  It will take a little planning as you near each end so a puff doesn’t occur right as you are trying to add another piece.

Twisting the garland
Overlap, pinch, and twist. That is all there is to it.

Notes

The tissue paper is light enough that the twist holds all the pieces together without glue or tape.  However, I wouldn’t try scaling any castle walls with it.  Also one piece of tissue paper makes 12-16 feet of length.  So this project is very inexpensive.  Also to see more details of the garland in action you can go to my Spring Garland Photo Wall post.

Enjoy these articles?  Get periodic updates by joining my mailing list (no spam, no way, no how) or subscribing to my RSS feed.

Posted on 6 Comments

Crepe Paper Tutorials

Crepe and tissue paper decoration detail

I need some Spring color!  Enter: an array of tissue and crepe paper garlands, tassels, and streamers. For a list of crepe paper tutorials on how to make each and every item shown scroll on down!  Instead of making the regular ho-hum mantel display I thought I would give my entryway some Spring umph.  As an added bonus I set up an area to take some pictures of the kids,using the decorations as a photo backdrop.

Crepe and tissue paper decorations
You’ll note that none of the kids are actually sitting nicely enough for pictures. So I used myself.  Yeah I am really that pale.

Crepe and tissue paper is inexpensive and can be turned into garlands, tassels, streamers, puffs.  Basically it is some versatile shiznit if you want some cheap and fancy looking decorations.  I really wanted a mix of textures and colors.  You can see a bit of the variety in this detail shot.  After making them all, I hung them from some lightweight command hooks.  Easiest thing to make a temporary display, plus crepe paper is so lightweight it takes nothing to hang them.

Crepe Paper Tutorials


Since I basically had a love affair with tissue and crepe paper I have a ton of tutorials to offer:

Crepe Paper Tutorials

In the mean time check out some of the details:

Crepe and tissue paper decoration detail

Enjoy these articles?  Get periodic updates by joining my mailing list (no spam, no way, no how) or subscribing to my RSS feed.