Posted on Leave a comment

How To Make Galvanized Pipe Curtain Rods

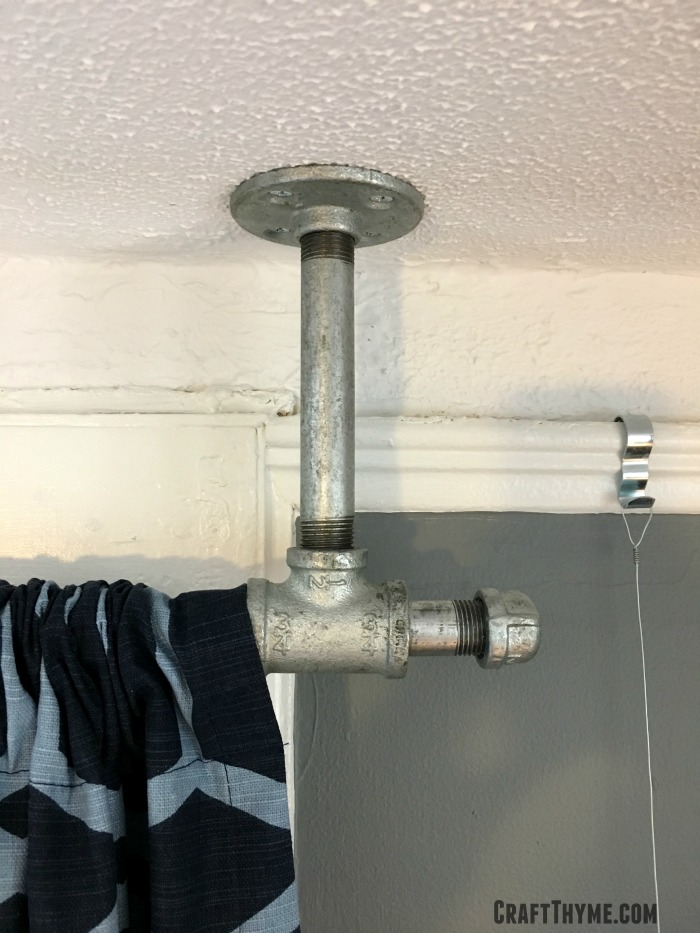
Tee ceiling mount pipe curtain rod

In our previous house we used black iron pipe for almost every single fixture. From pipe curtain rods to toilet paper holders we made them all.  Black iron pipe curtain rods were economical, easy to install, and fit the industrial decor of the previous home.  Once we moved down the street to a 1927 fixer upper we just didn’t feel the black iron was doing it for us.  Still it is hard to beat the price of a pipe curtain rod… Especially when you are looking at putting curtains and blinds over 54 windows (le sigh).  In comes our fancy take on pipe curtain rods with a couple of fresh designs in galvanized (silver) pipe.

Details of galvanized ceiling mount pipe curtain rods

Using galvanized pipe for curtain rods is not quite as economical as black iron, but still a shit-ton better than pre-made curtains rods, especially in the 8+ ft lengths needed.  We originally made replicas of the former pipe curtain rods that you can read about here.  However, it just wasn’t working for the installation and new space.  We needed something more ‘interesting’.  I came up with the random idea to install them from the ceiling.  Adam took that idea and ran with it!  He even came up with a few new end joints.

As typical for us we got most of the fittings from Zoro (affiliate links to follow) and got the actual lengths of pipe custom cut at our local home improvement store.

Supplies T- Connected Ceiling Mount Pipe Curtain Rod

Tee ceiling mount pipe curtain rod

Supplies Curved Ceiling Mount Pipe Curtain Rod

T – Connected Galvanized Pipe Curtain Rod

Step 1

Usually Adam writes these instructions since these pipe curtain rod styles are his creations, but I thought I would take a stab at it.  Plus how often do I get to write about nipples, rods, and elbows?  Ah yeah!

You’ll need to make two brackets to hold your rod.

  1. Connect a nipple to a flange.
  2. Connect a tee to the other side of the nipple.
  3. Hand-tighten everything

Step 2

Install one of the brackets in position from the ceiling.  Use appropriate fasteners.  We were able to hook into the lathe behind the plaster, but I highly suggest at least one or two drywall anchors meant to hold a lot of weight.  Maybe that is because we have small kids and I just picture them hanging on the curtains regularly…

If you are working solo then mount both brackets, measure, and try to line everything up so you can simply slide your rod into place when done. There is a little wiggle room on the brackets but you need to try to get them the same distance away from the wall and left/right from the window.

If you have two people it can be easier to mount one bracket where you want it and slide the rod with second bracket into place, then have your helper mount the second bracket.  It is a lot easier to measure the distance from your window in multiple places when the rod is already in.  (Insert giggles about rods)

Step 3

Slide the rod in to make sure you mounted everything correctly then back out one side and put your curtains on.  Then cap both ends.  Before you ask, yes, they will shift a bit in the bracket.  It has never bothered me.  When I open the right side it shifts right, then it goes right back to center when I open the left.  If you really hate the shifting aspect you could glue them in place (Use some construction adhesive meant for metal) or follow design option #2.

Galvanized pipe curtain rod

Ceiling Mounted Curved Pipe Curtain Rod

Step 1

Just like previously, you’ll need to make two brackets to hold your rod.

  1. Connect a nipple to a flange.
  2. Connect an elbow to the other side of the nipple.
  3. Hand-tighten everything

Step 2

This is where the assembly differs, step 2 & 3 get combined into one arm weakening installation.  Frankly although it adds a bit in installation time we highly suggest giving your galvanized pipe curtain rod a test fit.  This entails assembling the whole rod, sans curtain. To assemble simply put your elbows brackets on both ends of your rod.

You will likely need a helper at this point to help hold the curtain rod to the ceiling.  We checked to make sure we were centered with the windows and marked our mounting holes.  You can just go balls out if you like and do the next steps without a dry run, but I think you’ll be happier with the outcome if you test the assembly out first.

Then the fun begins! You will need to take one elbow bracket off put and put your curtains on the rod.  Then screw the bracket back in place assembling the whole thing completely.  Yes, now you will need to lift the whole mother-trucker into place, while not yelling at your spouse helper, and mount it.  While not horrifically heavy, you are still going to want to get that portion over quickly.

Galvanized pipe curtain rods and pulley light

After that you can stand back and admire your handiwork!  Oh yeah, that really is a fabulous DIY pulley light we will be showing you soon!

How to Make Ceiling Mount Pipe Curtain Rods


Posted on 3 Comments

Replacement Windows, The Finished Project Before and After

1927 house after replacing 52 windows

If you have been following along with our vinyl replacement window saga than you are probably more than ready to see the final product.  Here are some shots of what it looks like to have 52 original single hung windows replaced with new vinyl casement windows.  If you are interested in the process of having replacement windows installed you can read all about the process in the below pages.  Hopefully, all the information provided will allow you to circumvent some of the issues we had with installation of our replacement windows.

Oh and for full disclosure.  We paid for all of this work ourselves.  I am solely providing this information to help others out.  Home renovation is scary and costly at the best of times.  I wish I had some of this knowledge before going in on a major renovation like replacement windows for the first time in one unbiased place.

Everything You Need to Know About Replacement Windows: An Intro Primer

What to Expect When Installing Replacement Windows

Replacement Window Installation: The Actual Process

Capping A Metal Alternative to Finishing your Windows: Got Lead? Got Ugly? Capping Can Help

So now that you have heard all about the process of replacement windows it is time to actually see them in action!

Bam! Before & After

Before and after of vinyl replacement windowsYes, that is two of the 52 replacement windows in all of its finished glory.

And here is a nice set on the front porch

Replacement windows with metal capping for looks and lead safety.

Oh and it looks good from the interior too!

Follow our guide to have smooth vinyl replacement window installation.
I think it modernizes the house!  Which was great but also increased out tax value :(.  This picture is from our local paper by Maddy Jones.  You can see the article at the Citizen Times Website. While the increased taxes made us sad the lack of drafts and the crisp modern look was worth all the effort!

Posted on 3 Comments

Capping A Metal Alternative to Finishing your Windows: Got Lead? Got Ugly? Capping Can Help

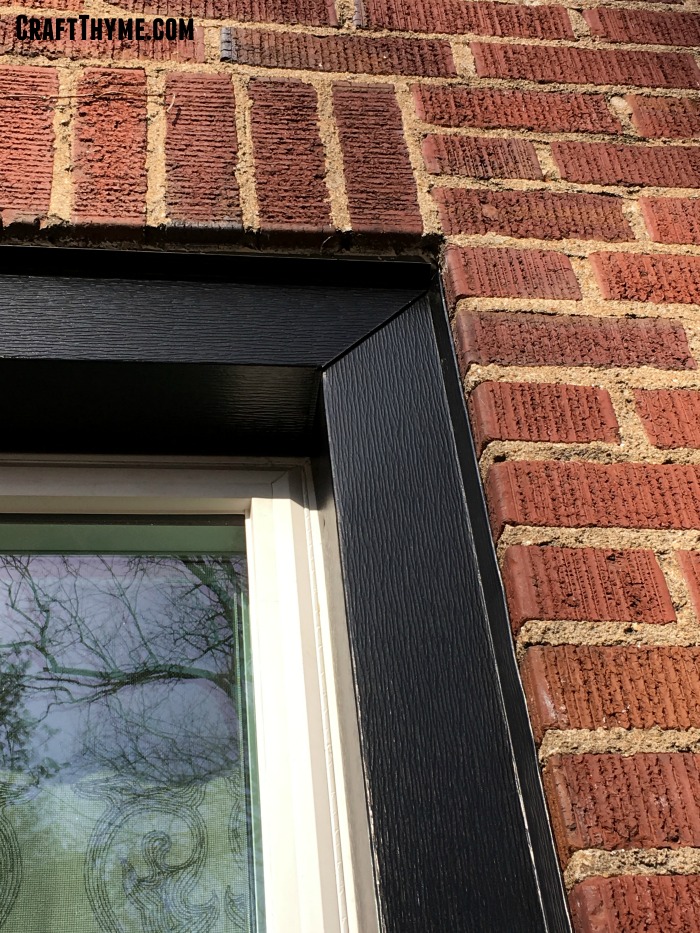
Mitered corners in plain frame metal capping.

As mentioned prior, we opted to have metal window capping, also know as metal window cladding, installed with our vinyl replacement windows.  Would metal capping be a good finish for your replacement windows?  Well that all depends on the look you are trying to achieve and if you have an older home and want to decrease lead exposure and abatement costs.

In our case we wanted to decrease the potential for lead paint exposure in our 1927 home.  We did not bother to test for lead we just went with the assumption that there was a good potential in our almost 90 year old home.  The exterior trim was in poor shape and hadn’t been repainted in years; with those two issues metal window capping seemed like a good alternative to scraping, painting, and reinstalling new trim after the replacement window installation.  If you want to read about the process from start to finish we have other information about replacement windows here:

Everything You Need to Know About Replacement Windows: An Intro Primer

What to Expect When Installing Replacement Windows

Replacement Window Installation: The Actual Process

Replacement Windows, The Finished Project Before and After


What is metal window capping

What is Metal Window Capping?

Metal capping is usually thin aluminum sheets that have been coated in color.  The metal is then bent to cover the trim.  I have heard of vinyl capping as well but we  only looked at window trim clad in metal.  One company offered a very thin aluminum sheeting that would be almost pressed around the current trim to give it a coating of thin sheet metal.  The assumption and description from the company is that the tight fit would more mirror the current fluted trim.  However, the thin pieces of metal would not be quite as protective.  The company we went with used a much more rigid material that could be manipulated to give flutes and bends or kept fairly straight for a modern look and provided a bit more protection.  The downside is it could not follow the original trim.

Damage to old trim prior to metal window cladding.
Trust! This trim is clearly not worth trying to save. Metal window capping to the rescue.

Differences in Window Capping

We learned the hard way not all capping is the same.  To this day I still am not sure why there was such a mess up with ours but our experience with capping went like this:

First, we got a deck of color options.  We went back and forth but settled on a black, with a slight bit of texture.  The plan was to have the rest of the trim, garage, and stucco painted in the spring.  We figured black would be easy to match and really set off the windows in the brick.  As the window company was getting ready to place our order they called to check back about the color selection.  The salesman suggested we might like a smooth matte aluminum window cladding instead of the slightly textured one we had chosen.  The textured one also had a semi-gloss appearance to the finish.  Well hell’s yeah!  Smooth matte black sounded perfect to give a modern finish to the house.  With no additional cost we were all like “order it up and count us in”!

However, in comes installation day for the first pieces of capping.  OMG no!  The process of installation scratched the ever-loving hell out of it.  Of course the installation crew says, yeah this is common with this flat matte finish.  That the original one we picked out is coated to reduce scratching…

Why this wasn’t mentioned at order time I have no idea.  I even asked for the differences between the one we chose and the one suggested…  All I can assume is that the salesperson did not know the difference.  *Sigh*  It took a week and a half to get the new (original) choice in, but the window company was more than happy to eat the cost of the one opened box and re-order a better solution.  It put the project behind even further on completion (as I write this there are installers banging away at metal sheets outside), but looks so much better than gouges with touch up paint.

So the moral of this story?  Not all metal window capping is the same.  Some of them have fade, scratch, and weather protection.  There are a variety of finishes as well as colors.  Additionally the thickness of the metal will provide protection but also dictate some of the final shapes that can be achieved at installation.  Make sure to get a UV resistant one if you are going with a dark or bright color.  Some fading over time is unavoidable but UV protection will help to manage and minimize the fading due to sun, hopefully, keeping your capping looking fresh far longer than a paint job would.

How Window Cladding is Installed is VERY Important

The installation of the window cladding is super important for two reason:

  1. Look
  2. Protection

First, the look of the capping is important.  As discussed above the metal capping can be bent into various shapes.  The window company originally tried to mimic our ornate trim.  They were more than happy to scale back to a very plain wrap at our request :).  Which was good all around because we ended up having some of the “hardest trim to cover” the window company had ever seen.  The bends and twists meant that they had to add wooden shims in any place they wanted to nail down the metal to keep from giving it ugly ripples and bends.

Shims are inserted on the exterior of these replacement windows to correctly apply metal window capping.
Shim, shimmeny, shim, shimmeny, shim, shim, sherroooo….

Which leads to the importance of #2: Protection

During our research we uncovered that one of the downfalls of capping is that if not installed correctly it can lead to damage inside the home.  It is very important that they install capping in a way that sheds water.  Otherwise you are creating a closed environment that will trap water against the old wood trim.  Obviously a recipe for rot and mold!  At this point in our installation we were on a first name basis with members of the crew and they were happy to walk us through why they were installing the trim as they were.

First the bottom sill layer went on.  It is done in one long piece with notches cut and folded up.  This will keep water off of the trim and sill.  The sides and middle layers are then installed straight up.  The straight join at the bottom is created to make sure to shed all water off of the windows and out of the sill.  A final top piece with mitered edges is installed to cover the top pieces and give a crisp finished look to the top.  Any places that gap a bit too much have a black caulk installed at the seams but not fully sealing the area so that it can breath and shed water.  If you look closely on the windows you can see there is a tiny channel on each of the replacement windows.  This channel holds the edge of the capping firmly along the window leaving no space for water to find its way in.

Correctly installed metal window capping
Just a touch of caulk was added to the bottom seam.

To Recap the Window Capping

Make sure to get a resilient metal material that can be installed in a way that will go with the overall look you are trying to achieve.  Secondly, think about long term protective coatings.  The cost difference was negligible but one coating was much more likely to withstand wear and tear.  Finally,  make sure your installation crew has a water plan in place.  Poor installation can create more problems with rot and mold than it solves.

I have to admit I was thoroughly impressed with the final result of the metal window capping.  It gave a crisper modern edge to the replacement window installation than would have been possible with a scrape and paint of the existing trim.  It also allowed us to install a lot more insulation than previously further cutting down on the drafts of an old home.Replacement windows with metal capping for looks and lead safety.