Posted on Leave a comment

How To Make Galvanized Pipe Curtain Rods

Tee ceiling mount pipe curtain rod

In our previous house we used black iron pipe for almost every single fixture. From pipe curtain rods to toilet paper holders we made them all.  Black iron pipe curtain rods were economical, easy to install, and fit the industrial decor of the previous home.  Once we moved down the street to a 1927 fixer upper we just didn’t feel the black iron was doing it for us.  Still it is hard to beat the price of a pipe curtain rod… Especially when you are looking at putting curtains and blinds over 54 windows (le sigh).  In comes our fancy take on pipe curtain rods with a couple of fresh designs in galvanized (silver) pipe.

Details of galvanized ceiling mount pipe curtain rods

Using galvanized pipe for curtain rods is not quite as economical as black iron, but still a shit-ton better than pre-made curtains rods, especially in the 8+ ft lengths needed.  We originally made replicas of the former pipe curtain rods that you can read about here.  However, it just wasn’t working for the installation and new space.  We needed something more ‘interesting’.  I came up with the random idea to install them from the ceiling.  Adam took that idea and ran with it!  He even came up with a few new end joints.

As typical for us we got most of the fittings from Zoro (affiliate links to follow) and got the actual lengths of pipe custom cut at our local home improvement store.

Supplies T- Connected Ceiling Mount Pipe Curtain Rod

Tee ceiling mount pipe curtain rod

Supplies Curved Ceiling Mount Pipe Curtain Rod

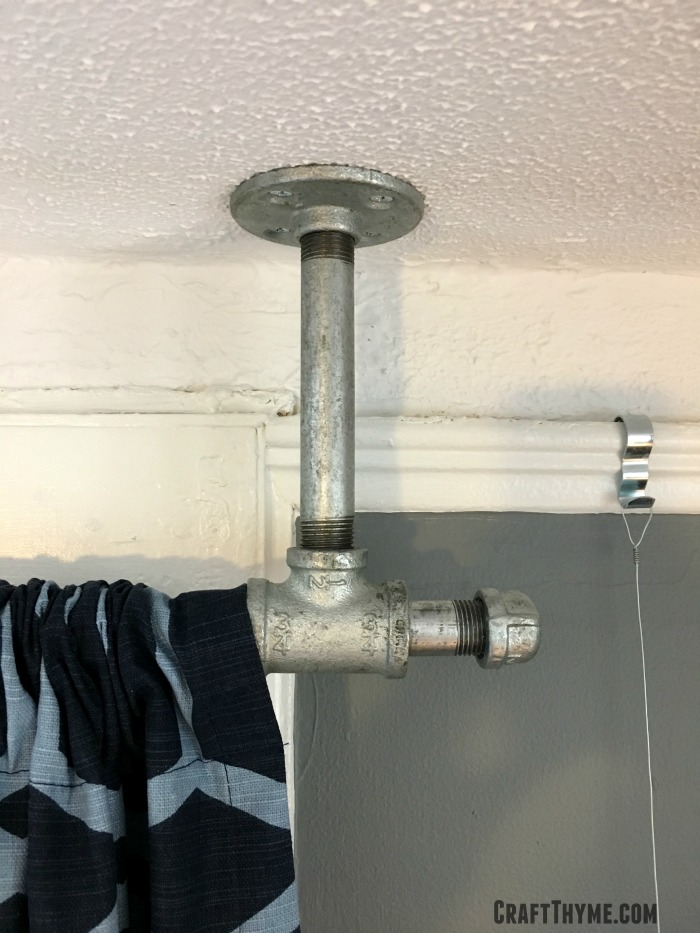
T – Connected Galvanized Pipe Curtain Rod

Step 1

Usually Adam writes these instructions since these pipe curtain rod styles are his creations, but I thought I would take a stab at it.  Plus how often do I get to write about nipples, rods, and elbows?  Ah yeah!

You’ll need to make two brackets to hold your rod.

  1. Connect a nipple to a flange.
  2. Connect a tee to the other side of the nipple.
  3. Hand-tighten everything

Step 2

Install one of the brackets in position from the ceiling.  Use appropriate fasteners.  We were able to hook into the lathe behind the plaster, but I highly suggest at least one or two drywall anchors meant to hold a lot of weight.  Maybe that is because we have small kids and I just picture them hanging on the curtains regularly…

If you are working solo then mount both brackets, measure, and try to line everything up so you can simply slide your rod into place when done. There is a little wiggle room on the brackets but you need to try to get them the same distance away from the wall and left/right from the window.

If you have two people it can be easier to mount one bracket where you want it and slide the rod with second bracket into place, then have your helper mount the second bracket.  It is a lot easier to measure the distance from your window in multiple places when the rod is already in.  (Insert giggles about rods)

Step 3

Slide the rod in to make sure you mounted everything correctly then back out one side and put your curtains on.  Then cap both ends.  Before you ask, yes, they will shift a bit in the bracket.  It has never bothered me.  When I open the right side it shifts right, then it goes right back to center when I open the left.  If you really hate the shifting aspect you could glue them in place (Use some construction adhesive meant for metal) or follow design option #2.

Galvanized pipe curtain rod

Ceiling Mounted Curved Pipe Curtain Rod

Step 1

Just like previously, you’ll need to make two brackets to hold your rod.

  1. Connect a nipple to a flange.
  2. Connect an elbow to the other side of the nipple.
  3. Hand-tighten everything

Step 2

This is where the assembly differs, step 2 & 3 get combined into one arm weakening installation.  Frankly although it adds a bit in installation time we highly suggest giving your galvanized pipe curtain rod a test fit.  This entails assembling the whole rod, sans curtain. To assemble simply put your elbows brackets on both ends of your rod.

You will likely need a helper at this point to help hold the curtain rod to the ceiling.  We checked to make sure we were centered with the windows and marked our mounting holes.  You can just go balls out if you like and do the next steps without a dry run, but I think you’ll be happier with the outcome if you test the assembly out first.

Then the fun begins! You will need to take one elbow bracket off put and put your curtains on the rod.  Then screw the bracket back in place assembling the whole thing completely.  Yes, now you will need to lift the whole mother-trucker into place, while not yelling at your spouse helper, and mount it.  While not horrifically heavy, you are still going to want to get that portion over quickly.

Galvanized pipe curtain rods and pulley light

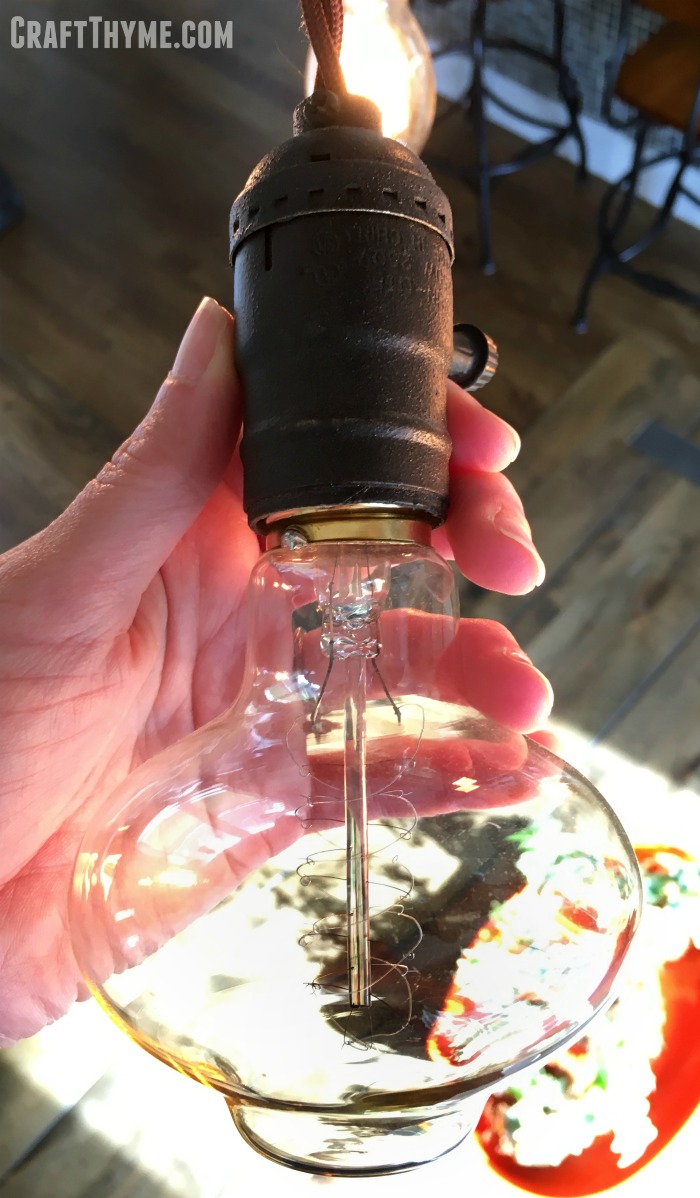
After that you can stand back and admire your handiwork!  Oh yeah, that really is a fabulous DIY pulley light we will be showing you soon!

How to Make Ceiling Mount Pipe Curtain Rods


Posted on 20 Comments

Edison Bulb Chandelier: A DIY Overview

A flattened edison bulb makes a unique touch to a light fixture

Our DIY Edison bulb chandelier occasions the most comments both on and off the website. It is the second highest source of interest in our home besides the gardens. Adam designed and created this industrial light fixture with 15 Edison light bulbs shortly after we moved into the house at Burk. The original light was pretty, but small and certainly not anything to get excited over. It did feature a single Edison light bulb that kind of kick started our creativity. That bulb was what lead to our industrial and pipe theme throughout the house. Unlike many of our tutorials we do not have the step by step photos of how to build an Edison bulb chandelier, however, we can give you a rundown, tutorial links, and supplies so that you can likely make an Edison light fixture of your own.

Designing an Edison Bulb Chandelier

As I mentioned above our main fascination started with Edison light bulbs and we have been meaning to blog about this Edison Bulb Chandelier forever.  Now that we are working on the new house we thought it would be good idea to catch up on some of the old projects that never made it to the blog.

A flattened edison bulb makes a unique touch to a light fixture

Do you know how many different types of Edison bulbs there are? We didn’t either, but in researching the project we founds tons of different shapes, styles, and prices. OUCH! Edison light bulbs are not exactly cheap… Below I am going to link to some options using my affiliate links. These links make it easy to purchase everything you need but I’ll let you in on a little secret. If you are patient and willing to go the Ebay route you can cut the costs of building and Edison bulb chandelier in half, easily! We sourced all of our material by bidding on lots of Edison bulbs, brass sockets, and cloth covered wire that mostly shipped from China. That means we have a ton of extra bulbs (saving those for when others burn out) and had to wait a couple weeks for items to arrive. If you can’t wait then go the Amazon route. You will pay a bit more but the items arrive much sooner.

In designing ours we knew we wanted to match the bronze fixtures, industrial design, and incorporate modern with traditional. Wait… did I say bronze? Oh yes, I faux finished every socket. The cost savings of buying brass over bronze was enormous! We brought the traditional/vintage feel in with the cloth covered wire and worked gave it a modern feel with the salvaged wood box top. Adam did a lot of research and consultation about power to make sure that we could make a fixture that could safely handle 15 bulbs. We also decided it would be cool to have them where each individual light can turn off and on. It allows us to mix up which bulbs are showcased and when we need a really bright source of light we can turn them all on.

DIY Industrial light fixture tutorial

Edison Bulb Chandelier Supplies

Basics of Edison Light Fixture Assembly

Step 1: Assemble Your Supplies and Make Your Boxes

As mentioned above we spent a good deal of time getting our supplies hunted down through Ebay. Once they arrived we did the following:

  1. Created a Box: You can use this headboard tutorial to get an idea of how to stain the salvaged wood. Attach the wooden slats to a basic frame like we made in with our potato boxes
  2. Faux Paint Sockets: If you aren’t happy with the original color you can faux finish them to a cast iron or bronze color
  3. Decide on Lengths of Cloth Covered Wire: We chose varied height so we needed to cut a variety of wire lengths
  4. Decide on Light Placement: Since we went with varied height of wire we decided to keep the placement in three simple rows. We drilled holes that were sized to just allow the cloth wire through without have a huge gap that needed covering.

How to make an edison bulb chandelier

Step 2: Start Wiring

Working with wires is not my thing… I know the basics but usually Adam handles this step. We did not have pictures and suggest googling wiring tutorials. Please be extra careful when wiring anything!  The basics go:

  1. You will need to attach the wire to each socket.
  2. Then each socket will need to be wired into the boxes.
  3. Boxes will need to be chained together

Step 3: Hanging the Fixture

We attached two heavy duty hooks to ceiling joists. The wood on this fixture makes it heavy! We used two loops of chain on either end. They are attached on the interior near each corner with smaller hooks and the loop of chain is simply hung over the hook. We used the loops, chain, and hooks for two reasons. First, so because they are heavy duty enough to hold the fixture. Secondly, the chain allowed us to hang the fixture lower than intended at first. This is important as you will need to hang the fixture and then wire it into your home’s power. PLEASE REMEMBER TO TURN OFF THE POWER BEFORE WIRING. I highly suggest turning off the main breaker while doing any wiring. It is just not as safe to turn off the breaker in the room you are in. It is waaay to easy to mistakenly turn off the wrong breaker and go to wire live wires.

Anyway, back to why we chose chain for mounting: It was way too heavy for someone to hold the entire Edison bulb chandelier while someone else wired it in. Plus you needed the space from the ceiling to the top of the industrial light fixture to actually do the wiring. Once it was all wired up, I used my small hands to reach in and hook each corner higher on the chain till we just had a tiny gap from the ceiling. It covers the hooks so that it appears to be a floating mount. It was way easier to hoist it link by link than try to tie off rope or wire in a new position.

Mae a custom edison light fixture

Step 4: Testing and Finalizing Your Design

Step 4 should probably go before the hoisting mentioned in step 3. No sense getting the fixture in the final position without making sure it all works. We tested each light to make sure all connections were secure with a single light bulb. That way you do not have to wonder if the bulb is broken if a socket does not appear to work. takes out all the process of elimination. Once we were sure all the wiring was in correct working order we hoisted it to the final position and then had a blast trying out different bulbs. We fiddled with all the types we purchased and played with placement and which ones looked good on and off. It took way longer than anticipated to find a good balance with the variable lengths and sizes of Edison bulbs, but it was fun to do. The final result still changes from time to time as we turn them on and off. In two years we have only had one bulb burn out and need replacement.

Since we do not have all the step by step pictures of how to assemble the Edison bulb chandelier please let us know if you have any questions in the comments. We are always happy to help and would love to see what you create!

Check out this tutorial on how to create your own DIY Edison Light Fixture. It is easy to make a great looking industrial light fixture for your home!

Posted on

Building a Custom Industrial Wooden Desk

DIY stacked wood desk tutorial

The only thing that appears to be constant in our lives is change.  Our youngest son just began walking, he and the next youngest have moved into the same room, Brianna and I cleaned out our master closet, moved a dresser into said closet to further our organization effort, our oldest started Kindergarten, and Brianna had a career change that sees her working from home periodically.

Realizing that we have no good place to work (much less concentrate) amidst the chaos of our family of six, creativity was forced upon us.  We’ve always lacked an office space in our home (and with 6 people, we have no free rooms!), so our ability to set aside such a space has been significantly limited.  Moving Keaton in with Cooper freed up a nice little corner of our master bedroom.

We’d looked at buying an industrial desk for our space, but we couldn’t find that perfect piece.  Everything we’d looked at was either the wrong size or the wrong price.  So, as typical, we decided to build something of our own!

DIY stacked wood desk tutorial

Supplies

Craft Thyme

Brianna and I measured our available space, and after drawing out a few different options, our plan was to build an industrial desk that was 18″ D x 40″ W x 30″ H that matched the general décor of our home.  Follow along below to see how we got there and let us know how we did!

Lumber Selection and Initial Cuts

As always, pick out lumber that speaks to you.  On the random Tuesday that I took off of work to focus on this build, the hardware store had some great, partially grayed untreated lumber.  (Stress the on the untreated) Selection of colorful, knotted, and straight wood was easy. On to the lumber prep….

Step in creating DIY industrial desk from lumber and pipe

Given that the actual dimension of a 2″ x 4″ is 1.5″ x 3.5″, the easiest way to get to 18″ was to stack 12 2×4’s together (18 / 1.5 = 12).  Super easy!

To get to 40″ wide, all we had to do was cut 40″ sections out of our lumber.  If you’ve done the math, you’ll see that I have waaaaay more lumber than I needed for this project.  Why have have 600″ when all I really need is 480″?  I do this for two reasons: 1) I want to be able to use the most interesting sections of the lumber, and 2) I’m probably going to mess something up at some point.

There are multiple ways to handle your cuts.  You can cut all 40″ sections and call it good, or you can strategically cut random length sections whose total lengths equal 40″.  I chose the latter.  With this, I don’t have a true final cut list for you, constant reader.  Make it random and make it awesome.

But we didn’t stop there… oh no, that would be too easy.

Step in creating DIY industrial desk from lumber and pipe

While stacking 2×4’s together gave us the right depth dimension, there were two readily apparent design flaws:  1) 2×4’s aren’t square, they’re rounded squares; and 2) the thing was going to be really freaking heavy.  To remedy, we broke out the table saw and ripped both sides of the previously cut 2×4’s to make everything nice and square.  We ended up taking off around 1/4″ from each side.  The end result was nice, square lumber that weighed an average of 7% less.

“Assistance Needed in the Pipe Cutting Area”

Having drawn out the basic design for our industrial desk’s frame (using Pencil*), we already had an idea of how we wanted to put things together.

Sketch for our tutorial on creating a DIY pipe desk for our industrial decor.

We’d ordered everything except for the long length of pipe from Zoro.com and started calculating the lengths we would need to finish the frame’s build-out.  I pre-assembled the feet of the frame, connected the front feet to the back using the 12″ nipples (such a silly term for a foot-long pipe), and started measuring.  We needed the bottom of the desk for fall at 27″ high, and with some simple subtraction, we’d come up with the following pipe cut list:

  • 2 – 24 (Front legs)
  • 2 – 20 (Back legs)
  • 1 – 32 (Back brace/Foot rest)

At that point, it was off to Lowe’s!  Remember, your local big-box home improvement store will cut and thread pipe for you – most of the time for free!

Putting the Pieces Together – Industrial Desk Frame

Hands down, the easiest part of this project is the desk frame assembly.  In a nice, open area, lay all of your pipe parts out and start putting things together as you’d planned.  There’s no right or wrong order in this step.  Give everything a good hand tightening as you get the pieces in their final position.  Once you secure the frame to the desktop, everything will be stationary, so there’s no need to use any tools to aid you in this step.

Tutorial on how to create an industrial desk from wood and pipe
(Colorful Balls and Toy Cars Optional)

If you’ve got a long enough level, go ahead and check your frame at this step in the process.  Yes, you can always make adjustments later if necessary, but it is easiest at this point.

Putting the Pieces Together – Desktop

This step takes both time, and patience (frankly, personality traits I typically lack)….

Using large clamps and as flat of a surface you can find, lay out 2-3 pieces of your previously cut lumber in the order you’d like them glues together.  Liberally apply wood glue to the back of your face board (I am a big fan of the squiggle application method), but it up against the second piece of lumber in the series, and clamp that baby together as hard as you can.  For best results, clamp both on the ends AND in the middle.  Repeat this steps as many times as you have clamps on hand.

Step in creating DIY industrial desk from lumber and pipe

Then wait….

Most wood glues actually have a drying time of only one hour.  So while this process takes patience, you can probably knock it out over the span of the afternoon.  Once your newly glued sections have set for their hour, continue this process for your remaining pieces of lumber.  When you have 6 stacks of two, start gluing those together.  And so on, and so on.

Depending on the size of the clamps you have, the last step of combining two stacks of 6 may be difficult (or frankly impossible).  I had this problem, and for me, this spawned creativity.  I went under the house and pulled out my crank straps.  You know, the ones you use to tie a king-sized bed to an SUV that’s as wide as a full-sized bed?  Believe it or not, these types of tie-downs make excellent large application clamps.  Do your final gluing, wait an hour, and drink a beer as most of the hard work is complete.

Flattening out your Desk Surface

There are multiple ways to achieve that perfectly milled work surface.  The BEST way is to use a mechanical planer to do the job for you.  Unfortunately, we don’t own one of these bad boys.

So… we did what we could the old-fashioned way and used multiple grits of sandpaper to knock down edges quickly.  As you’ll see below, there are lots of wood joints, knots, and saw blade “imperfections” that would make writing on this newly made solid surface rather difficult.  Hitting the desk top with heavy-grit sandpaper on the powered hand-sander will take care of any significant surface changes.  When finished with the high-grit, move to medium-grit across the whole surface, and finish it off with a fine-grit.

Tutorial on how to create an industrial desk from wood and pipe
Before Sanding
Tutorial on how to create an industrial desk from wood and pipe
After Sanding

Time to Stain and Poly

Choose your favorite stain(s) and desired polyurethane and get to work.  For this project, we alternated the use of Minwax Early American with Rustoleum Dark Walnut.  “Color blocking” best describes my technique on this particular piece: A block of one color here, a block of the other color there.  Randomize the application of the stains (if you’re using more than one), wipe away, and see how it’s turning out.  You can always make areas darker if need be by allowing for longer set-times or applying a darker stain over a lighter area.

Tutorial on how to create an industrial desk from wood and pipe

Step in creating DIY industrial desk from lumber and pipe

I’ll admit, once the stain had been applied and had dried, I couldn’t wait to see how the industrial desk looked on the frame.  So… rather than apply the coat of poly on my nice grocery-bag covered work space, I hauled it outside and set it on the frame to get a sneak peek of what the final product might look like.

Tutorial on how to create an industrial desk from wood and pipe

Being happy with the progress we’d made, I decided just to keep the desktop sitting on the frame in order to apply a coat of Minwax Semigloss Polyurethane.  I also went ahead and used some bronze colored wood screws to mount the desktop to the frame.  One coat of poly was enough for this project.  Let things dry as per the provided instructions.

Tutorial on how to create an industrial desk from wood and pipe

Finished Product

Pipe legged desk and stacked wood top. Tutorial included.


Tutorial on creating an industrial desk from black iron pipe

How to make an industrial desk from pipe

Posted on 72 Comments

Industrial Pipe and Wood Bookshelves

Using pipe to make industrial brackets for shelves.

Remember our posts on Achieving an Industrial Décor with Black Iron Pipe – Part I, Part II, and Part III?  In this post, Brianna and I are back for more tips on adding functional industrial décor with a quick tutorial for building some pretty awesome industrial pipe bookshelves with – you guessed it – black iron pipe and spare lumber.

Using pipe to make industrial brackets for shelves.

Throughout our travels, Brianna and I have collected knick knacks from across the globe to remind us of where we’ve been, what we’re capable of, and where we can go if we put in the effort.  Unfortunately, these precious mementos rarely have a place in our home at the time of purchase.  This can lead to what might as well be a four-letter word: CLUTTER. (gasp)

Trying to get a handle on cleaning and clutter management in the new year, I can’t tell you the number of clickbait posts we’ve admittedly clicked on this January claiming hold the secrets to the latest storage and organization techniques that will completely transform your home.  Let me save you the trouble of clicking through the masses and boil everything down into one simple point for you:  Everything has a place.   If your clutter isn’t in it’s place, put it there.

Our problem?  We’d run out of space.  The solution?  Build more space! (In the form of bookshelves in our master bedroom)

Supplies

You can take a lot of liberties on how you attack this project.  Styles and wall sizes vary, and the supplies listed below are those used for this particular adaptation.

Industrial pipe bookshelves from pipe tutorial with step by step how to

In this project, we built 4 industrial pipe bookshelves in three different styles:

Short Shelves (times 2):

Long Shelf (Standard)

Long Shelf (Over Desk):

Craft Thyme

For each shelf, the basic steps are the same:

  1. Select your lumber,
  2. Cut your lumber to size,
  3. Sand, rough, and buff,
  4. Cut your mounting holes,
  5. Test fit,
  6. Stain and poly,
  7. Assemble, Mark, Disassemble, Install, and Reassemble

Select Your Lumber

Selecting your lumber is strictly a matter of personal preference.  You’ll do best to find a piece of wood that speaks to you.  Spend time digging through the lumber stocks searching for that perfect knot, grain, or imperfection.  For this order, I decided to leave the lumber we used up to the random choosing of a Lowe’s employee by ordering online for in-store pickup.

Cut your Lumber to Size

Each wall we were looking to fill was 62″ wide.  Not wanting to fill the space from edge-to-edge, we chose 46″ for the widest (bottom) shelf and a smaller 20″ shelf to be placed as a higher accent piece.  Cut your lumber to size using whatever mechanism you have at your disposal.  We used our smaller miter saw to make the cuts.

Sand, Rough, and Buff

Once your cuts have been made, you’re going to want to distress your wood a bit.  Why?  1) It looks cool, and 2) SAFETY!  The way we’re going to mount the shelves will leave them sticking out 8″ from the wall.  Sharp, fresh cut lumber corners jutting out from a wall are just an accident waiting to happen.

Industrial shelves from pipe tutorial with step by step how to

Take some time to sand down your newly cut corners and edges.  Feel free to be overly drastic in how you do this – it will surely make your end result that much better!  And leave those imperfections there for everyone to see.

Cut your Mounting Holes

Symmetry comes naturally to me; it’s just the way my mind thinks.  (Brianna loves and hates this about me all at the same time.)  For this project, I chose to drill out the mounting holes in the same position on either side of the shelves-to-be.  Symmetry could be optional for you, just ensure that your shelf is properly supported in the design you chose to go with.

Industrial shelves from pipe tutorial with step by step how to

Use a 1-1/8″ hole saw or drill bit to cut the holes for your 3/4″ wide pipe.  I’ve tried this many different ways (including rocking a 1″ bit when drilling) in an attempt to find the perfect hole size.  Trust me, 1-1/8″ is the way to go.  There’s no need to sand these cuts (unless you’re more of a perfectionist than I am), because the actual opening will be hidden in the final product.

Test Fit

It goes without saying that you should test fit your pipe into your newly drilled holes.  Use the 2″ nipples to make sure that they fit well.

Industrial shelves from pipe tutorial with step by step how to

If they fall right through, don’t worry and remember that you’ll have a pipe cap and an elbow or tee on the other end for support.  If the opposite happens and you find that your pipe doesn’t fit into your hole, you can either try the rocking method mentioned earlier (not recommended – you can hurt yourself if you aren’t careful), or use a rubber mallet to tap the nipple into place.

Stain and Poly

Once your lumber has been properly cut, sanded, and drilled, break out your favorite stain and polyurethane finish.  For this application, we used Minwax Early American as the stain, and Minwax Semi-Gloss Polyurethane as a finish.  Apply the stain, let it dry overnight if possible, and apply the poly the next day.  Waiting for everything to dry is the hardest part, but the end result is well worth the wait.

Assemble, Mark, Disassemble, Install, and Reassemble

Yes, it sounds like a lot of steps in one, but at least they’re simple:

  1. Go ahead and assemble each shelf as you intend.  HAND TIGHTEN ONLY.   (Interested in what we did? See the final orientation of parts in the photos below.)
  2. With a partner, hold and level the shelf where you’d like it to hang.
  3. Mark the holes in the flanges with a pencil.  (Pro tip: Have two pencils – one for each of you.  You’ll avoid yelling about loosing level status this way)
  4. Pull the shelf down, and disassemble.
  5. Install your drywall anchors where your marked your flange holes.  (I go over the top here and use anchors capable of supporting 143 lbs each)
  6. Install your flanges (only) using your freshly installed anchors and provided screws.
  7. Into the flanges, install all of the hardware you plan to install besides the shelf itself and the black pipe caps.
  8. Install your shelf over the nipples that you test fitted earlier.
  9. Secure your shelf by adding the black pipe caps to the nipple peering out of your shelf.  A strong hand-tightening should be sufficient to ensure stability.

The Final  Industrial Pipe Bookshelves

DIY pipe shelf tutorial with directions

DIY pipe shelf tutorial with directions

Industrial shelf made from pipe.

DIY industrial shelves. Tutorial and instructions.

DIY pipe shelf tutorial with directions

DIY industrial shelves and pipe desk. Tutorial and instructions.

How to make diy industrial shelves from black iron pipe.

Posted on 4 Comments

Building an Industrial Table Lamp

How to DIY an industrial table lamp. #industrial #table #lamp

Unexpected Accent Décor

As you’ve seen from our previous posts on achieving an industrial décor (check out Part I, Part II, and Part III if you haven’t already), Brianna and I are always looking for ways to carry our theme throughout our home.  At the same time, we also don’t want to be ALL UP IN YOUR FACE about it either.  The last thing we want is for it to feel like you’re walking into a warehouse when you enter our home.  So how do we find that careful balance?

Focus and subtlety. We try to be very careful not to go overboard in any single space.  Our mantra:

  • If you’re going to have a big piece in a room – limit it to one big piece.
  • If you need something more – add interesting, eye-catching accent pieces as appropriate.
  • Add items you love/have sentimental value!!! (Added by Brianna)

The goal is to keep the focus where you intended (that’s why you went with that big piece in the first place, right?) and to add pops of décor that are interesting and don’t pull your focus (for too long).

You recently saw how we added a salvaged wood headboard to our master bedroom.  In this post we’ll take a closer look at one of our favorite accent pieces in our bedroom, and more importantly, show you how to build it!

Building a Meat Grinder Lamp

Yes, we built a lamp out of a meat grinder.  Why?  Honestly, I was walking through the Antique Tobacco Barn, saw an awesome, rusted old meat grinder for a great price and declared “I’ll do something with that one day!”  That something turned out to be a bedside lamp.  How’d we do it?  Here you go!

Supplies

  • Meat Grinder (one that has seen better days)
  • Steel Wool
  • Light Socket
  • 3 feet of 18-Gauge Lamp Wire
  • 2-Wire Electrical Plug
  • Edison-Style Light Bulb
  • Super Glue
  • Foam Paint Brush (optional)
  • Small Amount of your Favorite Paint Color (optional)

Preparation

Depending on how loved or neglected your meat grinder was in its past life, you may or may not have a lot of work ahead of you.  Our grinder had a lot of surface rust, an unknown white substance, and a few “bits” still rattling around inside. While we wanted to keep the repurposed look-and-feel, we wanted to clean things up a bit before putting it on the nightstand and touching it every day.  Enter the steel wool.

Dismantling your meat grinder should be pretty easy.  On any given model, there are typically only 5-6 parts, none of which should be sharp of warrant the use extreme caution.  Remove each component, and get to scrubbing with the steel wool.  The steel wool will do a great job at knocking away much of the neglect of the years while still preserving the harsh metallic look.

Our grinder’s wooden handle was pretty (ok, really) grimy.  As an optional step, or for a pop of color, consider sanding or painting your grinder handle.  We chose to use the same orange from our Pantry Door Project.

When done, wipe down your pieces and re-assemble the meat grinder.

How to DIY an industrial table lamp. #industrial #table #lamp

Assembly

Step 1: Wiring up your light socket

Light sockets are fairly easy to come by in a number of different styles from your local big box store.  We had ours from a past project where we had applied a faux cast iron finish.

Fortunately, the skill level required here is novice.  I know this is scary, but I promise you, it’s not.  You can do this!

  1. Remove the base and top sheath of the light socket.
  2. Slide the base of the light socket onto your lamp wire.  (DO NOT SKIP THIS STEP)
  3. Strip one end of your lamp wire, twist the wire, and shape it into a “candy cane” that will hook around the one of the screws of the light socket.
  4. You’ll likely need to loosen the screw on the light socket in order to hook your newly curved wire.
  5. Do this, then tighten the screw with the wire snugly placed between the screw and the metal backing of the socket’s center.
  6. Repeat for the other wire and side of your socket.
  7. Replace the top sheath of your light socket and push it down into the base.  You should feel/hear a click when the socket is re-attached.

Step 2: Wiring up your lamp’s plug.

This step is very similar to the light socket wiring.  As in exactly similar.  Here are your easy to follow steps:

  1. As you did before with your socket, remove the housing from your electric plug.
  2. Slide this housing over your lamp wire.
  3. Again, strip one end of your lamp wire, twist, curve, hook, and screw.
  4. Repeat for the other side of the plug/wire.
  5. Replace the plug housing.

Your lamp circuit is now complete! At this point, you can test your new creation by adding a light bulb and plugging in your lamp.  Utter the phase “Let there be light”, turn your switch, and be amazed at your ability to create light!

Step 3: Attaching your “lamp” to the meat grinder

Nearly all meat grinders have a bolt at the bottom (our new top) that is used to mount the grinder to a table or counter.  If not already removed, take it out.  Feed the other end of your lamp wire through this hole.  Get geared up for more wiring!

Bring out the super glue!  Admittedly, we used Gorilla Glue, but anything will likely work.  I like Gorilla Glue because it’s not activated till you add a little water.  It’s my way of making sure that I don’t glue myself to myself.

Unplug your lamp!  This isn’t completely necessary, because as you now know, the actual electrical connections are inside the socket, but we always err on the side of caution.

You’ll want your socket to sit directly on top of the former bolt hole.  As you can see from the photo, while the very bottom of the socket just BARELY fits inside the hole, a majority of the socket rests on top.  And that’s okay!  Add a good drop of glue and set your socket on top.  Gravity was enough to assist us in the drying process, but clamping may be necessary.  Let your baby dry as long as you can.  I know it’s exciting, but this is something you’re going to use regularly; let is sit so it can take the brunt of regular use.

How to DIY an industrial table lamp. #industrial #table #lamp

Step 4: Completion and Admiration

When your lamp is dry, go ahead and add your favorite light bulb.  We’ve collected more than 10 different styles of Edison bulbs over the last few months and opted for the “Christmas Tree” filament bulb.  Plug in your lamp, flip the switch, grab a libation of your choice (wait until after the electrical work is done for this step), flip the switch, and admire your handiwork.

Pro tip: Buy Edison-style bulbs on eBay.  We were able to snag our bulbs for around $2 each as opposed to $7 each in your big box stores!

How to DIY an industrial table lamp. #industrial #table #lamp