Posted on 18 Comments

Modern Art: Concrete Style

Basic Orange Ombre Modern Art

I have a confession, I have never been a huge fan of modern art.  Having studied the theory and history behind a larger portion of 20th century art I have an appreciation for the merits… but the aesthetics… meh, not my thing.  Let me tell you, that was not a popular opinion in art school.  However I have a modern house, with industrial decor.  This has changed my viewpoint.  It takes a lot more work to integrate a classical oil portrait with our furnishings.  In fact, I felt like we needed some modern color in our rather neutral decor instead of some classical portraiture.

If you follow me on Pinterest (you should!) then you would have noted the love affair I am currently having with concrete.   I was reading a post about making a faux concrete counter top using a product called feather finish when I came up with the idea to make some modern art that would incorporate concrete finishes.  Color and concrete say what?!  Adam was confused when I tried to explain, but luckily he was the kind to just go with it.

A few Michael’s coupons and a trip to Home Depot later you have my DIY take on modern art.

Modern Art: Concrete Style

DIY modern art with concrete and gold leaf finishes

Supplies:

Canvases*

Gold Leaf Sheets* or a Gold Leaf Kit* (which includes the sizing and sealer)

Adhesive* (also called Sizing*)

Sealer*

Feather Finish* (HINT: Ardex has partnered with Henry to make a feather finish you can get at Home Depot, but here is my Amazon Affiliate link if you want the real thing shipped to your door)

Paints*

Brush Set*

Step One: Lay it out there

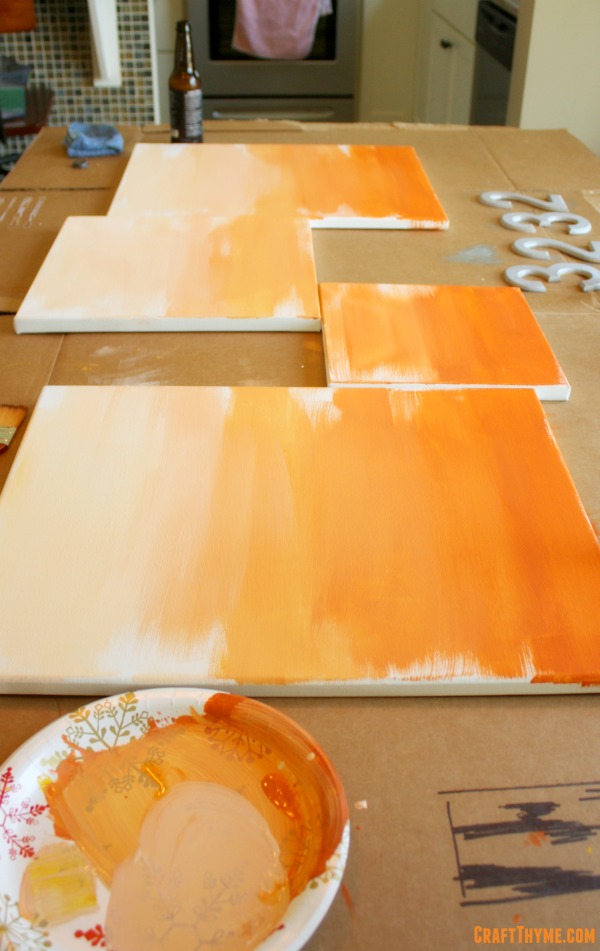
I picked out four pre-stretched canvases (we had some on hand and used a 40% off coupon to grab the others)  I laid them out for the space.  There is a fourth around the corner not shown in the above picture.  It is an awkward space, as the windows are not centered, so I used the two smaller canvases to fill out the area.  After deciding a layout I thought would look good I laid them out on the table in a similar, but closer, fashion.

Step Two: Om Om Om Ombre

I started with a base ombre of 4? colors.  I tend to just add paint mix and repeat so four is just a guess from looking at the finished product.  These particular colors were a base orange mixed with a touch of blue (to darken) and then yellow & white (to lighten).  I wanted a rather choppy look and did not bother to blend wet edges well.  If you want a very smooth ombre pre-mix all your colors so that you can blend in the wet edges.

Basic Orange Ombre Modern Art
You will note the awesome ‘professional’ equipment. Old cardboard box, paper plate, and beer. Also known as liquid crafting juice.  The super awesome layout sketch is that black scribble in the corner.  As you can see I love to fully plan out every brush stroke *sarcasm*

After the ombre was dry I brushed some black in feathery horizontal strokes.  This step is not shown, but really just consists of slapping some black on the canvas and moving it left and right till it feathers out at the edges.  You can practice on a piece of cardboard to figure out how much paint and pressure you need.

Step 3: Concrete Answers

I probably should have planned this step out better but I was just so damn excited to work with a new medium that I went right to mixing up the feather finish.  I followed the directions which were 2 parts mix to 1 part water.  I thought “Hey! Let’s make this easy, 1 cup water to 2 cups feather finish!”  Okay, huge mistake.  I made about 100 times more than I needed and it was quickly too thick to do what I wanted.  Check out the huge amount:

Feather finish by Henry and Ardex
Why yes that is a plastic spoon from a Christmas Party…. And I made this in June… Horde much?

So my suggesting is to just mix it the consistency of pancake batter.  You are using this for decoration not construction strength.  After re-mixing my feather finish I used a very old putty knife/multitool to feather the concrete on in bands that matched the style of the black paint.

Troweling on feather finish to make modern concrete art

Step 4: If You Like It Then You Better Put Some Gold On It

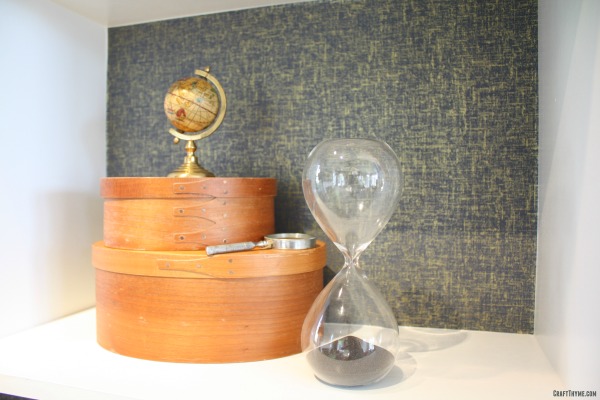
I took a step back and was really feeling the look, but wanted to tie some of the other room finishes into the final piece of art.  In comes the left over gold leaf I had from the lamp shade redo.  I thought it would tie that and the wallpapered bookcase into the open concept dining room.  I laid out the sizing (If you need gold leafing tips you can read more here) in the same pattern as the paint and concrete.  Once it had set I laid on the gold leaf and covered the areas with sealer to keep the leaf from tarnishing later.

Sizing in loose brush strokes to prep for gold leaf
If you wonder about the numbers in the back of the photos, I always figure why do one DIY project at a time when you can do two or three…

All in all, I love the color and texture mix.  It adds visual interest and ties the various spaces together in the first floor of our home.

Posted on Leave a comment

Small Chick Order: How to Pick your Breed

Easter Egger Chicken

Do you have any idea how many breeds of chickens there are?  Neither did we…  Selecting the perfect breed of chicken is not easy.  It is even harder to find the perfect small chick order.  By small,  I mean less than 10 ordered online!  Picking out the breed  and finding a place to order only 5 chickens involved a variety decisions, discussions, and research.  I’ll be honest it was a painful process. Well, at least for me.  Adam just kinda went with whatever I thought we should have.  Way to dodge the responsibility for bad chickens there!

I actually felt overwhelmed by the variety of chicks and underwhelmed by the choices of where I could order from.  I finally broke it down into some easy steps that let us come to a final choice of Easter Egger (Hybrid) chickens from Efowl.com.  If you follow these steps then this will really help narrow your selection if you choose egg laying chickens.  I will fully admit to just glancing over the meat breed selections, so keep that in mind if you use this to help narrow your breed.

Easter Egger Chicken

1. Do you want chickens for eggs, meat, or both?

We wanted egg laying chickens.  That cut our selection a ton.  While I am not entirely opposed to killing my own chickens I am entirely opposed to plucking a chicken.  Hello?! I find chopping vegetables to be more prep work than I want to do in the kitchen.  What are the real chances I am going to go out back and catch dinner? Um… None…

2. Alright we chose egg laying chickens turn to page 52.  Oh wait, this isn’t a choose your own adventure!  Here is the real question: What size chicken do you want?

The following are stats for hens:

Bantams

  • Full Grown: 1-2 lbs
  • Eats: 1 3/4 lbs per week
  • Pros: Need less space in the coop, eat less
  • Cons: Fly, small eggs, may need special consideration in cold weather

Standard Sized (Light Breed)

  • Full Grown: 4-6 lbs
  • Eats: 2 1/3 lbs per week
  • Pros: Many options for breeds, good for warm weather
  • Cons: May need special consideration in cold weather

Standard Sized (Heavy Breed)

  • Full Grown: 6-9
  • Eats: 3 1/2 lbs per week
  • Pros: Large eggs
  • Cons: May need special consideration in hot climates, eat large amounts of feed

You can get plenty of detailed information, but this gives you the initial stats.  We wanted a non-flying bird. Ain’t nobody got time to clip wings and we can’t let them fly around the neighborhood. The lighter breeds seemed like a good compromise.  Decent egg size, but we didn’t have to make a huge coop or invest a ton in feed.  Our climate is fairly mild so they should be fine all year round.

3. Rank the following in importance:

  • Resilience/Health
  • Temperament/intelligence
  • Egg Color
  • Looks

Having trouble ranking? Guess what?!  Me too!  That is how we ended up with Easter Eggers.  They are hybrid chickens, meaning I could never mate them and get more Easter Eggers.  Seeing as roosters are not exactly okay in the neighborhood I doubt we will be breeding chickens anytime soon.  But guess what else this means?!: They tend to be healthy, with even temperaments that are good for kids, and have eggs in blue, green, and rarely pink/brown.  The looks are up in the air…  Which is the only thing I didn’t get with this breed.  It was important to me to have a nice resilient bird.  I have no clue what I am doing! I need a good healthy bird that can withstand a few mistakes on my end.

Let’s say that maybe looks ranked higher.  Have you seen a Polish breed like a Golden Laced Polish?! Crest Yes! Or what about a beautiful feathered leg variety like a White Sultan? Or the long legged beauty of an Egyptian Fayoumis? Yeah… If you are in it for the looks then pick a beautiful breed. They are out there, but the Polish tend to be flighty since they can’t see.  A white sultan requires lots of grooming to look that good, and an Egyptian Fayoumis… Not going to be happy penned in our back yard.  For us it was more work for the beauty.  Maybe after we know what we are in for we can try a fancier breed.

If you are in it for specific egg color most websites will break down their chicken selection by egg color.  That makes it pretty easy.

Intelligence is just up in the air.  I scouted many a forum post at backyardchickens.com and read plenty blog posts my favorite being the ones at Northwest Edible Life. I figure it is like Amazon reviews.  If most everyone says it is a smart good chicken breed it probably is.  There are always going to be the 1 star reviews.

4. Finally and maybe most importantly how many chickens do you want and where do you plan on getting them?

Depending on the time of year and how many chicks you want you may find yourself S.O.L.  Locally sourcing (craigslist and auctions) are the way to go for a small number of chicks, but takes time and often limits your choices.  The internet opens up a lot of options for various breeds, but guess what?!  You want 5 chicks? Suck it.  Most hatcheries have a minimum order of 10-25 chicks.  They have good rational reasons such as needing to keep the chicks warm etc.  So if you want a small chick order (fewer than 10 chicks) your options are slimmed immediately.  You will have to look at some of the specialty websites and choose from their selection.  We looked at the following (these are not affiliate links, just places we checked out)

Meyer Hatchery

  • Pros: Order as few as 3 chicks
  • Cons: Had lots of customer service complaints

My Pet Chicken

  • Pros: Minimum order is 3 BUT…
  • Cons: Minimum order is based on your zip code ours was actually 7

eFowl (Don’t Laugh at the name)

  • Pros: 3, 5, & 10 chick special orders
  • Cons: Not all breeds are available at the special order sizes

The reason I say these options may be the most important factor for ordering is because we lost out on the Easter Eggers on Meyer and My Pet Chicken.  Literally, I had a cart full, went to lunch, came back to buy them and they were sold out of female chicks until July….  If you want a certain breed, at a certain time, in a certain sex, and you only want a few. Good Luck!  It would be way easier to look at the choices available from the various websites and choose from there.

Finally, you can always ask other chicken owners.  I asked a former co-worker of mine for advice and she was heartily behind the Easter Eggers for the reasons supplied above.  It is always good to get an experienced chicken owner’s opinion.  If you don’t know any there are plenty of chicken forums to read like I mentioned above.  Good luck selecting you breed!


Posted on 8 Comments

Bookcase Ideas: A Quick Makeover

detail of wallpapered bookcase

One of the neat features of the new house was a large built in bookcase, but it had the featureless contractor-white of a new house.  I needed some bookcase ideas and fast.  I wanted to make it pop, especially, before we filled it with items. I was in the process of trying to look through ideas for bookcase makeovers when I happened on the clearance section of Target.  Okay, Adam happened upon the clearance section of Target… BUT, I took to the idea immediately.  We decided to try some navy and gold peel and stick wallpaper.  It is removable and basically feels like a large vinyl sticker.

Bookcase Makeover

detail of wallpapered bookcase

Materials

  • Peel and stick wallpaper*
  • Straight Edge
  • Cutting Tool (I happened to have a nice rotary cutter and mat which made this process so much easier)

Before:

Just a boring plan bookcase…

Boring white bookcase transformed with peel and stick wallpaper

Quick Directions

Measure, cut, and stick.

Except it needs a little more finesse than that.  First, this was a custom bookcase.  Guess what that means?! No section was the same size…  I carefully measured the different sections and then calculated the best cuts so I did not have to waste more of the paper than needed.  Even on sale it is not what I consider cheap!

My first section I left a little edge on the bottom and side thinking it would give a better fit if I trimmed it with an exacto knife after sticking it down.  Wrong, wrong, wrong.  It made it near impossible to get the sticker all the way to back of the shelf, then it was hard to get it smoothly applied (Use a credit card.  The enclosed tool was useless… I used to place decals for a living and you need something with a little flex), then when I trimmed the edge it was jagged.  I made sure to just measure carefully and trim accordingly for all other sections.

If you are not used to applying decals I will give you a tip.  Apply from the top middle and sweep out and downward to the left and right.  Occasionally, if you are matching patterns you will have to start on once side.  In those cases try to move in smooth outward motions from the area you start at.  Small air bubbles will usually lay down in a couple of days.  I did not have to do this for these small sections, but if you are applying a giant decal and, say, have a large group from the corporate office coming to check your display, and maybe have one giant ass air bubble in the middle and no extra decals…. Well you can take a very small needle and poke a tiny hole and work the air out getting it fairly flat.

After you have all the sections stuck, step back, admire your beautiful bookcase, and start arguing over what books and art should fill the shelves.

After:

Filled with items from our travels, our favorite books (note the fascination with the Dark Tower), and some elegant accessories.  I think the navy and gold wallpaper gives the bookcase some focus without being overly busy.

Boring white bookcase transformed with peel and stick wallpaper

Posted on 1 Comment

The Chicks Have Arrived!

Yellow Easter Egger Chick

In case you are not following my Facebook Page, I have a huge announcement: The chicks have arrived!  5 puffy balls of Easter Egger cuteness arrived in the mail yesterday.

Alright, maybe that isn’t a huge announcement, but it is a big deal to us.  We are embarking on raising some urban, backyard chickens starting with chicks.  While, I grew up out in the country and spent many an hour terrorizing my neighbors chickens.  It is a hell of a lot of difference from being responsible for their welfare.  So I would say my experience with chickens ranges form next to none and Adam’s to none at all.  With that combined knowledge we seem like the perfect candidates to raise a small flock?! Don’t we?!

What we lack in practical knowledge we a desperately trying to learn from the internet and books.  That has meant spending countless hours planning a nice coop (yet to be built), pricing out supplies, choosing a breed, and finding a hatchery.  In case any of you want to follow along on our chicken progress, I’ll be posting the ins and outs of what we learn.  This will hopefully distill those hours of learning down to an easy guide to help you make the decisions to raise (or not to raise) your own backyard chickens.

Until then check out some of the fluffy cuteness:


5 Easter Egger Chicks
5 little balls of cheeping fluff. I thought it would be annoying, but their little peeps are quite relaxing. They are 3 days old!


Tiny Easter Egger Chick
A bird in the hand? Look at how tiny they are!


Yellow Easter Egger Chick
Yellow Fluff! Chick perfection.
Posted on 5 Comments

How to Make Raised Beds or Wooden Planter Boxes

Raised beds with peas

[sam id=”1″ codes=”true”]

Do you want to know how to make your own decorative wooden planter boxes or raised beds?  Well then let me give you this How To Make Raised Beds tutorial. But first a little background! I have never done raised bed gardening before.  My family had always preferred to till or double dig a garden plot.  So when faced with the hard-pottery like surface of my yard I assumed it would be a year or two before I could remediate enough soil to plant a nice vegetable garden. We have been more focused on attempting to get some grass to grow and beds mulched before the entire yard became a pile of weeds.

I am sitting at work when this text comes through:

Hauling lumber in a CRV
And that is how you haul an ungodly amount of lumber in a CRV and take a selfie at the same time

Adam came through with planter boxes.  Not just some crappy raised beds!  No I was getting full, wooden, decoratively accented, planter boxes.  You might ask why we are about to get, yet another, Adam tutorial.  Well let’s face it folks, spreading mulch and planting 10 billion strawberries just doesn’t make for that great of a tutorial!  Which is all I have done the last few weeks, mulch, weed, plant, repeat.  Good for the soul, not so good for the interwebs fame.  On to the tutorial:

How to Make Raised Beds or Wooden Planter Boxes

DIY raised bed or wooden planter boxes

Material List

(Yet again furnished by Adam someone who actually makes note of these things)

  • Lumber:
    6 – 2″ x 8″ x 12′ untreated lumber. Unit cost: $8.05 Total cost: $48.30
    2 – 2″ x 8″ x 10′ untreated lumber. Unit cost: $6.63 Total cost: $13.26
    1 – 2″ x 4″ x 8′ untreated “cull” (second) lumber Discounted cost: $0.94
  • Metal Conduit: 10 – 10′ x 1/2″ . Unit cost: $2.30 Total cost: $23.00
  • Compression Coupling: 5 pack 1/2″ Unit cost: $2.16
  • Conduit Tube Straps: 25 pack 1/2″  Unit cost: $3.75
  • Wood Screws:
    1lb pack of 2-1/2″ exterior wood screws Unit cost: $8.47
    2 – #10 x 1 Wood Screw 10 Pack Unit cost: $1.18 Total cost: $2.36

Total Material Cost: $102.24 (99 square ft of garden space)

We can totally get into a discussion about treated versus untreated if you want.  Personally I would rather be on the safe side.  You can use expensive cedar etc if you like but I would read the analysis in this article about Raised Beds and False Economies from Northwest Edible and make a decision on the material you want to use.  We went with the cheaper, yet more often replaced version.

Cut List

  • Lumber:
    2 – 2″ x 8″ x 12′
    2 – 2″ x 8″ x 9′
    2 – 2″ x 8″ x 3′
    4 – 2″ x 8″ x 6′
    10 – 2″ x 8″ x 10″
  • Conduit:
    8 – 6′
    2 – 9′
    2 – 3′
  • Cull lumber:
    7″ sections to act as joining block in bed corners

Step 1: Cut Me Right Back Down to Size

I might just have aged myself with that title…  However, the first step is to make all your cuts, if you didn’t get the home improvement store to do it already.  As I mentioned in the matching Wooden Trellis post, it might be a good idea to get them to cut it.  Otherwise you need specialty blades and safety goggles for the conduit especially.   Please be careful and cut responsibly.  I don’t want anyone to lose a finger and/or sue us.  You decide which one worries me the most.

Step 2: Sides, Sides, Everywhere sides

Assemble each side as follows.  Screw two decorative end pieces to each end of the lumber.  They should be flush at the bottom, 1.5 inches on the side, and stick up 2.75 inches above. As Adam had to explain to me an 8″ board is really only 7.25 inches.  Hence the 2.75″ height on the 10″ cut end caps. Trust me I argued the math on that one before he reminded me about the measurements of dimensional lumber.   You can see the edge spacing a bit better in the next couple of pictures if my verbal description didn’t make sense. Note: He even made the screw holes into nice satisfying triangular shapes.

After you have all the wood joined, take your matching pieces of conduit and strap them down with the conduit tube straps.  Pick a height you think looks good.  Adam wrestled with the idea of making nice wooden joins to hold the conduit.  I reminded him that A) it would rot that much quicker and B) this was meant to hold dirt and plants.  Not survive the scrutiny of furniture design.  No one was going to come take points off for using straps…  The plants would cover the interior anyway!  My logic won the day and made the project much easier and faster.

Wooden Planter Box Side

Step 3: Screw It

Take your sides and overlap each piece the 1.5″ you left and screw them together, or take your cull lumber and use it as a block to join each side by screwing from the inside to the outside.  What is the difference?  Option 1 results in extra screw holes on the outside but is easier to hold in place and screw.  Option 2 leaves no new holes on the outside but really takes two people to hold all the pieces together and make a join.  We actually joined them together both ways.  The road facing side has the pretty joins as I was home and able to help at that point.

REMEMBER, you are going to want to screw the pieces together very near the final destination.  Like within inches!!!!  You are only going to want to scoot and shimmy these to make them square when all assembled.

joining wooden raised beds
Note the 1.5 inch overlap. You can screw those directly together of place your 7″ block on the inside and screw out to minimize visible screw holes.

Step 4: If I’m Lining I’m Crying

This next step is purely optional.  My yard is not level, not even close to level.  And I personally wanted as much of the box to show as possible, which means not burying it in the yard.  We could have leveled the ground but who the hell has time for that?  Or you can take some landscaping fabric and staple it to the interior.  I am sure the idea of landscaping fabric is not new BUT I felt pretty smart figuring it out on my own.  I took the 3 ft wide section and cut it into 1/4 sections that were 7′ to 13′ long.  Then I stapled the hell out of it along the interior bottom of the wood.  Why?!  Because usually I loathe landscaping fabric with a passion but I didn’t want all the dirt to wash out of the un-level areas.  It does have its uses. Note: I made sure not to go to far into the box either in case an intrepid root want to attempt to penetrate the godawful dirt below.

Once you have everything together and fabric stapled you will need to kind of shimmy all of into perfect square. This is a great time to argue about actually square versus what looks square in your yard.  It is even a more excellent time to keep readjusting the square after looking at it from various angles and arguing some more.  I bet you can guess this is about the part in the process that I came home.  I have the unique ability to complicate a project in less than .002 seconds.  Call it my DIY super power.

lined planter boxes

Step 5: Fill ‘Er Up

We bought soil (see the aforementioned craptastic clay lot we own) and it was my job to fill the beds.  We did throw in some lovely clay soil at the corners and to hold down the landscaping fabric.  Why?  Because we were planting some trees at the same time and it was so dang windy that day.  Seemed like a good place to dump it and hold it down.  On top of that I poured bag after bag of garden soil and mixed in some compost.  Note: The soil will settle so make sure to fill it slightly higher than you want for the final level.

DIY decorative raised beds
Just note… You should really get everything square before you offload the dirt like this. Else you will be spending your time moving the dirt twice. Ask me how I know…

The kids were so excited to plant seeds!!!  And I have been pleased by how weed free and easy to maintain they have been.  It has not hurt that I get compliments by all the joggers and walkers that pass by!  Hopefully I’ll have a nice small harvest to show for all this work!

Raised beds with peas