Posted on 6 Comments

August Package Pals: Why I Can’t Be Trusted

I have a thing for craft supplies.  So, when I saw the chance to sign up for Package Pals hosted by C.R.A.F.T  and Stars & Sunshine I jumped at the chance.  What is it?

August 2013 package pals button

It is a sign up where you and another crafty person get matched together to send each other crafty items.  Unknown Craft Items?  Don’t mind if I do.

Do Not Trust Me

Here is where I can’t be trusted.  Laura, the awesome person behind Experimental Home was matched with me.  Having just made a huge move from my state of North Carolina to Texas she was still able to get it together, send a wonderful package, take pictures of her package to me, blog about her package, obviously take pictures of what I sent her, probably blog about that too, and most likely making something clever and amazing with what I sent her.  While, probably throwing together a perfect graphic to explain the whole process.  Yeah I’m SOOOO jealous of how she has it together, but in a good way. :)

What did I do?  Immediately rip into my package like a kid on Christmas morning!  Did I take photos of her lovely orange twine packaging? No.  Did I stop to find the card? No.

August Package Pals: Picture of opening my craft package
Note the torn paper and twine… I may, or may not have used my teeth to remove the twine since finding scissors would take to long.

In the presence of unknown craft supplies I turn into some sort of ravaging craft animal.  Incapable of thinking about things like blog posts and photos.  I ripped it open and ran my fingers over the journal yelling to my husband, “Oh shit, she hand-embroidered this journal I bet!”  To which I believe he may have made some non-committal grunt and/or reminded me to watch my language in front of the kids (A sailor mouth is a hard habit to break).  However, I don’t know because I was flipping through patterned paper, caressing fresh bunting , and marveling over a matching clipboard.

August Package Pals: Detail of the package
Look at this journal! Look! She crafted me a craft item. It is like Craftception.

Then, and only then, it dawned on me.  Oh crap, I should have taken pictures.

Luck Would Have It

Luckily, Laura has saved the day again by nicely documenting the items she sent me.  You can read all about her thoughtful and awesome choices over at Experimental Home.

In the next couple of weeks I’ll be documenting what I made with all of her awesome supplies.  I’ll give you a hint and it starts with ‘Halloween Mantel’.  Until then I have to thank Laura for making Package Pals a fun, and in her case, professional blogging experience.  I hope to sign up again and keep in touch with my new Package Pal!

Posted on Leave a comment

Exciting Changes Ahead!

You might notice that the bi-weekly posting schedule has dropped to weekly.  Don’t worry I’m not going away.  I am just taking time to make some fresh changes.

A Little History

I started Craft Thyme in February as a hobby, though you may see some older material I moved from a personal blog.  Because I am crazy motivated I thought it was good time to start that, while finishing a degree in computer information technology, trying to find a new job, etc.  Craft Thyme languished unloved and somewhat haphazardly posted.

I really think of June as the true start date for Craft Thyme and since that time I have put steady part-time hours each week towards creating tutorials and networking this website. And guess what?  I have seen steady growth from just a few page views to regularly close to 200 hundred a day.

While that isn’t a lot of views, that increased traffic coupled with the fact some regular readers have taken the time to comment, pin pictures and email, has given me the motivation to create a better, more professional website with better pictures, tutorials and projects.

Where We Are Headed

Here is a list of things I have in the works with hilariously impossible aggressive timelines.

Redesign Website: Jan 2014

Write First Ebook: Nov 2013 (always wanted to try that, so that’s more a personal goal that relates to crafting than something that will intrinsically change Craft Thyme)

Develop a Biweekly Newsletter: Oct 2013

Add a sub blog on Crafting a wordpress blog: Oct 2013

Marketing Plan for Craft Thyme: Dec 2013

Some of these items require a lot of substeps.  For example, I am learning PHP to better control the design of my website.  The ebook will have brand new tutorials on garland making for the Christmas season.  Marketing is going to take a lot of research…

The sub blog is my answer to annoyance.  I have spent the last couple of weeks reading about how to make a professional blog and website that is useful/fun for readers and allows me to make a little income to offset this time consuming hobby and pay for all those lovely craft supplies.  There is great information out there, but from a technical stand point there is some crazy or outdated shit that people keep posting.  For example: Facebook no longer penalizes posts from third party API, there is no need to go hand edit every link out of your comments because Google offers tags and tools like (nofollow attributes) to handle these types of content, plugins and why they aren’t so great technically (why I am learning PHP)…  The list goes on and on!

Since I spend a lot of time reading up on technical items like jquery, PHP, SEO, etc I figured sharing that info for the less technically inclined would be a good way to document my website tests and growth, as well as, make notes of my research.  Plus it just drives me bonkers when I read advice I know is just technically bullshit and internet marketeering witchcraft.

So Why The Lack of New Tutorials?

Yeah, well all the above items will set the stage for easier to read and better tutorials. Plus other things like practicing better photography, working on my writing style, and coming up with fresh ideas happen without timelines and are part of the day to day work that needs to occur behind the scenes in the coming months.

All these items take time. Lots of time.  As we say in Western North Carolina ‘Shit Tons’ of time. You’d be amazed the time and think I am cray-cray for doing this as a hobby.

I currently work full time outside the home in a brand new field AT a brand new job (So nightly reading of technical concepts has become my defacto existence), have two children ages (3 & 1), a husband back in school, plus I like to sleep.  I’m not Martha Stewart.  I literally can not function without sleep, though, I sooooo wish I could.

I’d rather give one good and useful post a week as opposed to slapping some crap up in a haze of sleeplessness and I think readers would prefer that too. If not, I am sure I can ramble on like today’s post :).  Just let me know!

So while I am embarking on these changes please let me know if I can offer anything in the way of readability, tutorials, or other things you might want to see!  My door is always open:

Email: Brianna @ CraftThyme.com

Facebook

Pinterest

Or the comment section below

Thanks in advance for everyone’s support!

Oh and while you are ‘supporting’ sign up for that biweekly email by clicking here.  It will start soon and hopefully offer tidbits beyond what simply shows up on the Craft Thyme.


Posted on 15 Comments

Vases from Butternut Squash

Autumn vases created from butternut squash

If you haven’t read Monday’s post this is going to seem like a rather odd tutorial. I have a few of those from time to time. But I’ll shall forge ahead showing you one of my favorite ways to use vegetables and fruit: As decorative containers.

Autumn vases created from butternut squash
See? This does look cooler than the title implies.

Supplies (not shown because… well you read the list)

Butternut Squash (or similar gourd-like vegetable)

Knife

Long Handled Spoon

Floral Foam/Oasis or Test Tube

Step 1: Get an adult who can actually use a knife properly

DIY squash containers step 1, cutting the lid

‘Knife Skills’ are not my specialty but I found using a sharp steak knife to saw at the squash allowed for a straighter, cleaner cut that could be completed while the squash was standing upright. This is important because no squash sits perfectly level. You have to actually sit them on a flat surface then cut parallel to the surface of you want a nice flat vase-like top.

Step 2: Scoops Away!

DIY Autumn vase from butternut squash, step 2 hollowing it out.
So much less yuck than cleaning out pumpkins!


Use the same knife to begin hollowing out the squash. Follow up with a long handled spoon to get way down in the neck.

Step 3: Hold your Water

Butternut Vases Step 3: Options to hold water

Depending on how long you want to keep your arrangements you can use one of the two methods. The first way I insert a vial to hold water. You can get them in floral supply sections, however, I use leftover plastic ones from my husbands home-brewing hobby. They started their life holding yeast cultures. This method works well for longer periods. The squash can dry a bit and that keeps it from molding and deteriorating as fast.

The second method just jams pre-soaked floral foam into the vase. I have found the butternut squash will hold the wet foam without leaking. However, because the squash is constantly in contact with moisture it will mold much quicker. This method is a great option if you want them for a dinner party or just for a couple of days. And much easier since you won’t have to hollow out the squash as far to accommodate the vial.

So am I crazy? Or does anyone else use fruits and vegetables in decorating? If you do I’d love to hear in the comments below.

Posted on 9 Comments

Autumn Decoration

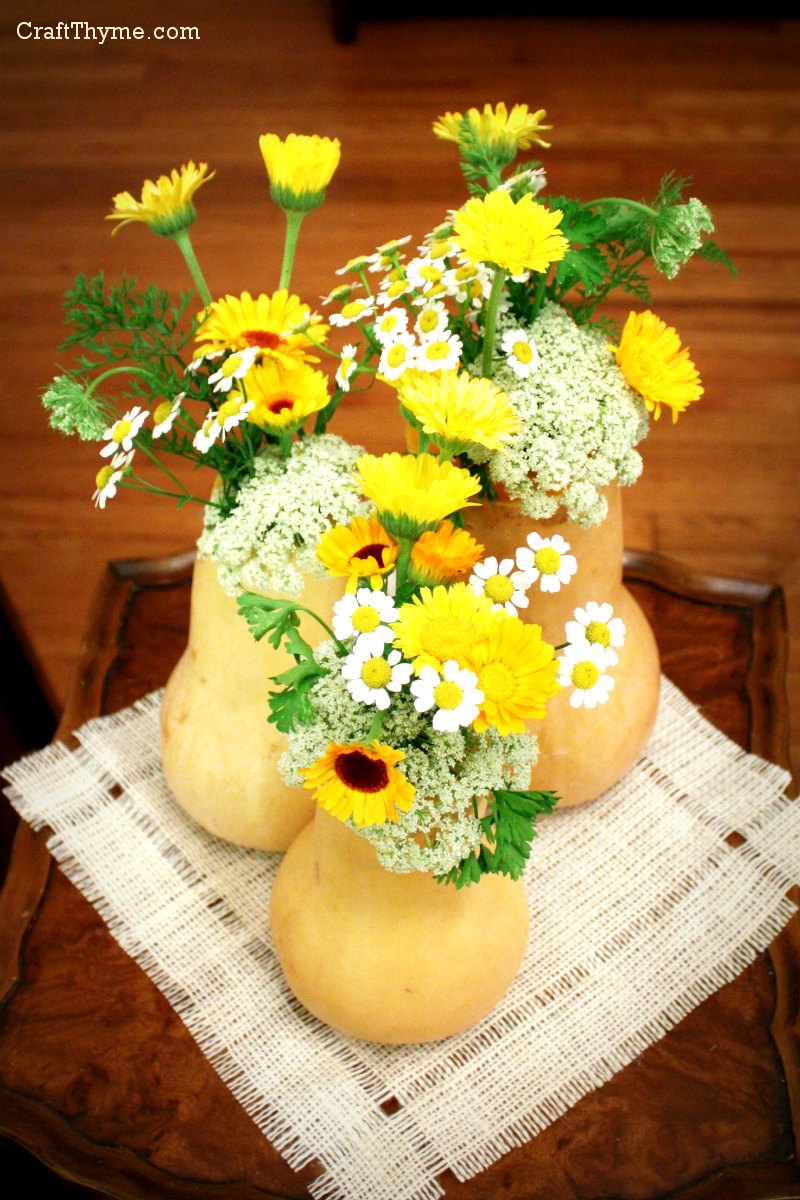
Autumn decorations made from butternut squash

The cool air at night just gets me all excited for Fall! It is my absolute favorite season (though followed closely by spring).  To celebrate the foreseen end to the humidity and heat of summer I added some autumn decor to the side table.

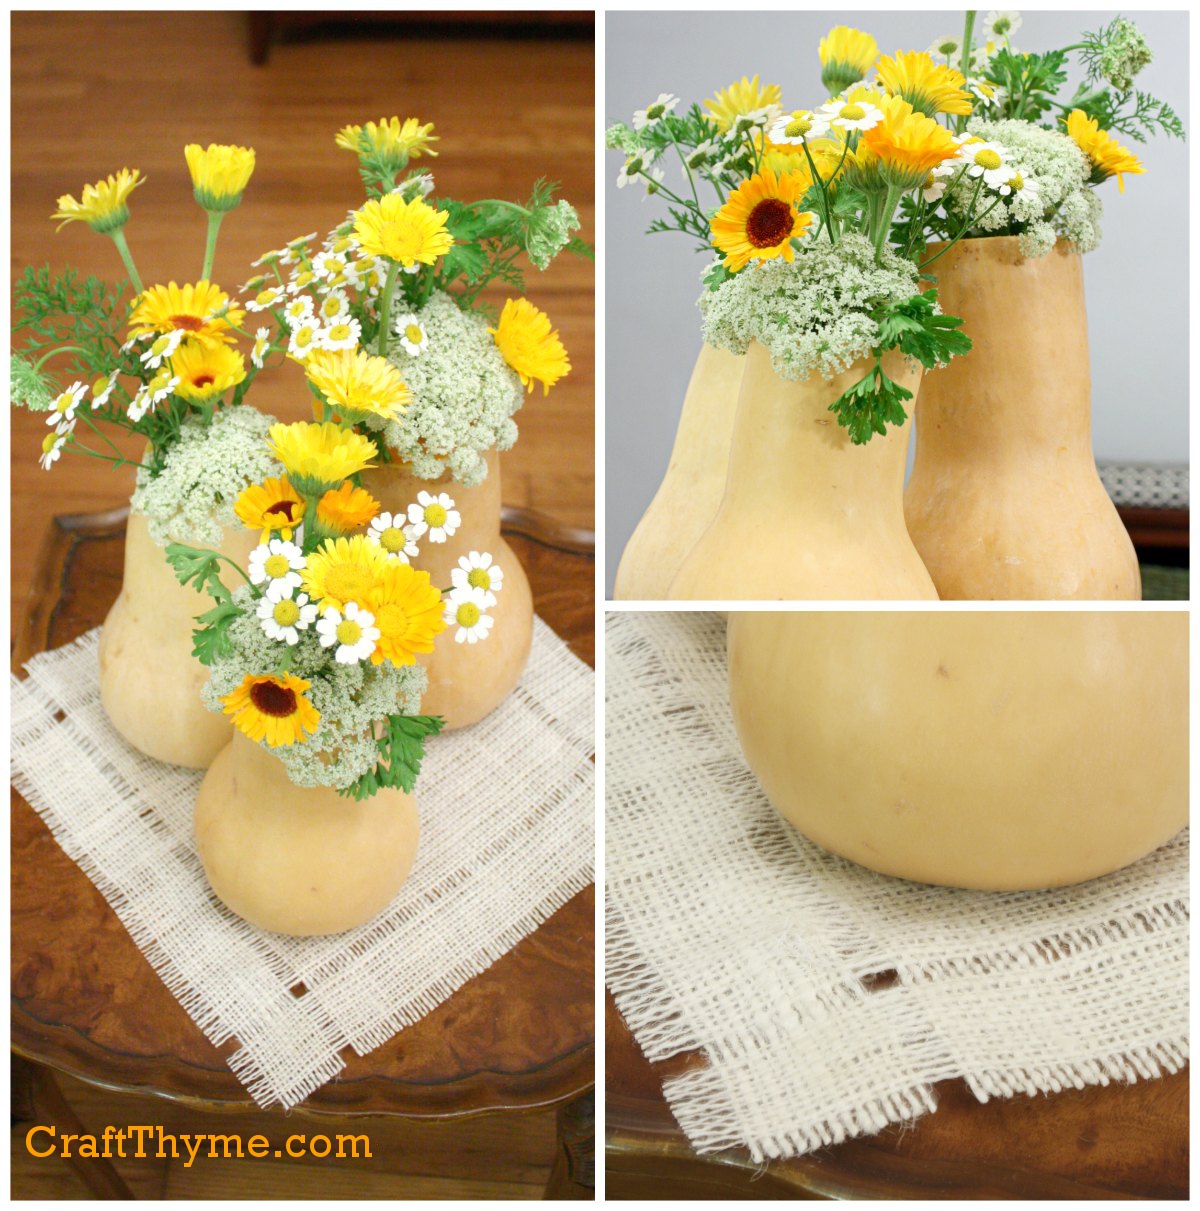
Autumn table decor made from butternut squash


Why yes, I am so glad you asked, those ARE butternut squash vases.  I have had a glut of butternut and self seeded calendula.  Since it really isn’t time to bring out the ‘full on fall’ (though I really want to)  items I tried to keep the arrangement summery by using yellow calendula (I had orange and cream too), carrot blossoms (since I was lazy and let some go to seed), feverfew, and parsley.

Autumn decorations made from butternut squash


The trio looked a little lonely so I got a scrap of white burlap to ground the arrangement.  I pulled out some strands in the burlap to mimic a pulled linen look and add a little visual interest.  I kind of want to make place mats from burlap since it was so easy to create.

I love using vegetables and fruit in decorating!  At my wedding in the early 2000’s my Uncle flew in from Washington State (we live in NC) and proceeded to core an ungodly number of apples and mini pumpkins to use as candle holders on my tables while we rehearsed the wedding.  They looked amazing and I have been hooked on fruit and vegetables ever sense.

If you would like some tips on making them into water tight vases see Thursday’s Tutorial by clicking here. (available 8/29)

Enjoy these articles? Get periodic updates by joining my mailing list (no spam, no way, no how) or subscribing to my RSS feed.

See more great decorations, decor, and DIY at these link parties: My Snippets of Inspiration, Yellow Bliss Road

Posted on 1 Comment

Crayon Crafts With Wax Paper

Remember all the crayon crafts you did as a kid?  Everything from leaf rubbings to general coloring.  My favorite was anything to do with melting crayons.  Perhaps I had a little pyromaniac in my soul but I loved the liquid wax.

I was happy to redo this childhood craft of melting crayons in wax paper to make interesting designs.  They make great sun catchers too!  On Thursday I’ll take my crayon ‘art’ and make a back to school garland.

Melted Crayon and Wax Paper Sun Catchers

Supplies

Crayons (grabbed some old ones from the kids)

Wax Paper

Iron

Grater

Supplies to make wax paper sun catchers

Step 1: Grate some Crayons

It doesn’t take a lot of crayon shavings.  Maybe a 1/4 of a small crayon.

grated crayons

Step 2 Scatter and Smother

Get an old towel and lay out a sheet of waxed paper  on it. Drop the crayon bits over the surface and then cover with another sheet of waxed paper.  The old towel is to catch any melted wax that might squirt out.  Crayons are washable, but can stain in large concentrated amounts.

Laying out grated crayon on wax paper

Step 3  Strike While The Iron Is Hot

This is an example of a hot iron just lightly brushed across the surface.  Hold it down more and smoosh (technical term) the wax around the paper until you are pleased with the result.

melted crayon

I cut these sheets into circles to create a garland you’ll see on my Back to School Mantel.  But they look great hung in front of a window catching the sun through various thicknesses of color.

Enjoy these articles? Get periodic updates by joining my mailing list (no spam, no way, no how) or subscribing to my RSS feed.

See other great crafts and DIY at these link parties: Curly Crafty Mom