Posted on 3 Comments

50+ Ways to Make Money on an Urban Homestead

We are excited to announce that we plan to take Craft Thyme and the Reaganskopp Homestead from a hobby to a money making side business over the next year. In theory, we are starting what I have dubbed: the Urban Homestead Side Hustle. I expect to be throwing a lot of stuff against the wall to see what sticks over the next year and might actually make money. Though it is my expectation that none of the trials will be ‘profitable’ over the first year. This is the perfect time to start a homestead side hustle, while we are employed full time and have income to use on capital expenditures.

If you want to skip the plan and scroll down I have compiled a HUUUUUGGGEEE list of ways a small homestead might make some side money. Otherwise read on to our plans.

Plans to Make Money on Our Urban Homestead

Right now we are bouncing ideas on how to make money on our urban homestead:
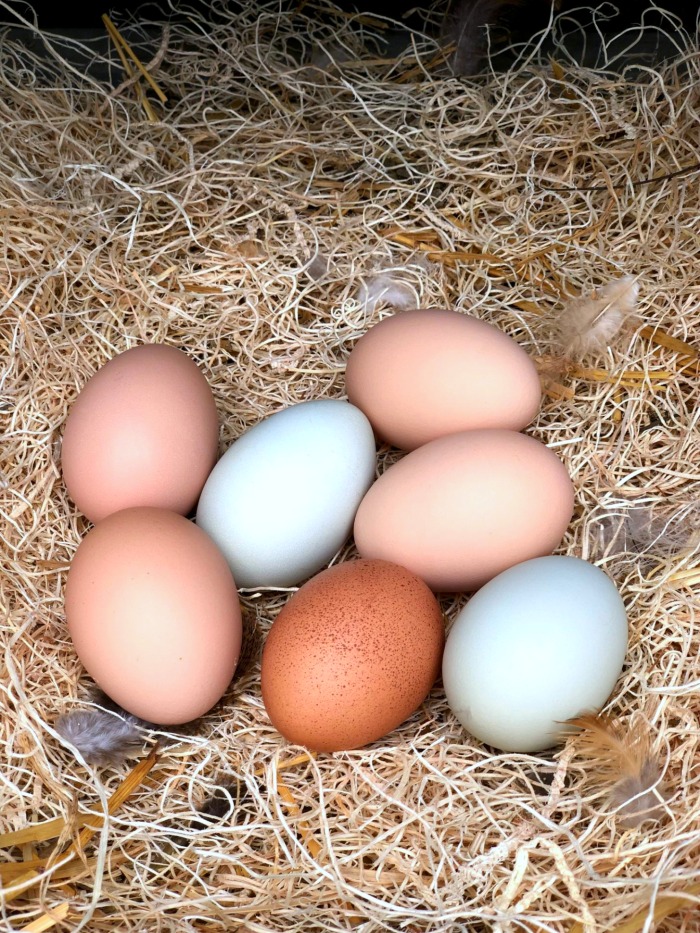
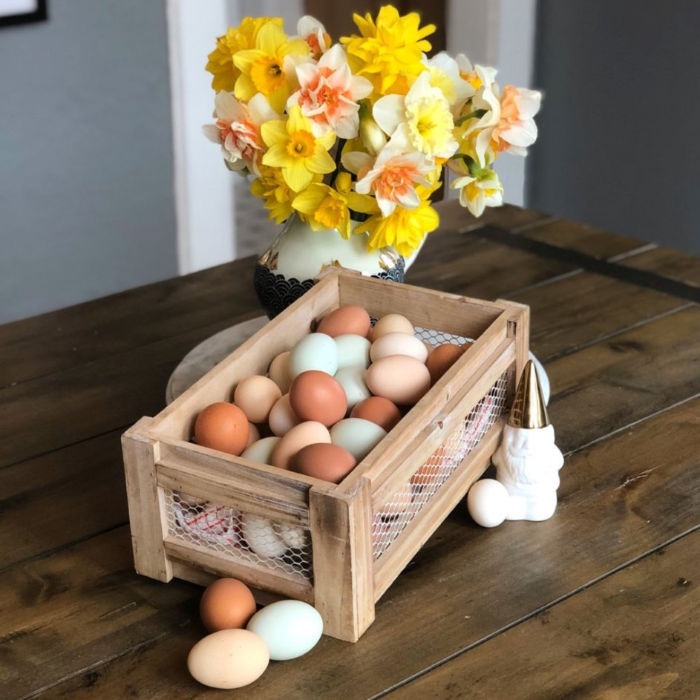
  1. Chicken Egg sales
  2. Quail (Meat & eggs)
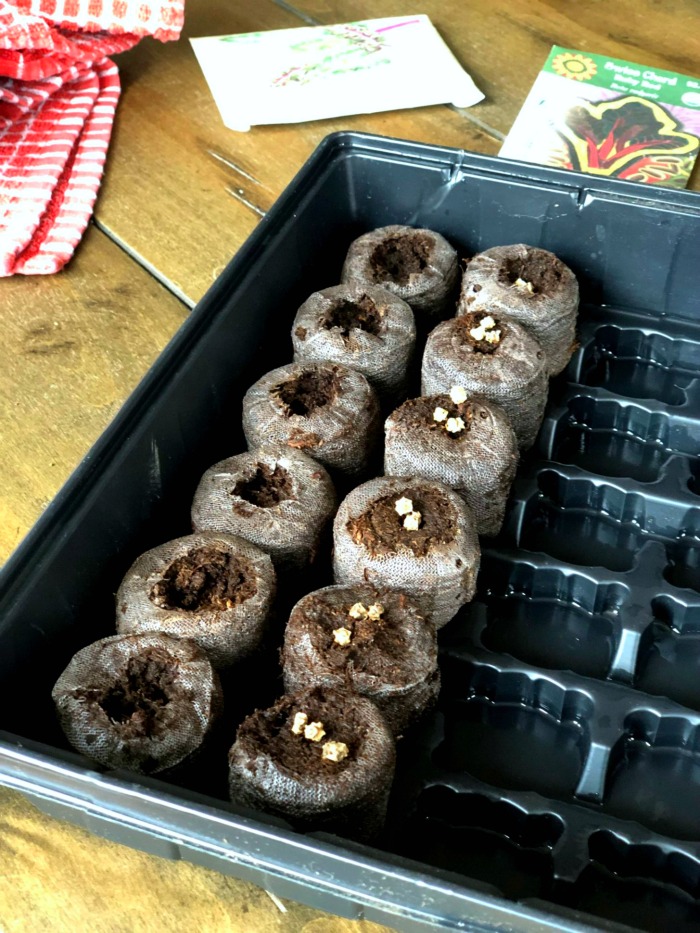
  3. Herb starts and potted herbs
  4. Chicken coop dried herbs
  5. Honor system vegetable sales
  6. Online classes, guides, and utilities for purchase
  7. In person or online permaculture & gardening consultations
  8. Affiliate and advertising revenue on the website and YouTube (We will always be transparent about income made from this source. Right now we do NOT do sponsored posts, so, any reviews of products are just because we like them. Speaking of! Some of the below links may be affiliate links)
Urban homestead eggs for sale with daffodils.  Multiple colors of blue, green, brown, tan and white eggs.

Why We Won’t Make Money

Why would start a venture that we don’t think will make money? For one major reason: Capital Expenditures. While I can probably start herbs and make a profit after seed, dirt, and pots are accounted for, it will take me forever to make back the investment we are considering for a small greenhouse. And that is okay by me. We work full time outside of the home so that we can afford some of the luxuries it might take other, more full time homesteaders awhile to afford. There isn’t one right way to start a business! This is just how we plan to do it. Slow and steady is fine too.

Why are You Posting About Money?

I grew up in the South and talking about money sure is tacky, but here is the deal. I see a lot of guides about how to make money for homesteaders, multilevel marketing, and other home business. It breaks my heart because most of it just does NOT give you the truth about what it takes to be successful. I used to teach business plan classes at the local community college. I have seen what it takes to both plan and grow small businesses. There are just so many expenses and other items (licenses, insurance, etc) that people do not plan on. These eat into your bottom dollar and often people find themselves losing way more money on their side hustle than they are making. Statistically if your business is making a profit by year 2 or 3 you are doing really good! A break even by year 4 or 5 is much more likely. You have to be READY to not make money, in order to make money.

We are hoping that our transparency in costs can help save our readers a lot of monetary grief in the future. Plus, it may keep us a little more accountable… Ask us how much we are in on an incubator and how none of our eggs have hatched *le sigh*.

Okay, okay, now that we have scared you here is what you came for:

50+ Ways to Make Money on Your Small Homestead aka Urban Homestead Side Hustle

I lied, one more note. These are geared to small homesteads, especially urban ones with access to lots of free yard sales and markets. I am sure some of these would work for larger farms and rural areas, but frankly, I wanted to find things that might work for me as well as my readers ;). That’s why we are focusing on the urban homestead side hustle. Enjoy!

Small Livestock

  1. Chicken Egg Sales: In North Carolina you can sell 30 dozen eggs a week without a license. 30 DOZEN! Just have to follow some easy rules.
  2. Chick Sales: Buy in bulk or hatch your own. May want to go for your NPIP certification
  3. Feather Sales: Check your local and international laws. Some places do not allow sales of untreated feathers. You can dye and decorate as well.
  4. Quail Egg Sales
  5. Quail meat sales
  6. Duck egg sales
  7. Hatching Eggs: If a rooster is allowed or you want to try a rooster collar. Ebay has tons of examples of ‘wanted’ breeds. May want to go for you NPIP certification.
  8. Worms for compost sale: Have you seen how much 600 worms cost on Amazon?! Also, who is tasked with counting out 600 worms…
  9. Mealworms for sale: Apparently, you just need oatmeal and a strong stomach . Not sure why, but these creep me out way more than compost worms.
  10. Bees for pollinating farms: There is literally nothing you can’t find on amazon…
  11. Bees for honey sales: Extractors can be rented or shared with local beekeeping clubs
  12. Rabbits for fur or pelts: Angora Rabbits for example. Keep in mind the best price take finishing fur products so you may need to partner with fiber specialists or tanners
  13. Rabbits for meat: If you have a local meat market or slow food area interest in rabbit meat is growing

Plants

  1. Veggie Starts: Heirlooms (tomatoes especially) and odd colors do particularly well in my area.
  2. Herb Starts
  3. Small Nursery: Grafting takes practice but one tree can provide tons of grafts
  4. Flower or other plant starts: I have seen research that plants with even one flower sell better than other plants at markets. We have a local grower who rents a green house and only does perennial plant sales. His are fabulous!
  5. Microgreens
  6. Topiary: Pretty round boxwoods in vintage pots are always desirable
  7. Mushrooms: Especially good for shady or north facing lots
  8. Mushroom logs: For others to grow their own mushrooms
  9. Fresh cut flowers: Dahlias grow back year after year (in some places you may have to lift the tubers) and make great cut flowers. They can be grown in a small space and staked.
  10. Hoop or hot house vegetables: Offering local greens and veggies when not in season can be a specialty if you live in a slow food market.
Bare root farkle berry and yellow root
Yes, this is me, happy to buy sticks! I mean bare root nursery plants.

Crafts

I am focusing on crafts that take a little bit of learning and equipment. If you have specialized knowledge such as fine woodworking or welding skills then focus on those first! These can be very lucrative ways to make money on a small urban homestead. Especially if you have a lot of craft fairs and craft oriented events in your area.

  1. Sew Clothing: Especially upcycled & refab clothing
  2. Alterations: My mom did this when I was a kid. Not her favorite activity, but it was side money.
  3. Sew items: Ask me how much my egg apron cost? (Spoiler: Much cheaper at Southern States) I also need pot holders, tool covers, tea pot warmers, hand towels, etc
  4. Leather belts & bags: Burned or embossed leather
  5. Basic Stained Glass: Our community college teaches basic courses and even focuses on easy on items that sell well
  6. Hand veggie prints: I saw some beautiful flour sack towels someone made by cutting shapes in potatoes and using them as prints
  7. Linoleum cut prints: Starter kits are very affordable and if you mount them to wood you can sell them as custom stamps
  8. Silk screening: This one takes a bit more investment. I have a degree in art with a concentration print making and sculpture (don’t ask, I don’t use it). Once you learn it you can churn out prints, clothes, etc.
  9. Crochet or Knitting: Bless you if you have the patience for this
  10. Cross stitch or embroidery: Double bless you for having patience with this. Look at alternative embroidery with funny sayings or different materials such as ribbon embroidery (the only one I have patience for)
  11. Handmade soaps, lotions, and other cosmetics: Even better if you have your own beeswax
Collecting eggs in an egg apron.  Great craft to make and sell on your urban homestead.
I never knew I needed an egg collection apron, until I got one!

Food

Check your local laws, people! Technically, you aren’t supposed to do provide a lot of food products in the State of North Carolina without a commercial kitchen. Even something as simple as having a pet in the home can disqualify you. I know plenty of people who do not follow that law, but you open yourself up to liability if you don’t. That being said, there are commercial kitchen times for rent at local community colleges and start up incubators in Western North Carolina. Your state may have different laws, but be compliant. It may take more time but probably less heartache and money in the long run. Plus you want your urban homestead side hustle to be compliant and safe! Right?!

  1. Jams & Jellies
  2. Breads: Think outside the box; crackers, pretzels, buns
  3. Cakes & cookies: Sweets with alternatives; gluten free, stevia/honey sweeteners, vegan
  4. Kombucha or kefir
  5. Fermented or pickled veggies: Pickled ones marketed for cocktails are always fun.
  6. Other Canned Goods: Please, please make sure you know when to water bath and when to pressure can. Killing people or making them explosively puke is not an ideal way to start a business.
  7. Dried Herbs: Teas, coop & home herbs for cleaning and scent, cooking
  8. Dried Spices or spice mixes: Now you have a use for the 1,000 hot peppers you dried.
  9. Small fruits: Berries, grapes, and small orchard fruits from heirloom varieties sell well in markets where these products can’t ship well to groceries
  10. Sell fresh vegetables & herbs
Yummy purple cauliflower.  Bright colored and heirloom vegetables are great ways to earn money on your urban homestead side hustle
Even the kids were willing to try this pretty purple cauliflower! Imagine how it would look at the farmers market.

Other

  1. Sell compost: This one is tricky to get enough green matter but local markets and coffee shops may provide items for free
  2. Sell vintage or fixed up finds: Homesteaders are great at recycling, fixing, and finding deals.
  3. Repair items: If you have the knack I know a man who repairs lawn mowers. Just lawnmowers. In his shed in Canton, NC. He is busy all summer long.
  4. Teach classes: Planting, foraging, animal husbandry, crafts, canning. Community colleges are often looking for continuing ED teachers and local nurseries and homestead stores often will allow you to offer classes or hire teachers.
  5. Teach online courses: Free platforms and plugins are available
  6. Website: Advertising is hard to make money from unless you have a lot of views, but you can make some tidy pocket money with affiliate sales
  7. Online products: Downloadable canning labels, pdf guides, ebooks
  8. Homestead Tours/Workshops: On site classes in butchering, canning, and other homestead skills are popular. Our local organic growers school teaches everything from on-farm poultry classes to life skills such as starting a fire from scratch
  9. Build custom chicken coops or plans: This takes a bit more skill but we often have people ask for plans for our custom coops. We also saw an old chicken coop we built fetch $400 on the local market when sold by the people who purchased our old home.
  10. Consulting or Design Services: I recently completed my permaculture design certification, and this does require an investment in time and money, but if you have a built reputation you may not need to be certified. I am just starting to offer these types of services and wanted to go the extra mile.
  11. Air BNB: Or other stay location service. People are interested in agrotourism and will look for camping sites and rooms on farms. Especially if you live in a tourist destination city. Be careful, our city has strict laws about who can and cannot rent out space on their property.

What other things can we add to this list?! Help us add more ideas to our urban homestead side hustle. Please place them in the comments below and we will get them added so everyone can make money with their small homestead.

50+ ways to make money on an urban homestead
Posted on Leave a comment

Fresh Eggs for Sale

Eggs in nesting box

Craft Thyme is excited to announce that our fresh eggs are for sale (for local pickup) straight from our small urban homestead! If you live in the Asheville, North Carolina area and are looking for tasty eggs from happy chickens you have come to the right place. Our eggs are never washed, never refrigerated, and lovingly laid by our happy hens. You get a fresh egg, truly free ranged on our local property.

How do you buy our fresh, ungraded eggs? Message us on Facebook or email us at brianna@craftthyme.com. We plan to sell at local markets this summer but until then we provide a pickup location in West Asheville, NC for our colorful, local eggs. Current cost $5 a dozen. Will sell in larger and smaller quantities.

Fresh colorful eggs for sale in Asheville, NC

Egg FAQs

Why aren’t the eggs washed?

When chickens lay eggs they create a protective coating called a bloom around the egg. This bloom keeps the bacteria out of the egg making for the freshest experience! We keep a clean coop and nesting boxes but occasionally you may see some mud spots on the eggs.

Shouldn’t those eggs be refrigerated?

No! One of the best things about fresh eggs is you do not have to refrigerate them (up to 45 days) but you can refrigerate them if you want (up to 3 months).

Happy chickens lay tasty eggs

What do your chickens eat and why should I care?

Everything! Our chickens get lots of time on our pesticide free lawn, they roam our wooded areas, and the dig in any garden bed I happen to not be watching. What they are doing that entire time? Eating whatever they fancy! Dandelions, worms, bugs, wild cherries, lettuce, you name it, they eat it. We also provide fresh feed, on demand, anytime the girls want. This means the chickens get plenty of exercise while their eggs taste of the seasons and have bright flavorful yolks.

So why are your hens so happy?

Our hens get the pampered life, from living in a Taj Ma-coop when they can’t free range to lots of pets, scratches and neck rubs. We make sure they get lots of dust baths, a clean secure coop to live in, and a basically stress free chicken life.

Chickens in nesting boxes laying fresh eggs

If these eggs are so great why are you selling them?

Right now we get anywhere from 8-12 eggs a day. Domestic hens lay almost every day during the warmer months. Regardless, of what we do they will still produce eggs unless they were sick or starving (not happening in this house). That means that even as a family of 6 we can only eat so many delicious eggs each week. The money made from our eggs goes right back to the care of the ladies.

Can I hatch these eggs?

No, right now we do not have a rooster and our eggs are not fertilized. These means no chicks will hatch. If that changes we will make sure to update this section.

Eggs in nesting box

Is it legal to sell eggs without a farm license?

By North Carolina egg law we are allowed to sell 30 dozen ungraded eggs without a license. Let me repeat that, 30 dozen! That is a lot of eggs, and while our girls produce, we are no where close to that many eggs.

Posted on Leave a comment

Easy Seed Starting

How to place your seeds to make seed starting easy.

Hi folks! Today we are going to learn more about a method of easy seed starting. Why? Because for years I have offered lots of utilities to help you start seeds. Guides to find the perfect time to start seeds, guides to get the most from your seed packet, guides to manage your seed inventory. What have We never offered you? A practical method to actually start seeds and grow them into healthy plants!

In this post you will learn why you WANT to start plants from seeds, how to get them going quickly, and how to avoid all the pitfalls you will want to most definitely, well, avoid.

If you aren’t looking to start seeds this year, no problem! We often use starts (plants already started) so we won’t judge! No snobby gardening here; plus we have lots of other gardening, DIY, and DOING advice. Follow along on our Instagram for our latest projects.

Now Let’s make Seed Starting Easy: Prep Time

You do want to save money, plant hard to find and unusual varieties, and have the healthiest plants? Then seed starting is for you. Starting your own seeds means you can order amazing varieties you would never see in the grocery store! Did you know pink striped celery is thing? How about white tomatoes? There are so many amazing fruits and veggies you can order from catalogs that you would rarely find as starts. Even more exciting, when you start your own plants you control the conditions so that you get healthy, disease free, starts to place in your garden. Sold? Great lets get started:

Materials Needed:

  • Seed Tray
  • Peat Pods
  • Seeds
  • Towel
  • Paper & Pen

Optional materials:

  • Heat mat
  • Fluorescent or LED lights

Easy Seed Starting: Get green by being clean

The first step to seed starting is being clean! I like to reuse my trays from year to year and you can too! It saves money and keeps the plastic trays out of the trash. Just start by killing any left over fungus or pathogens. Kill. All. The. Things. (Which is odd because I am generally all for being around bacteria). However, in this case, even if I am buying new trays I may clean them if they have been sitting around a lot of other gardening supplies. You have a few options for cleaning the trays but they all start with good old fashioned:

  • Soap and Water (don’t knock it till you try it)

After that it is up to you how much of a nuclear approach you want to take. If you had any issues with fungus or other problems the prior year you will want to do one of the three in order of severity of your problem:

  • Vinegar: Splash on all the surfaces and let dry
  • Peroxide: Splash on all the surfaces, rinse, and let dry
  • Bleach & water: Dilute bleach if you are going with this option and make sure to thoroughly rinse the trays before drying
Make sure the thoroughly sanitize any seed trays before use.
Squeaky clean tray! Like kids with organized toys, you are about to mess this tray up.

Medium Matters

While your trays are drying it is time to prep your seed starting medium, also know as soil. Except it isn’t really soil… There are as many opinions about seed starting mix as there are recipes for the perfect hamburger. However, there are a few rules everyone tends to agree on.

  1. Made of fine particles
  2. Neutral Ph
  3. Free of pathogens (otherwise all that cleaning is wasted)
  4. Not full of nutrients

I know number 4 seems odd. Why wouldn’t we want seeds to start in a nice fertile environment? Seeds include all the nutrients the plant needs to get established. Additional nutrients in the soil only serve to attract baddies like fungus that will compete with your seeds! Once they are up and established as plants with true leaves you can bring on the good, nutrient rich, stuff.

Since this is EASY seed starting I am going to give you my tip. Just use the peat pellets (shame, shame, shame). You have plenty more years as a gardener to angst over the environmental impact of peat, to research perfect balance of sanitized soil and coir, and discover seed blocks.

For now: Soak those peat pods in a large bowl of warm water.

Pre-soak the peat pods to make seed starting easy. This way you are sure that all of the pods are evenly moist, without being water logged. I have been lazy and soaked them in the tray and it makes a big mess, half don’t get inflated, and the other half are dripping wet. Yes, you have to clean one bowl afterward, but come on! You can do it!

Easy seed starting tutorial. Here are the supplies you need.
So many pretty seed packets! I could collect even more if space would allow!

Time to Plant Those Seeds

Gather all the seeds you plan to put in the tray. Make sure one tray is going to hold mostly plants that will go out in the garden at the same time. You will want to do this for a couple of reasons:

  1. It is easier to keep track of when you started the seeds and when they need to go outside when the entire tray is pretty closely related. For example all of my cabbage, broccoli, and cauliflower will all be started together. Their outside plant days are similar. (Pro tip: If you need help know when to start and when to plant outside we have the automatic calculator just for you)
  2. The plants tend to have similar growth rates. If you start a lot of unrelated plants together in close quarters you really have to make sure your summer squash don’t overrun your pepper starts. True story, the cucumbers will overrun everything, every time. They are the dicks of the vegetable start world.

Now that you have your clean tray, selected seeds, and pods make sure to keep that towel and paper/pen handy. You will be labeling the tray as you go. I know you are totally going to remember exactly where you put each seed, right? Wrong. Unless you have some amazing photographic memory you are going to be trying to puzzle out if that is cabbage or kale when they first start growing. Remember we want this to be easy seed starting.

Planting Seeds in 4 Easy Steps

Step 1: Lay out a row of pods

Generally I plant 6, 3, or 12 pods depending on what I am starting and how much my family will eat. When I am laying out the tray I always put 6 or 12 pods out. Want the real reason? My tray is set in blocks of 6 and I got tired of doing maths and figured if I really wanted 4 then I could either take 3 or plant 6. I’m lazy calm like that and you can be too! Just figure out small increments and lay out the pods you need for one to two types of plants. Do them in small increments so that you can:

1. Document what you planted

2. Keep from cross contaminating pods with other seeds. You don’t want poppies in your tomatoes.

Step 2: Dry your fingers

Step 2 seems like a no-brainer, but it is worth mentioning. You are about to pour some seeds into your hands. I guarantee that most of the time you will pour too many seeds out. If the seeds are nice and dry then they can safely go back into the packet when you are done. If your hands are damp you can ruin the entire packet of seeds. How do I know this? Because I have done it. Dampness = sprouting = lost packet of seeds.

Dry your finger tips in between each row of seed starting
Dry your fingers, and in my case, put on some lotion.

Step 3: Plant some freaking seeds!

Yes you are finally there!!! It is time to put the seeds in the peat pots. Start by laying the seeds on the surface of the pot. Put a few extra to insure every pod germinates. How many depends on the size of the seed. Large seeds like nasturtium might get 2 to a pod, while small seeds like cabbage might get 4 to 6. You want to insure germination but leave enough seed to replant when the groundhogs invariably eat all of my starts.

After all the seeds of a row are placed on the soil put the extras back in the pack. Then I use my fingers to bury the seeds into the peat to level indicated on the seed package. (Pro Tip: Need help interpreting your seed package? We have instructions for you)

How to place your seeds to make seed starting easy.

Step 4: Document

I know I already said it, but use that paper and pen to write down what you just planted. Just draw rectangles for each row or half row you plant. Why do I stress this so much? Because I have totally and completely messed this step up soooo many times. I have a lot of experience with plants so I can figure out which type is which when I forget to write them down but ask me to tell you which one is the large tomato versus the cherry tomato. Then you just gotta sit there and wait till it makes fruit. *le sigh* I am saving you from you!

Remember to always document what seeds you plant where. You will not remember!
I’ll remember what I planted where… No, no I won’t.

Now What?! Heat, light, and water

Turn up the Heat

Heat? What? Yeah, this was a trick I learned waaaay later in my seed starting life. Guess what? Seeds such as peppers and tomatoes really need warm soil (75-80 F) to get the best germination (i.e. when the seed pops above the soil). I can’t tell you the number of times I would start my peppers and tomatoes on a certain date but then they would take forever to germinate and throw off all my timing. So if you keep a cool house then allow plenty of extra time for those seeds to germinate OR get a seed mat. A seed mat will keep your seeds the perfect temperature. BUT remember some crops like cool soil too! Here is a handy chart by the University of California that gives you optimal temperatures.

Light It Up

Now that we have the seeds all tucked nicely in their perfect temperature, soil beds they are going to need light. And lots of it! You can make do with a super sunny window sill or a small plastic cold frame/greenhouse, but make sure to constantly turn the trays, watch for signs of legginess, and monitor temperatures. I am telling you right now getting a light is sooooooo much easier. You can get fancy led grow lights or a simple full spectrum fluorescent. I went cheap on the fluorescent but often think of upgrading to those grow lights… Anywho, enough dreaming. Put the trays super close to the the lights and move them back as the plants get bigger.

Good lighting is important to make sure you seed starts are healthy.
Ignore the dirt. The tinfoil underneath helps reflect additional light when they get bigger. Also, I am using super fancy cups to lift the trays closer to the lights. My lights are on chains to be adjustable, but my chains were only so long. So instead of buying more chain I just lift the seeds. Problem solved!

Water is Key

Finally, you need to keep the seeds evenly damp. Not soaking wet, but certainly don’t let them dry out! Even moisture will help them get started but keeping them water logged can choke roots and lead to fungus issues.

See how easy was it to get the seeds started?!

Additional Resources

Here are some additional resources to keep your garden growing:

Seed Starting Calculator and Guide

How to Read a Seed Packet

Plant Like a Pro

How to start seeds the easy way. Learn tips that will get you healthy starts, that save you money, and give you a garden full of rare veggies, flowers, and fruit!
Posted on 23 Comments

Temperate Seed Starting & Planting Calculator

A few years ago I wrote a guide on how to figure out when to start your seed and made a free seed starting online calculator. It needed an update… Badly… I am pleased to introduce the new (also free) Temperate Seed Starting & Planting calculator. Simply put in your first and last frost dates for your region and over 40+ of the most popular vegetables, herbs, and flowers will automatically calculate when you should plant your seeds.

New In This Seed Starting & Planting Calculator

There are a lot of little things but the major updates:

  • Succession Planting Calculation
  • Fall Planting Calculation
  • More Vegetables
  • Additional Planting Information
Seed starting calculator with fall planting, succession planting, indoor & outdoor dates

But Wait There’s More!

I love sounding like an infomercial! No truly there is more. With only two dates, you can now calculate when to start seed indoors, when to plant seedlings or seed outdoors, when to plant seeds for a fall yield, and dates for succession planting. All in one sheet! I also added a second sheet with planting details such as seed depth, seed spacing, ranges for harvest, and sun needs. I find it useful to have all those details handy when I get seed from seed swaps or order from companies (ahem… Baker Creek) that assume I just know when to plant this and that. I have a good memory… But not that good!

Additional information to help you plant seeds such as planting depth, harvest times, spacing, and succession dates for flowers, vegetables, and herbs.

Are You an Old School Seed Starter?

Lots of people still like paper and pencil and that’s okay. In my previous guide to calculating seed start dates I outline exactly how to calculate all the seed starting dates by hand. (Linked for you convenience) You can still use this free seed starting calculator to see the number of days before frost, days to harvest, and days for succession planning to use in your calculations.

So How Do I Get/Use this Seed Starting & Planting Calculator?

  1. Click on this link to the Seed Starting & Planting Calculator to make a copy for your own.
  2. Research your average last and first frost date. I like to Google “Average Frost Dates (Insert your location)” and look at a few sources to get the latest weather patterns. However, if you live in the United States and do not want to research the Farmers Almanac website has a search page for that. (Again linked for you convenience; Cause I am awesome like that)
  3. Insert those dates into the appropriate boxes
  4. Follow the planting dates! They should work for most temperate climates. If you are approaching the arctic or tropical zones will need to use techniques to either extend your season or shield cold loving crops from the heat.

Yes, it is that easy but if you want a little more information about how it works behind the scenes and what you can play with here you go:

Dates for succession and fall planting are triggered by the X for (wait for it) in the Fall and Succession planting columns. They are calculated by the first frost date, days of harvest, and recommend succession planting dates. If you want longer times between successions you can change the time in the second Planting Tips sheet. I mention it, because succession planting dates are much more subjective depending on the actual days to harvest, and how much of a crop you want to get. I just can’t eat that many beets or lettuce and would never want to plant them at such small intervals, but technically you CAN!

I also think it is important to note that crops that don’t make good fall candidates are set to be harvested 45 days before first frost. Generally, those warm weather crops just seem to start lagging when the sun decreases and cooler temperatures appear, but you could technically push the growing season longer. I’m also very conservative and have cool weather crops harvesting 2 weeks prior to frost for fall and succession planting. Why? Because if you happen to have a cool autumn their growth will be stunted and you can run the risk of not getting a final fall crop. There many ways to extend that fall crop with row covers, tunnels, cold frames, etc. However, this sheet is meant to calculate growth in open ground or open raised beds.

Why a Free Seed Starting & Planting Calculator?

Honestly, I couldn’t find a calculator or excel sheet that did it all. A number of gardening websites offer utilities to calculate seed starting dates OR succession planting OR fall planting, but not all of those dates in one place. The seed starting utilities also tend to forget about first frost when figuring succession days. So yep, I thought I could make something better, and so I did.

All I ask in return is that if you find this free seed starting and planting calculator useful that you share this post with others on social media or comment below. Also if you want me to include additional vegetables, flowers, or herbs comment below! I’ll see what I can do!

FREE online Seed Starting Calculator.  Includes planting tips, succession planting, fall garden planting, indoor and outdoor planting dates for 40+ vegetables, herbs, and flowers.

Posted on 13 Comments

2019 Egg Laying Tracker

Free egg tracking spreadsheet with charts

Edit: We now have a 2024 Version Available!

We may already be a week into 2019, but it is not to late to start tracking your home chicken egg production with this easy spreadsheet.  In 2018 I released a version that allows you to track your chickens, egg production, sizes, colors, income, and expenses.  Everything the home chicken hobbiest might need to keep their flock’s statistics.  I’ve made some tweaks and am now happy to offer another free egg and chicken tracker for 2019.  This way everyone can keep up with how deeply in the hole their chickens are taking them :).

2019 Egg Laying and Chicken Flock Tracker

As with last year’s model I am releasing this utility for tracking eggs and other chicken statistics via Google Sheets.  I like Google Sheets because I can access it on my phone and easily enter in eggs while I collect them.  I used the sheet myself for all of 2018 and got the following charts at the end of the year.  We started with a new flock that did not start laying until July which is why there are no eggs for the first few months.:

Free egg tracking spreadsheet with charts
Let’s not discuss the profit portion… Hobby right? Might also help if we didn’t eat so many eggs.

So what’s New for 2019?

  1. Added XL eggs.  Apparently some of you are all fancy and actually measure and grade these eggs out.  For you I added the calculations for XL eggs in all colors!
  2. Created a separate sheet for the lazy in us.  It is a pared down version of the larger tracker for those that just want to track some basics.

Tell us more about the Easy Tracker!

So you want to know more about the simple egg tracker?  Well I took out the sizing, as I heard many people did not weigh their eggs nor did they want to guess the size.  I left in color, but you can skip that entirely and just put in a total. It also removes a chart and shortens the summary.  You still get all the totals, averages, and goodies.

Easy egg tracker for the home hobbiest

So How do I Use the Free Chicken Egg Tracker?

I made a pretty good guide on how to use the tracker in 2018.  It still works just click that link!  Also there are some details and release notes inside the first page of both trackers.

Great I’m Sold! How do I get it?

I sure hope you are sold on this egg and chicken tracking spreadsheet because, well, it is free!  No catch, I just like making utilities for myself and if others find it useful then great.  Click on the links below and you will be prompted to make a copy for yourself.  As usual if there is enough demand I will consider making this in Excel or a printable pdf version.

Other Helpful Links:

All I ask for payment is that you share this post if you think others can use it and let me know your questions, comments, and ideas for improvement in the comments below!

Free Egg Tracker 2019