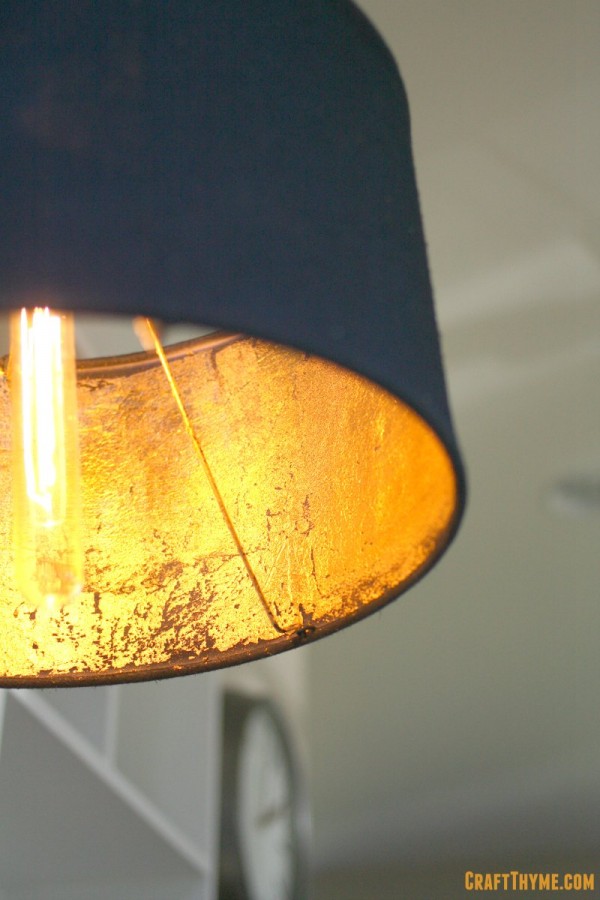
I have always admired the look of a gold leaf lampshade, but I have not admired the price. DIY to the rescue! I did the DIY gold leaf lamp shade for two different shades. I absolutely love the look of the gold leaf paired with the warm glow of Edison bulbs. I like it even better when I just squash my liberal guilt down and tell myself that it is an accent light and I don’t reaaaalllllyyyy need to be using the LED’s to save the environment… Anyway, back to the tutorial.
How to DIY Gold Leaf a Lamp Shade

Materials Needed:
- Lamp shade: Note the underline and bolding. The lampshade selection is key to choosing the correct materials from this point forward!
- Gold Leaf Sheets*
: I grabbed a Gold Leaf Kit*
and ordered a refill. I needed somewhere in the order of 40 sheets to do two normal sized lampshades. I am not advocating using real gold here! The gold toned sheets give a great finish at a tenth of the cost of actual gold.
- Adhesive*
(also called Sizing*
): Here is where the lampshade makes a difference. Hard plastic interior lampshades work well with the paint on adhesive contained in a gold leaf starter kit, BUT you will really need a spray adhesive for a fabric lampshade. The fabric soaks up the liquid adhesive quickly while a spray adhesive coats the surface of the fabric giving a good sticky edge to grab the leaf
- Sealer*
- Soft Brush: Does not need to be expensive and frankly I misplaced my bristle brush and just finished up with a sponge brush. I might have been too lazy to dig through the paint supplies to find a nicer brush, though, the results would likely have a smoother finish.
- Spray Paint: Only if you are changing the color of your lampshade

- Replace this sponge brush with a nice soft bristle brush. Don’t be a lazy cow like me!

Step 1: Correcting Your Lamp Shade
Is your lamp shade old? ugly? Old and Ugly? Give it a good cleaning, spray paint the hell out of it, and or bedazzle the exterior until you are happy with the look. You’ll need to complete the outside prior to the gold leaf. What’s that you ask? Can you spray paint a cloth lampshade? Hells yes you can. Just remember it will soak up a lot of paint so be prepared to do a few coats.

Step 2: Getting Sticky
All gold leaf applications require that you have a tacky adhesive set and ready prior to gold leafing. What this means in layman’s terms is when you touch a prepared surface it will need to feel sticky to the touch. Picture your counter after you have left some sugary substance dry and you get a nice sticky feeling. Liquid adhesive is painted on and left to dry anywhere from 10-30 minutes. Spray adhesive is instantly ready. Remember to only apply in areas large enough that you plan to work with soon. The sticky places can overly dry or collect dirt and lint. I worked in 1/4 shade size pieces.
Make certain to cover any areas that you do not want to gold leaf! Small particles of leaf will flake off during the leafing process and cling to any sticky areas. Great if you plan on having gold in that area, bad if you do not.

Step 3: Be Delicate
First and foremost, the gold leaf is not actually attached to the little booklet. The pages in between are there as protective dividers. Don’t be a dork (maybe like me) and spend a good amount of time trying to rip out a page. Lightly touch the gold leaf with clean fingers and kind of fan out the leaf above your project. Where ever it touch the sticky part it is going to be STUCK. So just know that wrinkles, ripped pages, etc are going to be part of the first few attempts. This worked fine as I wanted an industrial, patchy look. Also if the interior surface is not hard, you are never going to get a smooth appearance. You should check out my tutorial on gold foiling fabric for an alternative if you are looking for a completely smooth fabric finish.
Step 4: Burnish Away
Once the leaf has been laid down use a soft bristle brush to pat it into any crevices and remove any extra leaf. After burnishing a sheet repeat step 3 with the slightest over overlaps on the next sheet. I wanted a more random look so I applied sheets at different angles and used partial sheets to fill in gaps

Step 5: Protect Your Baby
Gold leaf is delicate and faux gold leaf will tarnish and change when not protected. The kits come with a paint on sealer but you can use any clear acrylic coat designed to cover metal. Paint or spray your coating. Once dry place your lampshade on and admire!

PLEASE NOTE: INSERT SOME CAUTION HERE
Use common sense here! You just added a reflective metal coating to an item that surrounds a hot light bulb. Monitor the heat that your lamp is putting out. Use a lower wattage or LED lightbulb if you detect any abnormal heat. A good looking lampshade is never a reason to start a fire!!!
[…] Tutorial: craftthyme.com […]
[…] craftthyme.com size: 600px x857px […]
[…] Bron […]
[…] Source […]
[…] life, then gold leaf can do the trick. You can apply it to the lamp’s base, or even on its shade. Craft Thyme has a simple tutorial that will have that ordinary lamp looking extraordinary in no […]
I lost a gold leaf lamp that was in my storage unit . . . someone stole it . . . with the rest of the lamp . . . How much would a new gold leaf large lampshade cost would you think ? I have to file an insurance report and just wondered if you made one, how much would it cost ? It was a large shade…. probably the largest one out there. It was my parents lamp that they had in their living room years ago. thanks
I would not have the foggiest notion.
[…] via […]
Hi!
I know I’m crazy late to the game, but would this work on a metal lamp, do you think? I have this one from Ikea and I’d love to do this with copper on it…
http://www.ikea.com/gb/en/products/lighting/floor-lamps/hektar-floor-lamp-dark-grey-art-60216549/
Absolutely. Hard metal is much easier to gold leaf!
I have a burlap lamp shade; it has those little “hairs” sticking out. I want to make it gold on the outside, but how? Will it look good to gold leaf burlap?
When you put the sizing on it would probably stick most of the hairs down. Otherwise the gold will just stick to them. I think it would give it a cool shabby chic look. Send pictures if you try it!
What I might consider doing is to spray the burlap first with a shellac spray to make it all come together first, then leaf it.
Brianna…just lovely. Think you’ve inspired me to try it on some of my lamp shades…but I may try the silver leaf. Love all those metal leaves…
I am visiting from the #SoMe2 linkup. I had no idea you could create your own gold leaf lampshade! These are beautiful, and your directions sound easy to follow! Thanks
Thanks for stopping by. Gold leafing your own lamp shade is easy! And much cheaper than buying one.
[…] DIY Gold Leaf Lamp Shade […]
Brianna, I absolutely loved this when I first saw it on Pretty Pintastic Party and knew it would be the perfect feature for this week! Can’t wait to try it! Thanks for partying with us and link back up next week! Sarah, Sarah Sofia Productions
Can’t thank you enough for the feature. Thanks for visiting.
Great tips the only thing I have gold leafed was pears at Christmas lol – Thanks for linking up to Pin Worthy Wednesday, I have pinned your post to the Pin Worthy Wednesday Pinterest Board.
Thank you for the pin!
[…] Craft Thyme’s Gold Leaf Lamp Shade […]
[…] […]
[…] am so loving gold lately and this gold leaf lamp shade from Craft Thyme is no […]
[…] Craft Thyme // DIY Gold Leaf Lamp Shade […]
[…] {DIY Gold Leaf Lamp Shade from Craft Thyme} […]
[…] DIY Gold Leaf Lampshade — Craft Thyme […]
[…] DIY Gold Leaf Lampshade — Craft Thyme […]
Very nice :) I will pin this
I’m a douche when it comes to DIY but this sure looks easy enough to attempt when I buy myself a new lamp (does it defeat the purpose?). PS/ Like the look of your blog!
One lamp was rather new so I do not think changing the shade defeats the purpose at all! Thanks for the compliment.
This is awesome! Thank you for sharing all of your tips, LOVE!
Glad you found the tutorial useful!
I love this! I’ve pinned several gold leafing projects lately (Would it be too much to gold leaf my whole house?), but you offer some of the best tips on making it happen. Thanks for sharing! I’ll be pinning.
I have really been into the gold leaf lately myself. It is not bad to do after a few practice runs.
Lovely job. I’m not much of a do-it-yourselfer but I sure like window shopping!
I think I feel similarly about cooking. Love to eat, look at recipes, not much for the actual cooking. Thanks for dropping by.
That is such a cool project! Loving it a lot + you can never have too many lamps ;)
Thank you! I am not sure about the too many lamps… We actually have some packed away. We love to buy and refurbish ones from thrift stores.
Great tutorial! I recently tried a similar project – using liquid gold leaf on the inside of a lampshade. I like your way better! It looks richer and has more character.
First, I absolutely love the name of your blog. Secondly, I have tried to use liquid leaf because I was scared to try gold leaf and it seemed kind of expensive. BUT, I found that nothing can beat the richness of the actual leaf. I think the pits and flakes give it real character. Do not get me wrong I think there are great applications for liquid leaf and rub & buff. Leafing is really the only way to get this look for a lampshade.
Absolutely gorgeous! And, hey…I’m a sponge brush user myself…lol! :)
Thanks for partying with us.
Sponge brushes are so easy, reusable, and cheap. I use them as is, cut up, and have even used the handle for a dowel pin in a pinch! They are not perfect for every project but they can usually get the job done. Thanks for dropping by!