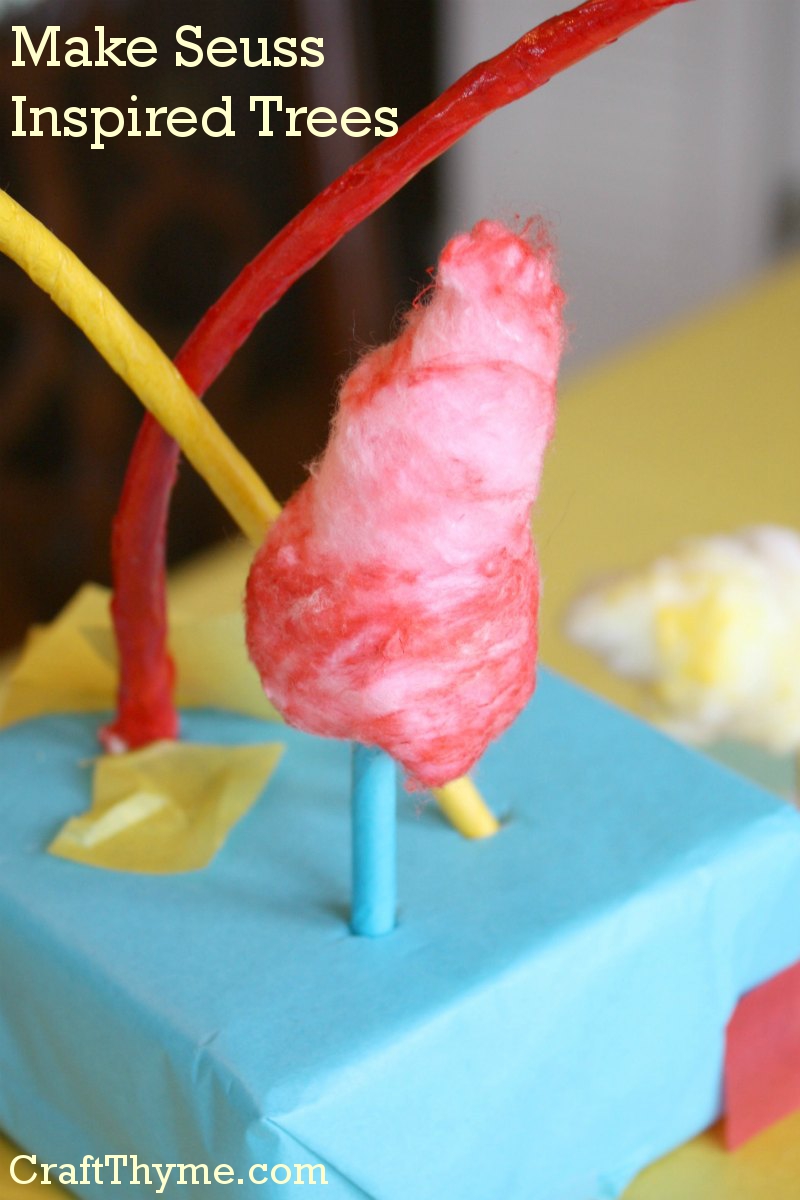
Want to make Dr Seuss inspired trees? Then you have found the most esoteric tutorial on the web. Hopefully this how-to will answer your extremely specialized questions. I debated making a tutorial on how to create Seuss like trees, but I personally wanted to recreate the pointy-one in the first picture as some sort of whimsical Christmas decoration. Plus I put some time in making these for Conlan’s Dr. Seuss themed first birthday, so why the hell not?

Supplies:
- Dyed Cotton Balls (You can see a tutorial on how to dye them here)
- Wooden Dowels or Bamboo Skewers
- Styrofoam (Or something for a base)
- Modge Podge (or thinned white glue)
- Tissue Paper (Traditional Dr. Seuss colors are Yellow, Red, and Aqua/Turquoise)
- Optional: Hot Glue
Step 1 Bending Dowels
Soak wooden dowels or bamboo skewers in water. I threw mine in a pot the night before: That means around 8 hrs of soak time. This will make them supple enough to bend into curvy shapes. You can see in the above picture that I just stuck mine in my, rather dirty, heating vent grate to dry. You WILL break a few and some may split a bit. I saved the broken pieces to make short trees, while, the splits can be trimmed off and will be covered in the next step.
After they were dry, I stuck ends into the bases to make sure that I had enough and to get an idea of the final placement.
Step 2 Adding Embellishment

Dr Seuss’ illustrations of trees have color and curves and the magical element of poof. To color the “trunks” cut a strip of tissue paper and lightly coat the dowel with a little glue. Then wrap the tissue paper around the dowel. You can leave a little on both ends uncovered as it will be sticking in the base.
Once covered, I lightly coated the tissue with gloss Modge Podge to give the trunk a nice sheen and make sure the tissue was nice and stuck.
Step 3 Add Poof

Simply take the dyed cotton balls and lightly stretch them into cones, swirls, and puffs. I then used hot glue to attach 1-3 cotton balls per tree. To hide the unsightly bases I wrapped them in an extra piece of tissue and simply poked the bottom of the dowel through the thin paper.
You can see the complete Dr Seuss themed birthday party click here.
Related Tutorials:
How to Dye Cotton Balls: It is #1 in my post 11 Household Items You Can Dye: With Tutorials
Enjoy these articles? Get periodic updates by joining my mailing list (no spam, no way, no how) or subscribing to my RSS feed.
