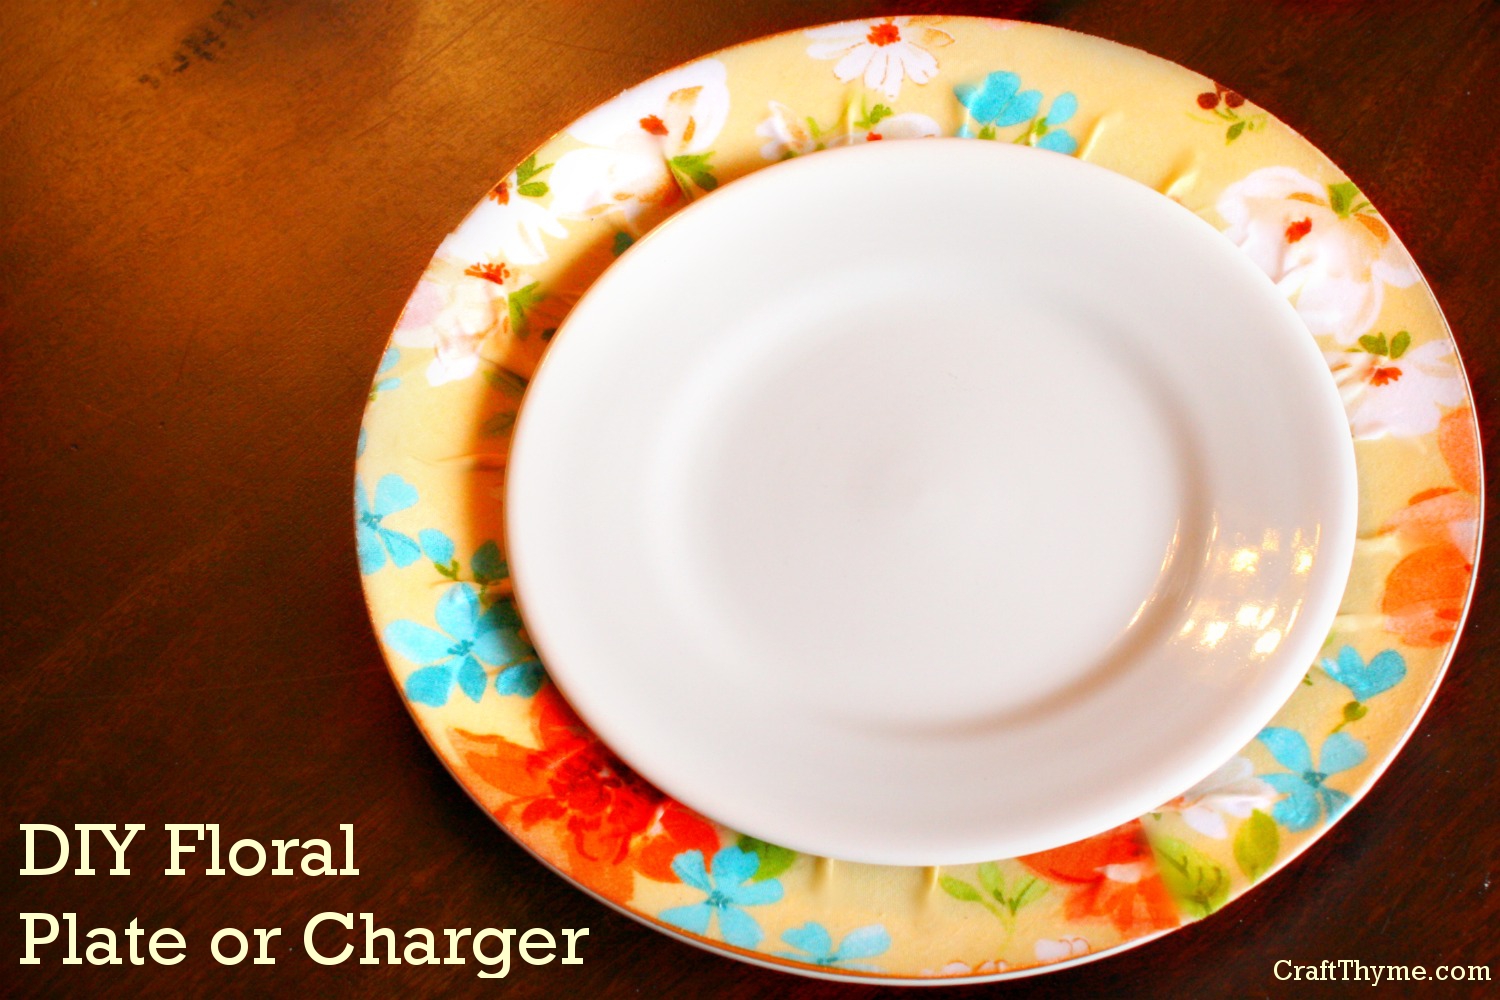
You might ask yourself: What the hell is a charger? Not only will I answer that question, I’ll show you how to make a pretty floral charger for your Easter table setting. While a charger is technically a car and the thing you use to make your cellphone keep working, in this case we are discussing a decorative plate. It goes under your regular plate for decorative purposes.
Basically a charger = a useless plate that you can’t eat off of. But damn do they look good.

Supplies
- Plates that can get
ruinedmade awesome (these lovelies we .50 a pop at Goodwill) - Fabric
- Decoupage Glue
- Something to paint the glue on with (foam brush, paint brush, fingers, whatever)
- Ruler
- Scissors (I happen to have rotary cutters but as long as you can cut fabric you’ll be fine)
Step 1 Cut Fabric on the Bias

Decide how large of a fabric rim you want on your plates. Mine had a natural edge so I chose that to be the width of my fabric strips. Use that width to cut multiple bias strips. Why bias? Well… I wanted the very outside edge to lay neatly on the plate and to create a “gathered” look towards the center of the plate. I’m not going to get into a lot of technical fabric mojo here, but bias cuts allow this. If you don’t know what a bias cut is or how to do one, let me google that for you. There are a variety of tutorials that will show you how to do that in a flash.
Step 2 Sticking the Fabric

Note: I thinned my decoupage glue with a bit of water because fabric really soaks it up, and frankly that stuff is expensive!
Take the glue and cover a few inches of the rim. Carefully stretch the fabric along the edge, pressing gently to adhere and smooth. Leave the center all ripply.
Step 3 Getting Messy

Stay with me because this should probably be a video instead of a still photo.
Take the fingers of one hand and form the extra fabric into little gathers, while holding the edge so it doesn’t slip. Now take your other hand and apply glue from the rim to center (a downward motion). This takes a little dexterity, but, no worries!. The glue makes it nice and slippery so if anything slides etc. you can nudge it back into place.
Step 4 Let it Mostly Dry

When the glue turned mostly clear you will want to take your plates and press down on all the gathers. I did this to make the charger flatter so the dinner plate will set level. I also did this for aesthetic reasons as it gave me an opportunity to smooth out any air bubbles and remove any excess glue. After smoothing the plate I put a second coat of decoupage glue to seal the fabric fully.
Notes
These chargers aren’t washable nor are the meant to be eaten on. With the multiple coats of decoupage glue they are wipeable.
If your strip fabric doesn’t go all the way around just add a second. I cut the end straight and overlapped it slightly right on one of the gathers. With the gathers and pattern it is hardly noticeable.
Regular Readers
I am mixing it up a bit. Usually I post the finished mantel, table setting, etc. first and then add the tutorials. This week we are going backwards! I’ll post the link to the final Easter table setting here when we get to it.
Enjoy these articles? Get periodic updates by joining my mailing list (no spam, no way, no how) or subscribing to my RSS feed.

It´s really nice, i´d like so much, congratulations!