Posted on 16 Comments

Bean Arts and Crafts Transformed

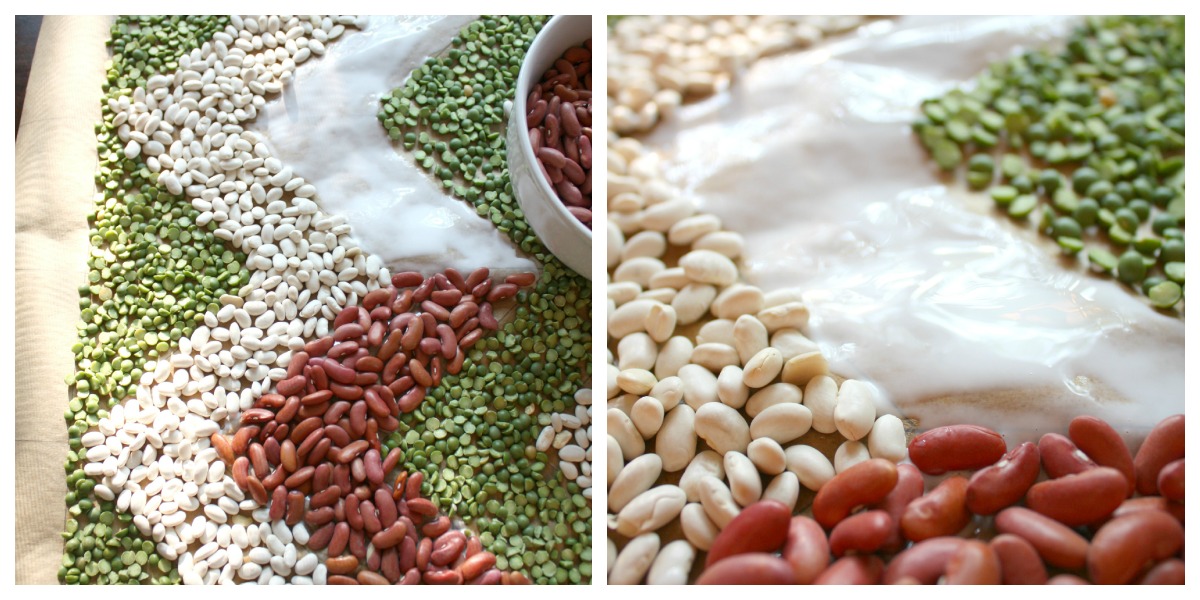
Detail of bean gluing process.

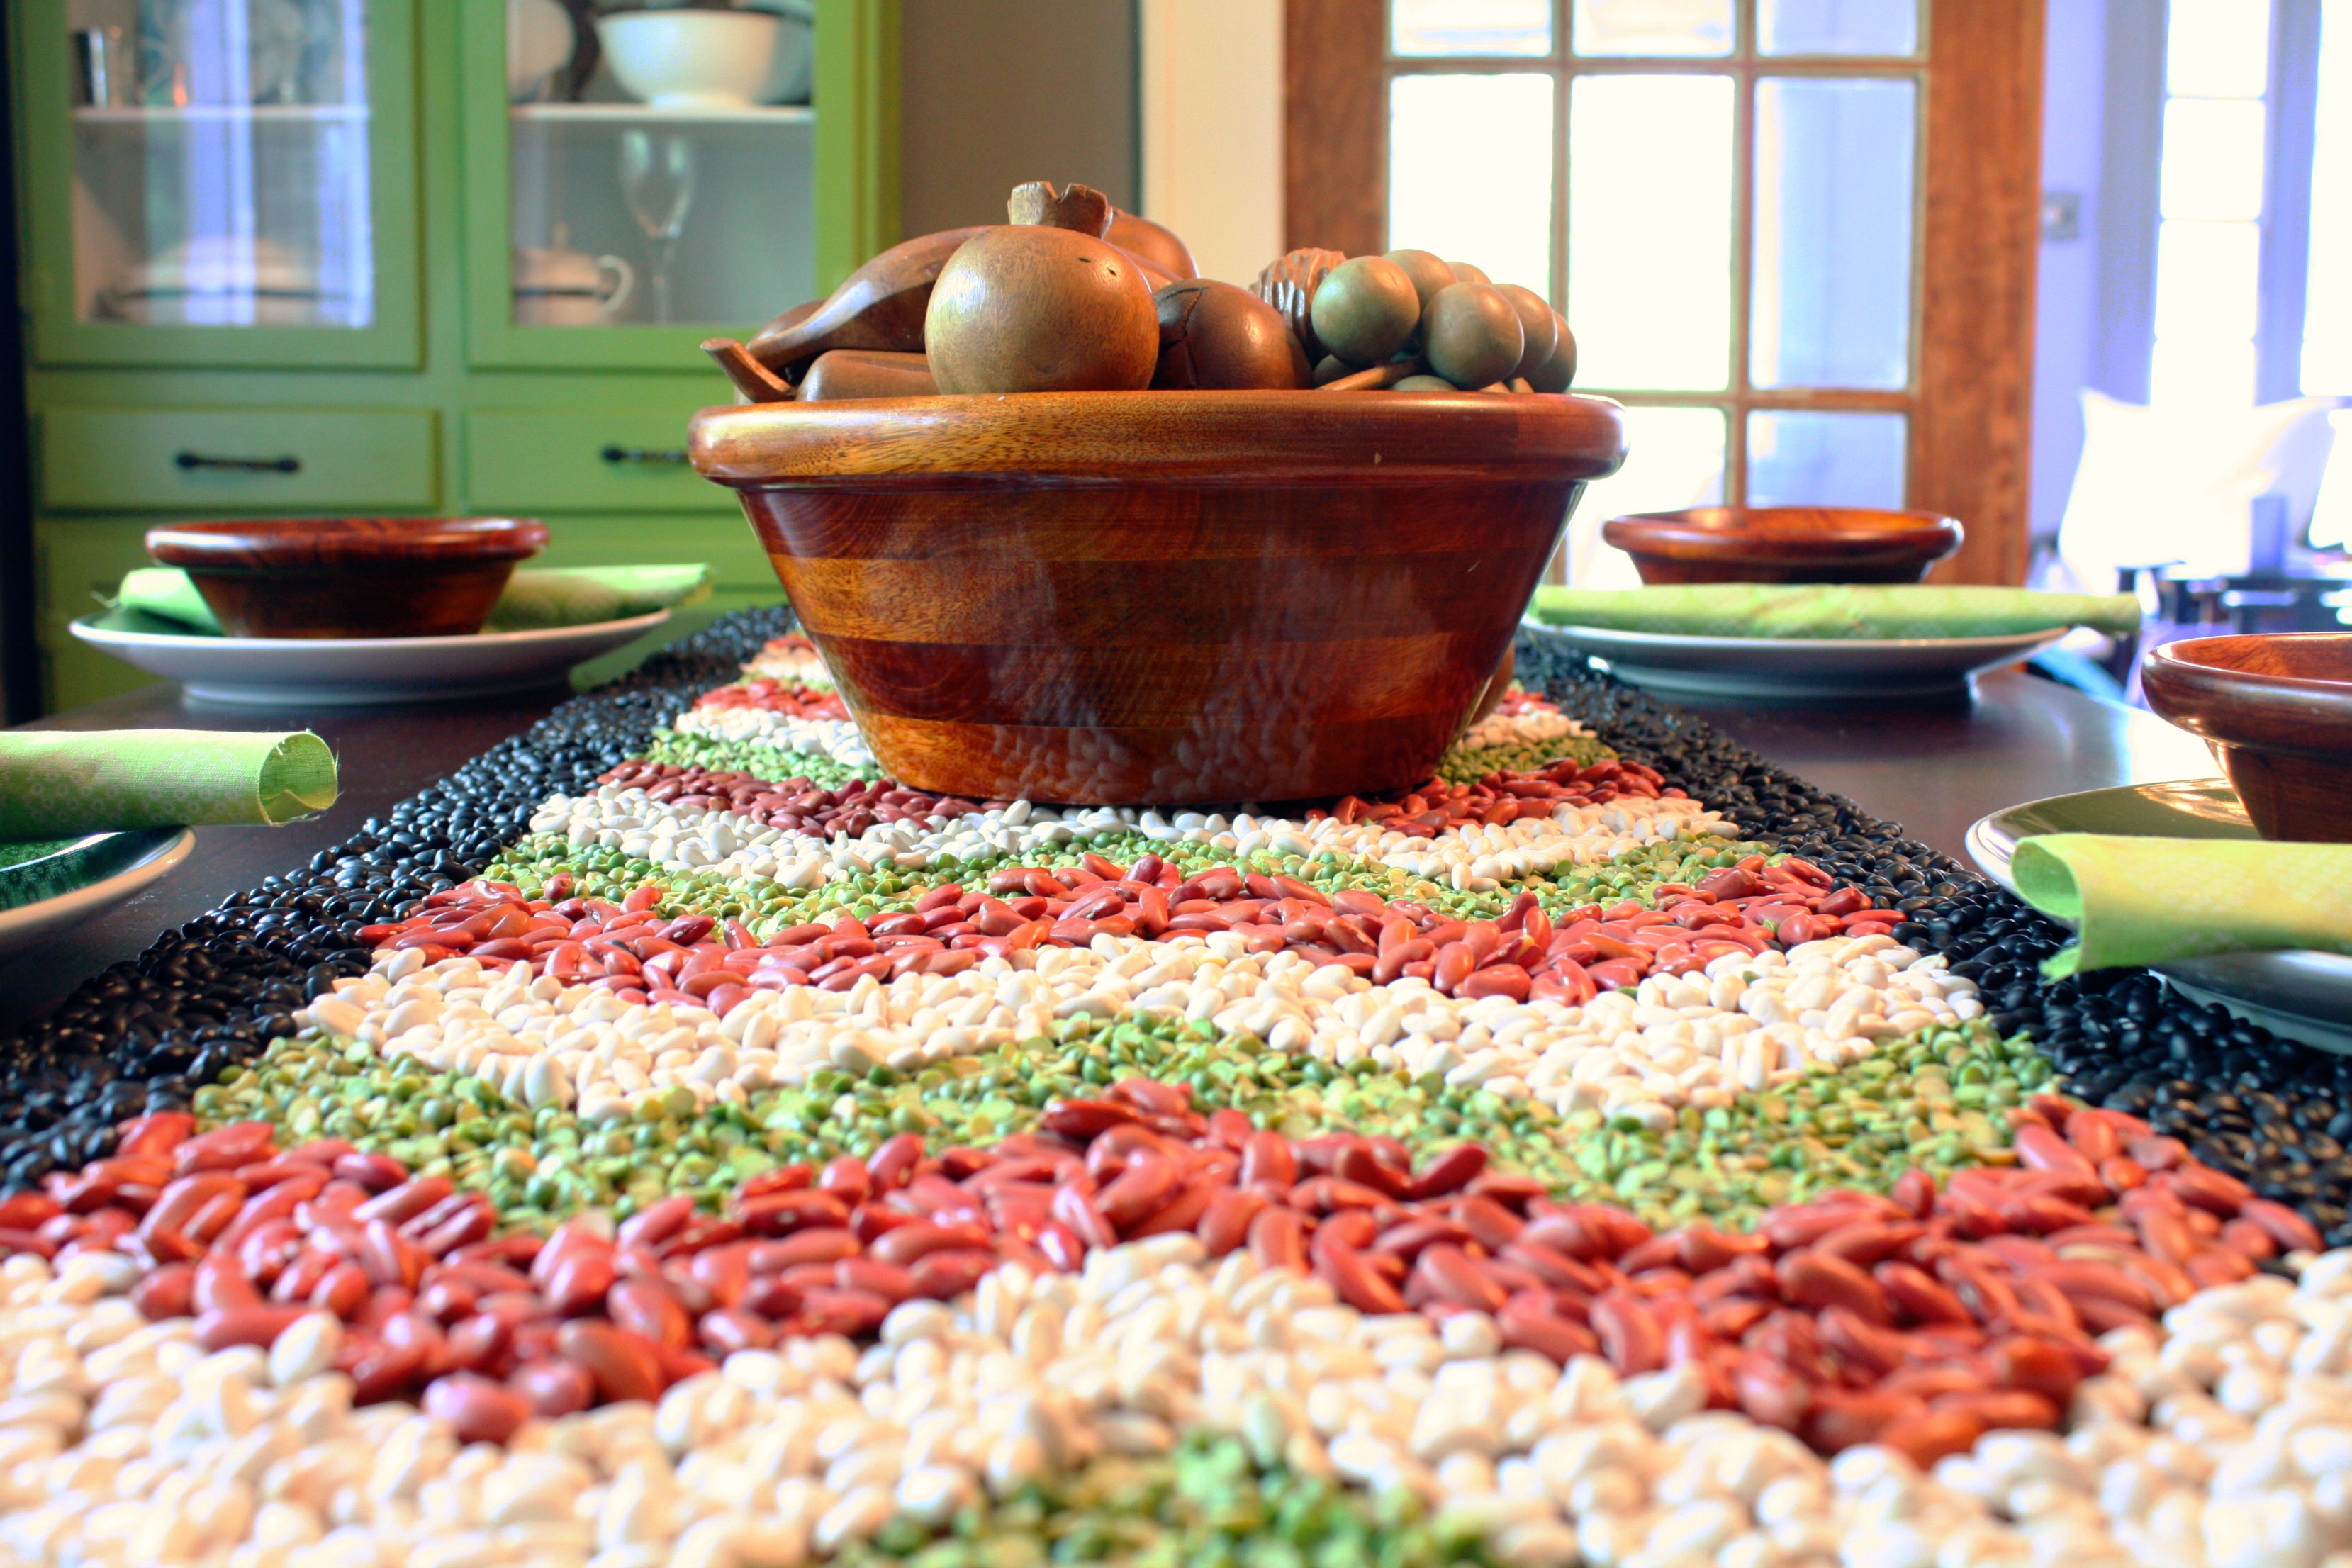
Have you had children? Were you a child? Then you should probably have made bean or macaroni art at one point and you are probably a homosapien. Have been recently gifted with some lovely artwork from my son I wondered if you could transform the homely bean art into something adult and sophisticated. Why yes, yes you can. Enter the Chevron Bean Table Runner.

Create a Textured Table Runner from bean crafting
Bean Craft At It’s Finest

Thank this is easy? Add a small child to the mix…

Supplies

Beans (various colors, split peas, rice, macaroni, whatever works)

Thick Craft Paper (this is the kind you can put down to catch paint splatters)

Pencil/Pen (to draw design)

White PVA Glue (thin lightly with water or you’ll be using a ton)

Patience

For the Chevron

Ruler

A way to mark 45 degree angles (I used a Triangle)


Step 1: Design

Supplies for textured bean runner


Decide on your design and cut out the length of paper you needed. I went with a straight forward chevron and penciled the pattern onto the paper.

Step 2: Distract Your Children

Sooo… If you have kids and there are tiny objects and glue they will want to help… Stop what you are doing cut them off some paper, add glue, beans, then begin your craft project again.

Child doing bean crafts
Don’t ask about the Mardi Gras beads. Its a ‘thing’ in my house.

Then give up and let the kids/cats/dogs/parakeets/slow loris help in the end. Tell me you don’t want a slow loris?

Child helping with bean art
McClain says he is my “Little Helper”. He is my “Best Helper”.

Step 3: Glue beans, and glue beans, and glue beans

The technique matters, because after you put a lot of beans on the project you aren’t going to want to pick it up and shake it like when you are applying glitter. I found putting a thick layer of glue for one color of bean and pressing a single layer of beans into the project worked well. I watered the glue down until it was easy to brush (using an old brush) onto the paper, but not so much that it soaked into the paper. Don’t fill to much space with glue or it will dry before you can get it all filled in.

Allot way more time than you think this will take. Well if you are anal like me and apt to go back and fill in empty spots. Which is my final suggestion. If an area looks bare just dab a bit of glue and press in a few more beans.

Detail of bean gluing process.


Notes

Uh this is pretty straightforward. If it isn’t then feel free to comment or email me for clarification.

Check out my fall table decor to see this bean craft runner in action… Well as actiony as a table runner gets.

Enjoy these articles? Get biweekly updates by joining my mailing list (no spam, no way, no how)

See other great DIY’s, Crafts, & Decor at these link parties: Lambert’s Lately, 52 Mantels, Live Laugh Rowe, Shabby Creek Cottage, The Pin Junkie, DIY Vintage Chic, Today’s Creative BlogC.R.A.F.T, Craft-o-Maniac, Home Coming

Posted on 19 Comments

Fall Table Decor

fall table decor featuring a chevron bean table runner

Autumn seems like a time for relaxation. The cooler weather forces an end to the constant outdoor activity but it is before the bustle of Christmas. Fall is a time to just let it go. Therefore my table is simple, clean, and easy.

The main show piece is a chevron table runner made from beans (click here for the tutorial).

See I can have a serious craft post from time to time.

The centerpiece is an assortment of carved wooden fruit. My grandparents lived for a time in Thailand, and brought back and assortment of hand carved furnishings and decor. I managed to snag a double set of the fruit. So much cooler than old-school wax ones.

Wooden fruit hand carved in Thailand

Simple wooden bowls and green accents match the runners. Perfect from the green transition of summer to the ruddy browns of fall.

Fall table decor details featuring pea green and ruddy browns

Enjoy these articles? Get biweekly updates by joining my mailing list (no spam, no way, no how)

Enjoy other great DIY, Crafts, & Decor at these link parties: By Stephanie Lynn,  The Pin JunkieCraftberry Bush, Craftionary, The Jenny Evolution, Peek into My Paradise, Tidy Mom, My Romantic Home, Simply Sweet Home, The Stitchin’ Mommy, DIY Vintage Chic, Twigg Studios, I Should Be Mopping The Floor

Posted on 8 Comments

Sea Shells & Lemonade = Table Decor?

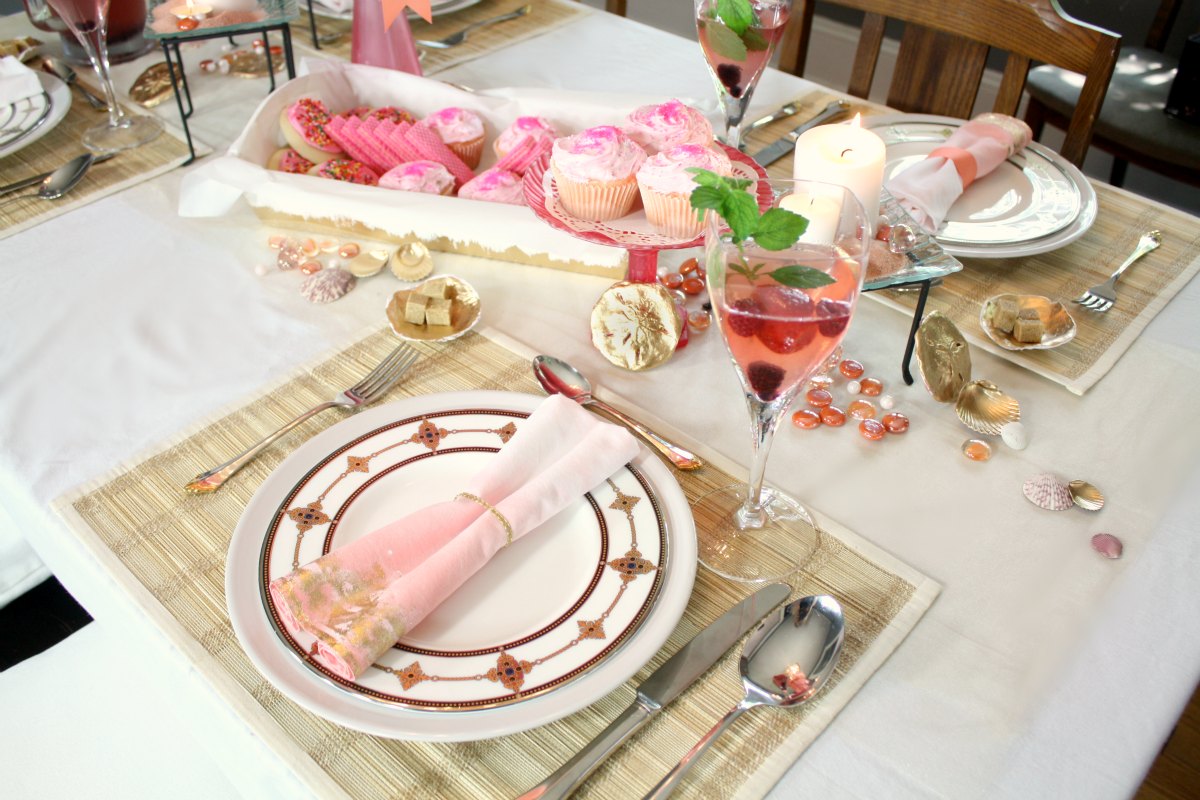
Sea shell inspired table decor.

I initially had the idea for this table setting from some sea shells I found when scrounging through my mess of a basement.   I had saved a small bag of pink scallop shells and thought they would make a good basis to start my summer decor.  Though I live  in the mountains my second love is the beach.  I wish I was a lake girl, since so many lakes are so much closer, but the mud, the dark water, the…  Nope it is sand and surf for me.  However, any good mountaineer knows overdoing the surf theme just seems out of place.  So here is my hybrid of pink, salmon, & gold.  Call it pink sand, shore, and lemonade inspiration.

Table decor inspired by pink sea shells
I’m so good at naming tablescapes… #sarcasm. Please suggest better names in the comments! Please!

The table setting is anchored by a diy ribbon chandelier (tutorial here) above and gold tulle net runner below.  The gold accents unify the various shades of pink that run from rose to salmon.  Shoo… okay I can say I used my art degree today to critique my design.  Now on the the fun stuff!

PINK LEMONADE CUPCAKES!

I knew I wanted some fun pink desserts and, thank the grocery gods, I walked by a display for Pillsbury pink-lemonade cupcakes.

Table setting inspired by pink seashells
Read below to learn more about my awesome baking skills.

Yes I can bake…  But can I decorate a cake?  Oh hell no.  It is a crafting skill that is just beyond me.  Knowing this, I often take the easy way out with mixes, pre-made icing, and sugar sprinkles.  As far as I can tell sugar sprinkles cover a multitude of sins.  Plus who could walk away from a thing of icing labeled ‘Pink Lemonade”.  And I swear I am not getting paid by Pillsbury to say all this awesome stuff.  Though, if they would like to, feel free to give me a ring.

Pink and Gold table decor
I like to call this the sugar, sugar, sugar portion of the table

Oh my!  I almost forgot mixed berry sangria!  Perhaps I should preface this with my Facebook status:pink-fb-statusNot to be a braggart but I make multiple awesome sangrias.  Citrus, berry, peach, etc… One for every season.  The recipe for this mixed berry and lemonade one will be up Thursday!

Salmon and Pink place settings
Gold Finger! A tutorial for creating your own gold sea shells and sand dollars from paper clay is in the works.

One of the things I enjoyed most about creating this display was learning to gold foil fabric (tutorial coming).  I thought the ombre dyed napkins (another upcoming tutorial) really set of each place setting because of the gold edging.  I’ll leave you with one more picture and a list of craft tutorials and how-tos required to recreate this summer table decor.

Sea shell inspired table decor.


I would love to have a better name and ideas on what you like or would improve.  Every table display is a learning experience so please leave comments.  Other than the cupcakes… Those mo-fo’s were delicious!

Tutorials:

How to Dye Sand

Permanent Sea Glass Finish

Modern Ribbon Chandelier (yes it is supposed to look like that)

Mixed Berry Sangria

Ombre Dyed Napkins

Gold Foiling Fabric August 8, 2013

Mold Making from Polymer Clay (Gold Seashells and Sand Dollars) I have photos and how tos but I am not sure how many people like to sculpt and make molds…  I may or may not post a tutorial.

Enjoy these articles?  Get periodic updates by joining my mailing list (no spam, no way, no how) or subscribing to my RSS feed.

See more great crafts and decor at these link parties: Our Home Away From Home, Today’s Creative Blog, Daisy Cottage Designs, Shabby Creek Cottage, House of Hepworths, Live Laugh Rowe, The Crafty Blog Stalker

Posted on Leave a comment

Easter Table Setting: Florals

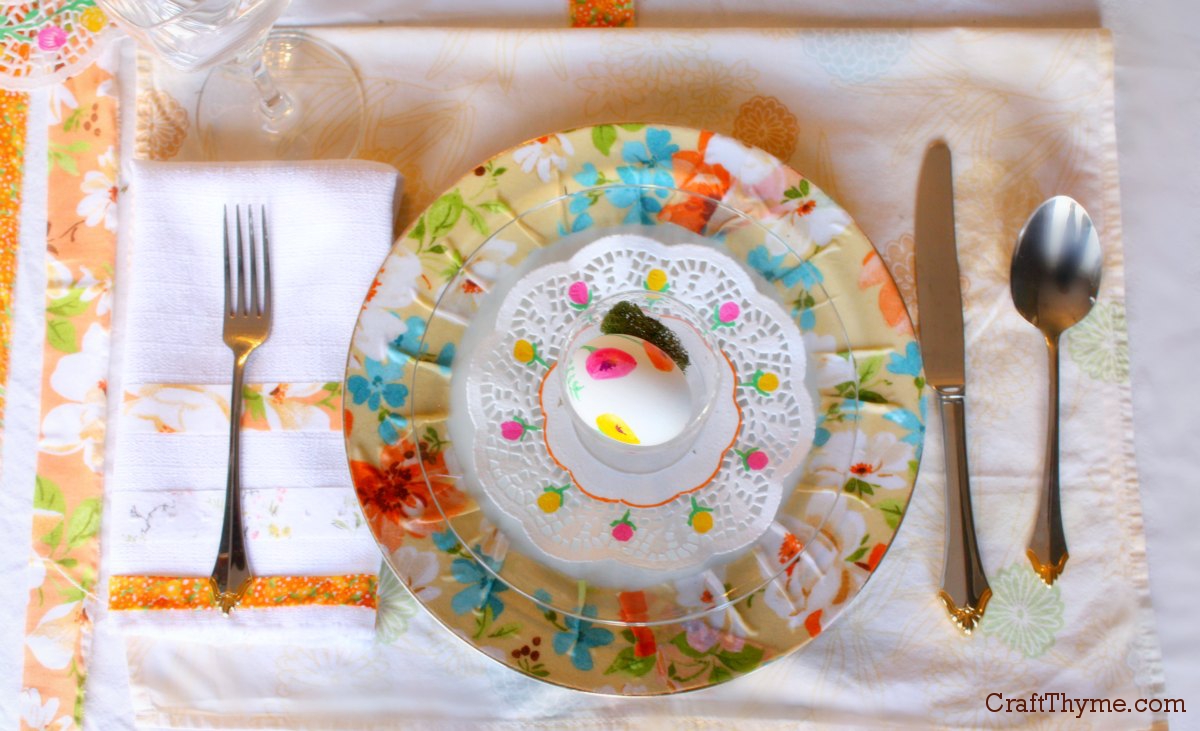
Decorated table setting for Easter

I always have a ton of ideas when it comes to creating any table setting.  Easter is no exception.  It is more a case of me trying to stick with 1 theme and make a cohesive look for any of my crafts and decorations.  This year I settled on a floral theme.  Initially, when I thought of florals; I thought pink!  Well let’s be frank, for me, a little pink goes a long way.  So bring on a fresh new color for Easter.  Orange!

Easter Decorations and Table Setting

Obviously, these Easter place settings used my hand-made chargers, no-sew napkins, and patterned Easter eggs.  However, I always have to add some details.

DIY Floral Table Setting


I wanted to layer a number of patterns to create a bohemian feel.  Strips of various floral patterned fabric dressed up white table cloth.  While I quickly colored the floral part of various paper doilies to complement the colors already used in the fabrics.

Decorated table setting for Easter

I also tried to bring in a little spring green, white, and tan to balance out the colors.

Floral Easter Place Setting

I am pleased that the table setting and Easter decorations came out Spring-like and feminine without resorting to a pink bonanza.  Here is one more shot of some of the details.  Below that are all the accompanying tutorials for creating your own DIY Easter decorations.

Easter decorations and decorTutorials

Enjoy these articles?  Get periodic updates by joining my mailing list (no spam, no way, no how) or subscribing to my RSS feed.

Posted on 1 Comment

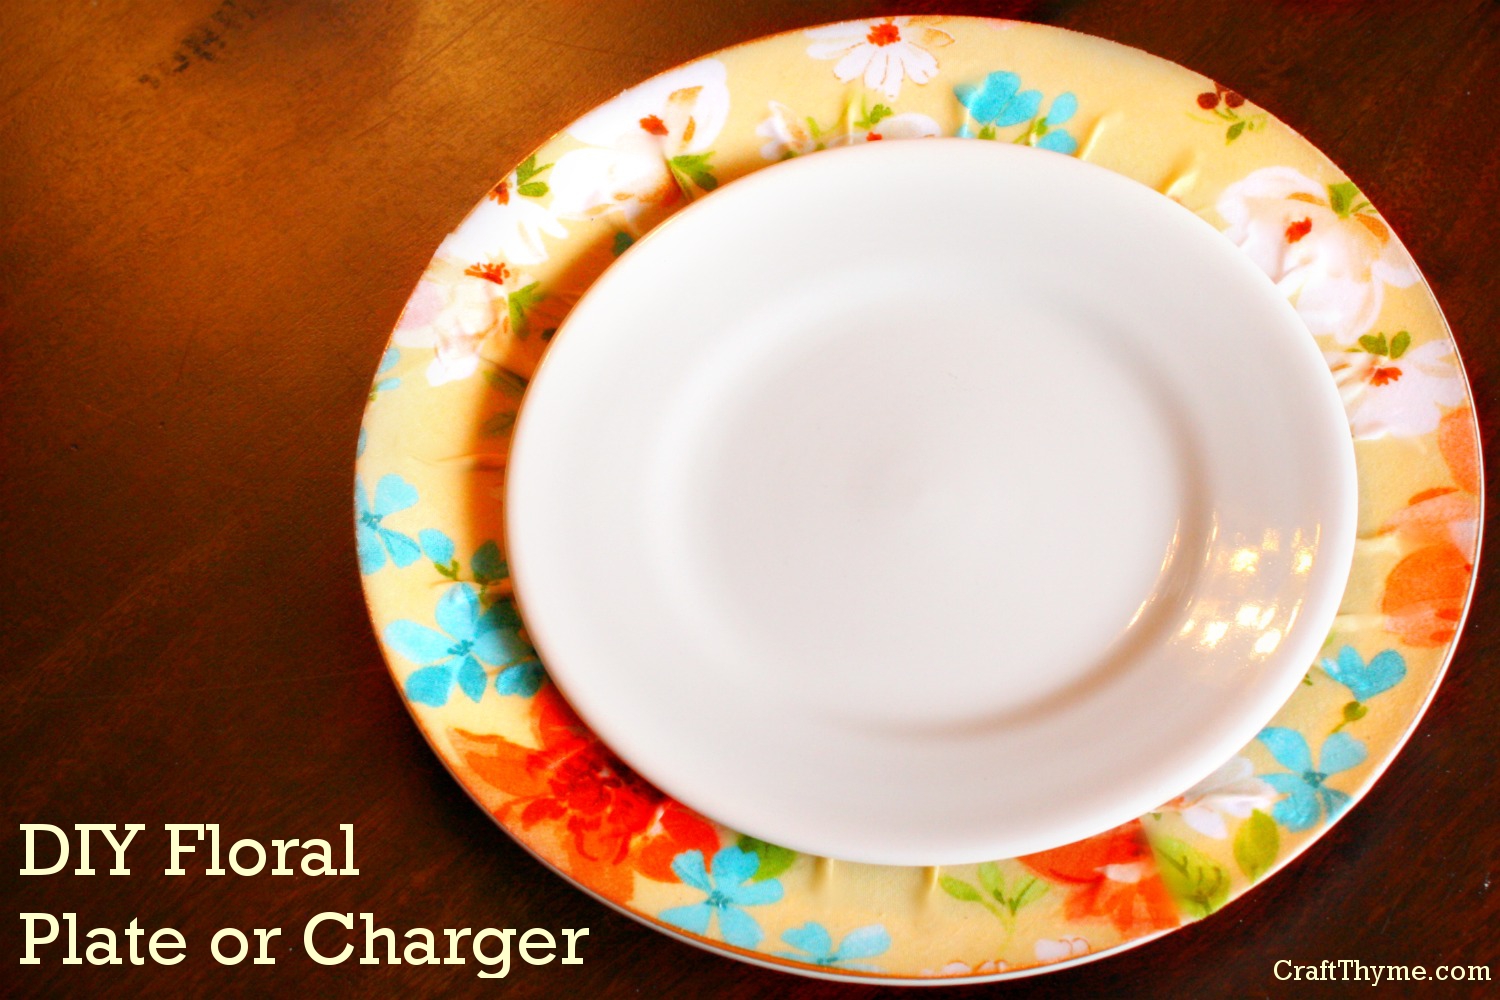
Make a Floral Charger or Decorative Plate

DIY floral Plate or Charger for Easter

You might ask yourself: What the hell is a charger?  Not only will I answer that question, I’ll show you how to make a pretty floral charger for your Easter table setting.  While a charger is technically a car and the thing you use to make your cellphone keep working, in this case we are discussing a decorative plate.  It goes under your regular plate for decorative purposes.

Basically a charger = a useless plate that you can’t eat off of.  But damn do they look good.

DIY floral Plate or Charger for Easter
Damn that is a mighty fine looking useless plate

Supplies

Floral Plate - Charger Supplies

  • Plates that can get ruined made awesome (these lovelies we .50 a pop at Goodwill)
  • Fabric
  • Decoupage Glue
  • Something to paint the glue on with (foam brush, paint brush, fingers, whatever)
  • Ruler
  • Scissors (I happen to have rotary cutters but as long as you can cut fabric you’ll be fine)

Step 1 Cut Fabric on the Bias

Cutting Fabric on the Bias
You can see that I am very exact in my measurements #Sarcasm

Decide how large of a fabric rim you want on your plates.  Mine had a natural edge so I chose that to be the width of my fabric strips.  Use that width to cut multiple bias strips.  Why bias?  Well…  I wanted the very outside edge to lay neatly on the plate and to create a “gathered” look towards the center of the plate.  I’m not going to get into a lot of technical fabric mojo here, but bias cuts allow this.  If you don’t know what a bias cut is or how to do one, let me google that for you.  There are a variety of tutorials that will show you how to do that in a flash.

Step 2 Sticking the Fabric

Adhering the fabric to the plates
You’ll note that I put down some old newspaper. Modge Podge is a beotch to scrape off the table.

Note: I thinned my decoupage glue with a bit of water because fabric really soaks it up, and frankly that stuff is expensive!

Take the glue and cover a few inches of the rim.  Carefully stretch the fabric along the edge, pressing gently to adhere and smooth.  Leave the center all ripply.

Step 3 Getting Messy

Step 3 adhering the gathers
I hope the glue really is non-toxic since I basically decoupaged my hand.

Stay with me because this should probably be a video instead of a still photo.

Take the fingers of one hand and form the extra fabric into little gathers, while holding the edge so it doesn’t slip.  Now take your other hand and apply glue from the rim to center (a downward motion).  This takes a little dexterity, but, no worries!.  The glue makes it nice and slippery so if anything slides etc.  you can nudge it back into place.

Step 4 Let it Mostly Dry

Step 4 removing air bubbles
Yet another photo that looks like I need a manicure and have some flaky skin disease. I promise it is the glue!

When the glue turned mostly clear you will want to take your plates and press down on all the gathers.  I did this to make the charger flatter so the dinner plate will set level.  I also did this for aesthetic reasons as it gave me an opportunity to smooth out any air bubbles and remove any excess glue.  After smoothing the plate I put a second coat of decoupage glue to seal the fabric fully.

Notes

These chargers aren’t washable nor are the meant to be eaten on.  With the multiple coats of decoupage glue they are wipeable.

If your strip fabric doesn’t go all the way around just add a second.  I cut the end straight and overlapped it slightly right on one of the gathers.  With the gathers and pattern it is hardly noticeable.

Regular Readers

I am mixing it up a bit.  Usually I post the finished mantel, table setting, etc. first and then add the tutorials.  This week we are going backwards!  I’ll post the link to the final Easter table setting here when we get to it.

Enjoy these articles?  Get periodic updates by joining my mailing list (no spam, no way, no how) or subscribing to my RSS feed.