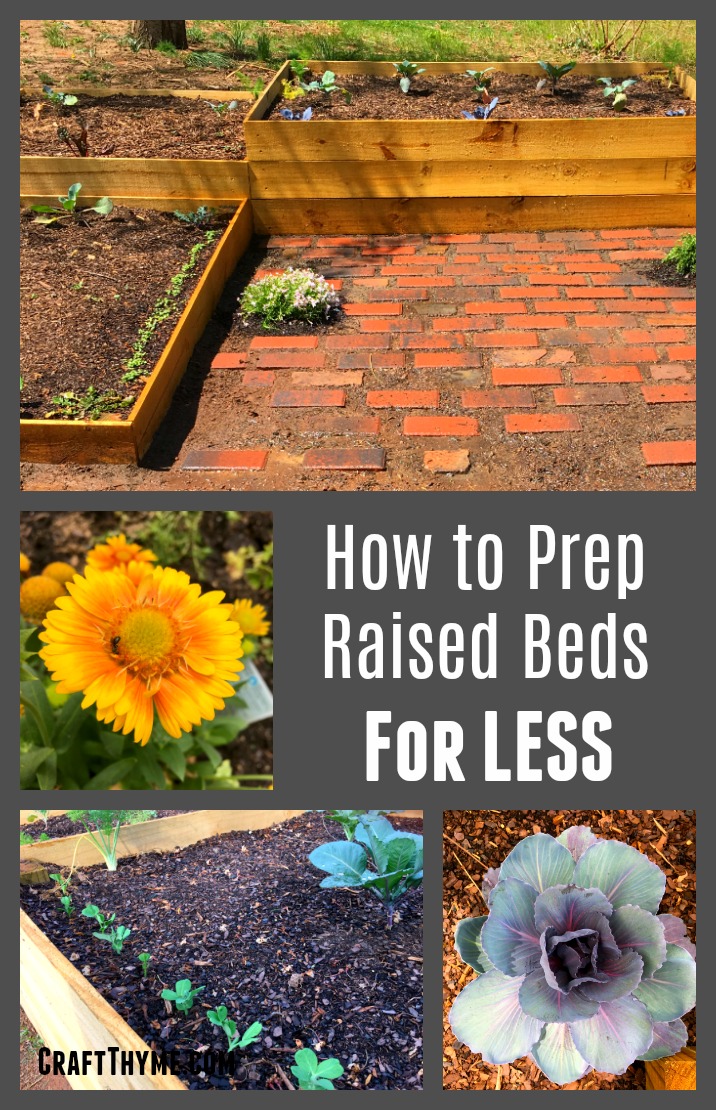
Do you want to know the best way to prep raised beds once you have them built? The soil mixture you use for your raised beds is a hotly contested subject; and everyone has their own techniques. However, we have developed our own unique method that is cost effective (a nice way of saying cheap as possible), retains moisture, and keeps weeds from coming up through the bottom of your bed. I feel pretty secure that our method will give you a good weed free start on your raised garden beds. We have been working with it all summer and despite the groundhog setback the beds have been yielding lots of pretty veggies and flowers. We got the idea from hugelkultur beds (a topic for another post) and tested it out in our newest DIY garden boxes. It is working great! First let us give you the lowdown on some of the problems of raised garden beds and then get onto prepping those beds.
Raised Garden Bed Issues
We can all agree raised beds have a lot of advantages. You have more control of the soil, attractiveness, soil drainage, etc. BUT, in our experience some of the great things about raised garden beds can also be issues.
- Raised garden beds can dry out very quickly. Like whoa…
- Weeds, especially grass, like to pop in from the bottom/sides
- It costs a lot to fill a raised bed
Craft Thyme’s process for preparing raised garden beds addresses all the above issues and helps make the beds virtually weed free! Affiliate links may follow.
Supplies
- Landscaping Fabric (Yes, I am suggesting making a deal with the Devil)
- Stapler (Like a construction stapler, not a red swingline)
- Scissors
- Wood branches/chips/logs (see below)
- Topsoil
- Garden Soil
- Compost (Optional)
- Plain Cardboard or lots of Newspaper
Step 1: One of only two times you will hear me say use Landscaping Fabric
As a matter of course landscaping fabric is the devil.
Landscaping fabric is the thong of gardening. It serves a small purpose and is always in the way forever after.
However, in preparing raised garden beds I have found it very useful. Start with a long sheet of landscaping fabric. I try for at least the length of one side of the raised garden bed and fold it in thirds. But if you happen to be folding it outside on a windy mountain day, well you are going to curse and probably cut shorter sheets). Cut along those fold lines to make three strips of landscaping fabric that is about 12 inches wide (Most standard rolls come in 3ft widths. Obviously, cut accordingly if you buy one of those big honking rolls).
Take the fabric and staple the fabric no more than 6 inches high on the wood of the bed. Anytime you hit a corner or have to start a new piece fold the fabric and overlap. More fabric is not bad in this case.

This process is, in my humble opinion, and excellent squat workout. Adam built a lot of beds… Let’s just say I got quit the glute workout. You can staple it lower if you have small beds, but you want to insure that the fabric overlaps the ground below. This will work as a barrier to keep dirt from leaking out of your beds and weeds from poking in on the sides. Remember we are going for weed free raised garden beds!
Step 2: Wrap it up
Take sheets of cardboard or 5-6 sheets of newspaper and cover the entire bottom of the bed. If you have issues with the newspaper blowing around you can wet it down to make it stick to the ground. It should overlap over the landscaping fabric. This will make sure the fabric stays down when you start filling the beds. The cardboard/paper will decompose over time and the roots of plants will be able to go past it to dig in the soil below.

Step 3: Wood is Good
NEXT LAYER! Not sure why I needed to scream that, but it felt right. So the next layer is dependent on the height or your bed. Shallow beds will get just wood chips, deep beds get sticks covered with wood chips, deeper beds get logs, then sticks, then wood chips. Hopefully you get the idea.

The wood acts like a sponge and holds water in the raised bed. I have heard the decomposition of wood can rob the soil of nitrogen, but so far we have been good because the soil is going to suck anyway. Read further to see the discussion on supplementing the soil and how to tackle that going forward.
When gauging the depth of the bed, leave a minimum of 6 inches of room for actual dirt from the top! Cause plants can’t live on wood alone, mushrooms are another story. Few tips for selecting wood:
- Old rotting logs are best
- Small dry sticks and old leaves will also work
- We happened to have a lot of fallen logs and wood chips from tree work we had done in the fall. If you do not have your own; try to find twigs, branches, etc from the neighborhood. It is always easy to collect fallen limbs after a storm. Unless you live in a desert… Or grass lands… If you have to buy bags of wood chips try for the non-colored/Untreated types where available

Step 4: 5 Second Rule (Dirt don’t hurt)
In case I hadn’t already diverged from traditional gardening advice enough… You have two options available for dirt. You can spend a fortune and get the best, compost-ful dirt you can find. Almost every post you will read on the internet will suggest spending as much as possible on dirt. Maybe that is a great way, but I follow the second method: 3 inches of cheap topsoil and the 3 inches of whatever gardening soil is available for sale at the local big box store. I turn a blind eye to the label for this one moment in time and throw whatever horrible bag it is in the bed.

Trust me these bags are labeled as fertilizer for 10,000 months! Grow an Amazeballs Garden! Etc. They aren’t good, they do not last a quarter as long as they say, and I feel bad, but they are cheap, get your garden going, and give you a base to build really awesome soil in the future. I’d choose gardening some over gardening perfect everyday!

Now What?
That folks, is how you prep a raised garden bed. The landscaping fabric/cardboard and purchased soil insure you start with a weed free bed! Feel free to plant away! If you follow this planting guide your veggies will help shade the ground and keep a lot of new weeds from sprouting.
But wait there’s more…
Couldn’t resist the infomercial appeal. Once you start with this technique you are going to have a couple options to ‘raise’ these beds to a higher level. Get it? You have a small amount of soil on top of a lot of ‘not exactly nutrient rich’ material. The wood material is what is helping keep your beds nice and moist, but it isn’t adding a lot of umph to the growing power of your plants. We combat that by adding organic fertilizer the first year. I also throw every single earthworm I find into the raised bed. You could, alternatively, add lots, and lots of compost throughout the growing season.
In fall I cut all the old annual plants at the base and allow their roots to rot in the soil all winter long. Additionally I rake in mostly composted chicken droppings and/or mostly finished compost and let the bed set. Do not rake it deeply into the soil (a couple of inches or two is perfect. You want to let the earthworms, fungi, and other bugs do most of the work). After the first year, I transition the dirt into a more traditional organic method. I focus on building good soil out of my cheap base which is an entire topic for another post. In short, I add compost as the season continues and by that point the soil is usually healthy enough to support year round planting! In short, though, you can expect to get one good season just out of the crap soil. So go out and get planting! And yes these seedlings and seeds came from my favorite vendor Sow True Seed!

I’ve been using weed barrier too. I cut it in half so that there’s more on the ground around the edges though, because I’m fighting very aggressive Bermuda grass. I use several layers of cardboard too, because newspaper won’t stop this stuff. Wood chips though…. that’s an excellent idea! I’ll be keeping my eyes open for a source for that, I think it would be a great addition.
Thanks! They help an immense amount in the water area. I used to have to fight to keep moisture in my raised beds, but this put them almost at an in-ground watering schedule once the plants were established.
[…] Craft Thyme shared how to prepare raised garden beds – weed free! […]
[…] Craft Thyme shared How to Prepare Raised Garden Beds […]
This is perfect!! I love gardening but hate weeding. I never thought about letting the roots die in the box for fertilization. That is a great idea.
It keeps the dirt nice and aerated too!