Posted on 22 Comments

How to Make Timber and Pea Gravel Stairs

How to Make Timber and Pea Gravel Stairs

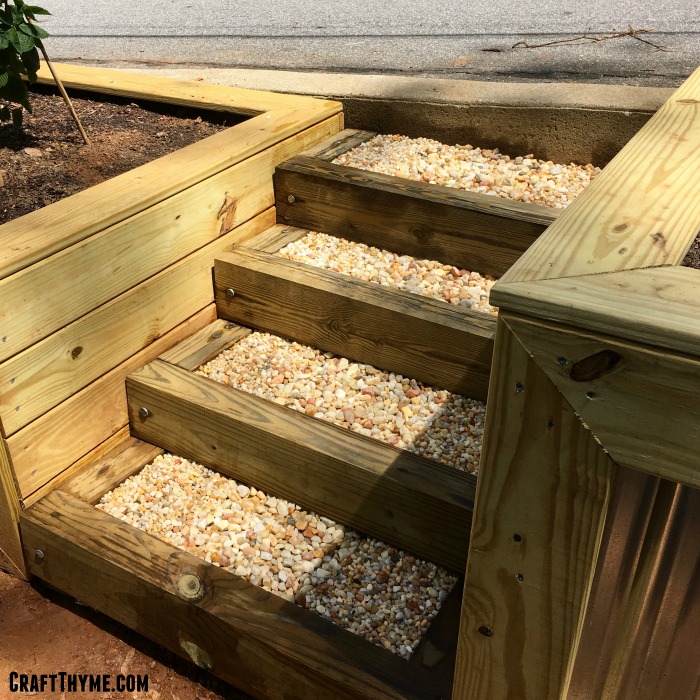
Pea gravel stairs? Timber stairs? Outdoor garden stairs? We really aren’t exactly sure what to call the new outdoor staircase that we built in our tiered raised garden beds, but we figured we had better get a ‘how to build timber and pea gravel staircase’ article up pretty quick after posting a picture on our Facebook page. People started asking! Which is kind of a big deal for a tutorial here at Craft Thyme. It seems kind of funny because we almost did not go to the trouble to build these timber stairs. We had been mulling over just using pre-fab risers when Adam got a nice Lowes gift card for his birthday (Thank you In-Laws!). With that little extra bump we decided to go all out and make, what I consider, really fabulous timber and pea gravel stairs. Of course this tutorial is for just one of three staircases we will end up building. On to the tutorial on building: pea gravel, timber, outdoor, (insert name), really freaking awesome stairs!

Building Fabulous Outdoor Timber and Pea Gravel Stairs

Below are directions on how to build four 12″ deep and 3′ wide stairs that rise around 3′ in height.  There are a lot of rise over run calculators on the web you can use to figure out a different installation.  Just remember that dimensional lumber is never the exact dimensions.  6″ was closer to 5.75″!  Measure your wood!  Also affiliate links may follow.

How to Make Timber and Pea Gravel Stairs

Supplies to Make A Small Outdoor Staircase

30′ – 4″X 6″ Copper Treated Timbers (You can read about our thoughts on copper treated wood in the garden)
8- 8 Inch Spike Nail
6- 10 Inch Spike Nail
Pea Gravel (Or some other pretty filler)
Landscaping Fabric (Optional)

Useful Tools

Saw (Our miter saw is one of my absolute favorite powertools)
Tape Measure
Small Sledge Hammer or Hammer
Small Level
Mattock (Also known as my favorite digging tool ever)
Shovel
Heavy Duty Stapler (Optional)

Supplies to build an outdoor staircase for the garden

Step 1: Dig and Sweat

We will save you the details of this part, but suffice to say you are going to need to dig. A lot… We have some pretty nice topsoil on our property but after a certain point we have hard red clay, roots, and rocks. So many roots and rocks… Anyway, we took turns removing the dirt far back enough to set the first stair. We cut in the sides of the soil just wide enough to fit the legs of the ‘U’ shaped stairs. Trust me you don’t want to dig anymore than necessary.

You are going to be building these stairs from the bottom up. So, plan to leave a little mound of dirt that will go through the center of your steps up to the top. Less dirt removal = less dirt to return to each step AND less digging!

Step 2: Is Actually Step 1

The second step is to build the first step! You are going to cut your timbers and form a ‘U’ shape. First cut your front timber the width of your opening. In our case it was slightly under 36″. Then cut two timbers to make the legs of the ‘U’. We opted to not place the timbers the entire way to the back of the wall. We did this for two reasons. First we have (as mentioned in the digging/sweating part) hard packed clay. This dirt is S.O.L.I.D. and digging it out is a beotch. Secondly, since the dirt is so stable we opted to save timber length. We opted to go 3′ back on the legs. We figured this would give us the stability needed and save us an extra 2′ on timbers(and digging!).

After cutting the timbers you are going to need to make your ‘U’. We pre-assembled ours and slid it into place. How did we assemble?

How to build the first step for a pea gravel and timber staircase
Soooooo… Many…. Roots…

Use the long width of your board (5.5″) side to make the rise of your stair. Place one of the 3′ legs behind it and hammer your 8″ spike right down the center. We had concerns about the wood splitting and considered pre-drilling a pilot hole. Of course being the way we are, we opted to just hammer away. And by we, I mean Adam. Those spikes take some real force to get into the wood. My job was to hold the wood and close my eyes so that I wouldn’t flinch every time he hammered in the spike. Want to talk about a trust-fall of marriage proportions. Will you hold a piece of wood, while your significant other hammers in a large metal spike with a small sledge hammer, by your hands and face? Yeah… Complete this same set of shenanigans on the other leg and then slide the first stair into place.

Detail of the spike in our DIY outdoor staircase

Step 2.5: Leveling the Step

While this is kinda part of the above step it is super important to get the first step in level and firm. All other stairs are going to be built off of this one so you need to make certain you have this one right. As you can see in the photos above we couldn’t find our ‘not 18ft long level’ so we ended up using a post level. It worked fine, but it probably would have been a lot easier with a 1 foot to 18 inch level. If you look closely at the bottom stair you will see that it appears to be floating. This is because we have several shims under it to make certain the step is nice a straight. We plan to go and back fill the step once we have made the path in front of it level as well. So much leveling…

Step 3: Making Your Stairway to Heaven Or the Road

The next parts of the process are very similar to step 1. You will make a second ‘U’ shape with the timbers. Simply make the arms of the ‘U’ two feet instead of three. Place it directly on top of the first stair and set it back 12 inches. You are going to want a nice 12 inches of clearance for those of the larger foot variety. I imagine that might not be deep enough for some gargantuan feet but it worked well enough for our family. Once you have your stair in place make sure it is level. Shim if necessary! Picking out straight timbers in the store makes this process a lot easier. I might occasionally yawn and roll my eyes as Adam carefully stares at each board, but in situations like these, a nice straight beam makes for a much faster installation.

Measuring the depth in our outdoor timber staircase

Once you have the stair in place it is time to drive in another spike. It is questionable as to whether this step is necessary but we wanted to make very sure this staircase wasn’t going anywhere. Plus I kinda liked the industrial look of the spikes. Just make sure to hammer your spike inside the 12 inch range. Otherwise you are going to have a wobbly step when you put the next level on. As an alternative, if you did not want to see the spike you could pre-drill a hole to countersink the head of the spike. In case you think I was making up the muscle strength needed to drive in a spike if you do not drill a pilot hole I made a tiny video! If you are upper-arm strength challenged (me) you are going to want to drill first then hammer.

Step 4: More of the Same

Continue the same process as step 3. We made the next tier have arms that were also two feet to tie them into the dirt better and give a good base for the last step that only had 12 inch arms. Our particular installation was constrained by the city road and curb so the wooden arms of each ‘U’ could only go back so far for stability. Because of this we did tie in a few hidden screws to the raised beds on either sides just to make sure that the hundreds of times the kids run up and down the stairs they never pull away from the curb. It really seemed to me that, if you have the ability to put in longer wooden arms and bury them in the dirt you wouldn’t need to worry about these stairs going anywhere.

How to build a pea gravel and timber staircase for the garden

Step 5: Styling and Profiling

After all the steps on your pea gravel and timber staircase are in place the next part is super easy! Take any dirt you have and pack it firmly into each step, while trying to get the dirt semi level. We packed the dirt 2-3 inches below the top of each step. You could pack more but I have this huge deal with landscaping fabric… I loathe the stuff and did not want to see it, but I also wanted a good permeable weed barrier underneath my pea gravel. So I needed to leave enough space to get a good thick coat of rock, but not so much that we were buying 50 bags of rock to fill up each step.

To insure the horribleness that is landscaping fabric was trapped forever I made sure to staple it to the inside of the staircase and bury the backside underneath each stair. This is optional as you could just fill the stairs, but I really wanted to try to cut down on weeds and also how much rock sunk into the dirt.Adding a permeable barrier to the pea gravel and timber stairs

After that it is simply a case of filling in your steps! We used a mix of two sizes of pea gravel. As you can see there is a larger gravel in the middle and smaller at the edges. Why? Cause we think it looks cool. I think it would also look cool with a black river stone, mulch, flagstones and pea gravel, crushed marble, bricks, you name it! There are a lot of options for styling these outdoor timber stairs.

Top view of completed DIY timber and pea gravel stairs we put in out raised garden beds.

You will be seeing more of these type of stairs on Instagram as we have two more of these outdoor staircases to build! Follow us there to get more behind the scenes construction shots as we build two more tiers of raised beds!

Tutorial on how to create timber and pea gravel stairs for your tiered garden.

Posted on 6 Comments

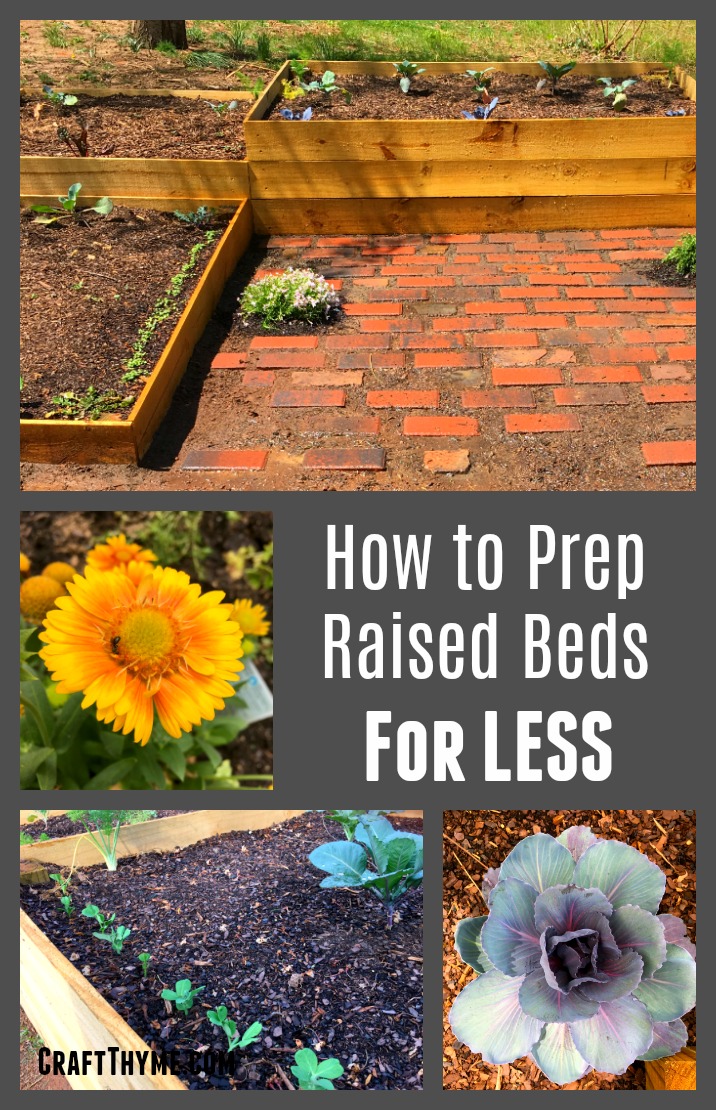
How to Prepare Raised Garden Beds: Weed Free Style

How to fill your raised beds with good soil, that maintains moisture, keeps out weeds, and doesn't cost a fortune.

Do you want to know the best way to prep raised beds once you have them built?  The soil mixture you use for your raised beds is a hotly contested subject; and everyone has their own techniques.  However, we have developed our own unique method that is cost effective (a nice way of saying cheap as possible), retains moisture, and keeps weeds from coming up through the bottom of your bed.  I feel pretty secure that our method will give you a good weed free start on your raised garden beds.  We have been working with it all summer and despite the groundhog setback the beds have been yielding lots of pretty veggies and flowers. We got the idea from hugelkultur beds (a topic for another post) and tested it out in our newest DIY garden boxes.  It is working great! First let us give you the lowdown on some of the problems of raised garden beds and then get onto prepping those beds.

Raised Garden Bed Issues

We can all agree raised beds have a lot of advantages.  You have more control of the soil, attractiveness, soil drainage, etc.  BUT, in our experience some of the great things about raised garden beds can also be issues.

  • Raised garden beds can dry out very quickly. Like whoa…
  • Weeds, especially grass, like to pop in from the bottom/sides
  • It costs a lot to fill a raised bed

Craft Thyme’s process for preparing raised garden beds addresses all the above issues and helps make the beds virtually weed free! Affiliate links may follow.

Supplies

  1. Landscaping Fabric (Yes, I am suggesting making a deal with the Devil)
  2. Stapler (Like a construction stapler, not a red swingline)
  3. Scissors
  4. Wood branches/chips/logs (see below)
  5. Topsoil
  6. Garden Soil
  7. Compost (Optional)
  8. Plain Cardboard or lots of Newspaper

Step 1: One of only two times you will hear me say use Landscaping Fabric

As a matter of course landscaping fabric is the devil.

Landscaping fabric is the thong of gardening.  It serves a small purpose and is always in the way forever after.

However, in preparing raised garden beds I have found it very useful.  Start with a long sheet of landscaping fabric.  I try for at least the length of one side of the raised garden bed and fold it in thirds.  But if you happen to be folding it outside on a windy mountain day, well you are going to curse and probably cut shorter sheets). Cut along those fold lines to make three strips of landscaping fabric that is about 12 inches wide (Most standard rolls come in 3ft widths.  Obviously, cut accordingly if you buy one of those big honking rolls).

Take the fabric and staple the fabric no more than 6 inches high on the wood of the bed.  Anytime you hit a corner or have to start a new piece fold the fabric and overlap.  More fabric is not bad in this case.

Found the perfect use for landscape fabric: A way to keep expensive soil inside a raised bed

This process is, in my humble opinion, and excellent squat workout.  Adam built a lot of beds… Let’s just say I got quit the glute workout.  You can staple it lower if you have small beds, but you want to insure that the fabric overlaps the ground below.  This will work as a barrier to keep dirt from leaking out of your beds and weeds from poking in on the sides.  Remember we are going for weed free raised garden beds!

Step 2: Wrap it up

Take sheets of cardboard or 5-6 sheets of newspaper and cover the entire bottom of the bed.  If you have issues with the newspaper blowing around you can wet it down to make it stick to the ground. It should overlap over the landscaping fabric.  This will make sure the fabric stays down when you start filling the beds.  The cardboard/paper will decompose over time and the roots of plants will be able to go past it to dig in the soil below.

How to prep a raised bed to minimize weeds and cost

Step 3: Wood is Good

NEXT LAYER!  Not sure why I needed to scream that, but it felt right.  So the next layer is dependent on the height or your bed.  Shallow beds will get just wood chips, deep beds get sticks covered with wood chips, deeper beds get logs, then sticks, then wood chips.  Hopefully you get the idea.

Modify hugelkultur to make a water-wise raised bed

The wood acts like a sponge and holds water in the raised bed.  I have heard the decomposition of wood can rob the soil of nitrogen, but so far we have been good because the soil is going to suck anyway.  Read further to see the discussion on supplementing the soil and how to tackle that going forward.

When gauging the depth of the bed, leave a minimum of 6 inches of room for actual dirt from the top!  Cause plants can’t live on wood alone, mushrooms are another story.  Few tips for selecting wood:

  • Old rotting logs are best
  • Small dry sticks and old leaves will also work
  • We happened to have a lot of fallen logs and wood chips from tree work we had done in the fall.  If you do not have your own; try to find twigs, branches, etc from the neighborhood.  It is always easy to collect fallen limbs after a storm.  Unless you live in a desert… Or grass lands…   If you have to buy bags of wood chips try for the non-colored/Untreated types where available

How to use rotting wood chips to keep moisture in the bottom of your raised beds

Step 4: 5 Second Rule (Dirt don’t hurt)

In case I hadn’t already diverged from traditional gardening advice enough…  You have two options available for dirt.  You can spend a fortune and get the best, compost-ful dirt you can find.  Almost every post you will read on the internet will suggest spending as much as possible on dirt.  Maybe that is a great way, but I follow the second method: 3 inches of cheap topsoil and the 3 inches of whatever gardening soil is available for sale at the local big box store.  I turn a blind eye to the label for this one moment in time and throw whatever horrible bag it is in the bed.

Adding topsoil to a DIY raised bed soil mixture
Can you say C-H-E-A-P topsoil?

Trust me these bags are labeled as fertilizer for 10,000 months!  Grow an Amazeballs Garden!  Etc.  They aren’t good, they do not last a quarter as long as they say, and I feel bad, but they are cheap, get your garden going, and give you a base to build really awesome soil in the future.  I’d choose gardening some over gardening perfect everyday!

Adding the final layer of premium garden soil to get your raised garden beds off to a good start.

Now What?

That folks, is how you prep a raised garden bed.  The landscaping fabric/cardboard and purchased soil insure you start with a weed free bed!  Feel free to plant away!  If you follow this planting guide your veggies will help shade the ground and keep a lot of new weeds from sprouting.

But wait there’s more…

Couldn’t resist the infomercial appeal.  Once you start with this technique you are going to have a couple options to ‘raise’ these beds to a higher level.  Get it?  You have a small amount of soil on top of a lot of ‘not exactly nutrient rich’ material.  The wood material is what is helping keep your beds nice and moist, but it isn’t adding a lot of umph to the growing power of your plants.  We combat that by adding organic fertilizer the first year.  I also throw every single earthworm I find into the raised bed.  You could, alternatively, add lots, and lots of compost throughout the growing season.

In fall I cut all the old annual plants at the base and allow their roots to rot in the soil all winter long.  Additionally I rake in mostly composted chicken droppings and/or mostly finished compost and let the bed set.  Do not rake it deeply into the soil (a couple of inches or two is perfect.  You want to let the earthworms, fungi, and other bugs do most of the work).  After the first year, I transition the dirt into a more traditional organic method.  I focus on building good soil out of my cheap base which is an entire topic for another post. In short,  I add compost as the season continues and by that point the soil is usually healthy enough to support year round planting!  In short, though, you can expect to get one good season just out of the crap soil.  So go out and get planting! And yes these seedlings and seeds came from my favorite vendor Sow True Seed!

How to fill your raised beds with good soil, that maintains moisture, keeps out weeds, and doesn't cost a fortune.

Posted on 4 Comments

How to Make a Goat Wire Fence Trellis

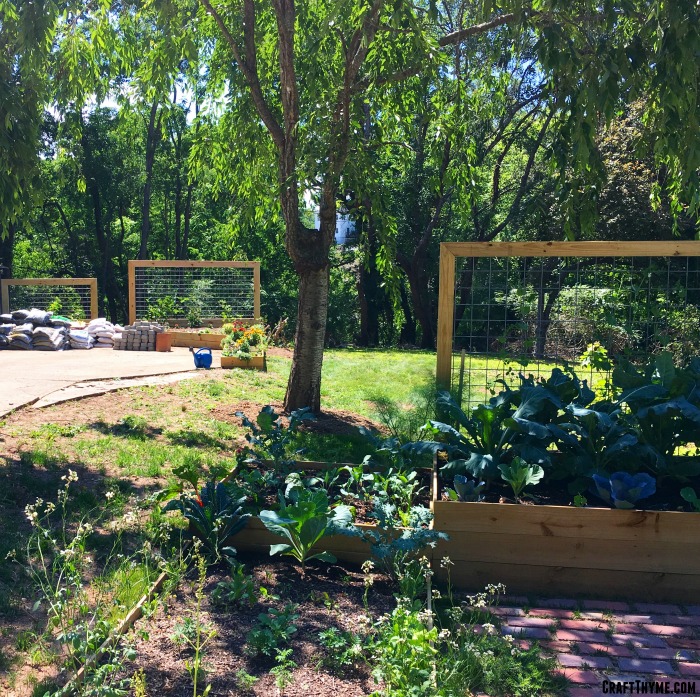
Completed goat wire trellises mounted to various raised beds

Goat wire fences are kinda the rage around Asheville at the moment. Trend or not, I personally enjoy the aesthetic. So why not build a goat wire trellis?! Craft Thyme tries to use similar materials for a lot of our builds so that everything in the outdoors has a more cohesive feel. In the last house it was a series of conduit structures. This one, well, Adam was kind enough to work with my goat wire obsession. We have lots of plans for the yard but are currently adding the goat wire in a series of trellises. I’m a big fan of growing food upwards in small urban environments and these DIY goat wire trellises are sturdy and perfect for everything from squash to grapes.

This build requires a few more tools than the usual, so I would rate this one intermediate. Not so much for the skill level, but mostly for the extra tools necessary.  As always be careful, don’t sue us, and build at your own risk! Affiliate links to follow.

Completed goat wire trellises mounted to various raised beds

Goat Wire Trellis Supplies

  • Goat Wire Fence Panel (4ft x 16ft)  You will need to get this from your local farm store (Think Southern States, Tractor Supply, etc).  The rolls of wire are impossible to get nice and flat.  Which is fine for a composting fence but not so great for a decorative trellis.
  • 2″ X 6″ or 2″X 4″ Lumber in lengths for your project. I discuss this more in step 1. Also if you want to get into that whole treated versus untreated controversy read the first few paragraphs of my How to Make Raised Garden Beds that Last.
  • 3″ Wood Screws
  • Waterproof wood glue (Or if you are forever forgetting supplies like us then regular gorilla glue works pretty well too)

Tools

Step 1 Deciding on Frame Size

In the supplies above you will note that I have two different wood sizes recommended. This is all because of proportion. We made some small goat wire trellises to replace some old ones that had been attached to the house. These looked nice with just plain 2X4 lumber. We also made some big honking trellises to go on the back of the aforementioned raised beds. Those were large and in charge and made with 2X6’s. Those large trellises also almost ended with a screaming match in the middle of the yard, but since neither of us decided we wanted to entertain the neighbors or get divorced we managed to remain civil and finally get the goat wire trellises in place. So you have been warned. The larger you make a goat wire trellis the more of a pain in the arse it becomes to install. THOUGH, we did actually work out a reasonable installation method by ginormous trellis #3.  You are welcome to skip our pain!

Now that your public service announcement and marriage saving tips are out of the way; plan out a simple box as follows.

You will have two long legs for installation. With the small goat wire trellises the legs just rested on the ground and attached the frame to the brick. With the larger ones we made extra long legs that were buried and screwed to the back of the raised beds.  You can see a back view below. Just remember to leave enough leg for your application!

Step 2 Time to Saw

We went to the trouble to miter cut the top board and side supports. Just a simple 45 degree miter looked a little more professional than a flat join. The bottom board fits flush on the inside of the side supports and does not need a miter.

Pro Tip: It is a little easier to create these goat wire trellises if you are a bit flexible in the finished interior height of the trellis not counting the legs. The wire will be set in channels and getting that wire set to an exact depth in the channels… Let’s just say even we weren’t silly enough to try that level of perfection.

Step 3 Channel Inner Peace or at least Channel your Wood

If you want the nice seamless finish that you see in these goat wire panels you are going to need to set them in channels in the wood. There are a few ways to make channels in wood but we opted for using the table saw. Even with the table saw there are two different was to make the channels. The first is the easiest and most expensive. It requires a dado blade. This blade is actually multiple blades you can set to create a channel in 1-2 passes. These are wonderful and also around $100! Though I did find one on Amazon for the 50ish range, but, I can not vouch for the quality. Since I don’t see a need to channel lots of wood in my life, and Adam didn’t see any immediate need to continue to channel after this project he opted to go the more labor intensive but cheaper method.

I heartily seconded his decision as I saw that as an extra $100 savings just asking to be spent on plants. I was informed math doesn’t work that way…

So how did Adam make the channels? Here is his description:

  1. Set the blade 1/4″ off center for the small width of your wood. You only need to set the height about 3/4″ inch deep to hold the goat wire.
  2. Run the board(s) down the entire length of wood
  3. Flip the board and run it down a second time.
  4. If you flipped it correctly you should now have a 1/2″ wide section in the center of your board. Now move your board slightly (1/8″ ish) in towards center. Run the board down, flip and repeat.
  5. Repeat step 4 if necessary.

After that you should have a 1/2″ channel in the center of your wood with lots of thin pieces of wood. Simply pull those out and break them off. I may have caught Adam using my old garden clippers and weeding tools to knock the wood bits out of the channel.

Ripping a channel in wood to make a slot for the goat wire fence

Step 4 Assemble Time!

You might notice that I haven’t had you cut the metal yet. There is a reason. it is a heck of a lot easier to adjust the goat wire panel than it is to reframe all the wood again. So let’s get to assembling! The small ones can be fully assembled on the ground. DO NOT try to assemble the large ones and then put them in place. Just don’t!  Recall marriage advice above step 1?

We made that mistake as you can see in the above framing picture. It broke and had to be reassembled in place. Feel free to dry fit it together and check to see if your channels are clear (seen in this smarter second attempt). Then do as we say and not as we did in the assembly.Test fitting the goat wire fence panel in the trellis frame

For both types of trellises start with your top bar and side bars. Line up your miter joints put in some glue and the angle screws into the wood. Next do the following:

Small Goat Wire Trellis

Now is time to cut the wire. We found it easier to measure the inside dimension and add 1 inch. Then you can lay the panel over the top of the wood and refine. Once cut, slide the wood into the channels. It is helpful to have two people to slide each side in but Adam manages to do the small ones with no help. I’m sure I was off eating bonbons or some such while he was making them.

Trimming the goat wire to fit in the channeled wooden frame.

After sliding the wire in, simply slide the bottom piece of wood into place and screw it in. Voila trellis done. We just installed by hammering masonry nails straight through the wood and into our brick..

Small goat wire trellis with muscadine grape

Large Goat Wire Trellis

After a lot of trial, error, and minor recriminations, we worked out the best method for installation of the larger trellises. Take your joined top and side supports and install them in place. You may be wondering how to get the goat wire into the trellis but trust us it works out just fine. Once you have your posts in place and the top leveled cut your wire to size. In the larger lengths it will bend enough in the middle that you will be able to slot the sides into the channels and then push it up to the top. It is super useful to have an assistant to hold the wire in place while someone else places the bottom board and screws it in.

Measuring goat wire to trim the panels to fit in the trellis frames

That’s it folks. With some wood, screws, a little glue, and a lot of patience you can have these very sturdy goat wire trellises. We have some muscadine grapes already headed up the small ones and have started training thornless blackberries up the largest one. The other side is holding some raspberry canes. Until I get the berries well established and I have some scarlet runner beans planted to add some color during the summer.

We love questions and comments! Please leave one below if you need any clarification from our tutorials.

Mounted goat wire trellis from the back
Back view of how we connected the trellis to the raised bed

How to build a trellis out of goat wire fence

Posted on 4 Comments

How to Build a Garden Box that Lasts

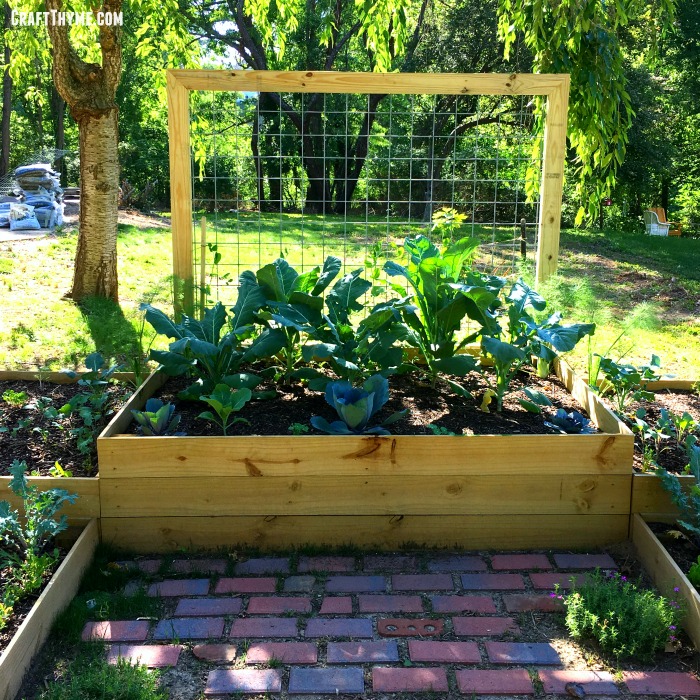
Completed version of our raised garden box. Also find information on how to prep your soil and make these goat wire trellises!

Before our last house I had never planted in raised beds, but let me tell you, it only took one planting season to make me a convert! Now that we (as in Adam) are in the new house we (as in I) had to build new garden boxes. But this time we wanted to figure out how to build a garden box that lasts, while not poisoning our veggies with lots of toxic chemicals from treated lumber OR spending a fortune on cedar.  Since we figured out this magic combo we thought we would share our raised garden box plans with you so that you could also save some moola and be able to use the raised beds more than a few years!

Time to get all gardening controversial right out of the gate.  Yes, shocking I know, but gardeners can have some very heated controversies.  Especially us younger new-comers on the gardening scene who refuse to blindly go all organic.  Yep, we scienced the heck out of these garden boxes.  First and foremost, not all treated wood is the same. Most of it is complete crap that you wouldn’t want to touch unless you have gloved hands.

Most treated wood = STAY AWAY Veggies!

BUT there is one form of treated wood that would be safe to use. Micronized copper treated wood.  While many still argue the safety we satisfied ourselves by reading page after page of research created by many extension agencies and laboratories.  The worst issue we could find was that it could potentially release the same amount of copper as a copper pipe water system in your home.  Additionally, if for some reason, large amounts of copper were leached into the soil your plants would die well before harvest.  I urge you to do similar research for yourself and boldly disclaimer my choices.  Basically be an adult, make your choices informed, and don’t sue us later if you do not like the outcome.

SHOOO, well now that all that science and research are out of the way let’s get on with learning how to build a garden box that lasts!

Garden Box Supplies

  • Fence Pickets
  • 4×4 Posts
  • 3″ Exterior Screws

Fence Pickets:  Why are we using fence pickets as garden bed walls???  I know it seems odd because we are going to have to make an extra cut to remove the top piece but, first, they are cheap.  Like cheap enough to make it worth the extra cut cheap. Secondly, there are two types of treated wood at our big box store.  Despite what common sense would tell you, the treatment referred to as Ecolife is DECIDEDLY NOT Eco… The other common treatment technique utilizes Micronized Copper Azole (or MCA) and has been tested and used for decades in these applications.

Craft Thyme!

The directions below are to create one, two-layer 4 x 6 foot box.  You can modify them to make any configuration you want.

Cut List

  • 4 – 10″ Corner Posts
  • 4 – 48″ Front/Back Bed Walls
  • 4 – 70.75″ Side Bed Walls

Cut list for DIY wooden garden boxes or raised beds

Step 1: Assembly Line

We decided to do this assembly line style and do all of the cuts up front.  Guess who got to cut too?!  Me!  I got a new saw for Adam’s birthday and his parents got him this hella cool stand for Christmas.  While we can (and have) cut wood old school with a crap saw on the ground, this certainly made the project a lot smoother.  Since this is a garden box we made square cuts.  While mitering the corners might look lovely, the purpose of these boxes are to hold dirt…  So cut time!  We start from the square end of the board and then when you are done the dog-eared end of the fence post will be tossed away.

Step 2: Screw It!

Now it is time to screw.  The easiest way to assemble is to start with the short end on a flat surface.  Lay your 4X4 posts down and place your flat boards on them.  Move the 4×4 posts in the width of one board (see the image) this will allow your long boards to sit flush when assembled.  Try to get these as straight/square/level as possible.  The straighter you have these sides the nicer your finished box will look.  However, there is wiggle room with the posts.  The end result will have small gaps the corners if your assembly is not straight.  This might be less aesthetically pleasing but will still function correctly!  I’m kind of the good enough camp… Adam had his level and square out… :)

Assembling a garden box
As you can see here we used a small piece of wood to gauge the space needed.

Screw each board using two screws into the 4×4 post.  Repeat for the other short side.

Assembling a DIY garden box
We placed two screws in each board down the post.

Step 3: Time to connect

This is a great time to connect with your loved ones… by having them hold boards, but if you do not have a build partner you are still going to connect, because now it is time to connect those boards! A partner can help hold everything in place, but for either instance find as flat/level of a place and stand up your pre-assembled 4 ft end.  Place the end of your board against the corner of the post starting at the bottom.  Push it flush against the boards and as level as possible and screw in place.  Take the other end of the board and connect it to the other short 4 foot end.  Why connect both?  Because when you have three sides assembled the structure becomes much more stable and easy to connect your boards.
Corner joint for DIY wood raised bed
Here you can see how we joined the edges and why a space was needed to attach the boards flush to the post.

Step 4: Rinse and Repeat

Connect one more board above the bottom layer and then connect the other side in the exact same manner as the first.  For added stability we took a small scrap of wood and screwed it in the middle of each long side as shown in the picture.  This step was simply to keep the boards nicely aligned.  After that your beds are D.O.N.E.  A bed this size is not lightweight but I could still easily drag it into place.  Keep in mind you might want to build it near your final site if you are not into lifting all that wood.

Center bracing on a wooden garden box.
Here is the optional center bracing. It doesn’t have to be beautiful as it will be covered with dirt.

Step 5: Prepping (but not with a concrete bunker)

How to fill and prep raised beds is a hotly contested topic.  No seriously!  Gardeners can get their collective yard-work granny panties in a wad over how you fill your beds.  I have my method outlined in the next post but for the purposes of making garden beds your last step is to install them.  You can choose to leave them on top of the slope or dig down to install them in level ground.  (Seriously, my method for prepping raised garden beds is cheap and awesome)

Finished DIY garden boxes or raised beds

I have done both methods.  I also find both attractive.  You will see more of the box when simply laid on the ground (Plus it is MUCH easier) but having it level can be important if you are going for a certain look with goat wire trellises as we did in the photo below.  This choice is really up to you!  Once installed you then fill with planting material and get planting!!!

Raised beds leveled in a sloped landscape.
This took a whole lot of digging!!!! Trellis in the next photo!

Notes: Keeping soil from going through small gaps, soil mixes, how to reduce weeds, water retention, etc is all available in my how to prep bed post! Yeah, I am plugging myself but seriously it is awesome!

Complete Garden Box

Completed version of our raised garden box. Also find information on how to prep your soil and make these goat wire trellises!


Posted on 14 Comments

Building a Composting Fence

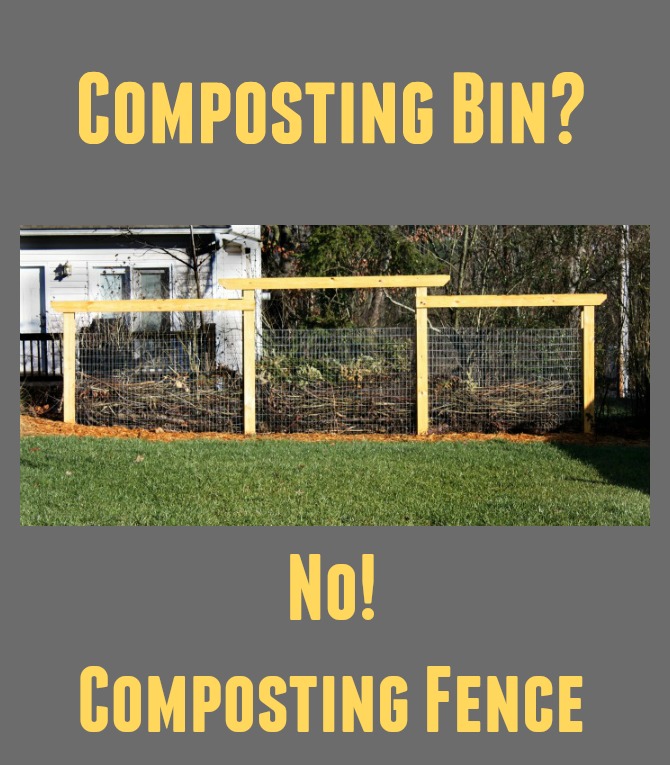
Finally an alternative to compost bin plans! Detailed instructions on how to make your own composting fence.

Do you have excessive yard waste in the form of tree branches, long grasses, leaves, annuals, and flowers past their prime?  We sure do!  With the veritable brush jungle behind our home, regular pruning of trees, a relentless landscaping habit, and the endless results of “being a good husband” – aka dead flowers – we’ve built quite the pile of yard waste in our back yard with no real plan of what to do with it.  After all, what do you do with a heap of dead, slow to decompose material? Composting fence!

Some time ago, Brianna came across the concept for a “composting fence”; a landscape architecture concept that would modernize your large, long-term compost pile.  With her birthday just around the corner, I thought that I would surprise her by taking a day off work and building it for her.

Plans for our composting fence.

As it turns out… this project isn’t really doable in a single day. But I get a pat on the back for effort, right? Keep reading to find out how to build your own!

Composting Fence Supplies

  • 60-in x 50-ft Silver Galvanized Steel Welded Wire
  • 4 – 4″ x 4″ x 96″ Treated Lumber
  • 1 – 2″ x 4″ x 96″ Treated Lumber
  • 1 – 2″ x 4″ x 120″ Treated Lumber
  • 12 – 5/4″ x 6″ x 120″ Treated Decking Lumber
  • 3 – 50-lb Fast Setting Concrete Mix
  • 2-1/2″ Exterior Wood Screws
  • Staple Gun & Staples
  • Metal Snips (In Some Cases)
  • Drill
  • Saw

Cut List

  • 2 – 4″ x 4″ x 66″
  • 2 – 4″ x 4″ x 78″
  • 2 – 2″ x 4″ x 48″
  • 2 – 2″ x 4″ x 60″
  • 2 – 5/4″ x 6″ x 120″
  • 4 – 5/4″ x 6″ x 102″
  • 4 – 5/4″ x 6″ x 62″
  • 4 – 5/4″ x 6″ x 84″

Brianna Here: I’m jumping in on Adam’s post because he has been busy building an under-deck storage area, planter boxes for a shade garden, and a chicken coop extension. Plus he didn’t actually get this done in a day sooo… I was there for a lot of the process. Here is reason #1 you can not do this in a day.

Step 1: Digging It?!

You are going to need to dig post holes. And then pour concrete. If you do not have post hole diggers see if there is someone you can borrow them from. We found a neighbor who let us borrow his for a long time. However, we keep doing projects like espalier of fruit trees and kiwi trellises so we just opted to buy one. Dig around 18″ deep, put in your post and level it. It is helpful if someone can hold it while another person pours in the fast dry concrete. Pour water in with the concrete and then wait. You are going to need these posts to be FULLY set before step 3.

Learn to make your own compost and bin detailed directions on making a compost fence.
We are leveling these posts after a few steps because we realized we needed concrete. Follow the directions and learn from our mistakes!

Step 2: Cutting

While you wait for the concrete to dry you can go ahead and make all of your cuts for the composting fence. You might be wondering what all this wood is for, however, you are going to use this wood to cover your stapled wire and make an attractive pergola-like top. We had plans to plant grapes at the bottom and use the top as an arbor. Additionally we hung some bird feeders above to attract more wildlife to the yard.

Step 3: Tug, pull, and curse

Unroll your welded wire and get it flat as possible. I personally worked on this while Adam cut lumber. He also added a 2X4 spacer to one side of the post. This gave closer to 6 inches of space between the wire for twigs and yard waste to be placed. When you begin unrolling the wire I suggest gloves as the ends of the rolls are sharp. I can not offer much advice other than rolling the wire face down and manually flattening as you go. It is a PITA, but the flatter you get it the easier the installation goes.

The reason that you want to wait until your posts are FIRMLY set in the ground is that you are going to need to attach the wire and PULLLLLLLL. I picture a ships-master whipping the rowers yelling ‘Pullll Damn Ye’. Anyway, take your wire cloth and line it up near the middle of your 2X4 attached to your post. You want to cover enough wood so that you can get a firm staple, but remember in the end the post will be totally covered so don’t waste a lot of expensive metal by covering your posts. We pulled the metal and figured out the minimum needed to staple it to the next spacer-post then cut the metal. We had to work in sections as our ground was not flat. Also getting more than 6 feet of this stuff straight at one time is a nightmare. I believe if you had a nice level yard you could probably just pull it straight across and skip the cutting, but that was not in our cards.

Learn to make your own compost and bin detailed directions on making a compost fence.
Note the red level on the wire! It comes in handy.

Here is where the partner comes in really handy. One person can pull on the attached sheet of metal while the other checks to see if they are close to level. Then that same person can staple. Pulling the metal helps get it taunt and reduces the bowing. Note I say reduces! We were not very happy with the wavy look when you peered down the length of the fence at first. However, in the final product this didn’t matter. I’ll explain at the end!

So you will repeat this process 5 more times if you are making 3 sections. As you will need put the metal cloth on both sides of the posts to make a channel that can be filled with your yard waste materials. The hardest part of this was getting everything around the same height and keeping all the metal squares in nice straight verticals. Let’s just say there were some potty words spoken over this particular process. These words may or may not have been used to describe peoples prowess with a level and/or their strength when pulling metal.

Finally an alternative to compost bin plans! Detailed instructions on how to make your own composting fence.

Step 4: Adding your decorative ‘Skin’

At this point you are going to add the decorative finish and height to the arbor over the composting fence. Take your long boards and screw them to the front and backs of your posts. We wanted a variable height so the longer ? length went on the fronts and backs of the two middle posts and the ? lengths went on the ends. You are going to be placing the boards over the stapled metal so feel free to really drill those screws in tight. It will act as an additional layer to secure the metal to the post and hide the unsightly seams.


When your now taller posts are in place take your crossbeam of 10 feet in length and attach that to the front and back of each middle upright. Adam, cut each of the ends at an angle for a nice decorative finish. The middle crossbeams will have the angular cuts on both sides. These are the hardest to place as you want to make sure to have the same overhang on both sides. Just measure the difference to insure an equal overhang on both sides. The other two crossbeams will only have a decorative touch on one end. The flat side will be easy to install as the straight cut will go flush to the edge of the middle posts. We installed our outside arbor sections about a foot down from the one in the center. We chose this height as we thought it was the most visually attractive result.

Learn to make your own compost and bin detailed directions on making a compost fence.

Step 5: Additional Bracing

This step is optional but we added additional bracing between the crossbeams. We did this for two reasons, first to create a place for vines to grow, and secondly provide a place to add hooks to hang bird feeders. I felt like the additional bracing made the entire structure more sound as well. To create the bracing we simply cut some 4X4’s and slotted it in-between the middle of each section and screwed it in place. The cut piece of wood usually fit tight enough between the two boards that no one needed to hold it when screwing, but it might be handy to have a partner to hold when securing it.

The Final Product

Finally an alternative to compost bin plans! Detailed instructions on how to make your own composting fence.

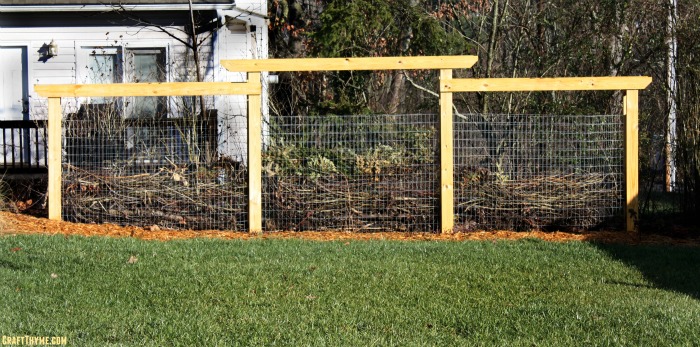
Unlike a regular composting bin we are not expecting to pull compost out of the composting fence. The added yard waste is for creating a screen and should slowly feed the soil at the base. So far the various layers of sticks and leaves are miking for a really interesting and attractive backdrop. I can’t wait to see how it looks when I get green vines growing up the arbor!

So now is the time to discuss the bit of waviness to the metal. First, we are not usually looking down the fence line. When you look straight on the fence you do not see it. Secondly, as we added lots of wood it filled out the metal making everything much more taunt. I have been quite happy how everything has held up over the winter. To complete the look we created a bed in front of the fence and planted flowers, cranberries, raspberries, and two grapes. The bird feeders have been a huge hit. I have seen so many more cardinals, jays, and finches flitting about the yard. I am really hoping they will help control the insect population this year in the garden. As birthday presents go this composting fence has been wonderful! It has created a nice windscreen, arbor space, and place to deposit yard waste, all while covering the unattractive brush berm between us and the neighbors. I’d call this project a win for the garden in so many ways.

Learn to make your own compost and bin detailed directions on making a compost fence.