Posted on 23 Comments

Make a Indoor Rabbit Hutch From a China Cabinet

What?! A twenty-five dollar Craigslist china cabinet becomes what?! An indoor rabbit hutch. Perfect for your pampered bunnies.

Want a rabbit hutch that looks elegant?  Well, we did!  We wanted to DIY an indoor rabbit hutch for our new family members Ollie and Biscuit.  We got these rabbits from Adam’s work as a co-worker’s friend was trying to rehome her bunnies before embarking on a lot of travel.  You might wonder how we decided to get some rabbits and it went something like this:

Forwarded email from Adam: Want to get some rabbits?

Me via Instant message: Ummmm… Sure?

Adam via IM: The boys will love them.

Our new family members; Ollie and Biscuit our mini-lop rabbits

So we have rabbits.  All kids need pets, right?  These rabbits needed a indoor space…  We are talking adorable, cute, pampered, litter trained, indoor rabbits.  So we needed an adorable, awesome, and elegant space for the rabbits.  Queue the DIY indoor rabbit hutch.  We found an old china cabinet on craigslist for $25 that just said: refab me into the most awesome indoor rabbit hutch ever!

Of course, this china cabinet wouldn’t fit in any car we have… Because that would be waaaay to0 easy.  So, thanks again Richard, for helping deliver said china cabinet.  (No really THANK YOU!  I have had rabbits in the middle of my living room for two weeks…)What?! A twenty-five dollar Craigslist china cabinet becomes what?! An indoor rabbit hutch. Perfect for your pampered bunnies.

In comes the china cabinet and before you can even say “DIY indoor rabbit hutch” Adam has already ripped out the middle glass panel.  So yeah, no picture of that!  From that we did a lot of measuring, talking, internet research, and experience from having the rabbits.  Our main goals:

  • More space with interesting areas for the rabbits
  • Something that looked good in our house
  • Reduce how much litter, hay, and rabbit pellets end up all over the floor
  • Provided good ventilation for the buns
  • EASY TO CLEAN!  (Brianna’s major requirement)
  • Make it quirky and interesting

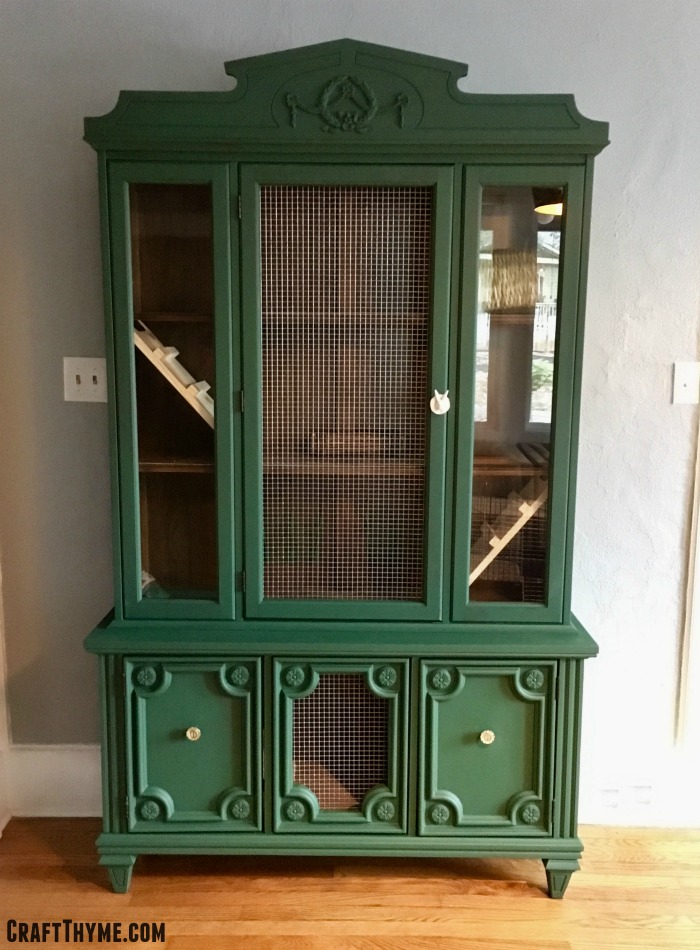
We designed the bottom hutch space to hold litter pans and sleeping areas.  There are ramps that go up to an eating area.  Above that are two more levels with a timothy hay tunnel, chewing twigs, and toys for fun.  We created areas for the hay to stay in the hutch and planned how to make this easy to clean!

What?! A twenty-five dollar craigslist china cabinet becomes what?! An indoor rabbit hutch. Perfect for your pampered bunnies.

Once we had the ideas sketched out we just got going!  It took minimal supplies. Affiliate links may follow:

DIY Rabbit Hutch Supplies

  1. 1 – 1 x 8. UNTREATED.  We used it to cut the ramps and grips.  Make sure it has no chemicals that could harm the bunnies.
  2. Hinges: We bought three hinges so that the ramps can be to clean.  They simply push up so we can just sweep and litter out from underneath
  3. Peel and Stick Tile 13 – 12 x 12 We lined all the shelves with peel and stick tile to make it easy to sweep bedding, litter, and bunny poops out of the hutch.
  4. 1/2″ Hardware Cloth (Chicken wire or other metal wire would work.  Indoor rabbit hutches don’t have to protect the rabbits from predators like an outdoor hutch would)
  5. Screws & Staples

Additional Supplies (Optional)

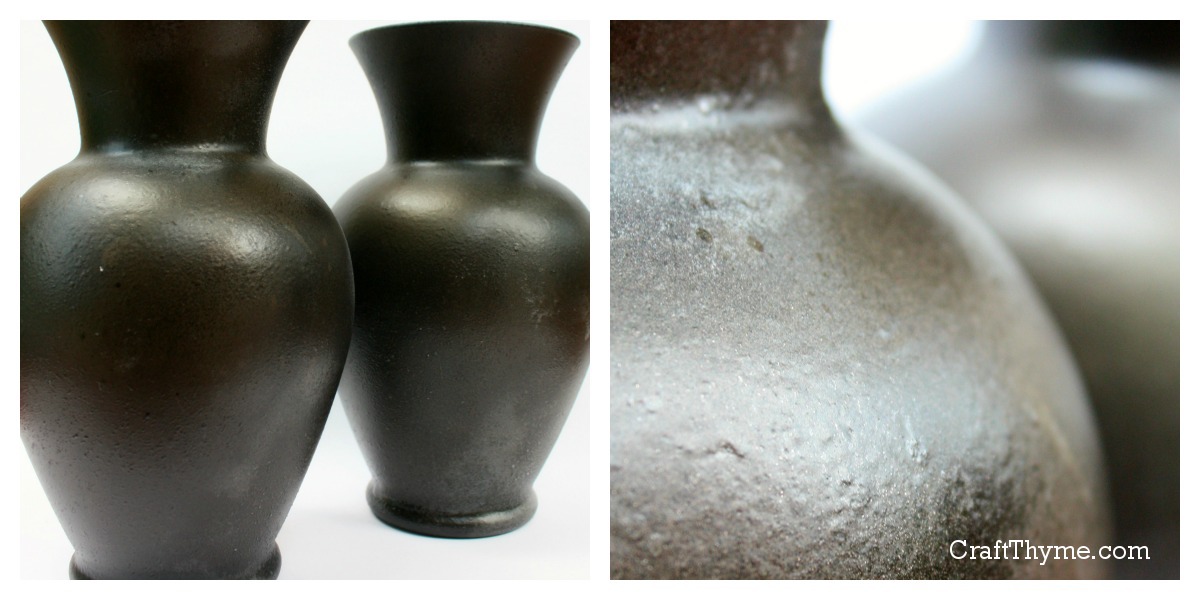
  1. Paint (We made our own chalk paint with this awesome recipe we had used before)
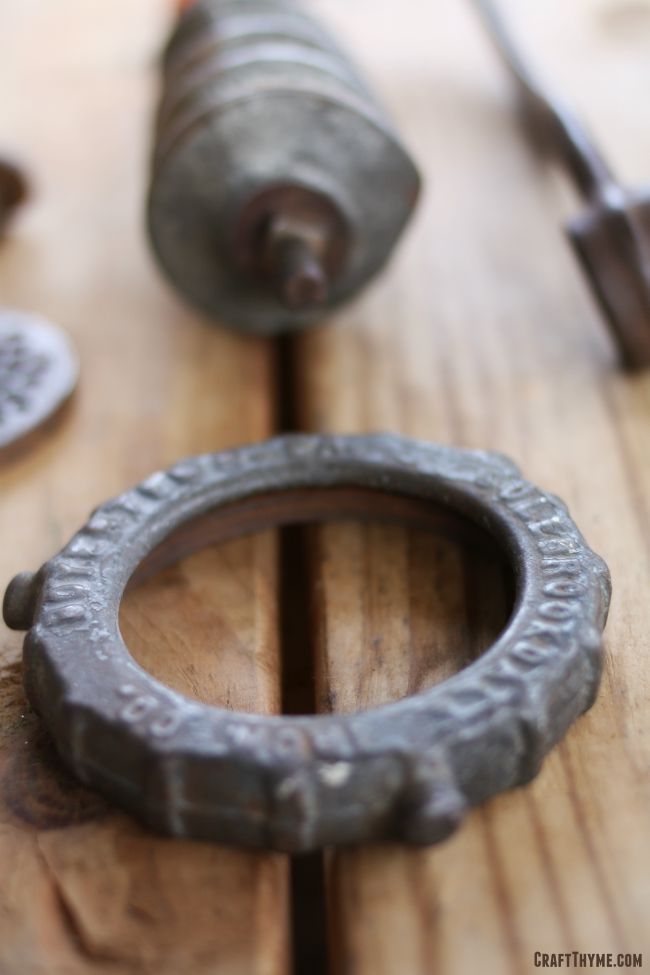
  2. New Knobs: Oh yes, that is a rabbit knob!  We happened to find three awesome knobs on sale for $2.50 at Anthropologie (Trust me I am too cheap to buy anything there full price)

Equipment

  1. Drill
  2. Saw

Optional Equipment

  1. Miter Saw
  2. Jig Saw
  3. Skil Saw
  4. Hand Sander

Transformation Steps

For this build we really winged it.  Adam used a skil saw to cut out holes for the ramps and a jig saw as a I wanted a fancy opening on the bottom.  Yep, that’s me, “Can we cut this center panel out?!  It will look hella cool and ventilation… But mostly it would look awesome…And RABBITS!”  Once the rough holes were cut, Adam, ran a quick sand on the pretty rough cut holes so the buns wouldn’t get hurt on rough edges.  We didn’t worry about beautiful cuts as we were going to cover the floor in tile anyway.Rough cuts are all that is needed to make this indoor rabbit hutch

Painting a Indoor Bunny House

As soon as the holes were cut on the DIY indoor rabbit hutch I went to work on the paint.  The cheap wood finish was pretty intact in the interior of the cabinet so I focused on a rustic look.  The green came from the deepest green of a painting we have in the living room.  Those poppies were painted by Adam’s grandmother and one of my favorite paintings.  (Poppies are my fav flower…  Now if I could just get them to grow!)

Painting that inspired the green diy rabbit hutch
Love this painting!!!!
Homemade chalk paint decorates an indoor bunny house
I actually taped for once!

Ramps for Rabbits

Adam made simple 45 degree cuts on the end of each ramp.  He just measured from holes to floor and took a guess on length.  He made small cuts to make the treads and give the rabbits something to grip while climbing.  Quick nails to hold everything together and then sanding to make sure none of the rabbits could get hurt.  We bought some hinges and connected them to the end to the end of each board and then to the inside of the rabbit hutch.

Details of building a rabbit ramp.

Other Items

Rabbits need lots of good ventilation (according to the internet :)) and make lots of poop (real life experience).  They also need free access to lots of timothy hay and water.  To accomplish all of these we did the following:

  1. We used heavy duty staples to affix the hardware cloth to the open panels.
  2. We lined all the shelves with peel and stick tile.  My hands will never be the same after cutting all that tile to fit the space! BUT poop clean up is as easy as sweeping it out of the shelf an into the trash.
  3. We drilled small holes to hold hay feeders along the back solid wall (helping to reduce the hay all over my living room)

After that it was simply a case of setting it in the living room and adding some fun toys like willow sticks and timothy hay tunnels!

Lots of details for the bunnies! White rabbit cabinet pulls, hay feeders, secret hiding spaces, ramps, and more in this DIY indoor rabbit hutch

OH!  And before I forgot.  The lovely lady who gave us the rabbits also gave us a metal rabbit playpen for them to run around in.  We added hooks to the back of the DIY indoor rabbit hutch so that we can simply hook the play space on.  We open the bottom door and let them run around.  Being litter trained the worst I have had to clean up was a few hard bunny presents from the living room.

In Practice with an Indoor Rabbit Hutch

We LOOOOOVVVVEEEE having something nice in the living room.  It allows the kids to interact with the bunnies and keep them as part of the household.

I might be a bit of a neat freak (As some people might have mentioned, Adam) and super sensitive to smells!  So I am psyched to be able to just renew litter easily and keep it from floating all over the house.  A cage was just allowing them to kick litter everywhere!  I just can’t stand a smelly animal space and want something that is super easy to clean and this fits the ticket.

Details of additional rabbit play space on our indoor rabbit hutch
They also have a play place!

Also, I honestly am over the moon about how cool it looks.  The green was perfect and looks great with the painting.  The chalk paint gave it a soft matte finish that keeps the color fun but not overwhelming.  I, frankly, would be happy with just a china cabinet that looks this good!  But it is even better as a nice home for Ollie and Biscuit!

Before and after of a Craigslist china cabinet turned into an DIY indoor rabbit hutch
Before and After
Posted on 4 Comments

Building an Industrial Table Lamp

How to DIY an industrial table lamp. #industrial #table #lamp

Unexpected Accent Décor

As you’ve seen from our previous posts on achieving an industrial décor (check out Part I, Part II, and Part III if you haven’t already), Brianna and I are always looking for ways to carry our theme throughout our home.  At the same time, we also don’t want to be ALL UP IN YOUR FACE about it either.  The last thing we want is for it to feel like you’re walking into a warehouse when you enter our home.  So how do we find that careful balance?

Focus and subtlety. We try to be very careful not to go overboard in any single space.  Our mantra:

  • If you’re going to have a big piece in a room – limit it to one big piece.
  • If you need something more – add interesting, eye-catching accent pieces as appropriate.
  • Add items you love/have sentimental value!!! (Added by Brianna)

The goal is to keep the focus where you intended (that’s why you went with that big piece in the first place, right?) and to add pops of décor that are interesting and don’t pull your focus (for too long).

You recently saw how we added a salvaged wood headboard to our master bedroom.  In this post we’ll take a closer look at one of our favorite accent pieces in our bedroom, and more importantly, show you how to build it!

Building a Meat Grinder Lamp

Yes, we built a lamp out of a meat grinder.  Why?  Honestly, I was walking through the Antique Tobacco Barn, saw an awesome, rusted old meat grinder for a great price and declared “I’ll do something with that one day!”  That something turned out to be a bedside lamp.  How’d we do it?  Here you go!

Supplies

  • Meat Grinder (one that has seen better days)
  • Steel Wool
  • Light Socket
  • 3 feet of 18-Gauge Lamp Wire
  • 2-Wire Electrical Plug
  • Edison-Style Light Bulb
  • Super Glue
  • Foam Paint Brush (optional)
  • Small Amount of your Favorite Paint Color (optional)

Preparation

Depending on how loved or neglected your meat grinder was in its past life, you may or may not have a lot of work ahead of you.  Our grinder had a lot of surface rust, an unknown white substance, and a few “bits” still rattling around inside. While we wanted to keep the repurposed look-and-feel, we wanted to clean things up a bit before putting it on the nightstand and touching it every day.  Enter the steel wool.

Dismantling your meat grinder should be pretty easy.  On any given model, there are typically only 5-6 parts, none of which should be sharp of warrant the use extreme caution.  Remove each component, and get to scrubbing with the steel wool.  The steel wool will do a great job at knocking away much of the neglect of the years while still preserving the harsh metallic look.

Our grinder’s wooden handle was pretty (ok, really) grimy.  As an optional step, or for a pop of color, consider sanding or painting your grinder handle.  We chose to use the same orange from our Pantry Door Project.

When done, wipe down your pieces and re-assemble the meat grinder.

How to DIY an industrial table lamp. #industrial #table #lamp

Assembly

Step 1: Wiring up your light socket

Light sockets are fairly easy to come by in a number of different styles from your local big box store.  We had ours from a past project where we had applied a faux cast iron finish.

Fortunately, the skill level required here is novice.  I know this is scary, but I promise you, it’s not.  You can do this!

  1. Remove the base and top sheath of the light socket.
  2. Slide the base of the light socket onto your lamp wire.  (DO NOT SKIP THIS STEP)
  3. Strip one end of your lamp wire, twist the wire, and shape it into a “candy cane” that will hook around the one of the screws of the light socket.
  4. You’ll likely need to loosen the screw on the light socket in order to hook your newly curved wire.
  5. Do this, then tighten the screw with the wire snugly placed between the screw and the metal backing of the socket’s center.
  6. Repeat for the other wire and side of your socket.
  7. Replace the top sheath of your light socket and push it down into the base.  You should feel/hear a click when the socket is re-attached.

Step 2: Wiring up your lamp’s plug.

This step is very similar to the light socket wiring.  As in exactly similar.  Here are your easy to follow steps:

  1. As you did before with your socket, remove the housing from your electric plug.
  2. Slide this housing over your lamp wire.
  3. Again, strip one end of your lamp wire, twist, curve, hook, and screw.
  4. Repeat for the other side of the plug/wire.
  5. Replace the plug housing.

Your lamp circuit is now complete! At this point, you can test your new creation by adding a light bulb and plugging in your lamp.  Utter the phase “Let there be light”, turn your switch, and be amazed at your ability to create light!

Step 3: Attaching your “lamp” to the meat grinder

Nearly all meat grinders have a bolt at the bottom (our new top) that is used to mount the grinder to a table or counter.  If not already removed, take it out.  Feed the other end of your lamp wire through this hole.  Get geared up for more wiring!

Bring out the super glue!  Admittedly, we used Gorilla Glue, but anything will likely work.  I like Gorilla Glue because it’s not activated till you add a little water.  It’s my way of making sure that I don’t glue myself to myself.

Unplug your lamp!  This isn’t completely necessary, because as you now know, the actual electrical connections are inside the socket, but we always err on the side of caution.

You’ll want your socket to sit directly on top of the former bolt hole.  As you can see from the photo, while the very bottom of the socket just BARELY fits inside the hole, a majority of the socket rests on top.  And that’s okay!  Add a good drop of glue and set your socket on top.  Gravity was enough to assist us in the drying process, but clamping may be necessary.  Let your baby dry as long as you can.  I know it’s exciting, but this is something you’re going to use regularly; let is sit so it can take the brunt of regular use.

How to DIY an industrial table lamp. #industrial #table #lamp

Step 4: Completion and Admiration

When your lamp is dry, go ahead and add your favorite light bulb.  We’ve collected more than 10 different styles of Edison bulbs over the last few months and opted for the “Christmas Tree” filament bulb.  Plug in your lamp, flip the switch, grab a libation of your choice (wait until after the electrical work is done for this step), flip the switch, and admire your handiwork.

Pro tip: Buy Edison-style bulbs on eBay.  We were able to snag our bulbs for around $2 each as opposed to $7 each in your big box stores!

How to DIY an industrial table lamp. #industrial #table #lamp

Posted on 9 Comments

Faux Galvanized Metal Finish

Tutorial on how to faux finish galvanized metal

The exterior of our home has lots of galvanized metal finishes.  Our outdoor lights, conduit porch railings, galvanized accented DIY trellis and planter boxes all have that metal finish.  It was a no-brainer to continue to use the galvanized finish to accent our street numbers on the porch and mailbox.  However, when I started researching modern looking metal numbers, oh holy hell!  The cost!  Even if we bought the most basic metal numbers* off Amazon. We were looking at close to $40.00 for four numbers!  I can not imagine if you have one of those long street numbers and wanted to place it in more than one location. Enter faux galvanized metal finish to the rescue:

Galvanized Metal Finish: Super Easy Faux Finish!

Tutorial on how to faux finish galvanized metal

Materials

  1. Craft Paint*  (Cheap is fine here.  We are painting numbers, not the Sistine Chapel)
    1. Silver*
    2. Black*
    3. White*
  2. Brush*
  3. Wooden Numbers: We used 5″ numbers in a sans serif font (For a modern look). I am just going to tell you now that I can not, in good conscience, give you an affiliate link to wooden numbers.  They are WAY cheaper at a local craft store.  Think $1-$2 per number before the usual 40-50% off coupon.
  4. Finish Nails: For hanging.
  5. Paper towels or an old rag

Step 1: Slap it On

Yep, just paint a layer of straight silver.  The wood is going to soak it up, so you might have to slap a couple of coats on.

First coat of paint to create a galvanized metal faux finish

Step 2: Mix and Match

Mix two different shades of silver, one lighter and one darker.  The easiest way to do this is take a whatever surface you are using to mix paint (cardboard, paper plate, actual palette) and make two small pools of silver paint.  Maybe 1-2″ in diameter.  Then added 2 drops of black in one and 4 drops of white in the other.  Mix and repeat if the colors are not about two shades off from the original.  Always remember paint dries slightly lighter!

Step 3: Pattern Time

I had a chance to look at some pressed galvanized metal containers while I was at the craft store picking up the wooden numbers. You might take a gander at the floral section and see if they have any galvanized metal buckets.  I always find faux finishing easier if I just saw a real life example.  In case you can not find a real life example here is a decent picture from Andrew Beeston of what we are trying to achieve:

Galvanized metal by Andrew Beeston from Flickr

The easiest way to get the angular light and dark patches is to dip your brush and use the flat side to press into the number.  I did the dark first and then went back and did the light color… Or maybe the other way around… It really does not matter except that you want hard edges and overlap, not a wet paint blend.

Second coat of paint to create a galvanized metal faux finish

Step 4: On No!  We don’t have pictures!

Yes, I failed to adequately document this last step, but it is sooooo easy.  Once your layers of paint have dried you can do this final step to soften the paint strokes of step three and give it a bit of a weathered look.  Pour a tiny bit of black paint out and mix it half and half with water.  Quickly brush the black all over the surface of your letter.  DO NOT PANIC, that you have just completely ruined your hard work.  Count to 10 and then wipe the black paint mostly off the surface of the letter.  It should just leave the finest glaze of darkness over the silver paint and knock off a little of the shine.  Remember that galvanized metal is not super shiny!

If, for some reason, the black stuck to much just repeat the above step but with a watery silver.  Remember that in faux finishing you can always just repaint any mistakes!

Completed faux finish for galvanized metal numbers

Step 5: Clean Fresh and Modern

Since the numbers weigh next to nothing we were able to simply use a single nail to affix them to the mailbox and porch.  We choose to orient them in a straight vertical line to give a fresh, modern, vibe.

Replacing old tired numbers with faux metal finished street numbers.

Posted on 39 Comments

Faux Cast Iron Finish

The final finish has a lot of texture and is matte in nature like real cast iron.

I developed this paint technique to create a cast iron finish on a HID-E-OUS brass lamp we had in our living room.  My husband and I have a lovely cast iron legged side table and a shared like of Restoration Hardware.  Also a shared like of not spending that type of money.  I tried to find a good tutorial to fake a cast iron finish but gave up and started playing with paint.  After multiple attempts, hauling the side table around to compare, and scraping off bad finishes I found a way to paint a faux cast iron finish.

Faux Cast Iron Tutorial


It looks great on furniture but also works to make an ‘urn’ like finish for Halloween.

Supplies

Supplies to create a faux cast iron finish.


For the basic finish you need:

Rustoleum American Accents Stone Finish in Mineral Brown* (long enough title?)

Bronze Spray Paint*

Matte Clear Finishing Spray*

Sand Paper (higher grit is better for smoother finish)

If you want to paint glass:

Add a glass primer or frosting spray*

Step 1 We All Hate It: Priming

Depending on the piece you are covering you’ll need to prime it.  Glass required a coat of frosting spray.  My horrible brass lamp needed a clear coat sanded off.  Google directions for the piece you want to cover.

Step 2 Using the Rustoleum American… Ah to hell with it: The Stone Paint

Faux Cast Iron: Spraying Stone

I’m just going to call it stone spray paint from here on out.  The title in supplies should let you know what I mean.  By the way, I am only suggesting that particular brand for the stone paint because it is the only one I have used.  I tried a variety of bronze paints and they worked fine, but I haven’t had a chance to try a different texture brand.  If you do please leave a note in the comments.

Lightly cover the whole piece with a splattering of the texture.  I moved waaaay back than my usual spray painting technique.  You can see if just splattered a coating.

Step 3: Bronzer instead of Blush

Cast Iron Paint Finish: Adding bronze

You can go ahead and spray a covering coat of bronze spray paint before the stone paint is dry.  Save some time and it doesn’t hurt anything.  However, let the bronze mostly dry.  I say mostly because I am impatient and if it is a bit tacky and peels up you’ll be fine. If you are doing it right it will look shiny and warty and you’ll be thinking “what the hell is this?”

Step 4: More OMG This Looks Awful

After the bronze ‘mostly’ dries take the sand paper and give it a buff.  It will knock off a lot of the texture leaving pits, holes, and scuffs.  Then cover in bronze paint again.  Repeat step 3 & 4 if you don’t feel like it had a lot of varied texture, or you were impatient (like me) and gummed up the paint into a wad.

Step 5: Now It Will Come Together

Finishing the faux cast iron finish
From What? to Wow! all in one coat of paint.

Let everything dry and then cover the whole item with a thick coat of matte spray.  By thick, I mean disregard the manufacturers guidelines and get that puppy about 3-6 inches from the surface.  You want the matte paint to pool in the pits and any decorative carvings.

That is pretty much that!  There aren’t really notes with this process other than more layers of paint give a richer finish.  You can see how I styled these cast iron ‘urn’ vases for a Halloween Vignette.

The final finish has a lot of texture and is matte in nature like real cast iron.

Enjoy these articles? Get biweekly updates by joining my mailing list (no spam, no way, no how)

See more great DIY, Decor, & Crafts at these Link Exchanges: 52 Mantels, Lambert’s Lately, The Crafty Blog Stalker, Craftberry Bush, The Pin Junkie, The Stitchin Mommy, I Should Be Mopping The Floor, Craft-O-Maniac, Dream A Little Bigger, By Stephanie Lynn, Kitchen Table Art