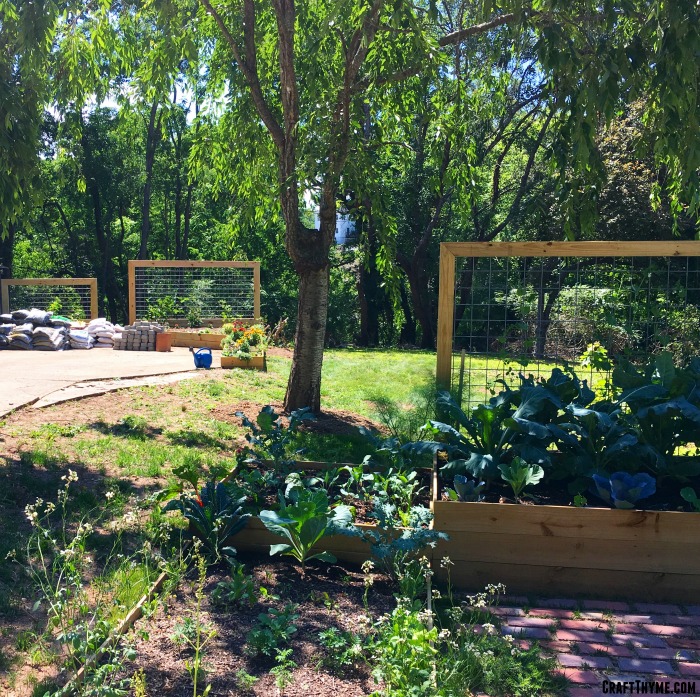
Goat wire fences are kinda the rage around Asheville at the moment. Trend or not, I personally enjoy the aesthetic. So why not build a goat wire trellis?! Craft Thyme tries to use similar materials for a lot of our builds so that everything in the outdoors has a more cohesive feel. In the last house it was a series of conduit structures. This one, well, Adam was kind enough to work with my goat wire obsession. We have lots of plans for the yard but are currently adding the goat wire in a series of trellises. I’m a big fan of growing food upwards in small urban environments and these DIY goat wire trellises are sturdy and perfect for everything from squash to grapes.
This build requires a few more tools than the usual, so I would rate this one intermediate. Not so much for the skill level, but mostly for the extra tools necessary. As always be careful, don’t sue us, and build at your own risk! Affiliate links to follow.

Goat Wire Trellis Supplies
- Goat Wire Fence Panel (4ft x 16ft) You will need to get this from your local farm store (Think Southern States, Tractor Supply, etc). The rolls of wire are impossible to get nice and flat. Which is fine for a composting fence but not so great for a decorative trellis.
- 2″ X 6″ or 2″X 4″ Lumber in lengths for your project. I discuss this more in step 1. Also if you want to get into that whole treated versus untreated controversy read the first few paragraphs of my How to Make Raised Garden Beds that Last.
- 3″ Wood Screws
- Waterproof wood glue (Or if you are forever forgetting supplies like us then regular gorilla glue works pretty well too)
Tools
- Bolt Cutters or a sharp metal cutting blade
- Table Saw
- Miter Saw (While I got this particular one for Adam, this is my new favorite saw!!!!)
- Dado Blade (Optional. Read the directions below)
- Protective eye wear (especially when dealing with the metal)
- Gloves (Perhaps you get the idea here, but the metal… sharp…) We like the ones with the rubber grip but the breathable fabric
Step 1 Deciding on Frame Size
In the supplies above you will note that I have two different wood sizes recommended. This is all because of proportion. We made some small goat wire trellises to replace some old ones that had been attached to the house. These looked nice with just plain 2X4 lumber. We also made some big honking trellises to go on the back of the aforementioned raised beds. Those were large and in charge and made with 2X6’s. Those large trellises also almost ended with a screaming match in the middle of the yard, but since neither of us decided we wanted to entertain the neighbors or get divorced we managed to remain civil and finally get the goat wire trellises in place. So you have been warned. The larger you make a goat wire trellis the more of a pain in the arse it becomes to install. THOUGH, we did actually work out a reasonable installation method by ginormous trellis #3. You are welcome to skip our pain!
Now that your public service announcement and marriage saving tips are out of the way; plan out a simple box as follows.

You will have two long legs for installation. With the small goat wire trellises the legs just rested on the ground and attached the frame to the brick. With the larger ones we made extra long legs that were buried and screwed to the back of the raised beds. You can see a back view below. Just remember to leave enough leg for your application!
Step 2 Time to Saw
We went to the trouble to miter cut the top board and side supports. Just a simple 45 degree miter looked a little more professional than a flat join. The bottom board fits flush on the inside of the side supports and does not need a miter.
Pro Tip: It is a little easier to create these goat wire trellises if you are a bit flexible in the finished interior height of the trellis not counting the legs. The wire will be set in channels and getting that wire set to an exact depth in the channels… Let’s just say even we weren’t silly enough to try that level of perfection.
Step 3 Channel Inner Peace or at least Channel your Wood
If you want the nice seamless finish that you see in these goat wire panels you are going to need to set them in channels in the wood. There are a few ways to make channels in wood but we opted for using the table saw. Even with the table saw there are two different was to make the channels. The first is the easiest and most expensive. It requires a dado blade. This blade is actually multiple blades you can set to create a channel in 1-2 passes. These are wonderful and also around $100! Though I did find one on Amazon for the 50ish range, but, I can not vouch for the quality. Since I don’t see a need to channel lots of wood in my life, and Adam didn’t see any immediate need to continue to channel after this project he opted to go the more labor intensive but cheaper method.
I heartily seconded his decision as I saw that as an extra $100 savings just asking to be spent on plants. I was informed math doesn’t work that way…
So how did Adam make the channels? Here is his description:
- Set the blade 1/4″ off center for the small width of your wood. You only need to set the height about 3/4″ inch deep to hold the goat wire.
- Run the board(s) down the entire length of wood
- Flip the board and run it down a second time.
- If you flipped it correctly you should now have a 1/2″ wide section in the center of your board. Now move your board slightly (1/8″ ish) in towards center. Run the board down, flip and repeat.
- Repeat step 4 if necessary.
After that you should have a 1/2″ channel in the center of your wood with lots of thin pieces of wood. Simply pull those out and break them off. I may have caught Adam using my old garden clippers and weeding tools to knock the wood bits out of the channel.

Step 4 Assemble Time!
You might notice that I haven’t had you cut the metal yet. There is a reason. it is a heck of a lot easier to adjust the goat wire panel than it is to reframe all the wood again. So let’s get to assembling! The small ones can be fully assembled on the ground. DO NOT try to assemble the large ones and then put them in place. Just don’t! Recall marriage advice above step 1?
We made that mistake as you can see in the above framing picture. It broke and had to be reassembled in place. Feel free to dry fit it together and check to see if your channels are clear (seen in this smarter second attempt). Then do as we say and not as we did in the assembly.
For both types of trellises start with your top bar and side bars. Line up your miter joints put in some glue and the angle screws into the wood. Next do the following:
Small Goat Wire Trellis
Now is time to cut the wire. We found it easier to measure the inside dimension and add 1 inch. Then you can lay the panel over the top of the wood and refine. Once cut, slide the wood into the channels. It is helpful to have two people to slide each side in but Adam manages to do the small ones with no help. I’m sure I was off eating bonbons or some such while he was making them.

After sliding the wire in, simply slide the bottom piece of wood into place and screw it in. Voila trellis done. We just installed by hammering masonry nails straight through the wood and into our brick..

Large Goat Wire Trellis
After a lot of trial, error, and minor recriminations, we worked out the best method for installation of the larger trellises. Take your joined top and side supports and install them in place. You may be wondering how to get the goat wire into the trellis but trust us it works out just fine. Once you have your posts in place and the top leveled cut your wire to size. In the larger lengths it will bend enough in the middle that you will be able to slot the sides into the channels and then push it up to the top. It is super useful to have an assistant to hold the wire in place while someone else places the bottom board and screws it in.

That’s it folks. With some wood, screws, a little glue, and a lot of patience you can have these very sturdy goat wire trellises. We have some muscadine grapes already headed up the small ones and have started training thornless blackberries up the largest one. The other side is holding some raspberry canes. Until I get the berries well established and I have some scarlet runner beans planted to add some color during the summer.
We love questions and comments! Please leave one below if you need any clarification from our tutorials.