Posted on 9 Comments

Liquid Leaf

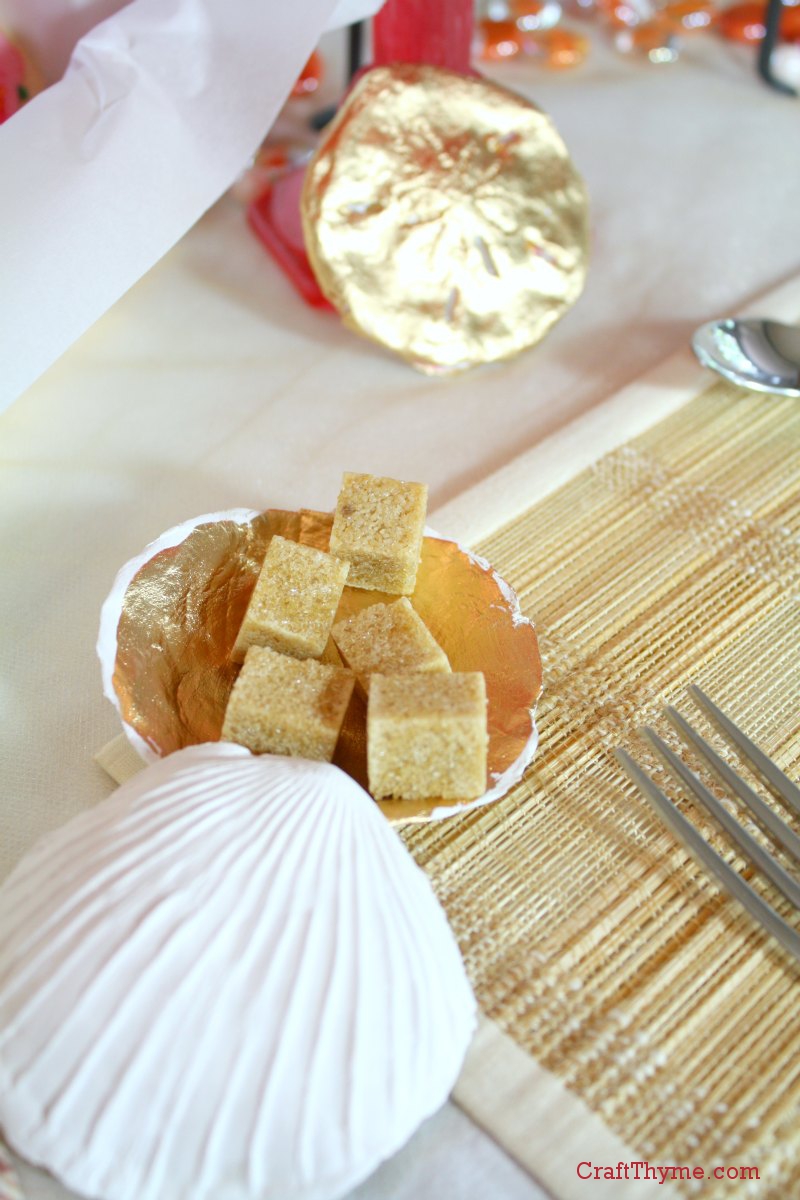
The sugar cube seashell holder and sand dollar were made out of paperclay and covered in liquid leaf. I like the poured look.

This isn’t so much a tutorial as more an answer to a few inquiries I had about the gold elements from the Pink Lemonade Table Decor.  There are a variety of metallic paints, waxes, glazes, leafs, foils, etc. for when you want to add shine to a project.  Each one has a place depending on the project and the look you are going for.  In this case I wanted a poured metallic look to cover the inside of real and scultped seashells and the outside of paperclay sand dollars.

I used Liquid Leaf* to finish these items. The below picture is from Plaid’s website. They have not paid me to say these nice things. In fact I doubt they know this website exists…

Liquid Leaf

You can achieve a leaf-like finish by thickly brushing on a coat and letting it dry.  I use some throw away flux brushes so I don’t have to worry about clean up.

The sugar cube seashell holder and sand dollar were made out of paperclay and covered in liquid leaf. I like the poured look.
The paperclay items did need a wash of thin white acrylic paint so that the leaf wasn’t immediately sucked into the surface. Trust me, I forgot to prime one of them and it used a ton of leaf and left lots of paint strokes.

You can get a metallic accent by brushing a thin coat on as I did with this Goodwill tray.  I did white-wash it with a layer of acrylic paint first and then used the liquid leaf along the bottom edge.

tray accented with liquid leaf

Finally liquid leaf works well on a lot of materials.  I finished the inside of real seashells as well as my faux created ones.

Vignette with various items accented in liquid gold leafTo be honest I initially planned on using rub-n-buff but I couldn’t find the tube in the basement.  However, I like the look of poured and cast metal that the liquid leaf created.  I’ll definitely use it again when I need this particular effect.

Notes

Make sure to put a thick coat on if you want a poured look.

DO NOT touch until fully dry.  Just don’t.  Let it dry.

You may need to cover the with a clear acrylic top coat.  Tarnish can occur and heavy use items will rub.

It stinks.  Ventilation is key.  Otherwise it is easy peasy to apply.

Enjoy these articles?  Get periodic updates by joining my mailing list (no spam, no way, no how) or subscribing to my RSS feed.

Posted on 8 Comments

Sea Shells & Lemonade = Table Decor?

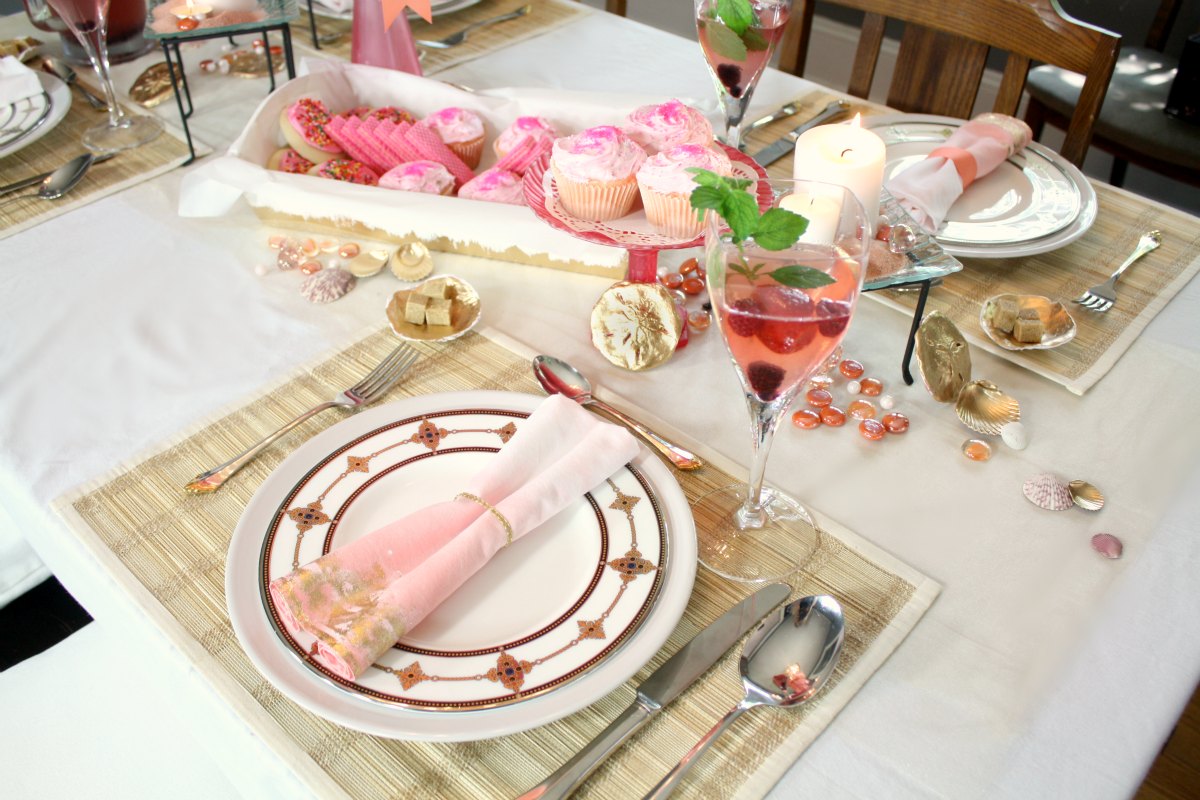
Sea shell inspired table decor.

I initially had the idea for this table setting from some sea shells I found when scrounging through my mess of a basement.   I had saved a small bag of pink scallop shells and thought they would make a good basis to start my summer decor.  Though I live  in the mountains my second love is the beach.  I wish I was a lake girl, since so many lakes are so much closer, but the mud, the dark water, the…  Nope it is sand and surf for me.  However, any good mountaineer knows overdoing the surf theme just seems out of place.  So here is my hybrid of pink, salmon, & gold.  Call it pink sand, shore, and lemonade inspiration.

Table decor inspired by pink sea shells
I’m so good at naming tablescapes… #sarcasm. Please suggest better names in the comments! Please!

The table setting is anchored by a diy ribbon chandelier (tutorial here) above and gold tulle net runner below.  The gold accents unify the various shades of pink that run from rose to salmon.  Shoo… okay I can say I used my art degree today to critique my design.  Now on the the fun stuff!

PINK LEMONADE CUPCAKES!

I knew I wanted some fun pink desserts and, thank the grocery gods, I walked by a display for Pillsbury pink-lemonade cupcakes.

Table setting inspired by pink seashells
Read below to learn more about my awesome baking skills.

Yes I can bake…  But can I decorate a cake?  Oh hell no.  It is a crafting skill that is just beyond me.  Knowing this, I often take the easy way out with mixes, pre-made icing, and sugar sprinkles.  As far as I can tell sugar sprinkles cover a multitude of sins.  Plus who could walk away from a thing of icing labeled ‘Pink Lemonade”.  And I swear I am not getting paid by Pillsbury to say all this awesome stuff.  Though, if they would like to, feel free to give me a ring.

Pink and Gold table decor
I like to call this the sugar, sugar, sugar portion of the table

Oh my!  I almost forgot mixed berry sangria!  Perhaps I should preface this with my Facebook status:pink-fb-statusNot to be a braggart but I make multiple awesome sangrias.  Citrus, berry, peach, etc… One for every season.  The recipe for this mixed berry and lemonade one will be up Thursday!

Salmon and Pink place settings
Gold Finger! A tutorial for creating your own gold sea shells and sand dollars from paper clay is in the works.

One of the things I enjoyed most about creating this display was learning to gold foil fabric (tutorial coming).  I thought the ombre dyed napkins (another upcoming tutorial) really set of each place setting because of the gold edging.  I’ll leave you with one more picture and a list of craft tutorials and how-tos required to recreate this summer table decor.

Sea shell inspired table decor.


I would love to have a better name and ideas on what you like or would improve.  Every table display is a learning experience so please leave comments.  Other than the cupcakes… Those mo-fo’s were delicious!

Tutorials:

How to Dye Sand

Permanent Sea Glass Finish

Modern Ribbon Chandelier (yes it is supposed to look like that)

Mixed Berry Sangria

Ombre Dyed Napkins

Gold Foiling Fabric August 8, 2013

Mold Making from Polymer Clay (Gold Seashells and Sand Dollars) I have photos and how tos but I am not sure how many people like to sculpt and make molds…  I may or may not post a tutorial.

Enjoy these articles?  Get periodic updates by joining my mailing list (no spam, no way, no how) or subscribing to my RSS feed.
See more great crafts and decor at these link parties: Our Home Away From Home, Today’s Creative Blog, Daisy Cottage Designs, Shabby Creek Cottage, House of Hepworths, Live Laugh Rowe, The Crafty Blog Stalker

Posted on 6 Comments

FAIL: Homemade Paperclay Disaster

I haven’t done any personal blogging here on Craft Thyme and think it will likely be a rare occasion because I want to keep the topics relevant and craft oriented.  However, a little behind the scenes sometimes puts crafting in context and honestly this crafting fail was too good not to share.

While there are a lot of abandoned projects that just don’t make it up to par, usually, when I am building on the tutorials of other sites they turn out alright.  Or hell they at least turn out…  And since I am being personal there are a lot of projects that just require too much time.  I work outside the home and I have two children ages 3 and 1.  Let me repeat that: two boys ages 3 and 1.  Not close to 4 and 2…  We got a barely potty trained and a crawler.  I’m surprised I remember my name and that is often why things don’t reach fruition.

Back to the Point (If there is one to this post):

I should have known something was desperately wrong when the first ingredient was an entire roll of toilet paper.  Have you ever actually seen how much paper is on a roll?

Well you have now.  Thats a whole lotta TP in front of a blender.
Well you have now. That’s a whole lotta TP in front of a blender.  Though I am digging my new photo setup I am working on so I can do tutorials at night. :)

I have probably sealed my fate by allowing the boys to help remove the toilet paper from the roll.  I did at least have sense enough to take the roll away from the bathroom so as not to reinforce removing paper from the regular area.

Pulling copious amounts of toilet paper off the roll.  Every child's dream!
Pulling copious amounts of toilet paper off the roll. Every child’s dream!

It was only downhill from there…

Plaster the Second Issue:

I worked with plaster throughout art school.  I know it has a short set up time, thin consistency, and works best for smoothing and casting.  Why I thought its properties would suddenly transform with the addition of toilet paper and glue, I will never know.  I mean toilet paper is magical…  So it made a little sense at the time.

The Final Fail:

The first time, the plaster set up too fast, the second time it was liquid then the plaster set up too fast.  Sensing a theme?  If there had been a third time I would have been insane.  I am still removing tiny bits of plaster-coated TP from under my nails as I type this.  And let me tell you there is an undesirable ick factor to a bucket of wet toilet paper.  And since this is “nice” blog we won’t discuss what wet toilet paper looks like ground up, and then splattered down your front.  Feel free to discover that gem on your own.

Plus it makes a huge freaking mess.

I adore Twigg Studios and regularly follow their blog, but honestly, in this particular case she must have some kind of plaster voodoo to have achieved this light, smooth, and airy texture.  Possible sanded the shit out of it was Patrick’s (My Husband’s) suggestion.  I found a similar recipe using joint compound, but now having worked with the texture of the mix I think that this might be a DIY that requires a commercial product.

All I can say is my faux barnacles did not equal her sea urchin or barnacle tutorial inspired by Design Sponge.

Take a guess which one I created?  The lump on the left?
Take a guess which one I created? The lump on the left?

Anyway, I’m off to order some real paper clay and take a stab at making these in a different way. That way I can get back to crafting and not craft-failing.

Enjoy these articles?  Get periodic updates by joining my mailing list (no spam, no way, no how) or subscribing to my RSS feed.

See more great crafts and decor at these link parties: Cherished Bliss, Crafty Confessions, The Gunny Sack Uncommon Slice of Suburbia