Posted on 15 Comments

Goodnight Moon Theme Birthday

Details of how to create your own Goodnight Moon birthday Party
Goodnight Moon has been a staple throughout my Son’s lives.  I have to admit that I originally did not see the appeal but after reading the book 6+ years I have grown to love it.  It seemed fitting to have a Goodnight Moon theme party for our last son’s first birthday.

However, have you ever tried to find goodnight moon themed items for parties?  Apparently, this book hasn’t reached massive commercialization.  I found some good items on Etsy but instead of purchasing I decided to DIY it.  Never underestimate the power of a scanner!

One of the most notable parts of the book is the color scheme.  Can we say “Great Green Room”?  The shades of green, red, yellow, and blue are unmistakable.  I used those colors as the base for my decorations.  We purchased matching plates, napkins, and silverware in a mix of those colors.

Details of how to create your own Goodnight Moon birthday Party

Since I wasn’t using the book for my own commercial gain I felt inclined to scan away and looked through google images to find source material.  I printed out some of my favorite scenes to place in frames and make a centerpiece for the buffet.  I also sat out the tattered copy of Goodnight Moon and Our World (the companion book).  Adam, filled out that buffet space with lots of yummy grilled items!
Details of how to create your own Goodnight Moon birthday Party

It is possible to purchase some adorable mouse wrapping paper.  However, by the time I found it, it was too late to get it shipped to my house.  You know what does work?  Tiling images in Picmonkey and taping together sheets of paper.  Trust me, no one year old actually notices his present is made of lots of small sheets of paper.  For that matter I do not think anyone noticed and it added a pretty pop of on theme color.
Details of how to create your own Goodnight Moon birthday Party

Obviously, at a Goodnight Moon theme party you will need a moon of some sort.  I looked through my cardstock stash and found some metallic white and silver paper.  I used a plate to make a nice circle and cut out a moon and then hand cut lots of stars.  The cutting took a bit but it was fun.  I lightly drew lopsided stars in pencil and then cut out a couple of sheets at a time.  The book has all kinds of wonderful and playful star shapes so my hand cut items matched perfectly.  I simply taped them to fishing wire and hung everything from the light fixture Adam hand crafted.

Details of how to create your own Goodnight Moon birthday Party


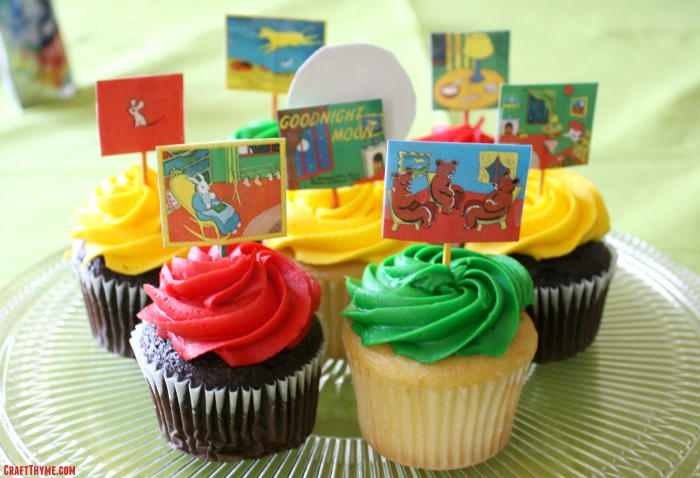
No first birthday party is complete without CAKE!  Well cupcakes in this case.  You may think what you like but I ordered them from Sam’s Club.  They were super helpful matching the colors and they tasted great.  To make them extra special we printed out tiny scenes from the book and made toppers with similarly colored toothpicks.  Keaton got a special moon on top of his too!  I would say he very much enjoyed his treat!


Details of how to create your own Goodnight Moon birthday Party


Finally, I made a fun game for both the adults and kids in attendance.  I printed out 10 1/2″ images of the elusive mouse from the books.  I then took the tiny mouse and taped him throughout the downstairs to windowsills, doors, Keaton’s highchair, etc.  Everyone spent the day trying to find all 10!

With just a little ingenuity and a lot of Goodnight Moon inspiration we were able to come up with a creative and affordable theme party to celebrate the last first birthday in our house.  Well that is until we have the grandkids.  :)  If you are not into DIY like we are or wanted some great gifts Amazon has some adorable merchandise.  Affiliate links below.


Details of how to create your own Goodnight Moon birthday Party

Posted on Leave a comment

Dr. Seuss Themed First Birthday

My youngest son turned 1 last week.  I’d love to say I had it all together, realized that Dr. Seuss’ 100th birthday was occurring and picked the perfect theme for Conlan’s First Birthday.  Alas, I would be lying…  I wanted a Dr. Seuss themed birthday for McClain’s first (two years ago) and ordered the licensed plates, napkins, etc.  The decorations came exactly one day after his party and were promptly shoved in the basement.  I got my Dr. Seuss theme on the second go-around.

Dr Seuss themed first birthday

To complement the purchased party items I made a few decorations.  Some Seussian-like trees for the wrapped box centerpiece and hand-dyed crepe paper ruffles.

While, I imagine that very few people will need to recreate the trees I think I may just give a run-down on how to make them next week.  It might be fun to do something whimsical like that for Christmas.

Dr. Seuss Themed Centerpiece


Dr. Seuss inspired decorations
Balloons and Streamers! Can’t have a birthday without them.

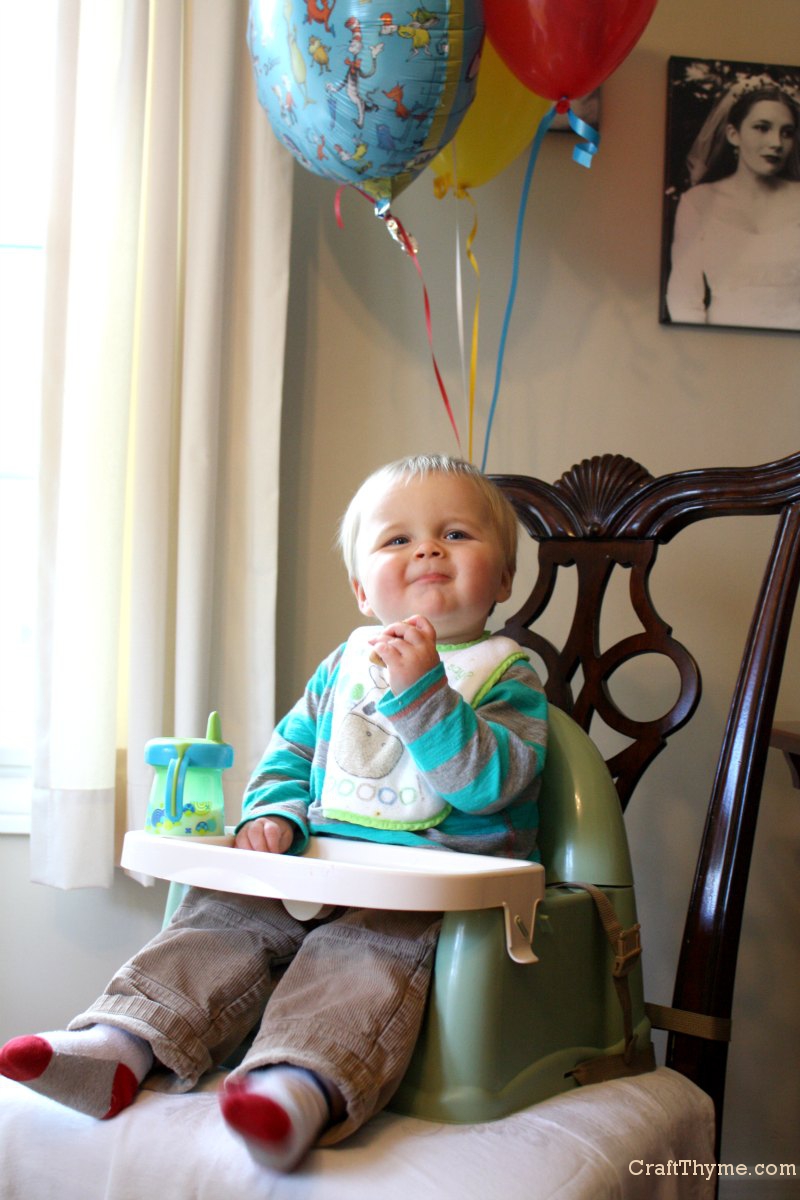
The guests (adults and kids alike) enjoyed the balloons.  They made great decorations in the colors of red, white, turquoise, and yellow & doubled as entertainment.  Everyone seemed to enjoy the basic snacks and of course a color themed cake.  Conlan, seemed to enjoy all the extra attention.

Okay... Maybe Conlan enjoyed the balloons more.  Oddly, he was not smiles about the cake.
Okay… Maybe Conlan enjoyed the balloons more. Oddly, he was not smiles about the cake.

While, the Dr. Seuss theme looked great and added nice color pops to the family photos (yes, I keep my friends off my blog) I did manage to miss getting one awesome picture.  The cake smash! Why?  Because Conlan was totally NOT about it.  He stuck one hand in, and looked at me to wipe it off.  Patrick gave him a taste of the icing, and he promptly made a face like it tasted horrible.  Clearly he is missing some important sweet-tooth gene I should have passed to him.  Anyway, enjoy one more photo of decoration details and scroll down for the connected tutorials.

Dr. Seuss inspired first birthday party


Tutorials to Create This Theme:

Dr. Seuss Inspired Tree Centerpiece

How to Dye Crepe Paper

How to Make Easy Crepe Paper Ruffles

Enjoy these articles?  Get periodic updates by joining my mailing list (no spam, no way, no how) or subscribing to my RSS feed.

See other great decor and inspiration at these link parties: My Uncommon Slice of Suburbia, Lady Bug Blessings, The Gunny Sack

Posted on Leave a comment

Camping Birthday Party

Recently we celebrated my sons 2nd, 2nd birthday. Meaning his wonderful relatives in Durham had already had his and his cousin a joint 2nd birthday party. Of course I have next to no pictures of the first or second party since I get so caught up in the moment I forget to take pictures of the decorations. Suffice to say that both events were lovely! Since I had mentioned my idea to throw McClain a camping themed birthday party I thought I would share the very few pictures I had the presence of mind to take.

I made a simple “Happy Birthday” banner by enlarging the Pinewood font and cutting out the letters on my Silhouette craft machine. For a rustic camping look I clamped them to some hemp twine and strung them between branches I anchored in buckets on either side of the buffet table. While the color is washed out in the photo I used blue, red, and green embroidery floss to make friendship bracelet tassels.

We moved all the furniture to the edges of the room to open up play space for the kiddos and places a tepee in the corner near the fireplace. My mother let me borrow a number of plaid and striped wool camping blankets to use on the floor and as throws. Here she is enjoying one with McClain in the tepee.

Chocolate and vanilla cupcakes were topped with moss (green sugar in two shades) and woodland characters. I have to say I used my Silhouette again to find these cute little animals and cut them out. However, there are plenty of cartoon forest creatures available as free clipart you could use. Just print them out and mirror the other side. Then match the two sides and glue to a toothpick.

Here is a detail of the cupcake toppers. I also set (high above the children) candles, with various birds and moss. While not shown, I used mess-kits to serve many of the snacks and lanterns as decorations. The menu kept with the theme by serving campfire chili, cheese log, and smores icecream sandwiches.

McClain’s favorite part besides the obvious attention and presents was a toss up between the tepee and the cupcakes. Though for pure family use I’m going to have to go with the tepee. We kept it up for a week and everyone, including the felines, enjoyed their time sitting in it.

Posted on 2 Comments

Traditional First Birthday

My son turned one yesterday. While, I was pretty choked up about the whole thing, I actually was calm the day of the event. We had a few friends and family joining us to celebrate for the second time. To mark the historic occasion, and because I was feeling nostalgic, Granny and I decorated her house with old school balloons, bows, party hats, and confetti.

I have to admit that other than a few Sesame Street items, most of the decorations were items we just re-purposed. We used party hats over baby food jars to weigh down the balloon centerpieces with lines of bows, noise makers, and curled ribbons we had on hand from other parties.

McClain really enjoyed his personal cake that Granny made.

Granny made this bib 29 years ago for me to wear my first birthday.

However, I can’t say he was a huge fan of his party hat.

We had to make sure his best friend Hippity made it to the party.

All in all it was good day to turn 1!

Happy First Birthday.

Posted on 14 Comments

Fall Centerpiece Idea

I created some quick, cheap, and easy fall table decorations for my niece’s 1st birthday. Even though I “cuted” them up with bugs I reused them to make a nice, adult autumn decorations after the party. Here’s what you’ll need:

  • Various clear glass vases (Mine were just a few bucks from Goodwill and the Dollar Tree)
  • Fall leaves of assorted colors

Yep, that’s it! I went up to the local library with a bag and grabbed a bunch of red, yellow, and orange leaves off the ground. Then I used the still-green/yellow leaves off of my dying morning glory vine. Separate your pile of leaves into green, yellow, orange, and red. Then I started at the bottom. It is important to curves the leaves around the glass to let the colors show. I actually filled the center with yucky brown leaves from the yard to hold the next layer of leaves up. Then I just went from green to yellow to orange to red.

Just after I finished them

Amazingly they have mellowed nicely and still look good a week later.

Darker colors but still nice

The rest of the decorations I made just using various papers, printer, old school markers, and vegetable oil (rubbing a bit of that on the bugs made them translucent). It made nice, relatively cheap decorations and the crepe paper streamers and balloons just screamed “old-school birthday party”. The bug theme with beetles, caterpillars, butterflies, and dragonflies was chosen to be gender neutral so Mr. Mac could get in on the birthday fun. We celebrated his for the family that won’t actually see him on his 1st in November along with his cousin who turned 1 a couple of weeks back.

Do you have any quick and easy fall or birthday decorations? Please share.