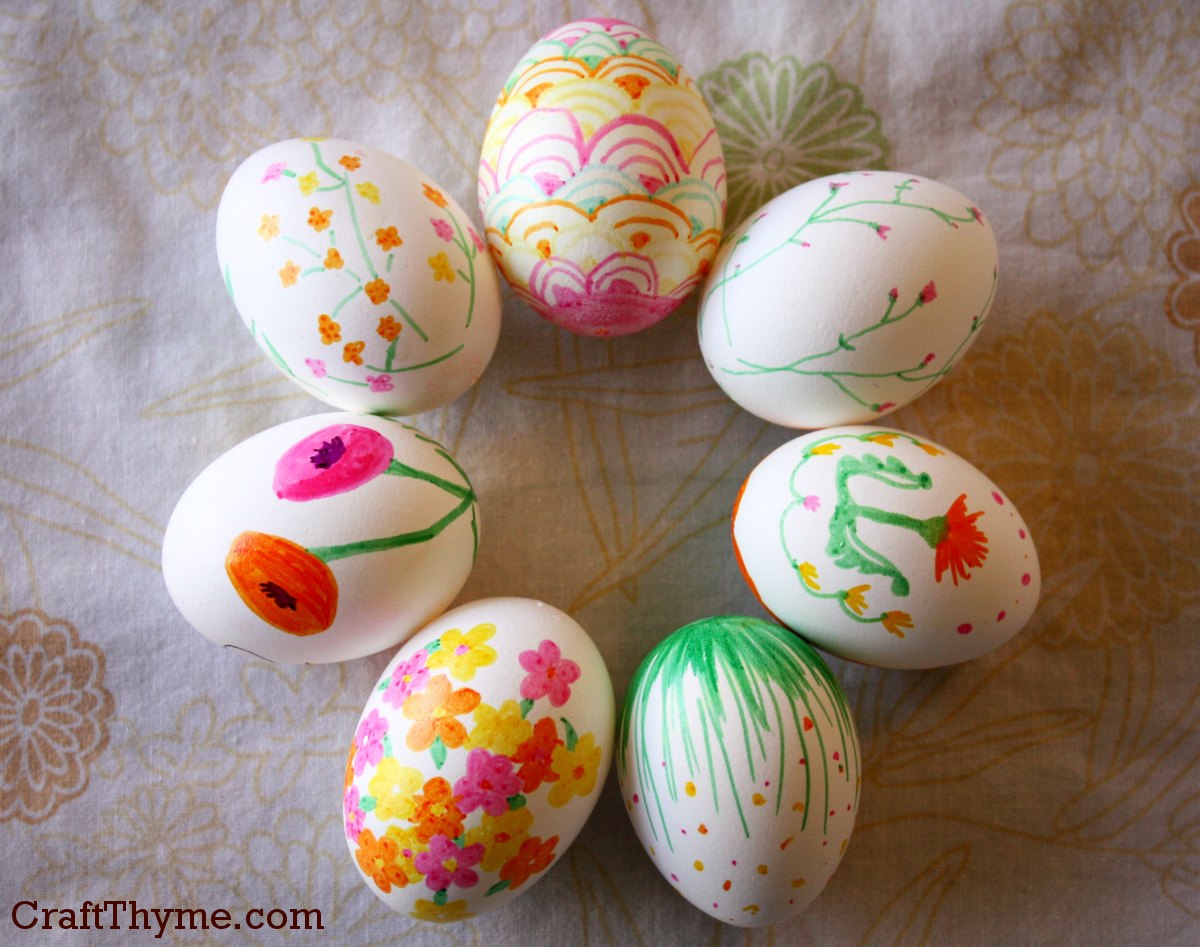
Easter is just around the corner and I wanted to make some pretty floral patterned Easter Eggs. These will be part of my Easter table setting (coming next week). I blew out some eggs a couple of weeks ago and they have just been sitting… Waiting… for divine Eggspiration.
Bring on the Pattern
Got a wild hair and grabbed some permanent markers. Voila! I did these all freehand while trying to throw a ball to McClain and keep Conlan from exercising his new found ability to crawl… off the porch. Imagine if I had a stencil or even a reference pattern!
If using permanent markers I would strongly suggest to NOT eat the egg. I wasn’t using hard boiled eggs, but I can’t imagine eating anything that smells like those markers do. But, the markers make a quick and easy way to make colorful patterns on Easter Eggs.
If you want to see these eggs in their final table setting I’ll post a link here when it goes live next week.
Enjoy these articles? Get periodic updates by joining my mailing list (no spam, no way, no how) or subscribing to my RSS feed.
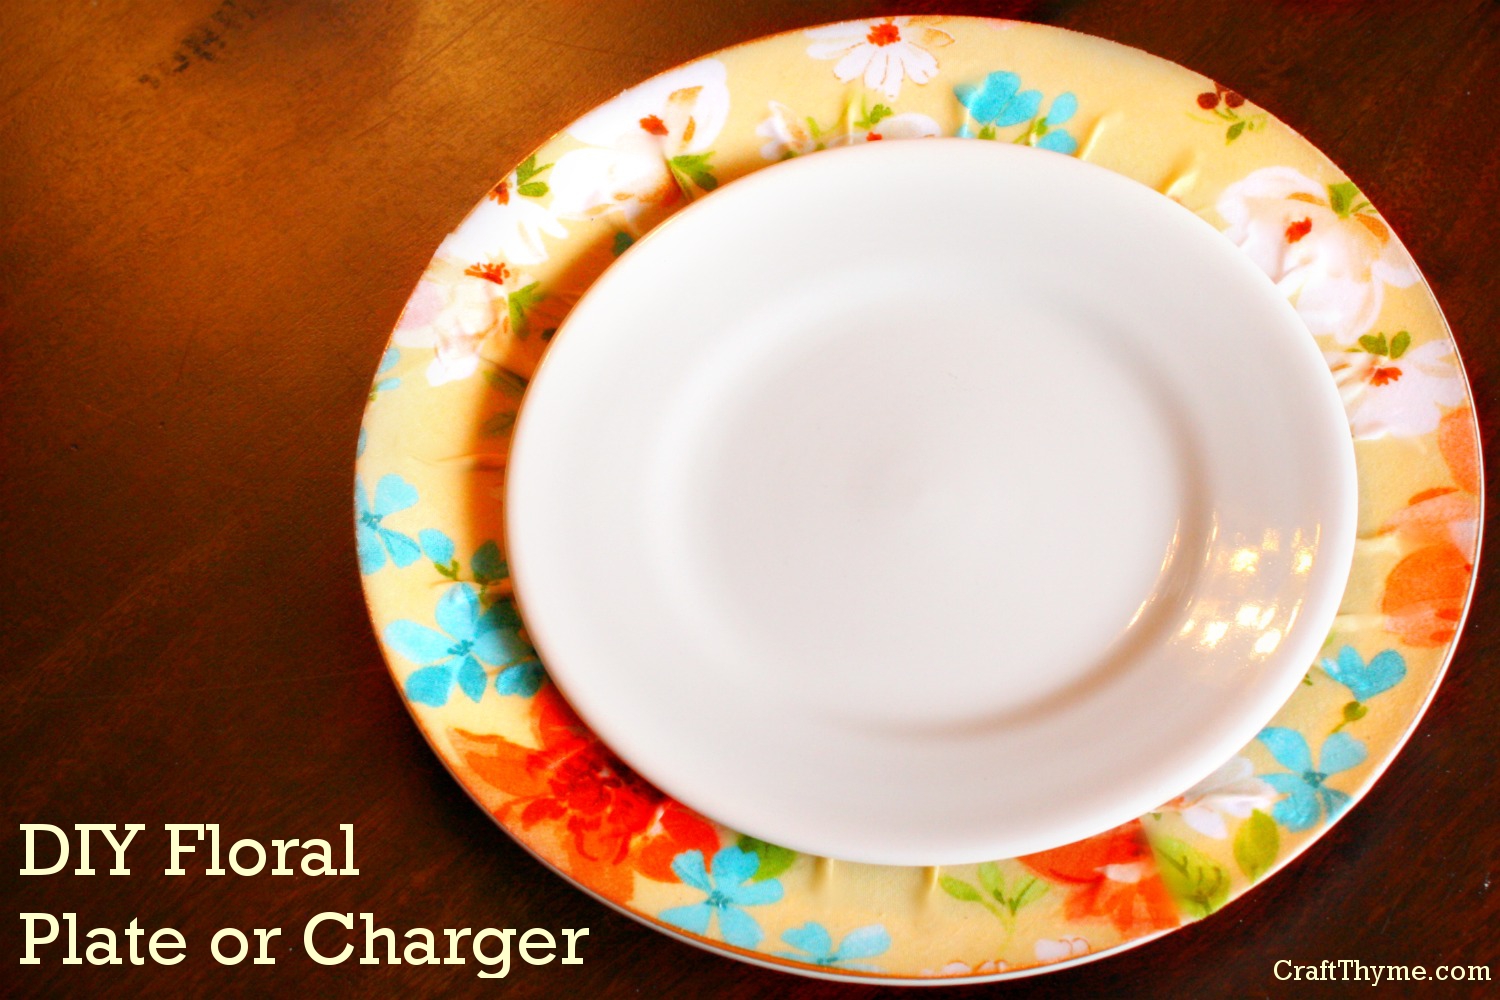
You might ask yourself: What the hell is a charger? Not only will I answer that question, I’ll show you how to make a pretty floral charger for your Easter table setting. While a charger is technically a car and the thing you use to make your cellphone keep working, in this case we are discussing a decorative plate. It goes under your regular plate for decorative purposes.
Basically a charger = a useless plate that you can’t eat off of. But damn do they look good.
Damn that is a mighty fine looking useless plate
Supplies
Plates that can get ruined made awesome (these lovelies we .50 a pop at Goodwill)
Fabric
Decoupage Glue
Something to paint the glue on with (foam brush, paint brush, fingers, whatever)
Ruler
Scissors (I happen to have rotary cutters but as long as you can cut fabric you’ll be fine)
Step 1 Cut Fabric on the Bias
You can see that I am very exact in my measurements #Sarcasm
Decide how large of a fabric rim you want on your plates. Mine had a natural edge so I chose that to be the width of my fabric strips. Use that width to cut multiple bias strips. Why bias? Well… I wanted the very outside edge to lay neatly on the plate and to create a “gathered” look towards the center of the plate. I’m not going to get into a lot of technical fabric mojo here, but bias cuts allow this. If you don’t know what a bias cut is or how to do one, let me google that for you. There are a variety of tutorials that will show you how to do that in a flash.
Step 2 Sticking the Fabric
You’ll note that I put down some old newspaper. Modge Podge is a beotch to scrape off the table.
Note: I thinned my decoupage glue with a bit of water because fabric really soaks it up, and frankly that stuff is expensive!
Take the glue and cover a few inches of the rim. Carefully stretch the fabric along the edge, pressing gently to adhere and smooth. Leave the center all ripply.
Step 3 Getting Messy
I hope the glue really is non-toxic since I basically decoupaged my hand.
Stay with me because this should probably be a video instead of a still photo.
Take the fingers of one hand and form the extra fabric into little gathers, while holding the edge so it doesn’t slip. Now take your other hand and apply glue from the rim to center (a downward motion). This takes a little dexterity, but, no worries!. The glue makes it nice and slippery so if anything slides etc. you can nudge it back into place.
Step 4 Let it Mostly Dry
Yet another photo that looks like I need a manicure and have some flaky skin disease. I promise it is the glue!
When the glue turned mostly clear you will want to take your plates and press down on all the gathers. I did this to make the charger flatter so the dinner plate will set level. I also did this for aesthetic reasons as it gave me an opportunity to smooth out any air bubbles and remove any excess glue. After smoothing the plate I put a second coat of decoupage glue to seal the fabric fully.
Notes
These chargers aren’t washable nor are the meant to be eaten on. With the multiple coats of decoupage glue they are wipeable.
If your strip fabric doesn’t go all the way around just add a second. I cut the end straight and overlapped it slightly right on one of the gathers. With the gathers and pattern it is hardly noticeable.
Regular Readers
I am mixing it up a bit. Usually I post the finished mantel, table setting, etc. first and then add the tutorials. This week we are going backwards! I’ll post the link to the final Easter table setting here when we get to it.
Enjoy these articles? Get periodic updates by joining my mailing list (no spam, no way, no how) or subscribing to my RSS feed.
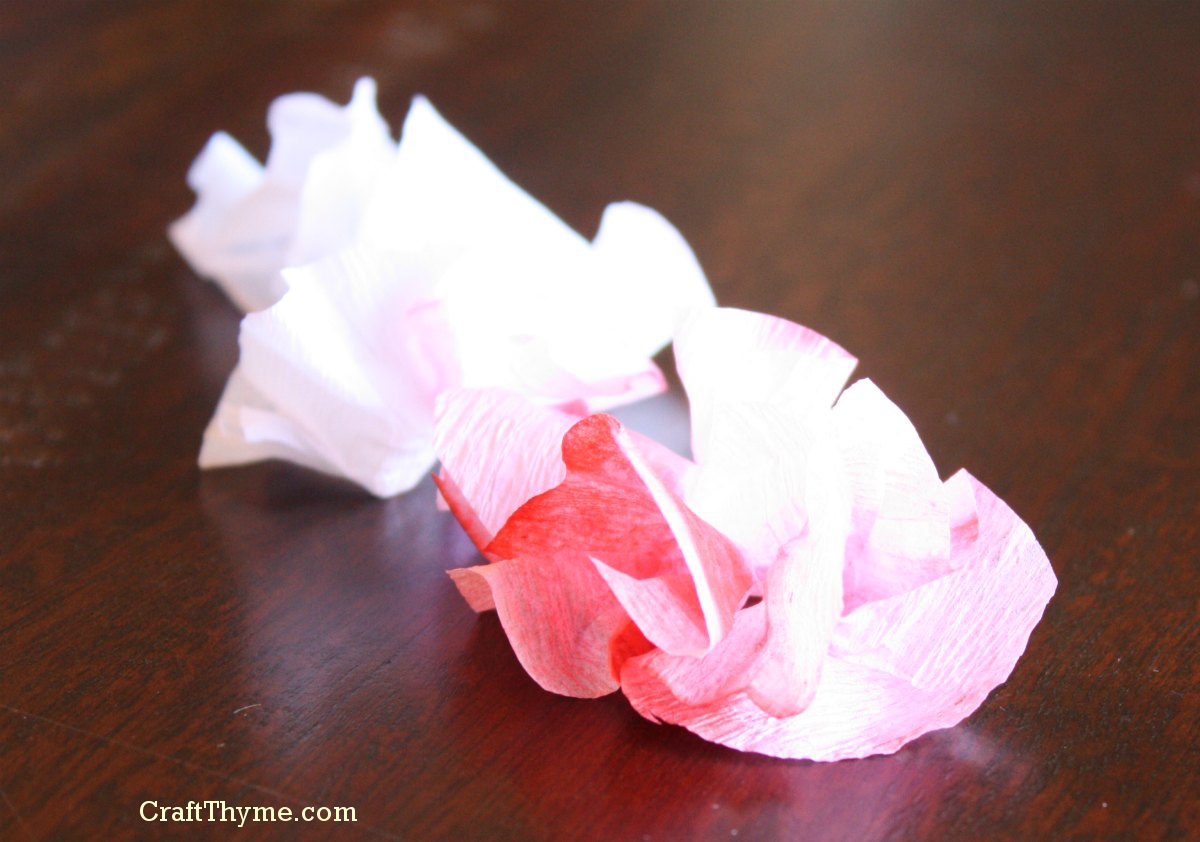
The following is a quick and easy tutorial on creating faux cherry blossoms from crepe paper. I have followed the rather tedious tutorials on making different crepe flowers before. Yes, they look lovely… But with two small children underfoot I will sacrifice a bit of my accurate-compulsive tendencies artistic integrity to make a final arrangement that beautifies my space. And doesn’t take 30 damn hrs to painstakingly cut tiny petals. So read on for Quick and Easy Cherry Blossoms:
Supplies (For some reason I always want to type ingredients here…)
Shown: Glue Gun with glue sticks (don’t run out!)
Crepe Paper
Scissors
Floral wire that matches your branches (this is optional)
Not Shown: Branches
Spray Paint
Step 1
Take your crepe paper and accordion fold it up. In this picture I am using two shades of hand dyed crepe paper (You can see the tutorial here). I make it as thick as I can still cut because I hate cutting. Cutting, to me, is just a process to get through before the fun begins in crafting. So thicker = less cuts.
I know you are surprised, but I am also one of those people that will die carrying in 4,000 bags of groceries instead of making two trips. So go ahead fold that puppy up thick!
Step 2
Cut out a circle-like shape. Trust me here, no need to go get a compass. As long as it ends up kinda rounded you are all good. I thought about using a circle punch (might have given up trying to find it in the basement) but I like the more organic shape in the end.
That lovely variegation is why I go to the trouble to hand dye my crepe paper. But for even quick and easier methods just go buy a couple shades of pink.
Step 3
Here is where the magic happens! Take your petals to the bedroom… Just Kidding! The magic I am discussing is what makes crepe paper so nice for creating organic items like flowers. Pull lightly on the outer edges of the petals. The crepe will stretch a bit and ruffle; making for a more realistic looking shape.
And here you can see what I meant by only needs to be kinda circular. Such an amazing cutting job.
Step 4
Take your super-technical-amazing-implement, in this case a pen and wrap the petal around the bottom to make a cup shape. You may have done the exact same thing on a pencil eraser as a kid to make tissue paper crafts. I couldn’t find a regular pencil in the house so a pen worked just as well.
Step 5
Technically at this point you are done. The flowers look pretty just laid on objects. You can see inspiration by clicking here. However, to fully assemble a branch you will need, well… A branch. For mine I used some old maple limbs from the yard that I spray painted white. Since they didn’t have a lot of small limbs I made extra places to glue the flowers with matching white floral wire. Again you can see the final result here. Simply use a tiny dab of hot glue and stick on a flower.
Notes:
To make thicker flowers that look fully open try gluing two smaller flowers together. Also for tight buds twist the petals tightly together around the pen. I was able to make 40 or so flowers in less than half an hour. It is always a race to see who will finish first. Me with the craft or Conlan with his nap, so, I know this one was quick and easy. I hope you all enjoyed.
Enjoy these articles? Get periodic updates by joining my mailing list (no spam, no way, no how) or subscribing to my RSS feed.
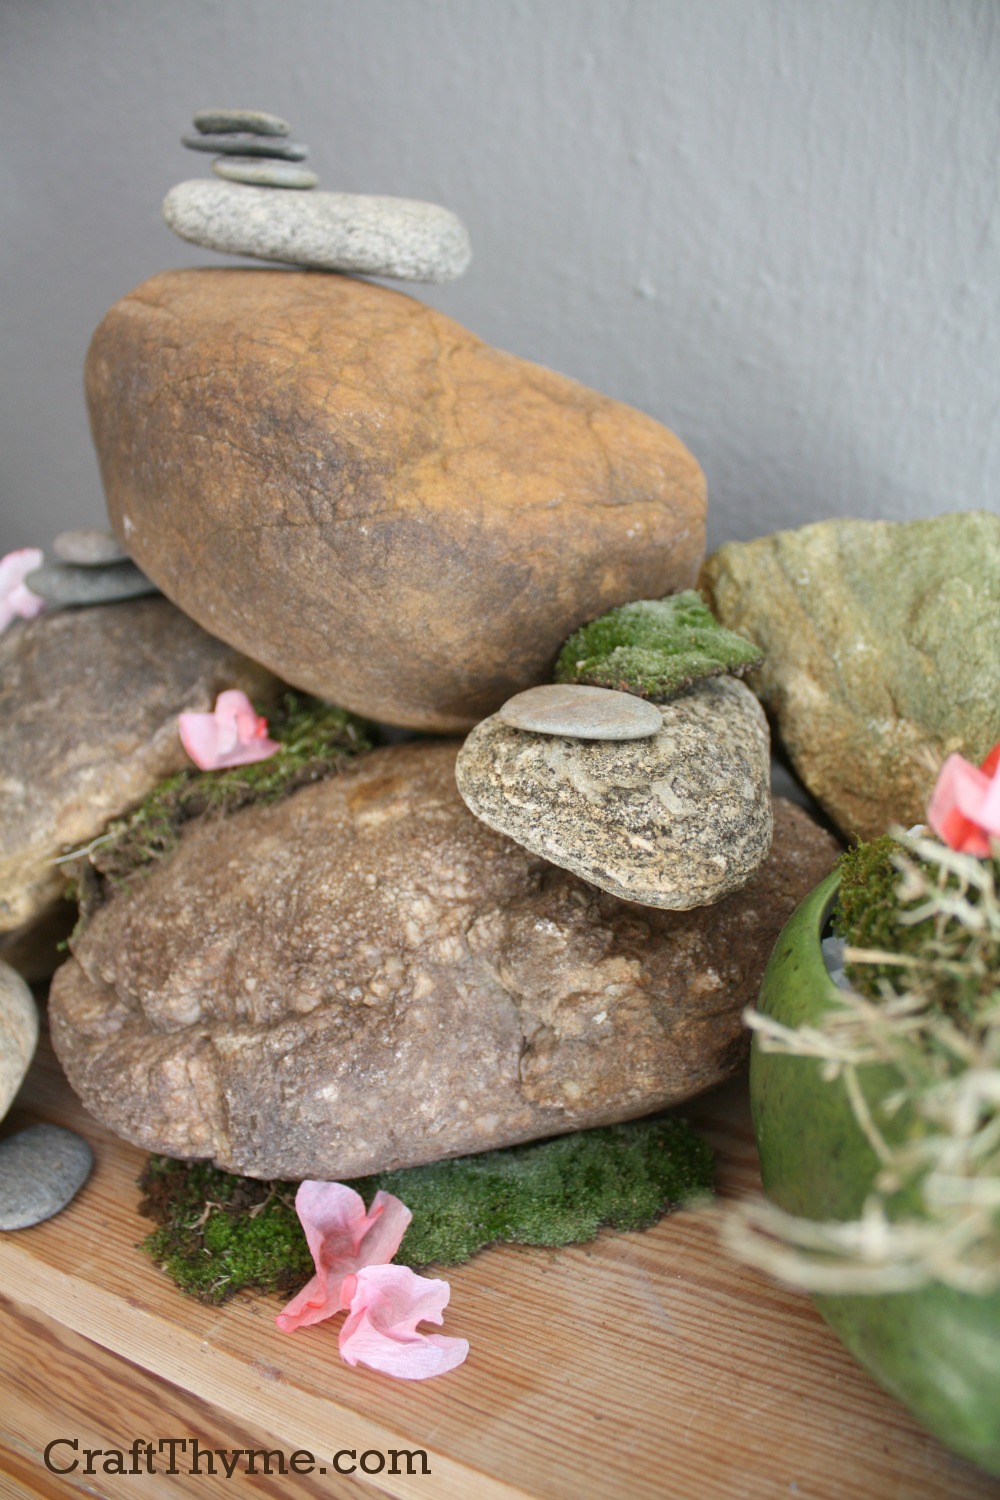
Spring is heralded by the appearance of flowers, singing of birds, and greening of everything. While it isn’t quite Spring-time I am beyond ready for a little bit of growth. To celebrate the coming season change I worked on creating faux cherry blossoms and branches from old maple limbs and hand-dyed crepe paper.
Flowers? Check. Green? Check. Now if it was really Spring.
The tutorial for creating these blossoms is quick and easy. The mantel itself, just required stealing borrowing a few rocks from the garden and moss from the neighbors shady backyard. Don’t worry I’ll put them all back very soon. Well at least the moss. The rocks are probably getting moved to a new position in the garden anyway.
The quick and easy crepe paper blossom tutorial leaves out the visual steps of spray painting branches white and hot gluing the blossoms down. Mostly because I really hope everyone can read the can of spray paint and use a glue gun… If not then I suggest you run, not walk, away from the rest of the tutorials. Anyway, here are a few more details. Make sure to check out the how-to for creating your own blossoms.
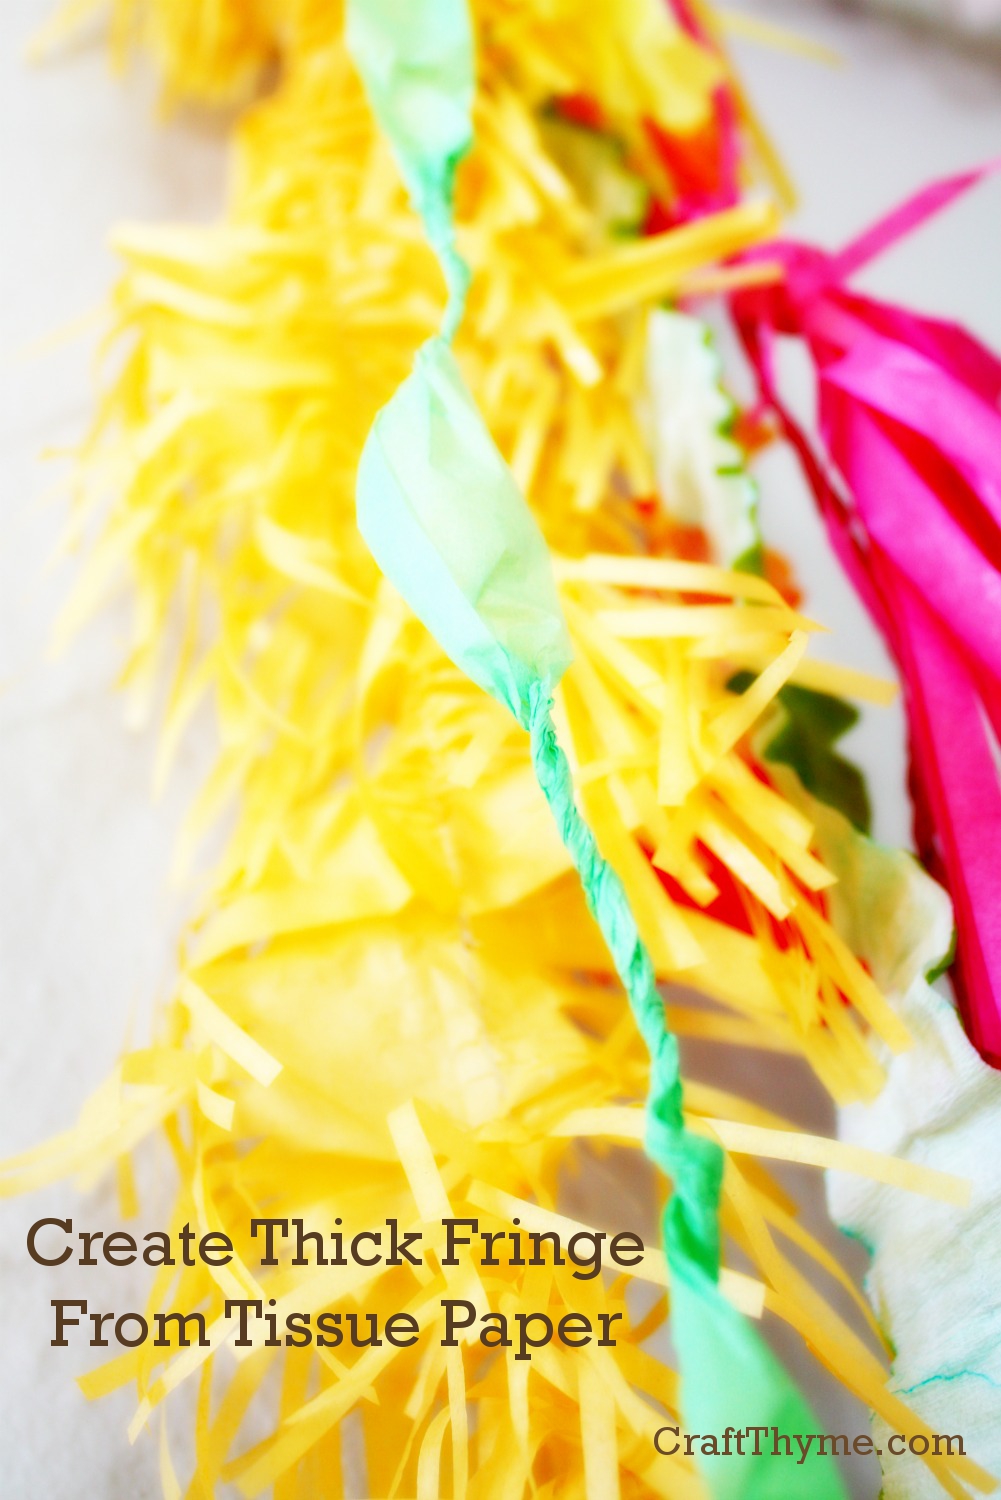
Creating a thick tissue paper fringed garland add a lot of texture to my Spring Photo Wall. As an added bonus one single sheet of tissue paper will give you 4-6 feet of garland depending on how puffy you want to make it. The picture below shows a single sheet of yellow tissue paper turned into the piece of garland:
If anyone has a shorter name for this project please speak up!
Supplies
Tissue paper
Scissors
Sewing Machine
Step 1
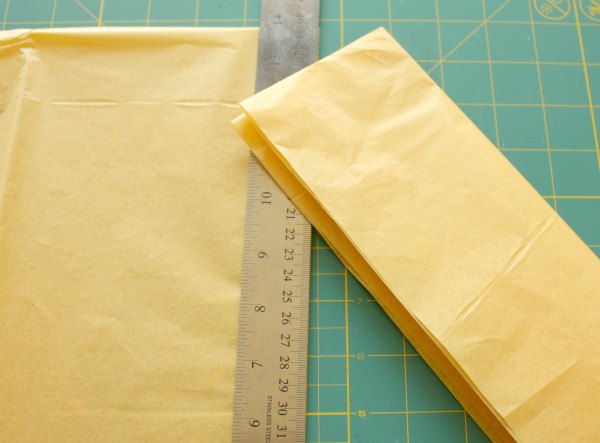
Cut a single sheet of tissue paper into thirds down the long side of the paper. Because I am lazy I folded mine in half to cut as you can see in the photo. After cutting the paper into thirds fold each third down the long/lengthwise side. This makes cutting the fringe much easier.
I know that is a lot of folding cutting instructions… But basically make each piece as long as possible.
Step 2
This is either the very easy or very time consuming part of the project. Cutting the fringe. I stacked all three pieces that were folded in half to cut the fringe. Sure that is six layers… But six layers of tissue paper is still pretty easy to cut. You might not I have some awesome fringe scissors in the photos. You can cut them one at a time, but for 12 dollars fringe scissors are awesome. You’ll see that I left a lot of room in the middle. I’ll explain why in the final step.
I’m just going to call these scissors of awesomeness.
Step 3
Unfold the tissue paper till each piece is flat and lay it on the sewing machine with the fringe on either side. For more detailed directions on gathering you can see the post on making Easy Crepe Paper Ruffles. But basically if you have a long stitch length and mess with the thread tension the tissue paper will gather itself a but to make the fringe fluffy and thick. When you get to the end of the first sheet just overlap about an inch and keep going sewing to make as long as a garland as you need. And then you are done!
I’m lazy so sometimes a little of the fringe gets sewn in the middle. Trust me it doesn’t ruin the effect.
Notes
Sometimes when I was sewing really fast the feeder teeth would rip a little hole in the tissue. It isn’t noticeable once the garland is done. The thick fringe hides any lazy mistakes imperfections.
Enjoy these articles? Get periodic updates by joining my mailing list (no spam, no way, no how) or subscribing to my RSS feed.