Posted on 6 Comments

How to Cut Daffodils for Vases and Flower Arrangements

Cut daffodils make a beautiful flower arrangement.

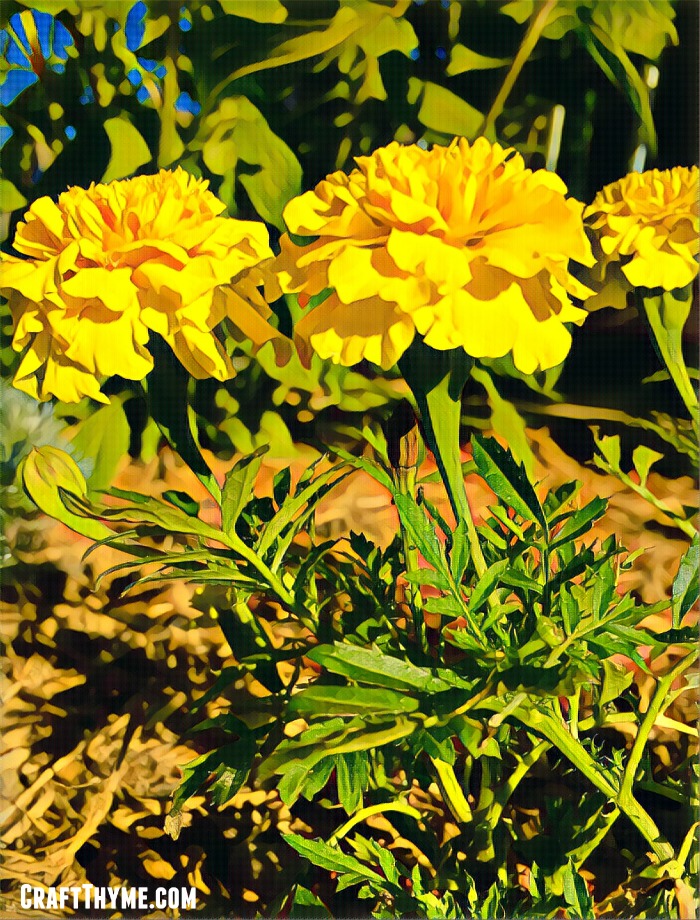
Throughout most of North America and Europe it is Daffodil time. These bright happy flowers in shades of yellow, white, cream, orange, and even pink centered are cultivated and naturalized throughout these areas. Daffodils are some of the heralds of spring, and frankly always warm my gardener heart, but did you know they also make great cut flowers? Cutting daffodils and conditioning them for flower arrangements is actually easy, but takes a little know how. You know what I am talking about, right? Thick bulbous stems… Gooey clear sap… Can you just plunk that in water? Well, kinda. It depends on your scenario. Do you want to cut daffodils for a vase of just daffodils or do you want to cut daffodils to mix in a flower arrangement? The process starts exactly the same!

Fun Facts About Daffodils

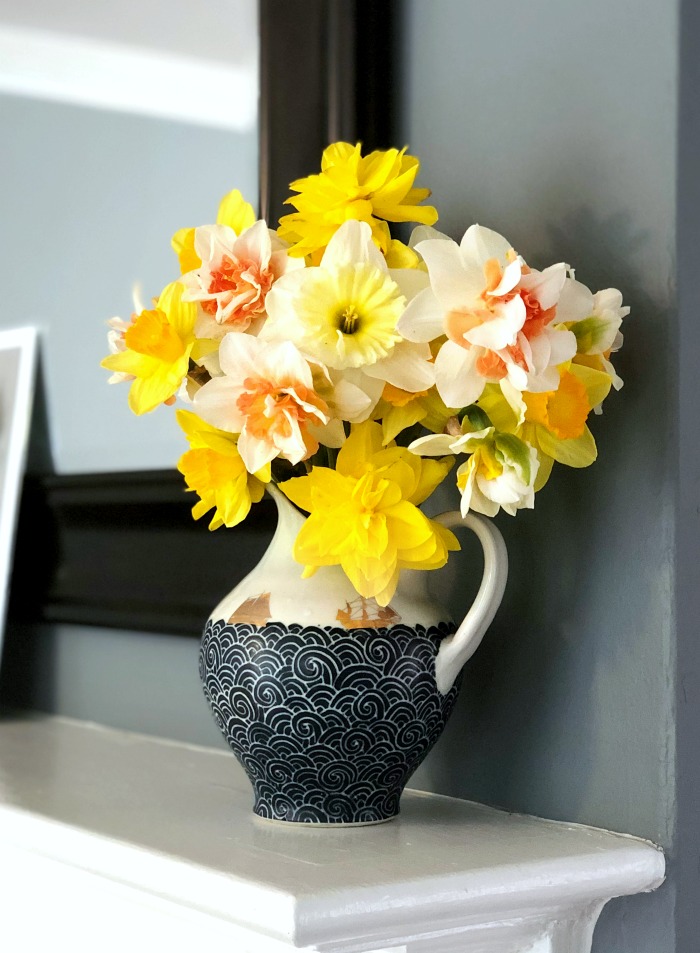
Daffodils are actually the genus Narcissus and part of the family Amaryllidaceae (amaryllis). They are closely related to other spring flowers like paper whites! Because of the beauty of these flowers there are likely more than 13,000 varieties of daffodils that have now been bred by growers. Thirteen THOUSAND! Wow! I managed to pick up some new ones this fall with soft pink centers which was a new color for me. You can find ones with green stripes, glowing orange centers, tiny one inch blossoms. So many options!

Flowers tend to last a long time on the bulb. In certain climates daffodils will bloom up to 6 months. Most climates, the flowers will last 4-6 weeks. This gives you a long color time that can let other later bloomers start to fill in your flower boarders.

If you are wild about daffodils then there exists an American Daffodil Society and when looking for European societies try searching Narcissus or Jonquils as they are often called there.

Daffodils and fresh eggs make a perfect spring centerpiece


How to Cut Daffodils for Vases and Mixed Flower Arrangements

Step 1: Collecting Daffodils

I plant a lot of daffodils. I am a sucker for those mixed bulb packs that go on super sale at the end of bulb season. Which means I end up with a bunch of double headed daffodils. Double headed daffodils are lovely! And fall over in a hot second. I don’t know who breeds them, but come on folks! Can we not focus on a stronger stem as well? I digress, but what this means is that, like clockwork, as soon as I get a spring wind (which is all spring), half my daffodils fall over. Instead of letting the ground enjoy their blossoms I go cut them all.

Simply take a pair of sharp scissors and cut the fleshy stem as close to the base of the leaves as possible. LEAVE the leaves! It is important to leave the leaves on the bulb until they start to turn brown. The leaves feed the bulb and allow you get fresh flowers next year and potentially more bulbs to split or allow to fill in.

Pro Tip: If the flower stem has gotten crimped, cut it at the base anyway. We will process those when we take them inside.

Cutting daffodils that have blown over and bringing them inside is a great way to enjoy their blooms longer
I’m sure the ground is appreciating all this beauty… *eyeroll*

Step 2: Cut Daffodils for Long Lasting Flowers

Take all the daffodils inside. By this point you have lots of oozing stems. This clear sap is important and inflates the stems keeping the flower heads upright. It’s also kinda sticky, messy, and poisonous. I’m not sure why you would try to eat it… but don’t. Just wash your hands well when done.

Daffodils weep a sticky sap that can ruin other flowers in a vase unless conditioned
GOOOOOOOOOOO

Anywho! Because you have a fleshy stem it is important to cut each one at 45 degree cut. If cut flat, the goo (what we will now be calling the technical sap from these flowers because goo is waaaay more fun to type) will tend to seal the cut daffodil stem to the bottom of the vase and not allow it to suck up the necessary water. You can cut them under water, but I frankly just cut mine and quickly stick them in water. It is just very important to not let the goo dry out UNLESS…

Trimming daffodil stems to 45 degrees

Step 3: If Adding Cut Flowers to Mixed Flower Arrangements

So that, goo… The sap can interfere with other flowers in a mixed flower arrangement by basically killing them faster. You can counteract this by sealing the stems with the moisture they have in them. They may not last quite as long, but still maintain flower pretty well, in my experience. They are very wet, fleshy, flowers and contain a lot of moisture that can be preserved. The process of sealing cut daffodils is easy and gets to involve FIRE!

You are going to need a lighter at a minimum and a candle is super useful for processing a lot of daffodils. Stems can be cut flat or at 45 degrees, but need to be at the final height you plan to add them to your vase at. Take the cut end and pass it through a flame till it turns LIGHTLY brown. We aren’t cooking them! Set it aside for a second and make sure it is no longer leaking goo. Then add it to your vase with other cut flowers.

Singe ends of daffodil stems to seal in the sap and make them last in flower arrangements
Do I need to remind you fire is dangerous? Don’t sue me if you get burned!

Extra Tips: For Adding Cut Daffodils to flower arrangements

Crimped Stems: When the spring winds blow my daffodils will usually just curve over, but occasionally a stem will crimp. You have two options for dealing with this issue. You can simply cut the stem above the crimp or stabilize the crimped section straight. You have to do one, or the water from the vase will not make it to the flower head. I have a lot of luck just straightening the stem and supporting the flower amongst the other flowers. However, you can use clear plastic floral straws (affiliate link) to straighten the stem. Cut daffodil stems are usually too large to put in a regular drinking straw.

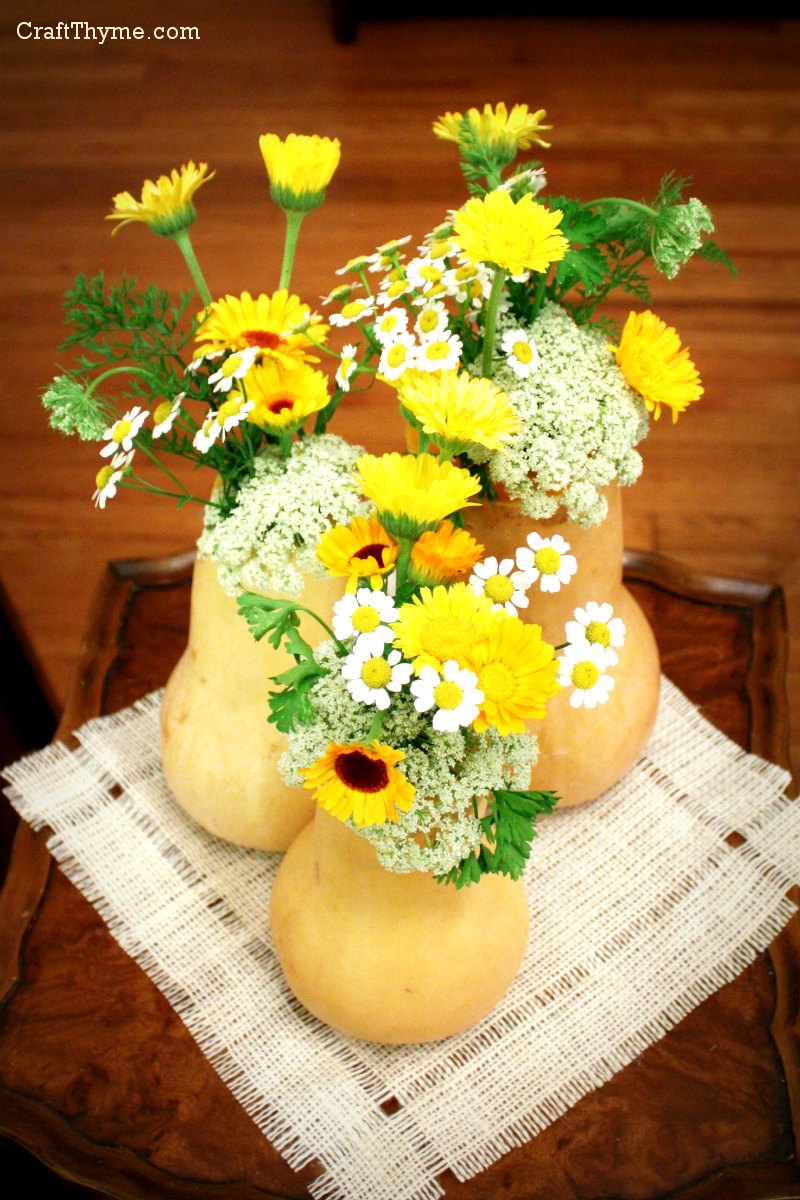
Uncut flowers: If you don’t want to cut your daffodils you can also make planters for inside the home. Bulbs can be forced but they need 13 weeks or so of refrigeration. In my experience they do not do well when digging them up and bringing them inside, but most big box stores have bulbs ready to sprout potted and in stock. These make lovely centerpieces!

Cut daffodils make a beautiful flower arrangement.
I swear daffodils are just happy flowers!

Scent: Be forewarned, these are technically a narcissus plant. Which means almost all varieties have a scent. I LOVE the smell, but some people are not fans. You might want to sniff a few before you bring tons indoors.

Otherwise, enjoy bringing some sunny spring cut daffodils into your home to brighten these first days of Spring.

How to cut daffodils to make them last in a vase or flower arrangement
Posted on 10 Comments

Grow Marigolds! They Are Awesome!

Every garden can use Marigolds. Find out these fun facts about why you need to add marigolds

Grow Marigolds… Let’s be honest, marigolds seem kind of out-dated. Yellow or orange balls of flowers you can get for $1 at big box stores. Sure they add some color, have a slightly strange scent, and weather neglect pretty well, but in reality they are just kind of the bland work horses of the garden. They are like the grandma of flower gardens and I resisted growing them for years!  Except they AREN’T outdated; marigolds are awesome!

Grow Marigolds

First, let’s just discuss the plant itself. Marigolds (or Tagetes for you Latin purists) are native to North and South America. Many of flowers in American garden’s are not usually native, so if you are from North or South America you should get some gardening brownie points just for using a native. Marigolds come in both annual and perennial varieties, though, most of the varieties you can get in the big box stores are going to be annuals.

That funky smell? BREATHE IT IN!  Well in some varieties it has been bred out, so if you don’t like it do not despair!  You can find a marigold that suits your sensitive nose. I, however, want that smell. You know why? It makes marigolds unattractive to predators (deer, bugs etc). In addition it ends up making plants grown next to them unattractive. So grow next to your tender cabbages, tomatoes, etc. Just keep it away from your legumes as marigolds have been known to interfere with their growth.  I have personally found the numbers of aphids and other pests tend to be significantly smaller on veggies and fruit surrounded by these lovely yellow and orange marigolds.

Growing marigolds is easy, but you can always buy them in most garden centers

Fun Facts

Marigolds are used to flavor and to color dishes in South America. They are also used in many Hindu religious ceremonies. I saw tons of them used in Holi to make beautiful garlands and necklaces. They are also often used to celebrate the day of the dead in Mexico. It is said you can feed marigold flowers to chickens to increase the color of their yoke. I have yet to try this experiment but I might this next summer and let you know how it goes.

Marigold garlands found in a temple in India during Holi
These marigold flower garlands were hanging throughout temples during our trip to see Holi in India.

How to Grow Marigolds

These flowers are perfect for first time gardeners. They will grow in almost any soil, deal with fluctuating water, and are very pest resistant. They grow easily from seed, which is why so many teachers send kids home with marigolds around Mother’s day.

Basically a marigold is as close as you can come to a pretty flower that needs minimal intervention.

Plant after danger of frost, as most marigolds prefer nice warm weather and full sun. Most Marigolds will sprout from seeds in 1-2 weeks. You can expect flowers to show 1-3 months after planting seeds. They do wonderful as starts you can transplant out or directly seeded in the ground. Transplants can get you blooming in late May to early June. Expect direct seeded to get going late June to Early July.

If you are buying marigold plants I like to pick plants with only a few open flower buds, so I can get the first good show of flowers after it acclimates to my soil. However, since most varieties will re-bloom feel free to grab a marigold with open flowers for instant color in your garden.

For the best blooms you will want good, well draining soil with a high organic content (really what plant doesn’t like that). Regular watering that allows it to dry in-between is preferred. As the blooms die cut them back (dead head) and it will bloom more. You can expect most commercial varieties to bloom from spring through to frost. As long as you cut off the old blossoms.

Marigolds mixed with vegetables like these scarlet runner beans make for an attractive garden.

Now to the Good Stuff

Marigold varieties! There are way more choices to be had than one would realize.  Which is why i saying growing marigolds is no longer just the business of little old ladies and elementary school children. You can pick plant sizes that go from tiny 6-12 inch to some truly spectacular varieties that grow more than 5 feet tall. I think most of us have seen the plain yellow and orange marigold varieties, but did you know you can get your hands on an almost white one? Green tinted Marigolds? How about an orange so dark it is almost red? Stripes? Ball shapes, daisy shapes, tiny florets, two toned petals? Marigolds have all of these and more.

I am personally trying some adorable teeny-tiny yellow marigolds this year from Sow True Seed. (affiliate link to follow) These lemon gem flowers should be showy in the new raised beds.

Marigolds mixed with other flowers in a potted border in India.
Marigolds add a bright warm punch to other flowers. This potted border had just started blooming when I visited India.

So expand your gardening past the basic ball shape and add some low growing varieties to drape over the edges of raised vegetable beds or as the border of a path. Plant a drift of large vanilla flowered marigolds to set off other pink, purple, or red showstoppers. Or just put a lovely stripped version in a flower pot to add some sunny notes to your windowsill. Marigolds size, shape, color variety and ease of growth make them more than a boring work horse for your garden. They open up the possibility of beautiful base flowers for the entire summer, so you can focus on more finicky flowers and vegetables.

Every garden can use Marigolds. Find out these fun facts about why you need to add marigolds to your garden and how easy they are to grow.

Every garden can use Marigolds. Find out these fun facts about why you need to add marigolds to your garden and how easy they are to grow.
Posted on 11 Comments

Halloween Vignette

Halloween Decorations; cast iron vases

Halloween is just around the corner and I hope this display gives you some Halloween decoration ideas.   It is one of my FAVORITE holidays.  I pretty much love every bit of it, from gaudy plastic spiders to sophisticated decorations.  Costumes! Candy!  I could go on and on.  This particular vignette was going for an old-timey, sophisticated macabre.

Halloween Decorations; cast iron vases
Before you make hot-glue spider webs read further down this post.

The cast iron vases were created from two cheap glass vases.  You can see the tutorial for faux cast iron here.

Detail of Halloween hot-glue spider web

I added an old picture, and lord my Mama would smack me, but I can’t remember which relative this is.   Surrounding it are spider webs made from hot glue.  I thought I was a genius making all those strings…  And I was EXCEPT, marble is porous.  And the tabletop is marble…  *scrape* *scrape* *scrape* Make sure to attach the hot glue to items you know will release the glue easily.

Idea for Sophisticated Halloween Decorations
Check out how well the faux cast iron finish on the vases matches the real cast iron table!

Topping it all off is my lovely bouquet of dead daisies.  The whole display makes me feel like someone left these fresh flowers by a lovely picture and then abandoned them for 100 years.  I love that dark Halloween feeling!  Must be a closet goth at heart.

Tutorials Used

Faux Cast Iron Finish 

Enjoy these articles? Get biweekly updates by joining my mailing list (no spam, no way, no how)

See other great crafts, DIY, and decor at these link parties: 52 mantels, Katherine’s Corner, Realcoake.com, Lambert’s Lately, Two Yellow BirdsCraftberry Bush, Pin Junkie , Craft-o-Maniac, Twigg Studios, Dream A Little Bigger , I Should Be Mopping The Floor, By Stephanie Lynn

Posted on 15 Comments

Vases from Butternut Squash

Autumn vases created from butternut squash

If you haven’t read Monday’s post this is going to seem like a rather odd tutorial. I have a few of those from time to time. But I’ll shall forge ahead showing you one of my favorite ways to use vegetables and fruit: As decorative containers.

Autumn vases created from butternut squash
See? This does look cooler than the title implies.

Supplies (not shown because… well you read the list)

Butternut Squash (or similar gourd-like vegetable)

Knife

Long Handled Spoon

Floral Foam/Oasis or Test Tube

Step 1: Get an adult who can actually use a knife properly

DIY squash containers step 1, cutting the lid

‘Knife Skills’ are not my specialty but I found using a sharp steak knife to saw at the squash allowed for a straighter, cleaner cut that could be completed while the squash was standing upright. This is important because no squash sits perfectly level. You have to actually sit them on a flat surface then cut parallel to the surface of you want a nice flat vase-like top.

Step 2: Scoops Away!

DIY Autumn vase from butternut squash, step 2 hollowing it out.
So much less yuck than cleaning out pumpkins!


Use the same knife to begin hollowing out the squash. Follow up with a long handled spoon to get way down in the neck.

Step 3: Hold your Water

Butternut Vases Step 3: Options to hold water

Depending on how long you want to keep your arrangements you can use one of the two methods. The first way I insert a vial to hold water. You can get them in floral supply sections, however, I use leftover plastic ones from my husbands home-brewing hobby. They started their life holding yeast cultures. This method works well for longer periods. The squash can dry a bit and that keeps it from molding and deteriorating as fast.

The second method just jams pre-soaked floral foam into the vase. I have found the butternut squash will hold the wet foam without leaking. However, because the squash is constantly in contact with moisture it will mold much quicker. This method is a great option if you want them for a dinner party or just for a couple of days. And much easier since you won’t have to hollow out the squash as far to accommodate the vial.

So am I crazy? Or does anyone else use fruits and vegetables in decorating? If you do I’d love to hear in the comments below.

Posted on Leave a comment

Easy Crepe Cherry Blossoms; A Quick Tutorial

Detail of cherry blossom

The following is a quick and easy tutorial on creating faux cherry blossoms from crepe paper.  I have followed the rather tedious tutorials on making different crepe flowers before.  Yes, they look lovely…  But with two small children underfoot I will sacrifice a bit of my accurate-compulsive tendencies artistic integrity to make a final arrangement that beautifies my space.  And doesn’t take 30 damn hrs to painstakingly cut tiny petals.  So read on for Quick and Easy Cherry Blossoms:

How to create quick and easy faux cherry blossoms


Supplies (For some reason I always want to type ingredients here…)

  • Shown: Glue Gun with glue sticks (don’t run out!)
  • Crepe Paper
  • Scissors
  • Floral wire that matches your branches (this is optional)
  • Not Shown: Branches
  • Spray Paint

Supplies for cherry blossomsStep 1

Take your crepe paper and accordion fold it up.  In this picture I am using two shades of hand dyed crepe paper (You can see the tutorial here).  I make it as thick as I can still cut because I hate cutting.  Cutting, to me, is just a process to get through before the fun begins in crafting.  So thicker = less cuts.

Creating crepe cherry blossoms step 2
I know you are surprised, but I am also one of those people that will die carrying in 4,000 bags of groceries instead of making two trips. So go ahead fold that puppy up thick!

Step 2

Cut out a circle-like shape.  Trust me here, no need to go get a compass.  As long as it ends up kinda rounded you are all good.  I thought about using a circle punch (might have given up trying to find it in the basement) but I like the more organic shape in the end.

Step 2: Cutting Crepe Paper Circles
That lovely variegation is why I go to the trouble to hand dye my crepe paper. But for even quick and easier methods just go buy a couple shades of pink.

Step 3

Here is where the magic happens!  Take your petals to the bedroom… Just Kidding!  The magic I am discussing is what makes crepe paper so nice for creating organic items like flowers.  Pull lightly on the outer edges of the petals.  The crepe will stretch a bit and ruffle; making for a more realistic looking shape.

Step three: ruffling the edges of the petals
And here you can see what I meant by only needs to be kinda circular. Such an amazing cutting job.

Step 4

Take your super-technical-amazing-implement, in this case a pen and wrap the petal around the bottom to make a cup shape.  You may have done the exact same thing on a pencil eraser as a kid to make tissue paper crafts.  I couldn’t find a regular pencil in the house so a pen worked just as well.

Step 4: Forming the shapesStep 5

Technically at this point you are done.  The flowers look pretty just laid on objects.  You can see inspiration by clicking here.  However, to fully assemble a branch you will need, well… A branch.  For mine I used some old maple limbs from the yard that I spray painted white.  Since they didn’t have a lot of small limbs I made extra places to glue the flowers with matching white floral wire.  Again you can see the final result here.  Simply use a tiny dab of hot glue and stick on a flower.

Detail of cherry blossom

Notes:

To make thicker flowers that look fully open try gluing two smaller flowers together.  Also for tight buds twist the petals tightly together around the pen.  I was able to make 40 or so flowers in less than half an hour.  It is always a race to see who will finish first.  Me with the craft or Conlan with his nap, so, I know this one was quick and easy.  I hope you all enjoyed.

Enjoy these articles?  Get periodic updates by joining my mailing list (no spam, no way, no how) or subscribing to my RSS feed.