Posted on 15 Comments

Vases from Butternut Squash

Autumn vases created from butternut squash

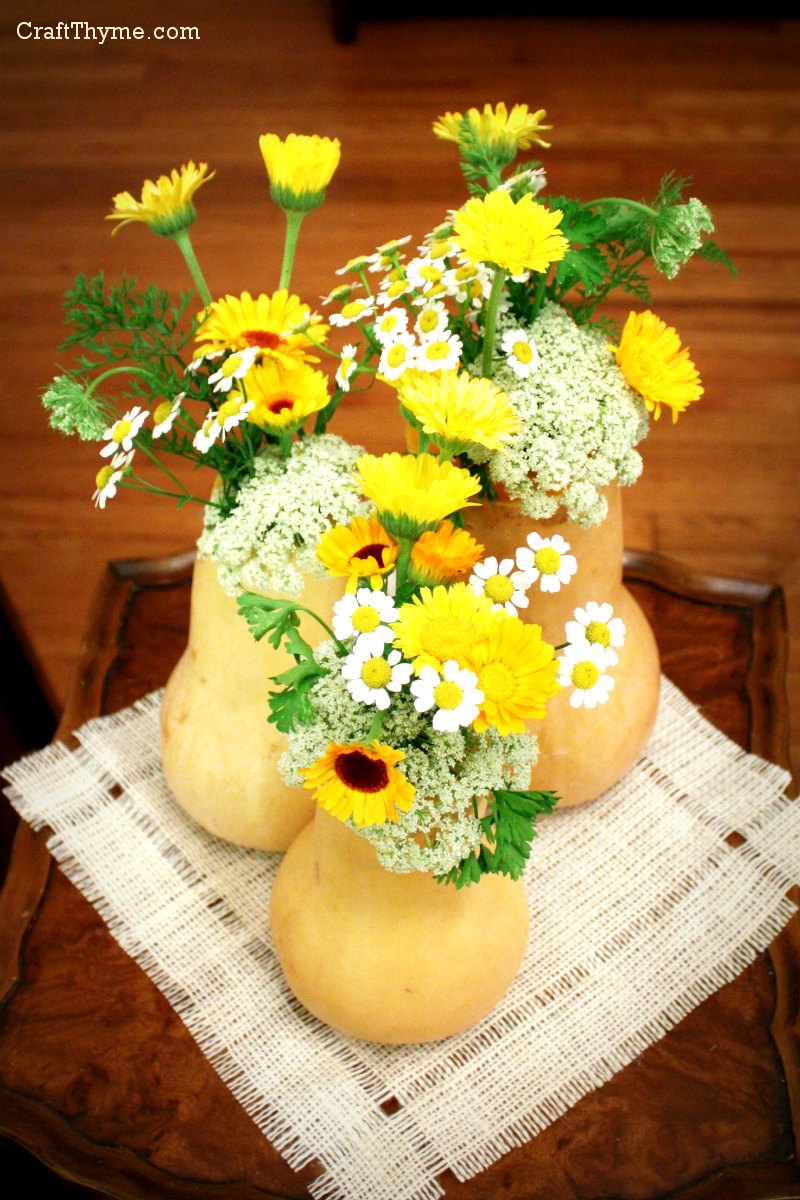
If you haven’t read Monday’s post this is going to seem like a rather odd tutorial. I have a few of those from time to time. But I’ll shall forge ahead showing you one of my favorite ways to use vegetables and fruit: As decorative containers.

Autumn vases created from butternut squash
See? This does look cooler than the title implies.

Supplies (not shown because… well you read the list)

Butternut Squash (or similar gourd-like vegetable)

Knife

Long Handled Spoon

Floral Foam/Oasis or Test Tube

Step 1: Get an adult who can actually use a knife properly

DIY squash containers step 1, cutting the lid

‘Knife Skills’ are not my specialty but I found using a sharp steak knife to saw at the squash allowed for a straighter, cleaner cut that could be completed while the squash was standing upright. This is important because no squash sits perfectly level. You have to actually sit them on a flat surface then cut parallel to the surface of you want a nice flat vase-like top.

Step 2: Scoops Away!

DIY Autumn vase from butternut squash, step 2 hollowing it out.
So much less yuck than cleaning out pumpkins!


Use the same knife to begin hollowing out the squash. Follow up with a long handled spoon to get way down in the neck.

Step 3: Hold your Water

Butternut Vases Step 3: Options to hold water

Depending on how long you want to keep your arrangements you can use one of the two methods. The first way I insert a vial to hold water. You can get them in floral supply sections, however, I use leftover plastic ones from my husbands home-brewing hobby. They started their life holding yeast cultures. This method works well for longer periods. The squash can dry a bit and that keeps it from molding and deteriorating as fast.

The second method just jams pre-soaked floral foam into the vase. I have found the butternut squash will hold the wet foam without leaking. However, because the squash is constantly in contact with moisture it will mold much quicker. This method is a great option if you want them for a dinner party or just for a couple of days. And much easier since you won’t have to hollow out the squash as far to accommodate the vial.

So am I crazy? Or does anyone else use fruits and vegetables in decorating? If you do I’d love to hear in the comments below.

Posted on 2 Comments

5-Five Minute Fall Place Settings

One of the things that often holds me back from entertaining is the feeling I need elaborate decorations. Honestly, after I have managed to clean the house and corral the toys I have very little energy left to give a nice seasonal feel to the house. So to prove to myself you can make some pretty place settings in no time I created:

5 Place Settings in 5 Minutes for under 5 Dollars

I used a placemats, napkins, and china I already had to make these place settings. I figure most people own a neutral napkin and placemat they can use in a pinch. I can guarantee these are quick, easy, and cheap. Why? Because I did these last night in less than an hour (with pictures) after McClain went to bed. Of course this is also why the pictures are a little dark.

Butterflies and Dried Hydrangea Place Setting

Wired craft butterflies taped to the table. The tape is covered with mini-pumpkins and dried hydrangea.

Country Acorns Napkin Ring

Simple strips of burlap act as a napkin ring. Just use hot glue to close the ring and attach the acorns.

Fall Berries Tucked Around the Place Setting

The napkin is folded to allow a small pocket. Instead of inserting the silverware simply tuck in some fall berries. Add some more small branches along the outsides of the plates.

Copper Vines Napkin Ring and Wine Charms

Scrap wire in various shades of copper and gold are wrapped to mimic vines. Matching wire is placed around the stem of the wine glasses to make wine charms.

Fresh Autumn Leaf Napkin Rings and Coasters

Simply hot glue colorful fall leaves together; creating the original disposable napkin ring. A few dots of hot glue keep the leaf coasters from scattering when guests lift their glasses.

Now there are no excuses left for me to not entertain. Well except maybe cooking the food…

Posted on 2 Comments

Easy Harvest or Fall Decorations

One of the easiest ways to create pretty Harvest or Fall themed decorations involves nothing more than 8 ears of Indian corn, wire, and a stick. With these simple items you can create a pretty fall swag like this one:

Step 1:

Gather your materials. No, I wasn’t joking, it really does just require corn, wire, and a stick. I guess if you want to be technical you will need wire cutters (in this case old garden shears) and something to hang the swag with (more wire).

Step 2:

Take one ear of corn and overlap the pulled back husks of the second ear. Wrap wire around the corn at the base and through half the husks of the first ear. I suggest using half the husks so you can fluff the other husks out to fill in between the ears.

Obviously, I didn’t worry to much about the wire showing. I knew this would be hung high over my door and not really visible from a distance. You could easily hide the wire by using brown floral wire or tie with monofilament instead of wire.

Step 3:

I wired 4 ears together facing one way and 4 ears the other direction. Then I wired them to a branch (i.e. the stick) I had laying about the yard. I suggest wiring the corn together first before attaching to the branch. This allows for the corn to hang down freely and look less rigid than when wired directly to the branch.

The corn isn’t all that heavy so you could simply hand the corn attached together however I found a firm base makes it much easier to hang the whole swag on the wall Plus it allows you to arrange the corn attractively while it is on the ground. As you can see from the above picture using a rustic branch, as opposed to a dowel, blends with the harvest theme and doesn’t stand out if it shows between the ears.

Step 4:

There really is no step four because it is that easy.

Usually the grocery stores offer indian corn this time of year but you might also try your local farmers market. While your out, snag a few pumpkins to give an extra harvest touch.

Since Halloween is right around the corner I couldn’t help but add a gargoyle into the mix.