Thanksgiving, for me, is about food, family, and giving thanks for all my friends and loved ones. Plus it is the calm before the Christmas bonanza. My mantel decorations are simplistic to reflect that. Plus I like to have a nice clean look before the gobs of Christmas Decorations begin.
Do as I say, in the apple tutorial and line up your letters. Not as I do :).
Thanksgiving is still about Fall for me. I want to reflect the warm browns, russets, deep reds, and last golds of the season before giving over to the cold, crisp winter. Plus I have a fruit decor obsession.
Told you all those aged papers would come in handy
So enjoy the last days of fall and relaxation before the excitement of Christmas.
Tutorials Used:
Golden Apples
Aging Paper with Tea or Coffee
How To Easily Cover a Book
Just keeping it simple.
Enjoy these articles? Get biweekly updates by joining my mailing list (no spam, no way, no how)
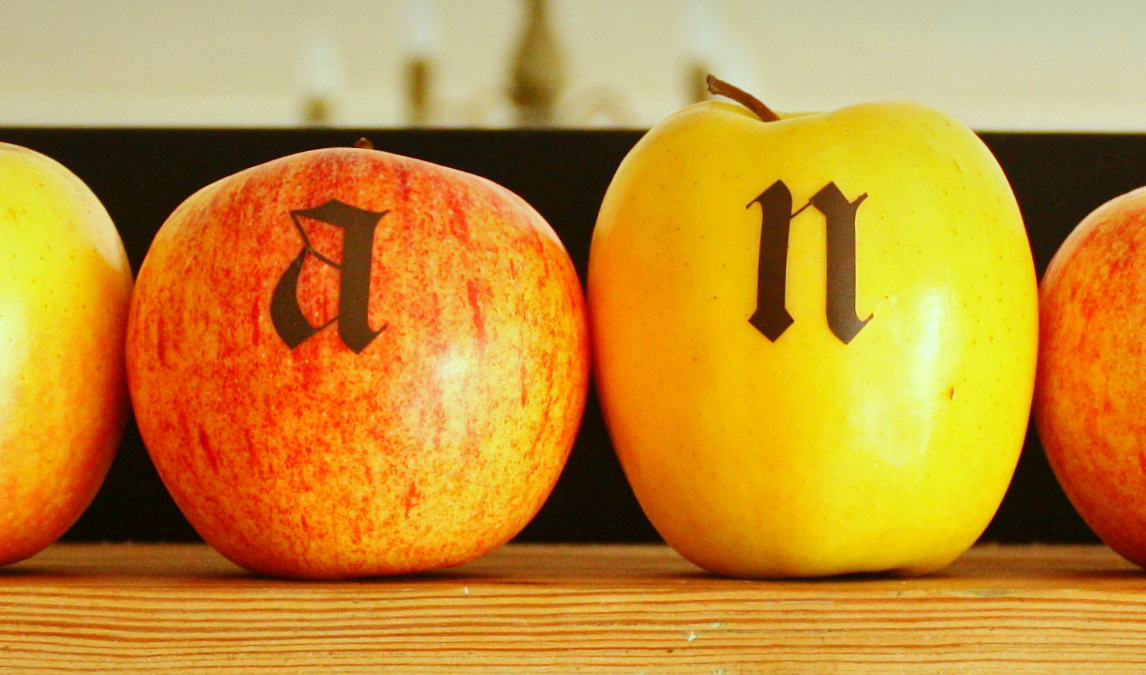
I know the traditional harvest decorations are corn and pumpkins but what about apples. Specifically golden apples. Ever heard of the goose that laid the golden apple? Yeah, this tutorial is kinda like that, but I’m not laying anything and we are making an golden apple… With letters… So basically not the same at all… Anyway on to the tutorial:
Supplies
Vinyl Letters* (I have a craft machine that cuts vinyl but any vinyl letters will work)
This is going to seem like a no-brainer tutorial but there are a couple tips you can use to make this go a lot smoother. First, measure the length of your apples. Measure a few of them and get an average. Because you will need to either cut or buy vinyl letters that fit. So don’t just measure one and assume all the letters are going to look good. (I can’t imagine how I learned this trick)
While you are measuring set the apples in there final location, because guess what?, they are fruit. A natural product. So is every apple going to sit nicely in your display? No.
Step 2 Vinyl: Not pleasant on your thighs in summer and not pleasant to adhere
Do not get me wrong. I love vinyl, but I also worked as visual manager and spent a few years of my life adhere vinyl decals to everything. Once you have worked with a 10 ft vinyl decal it becomes easier. That being said trying to adhere a flat decal to a rounded object, without a lot of bubbles and distortion is tricky.
See that tiny piece on the ‘T’? Yeah I had to adhere that decal twice to get it straight.
Remember to look at how your apples are sitting so you can get all the letters in line.
This is what I meant about in line. I am ATTEMPTING to get the ‘A’ and ‘N’ about the same level. Except I kinda failed. You have been warned… Do a better job!
Step 3: Bring on the Shine
Take your apple and spray it with metallic spray paint. What?! You can spray fruit?! Yeah fruit turns out lovely and inedible. Please tell me you wouldn’t dream about eating an apple covered in regular spray paint… Please.
The smooth surface of the apple takes the paint really well. I just did two quick coats, let it dry fully and got a really nice shiny surface.
Step 4: Peel
Don’t peel the apple! Just peel off the decal to let the apple color show through. For my thanksgiving mantel I only wanted one golden apple accent so I only painted the ‘T’ and peeled the vinyl away. I spelled the rest of the word using brown vinyl I left in place on the other apples.
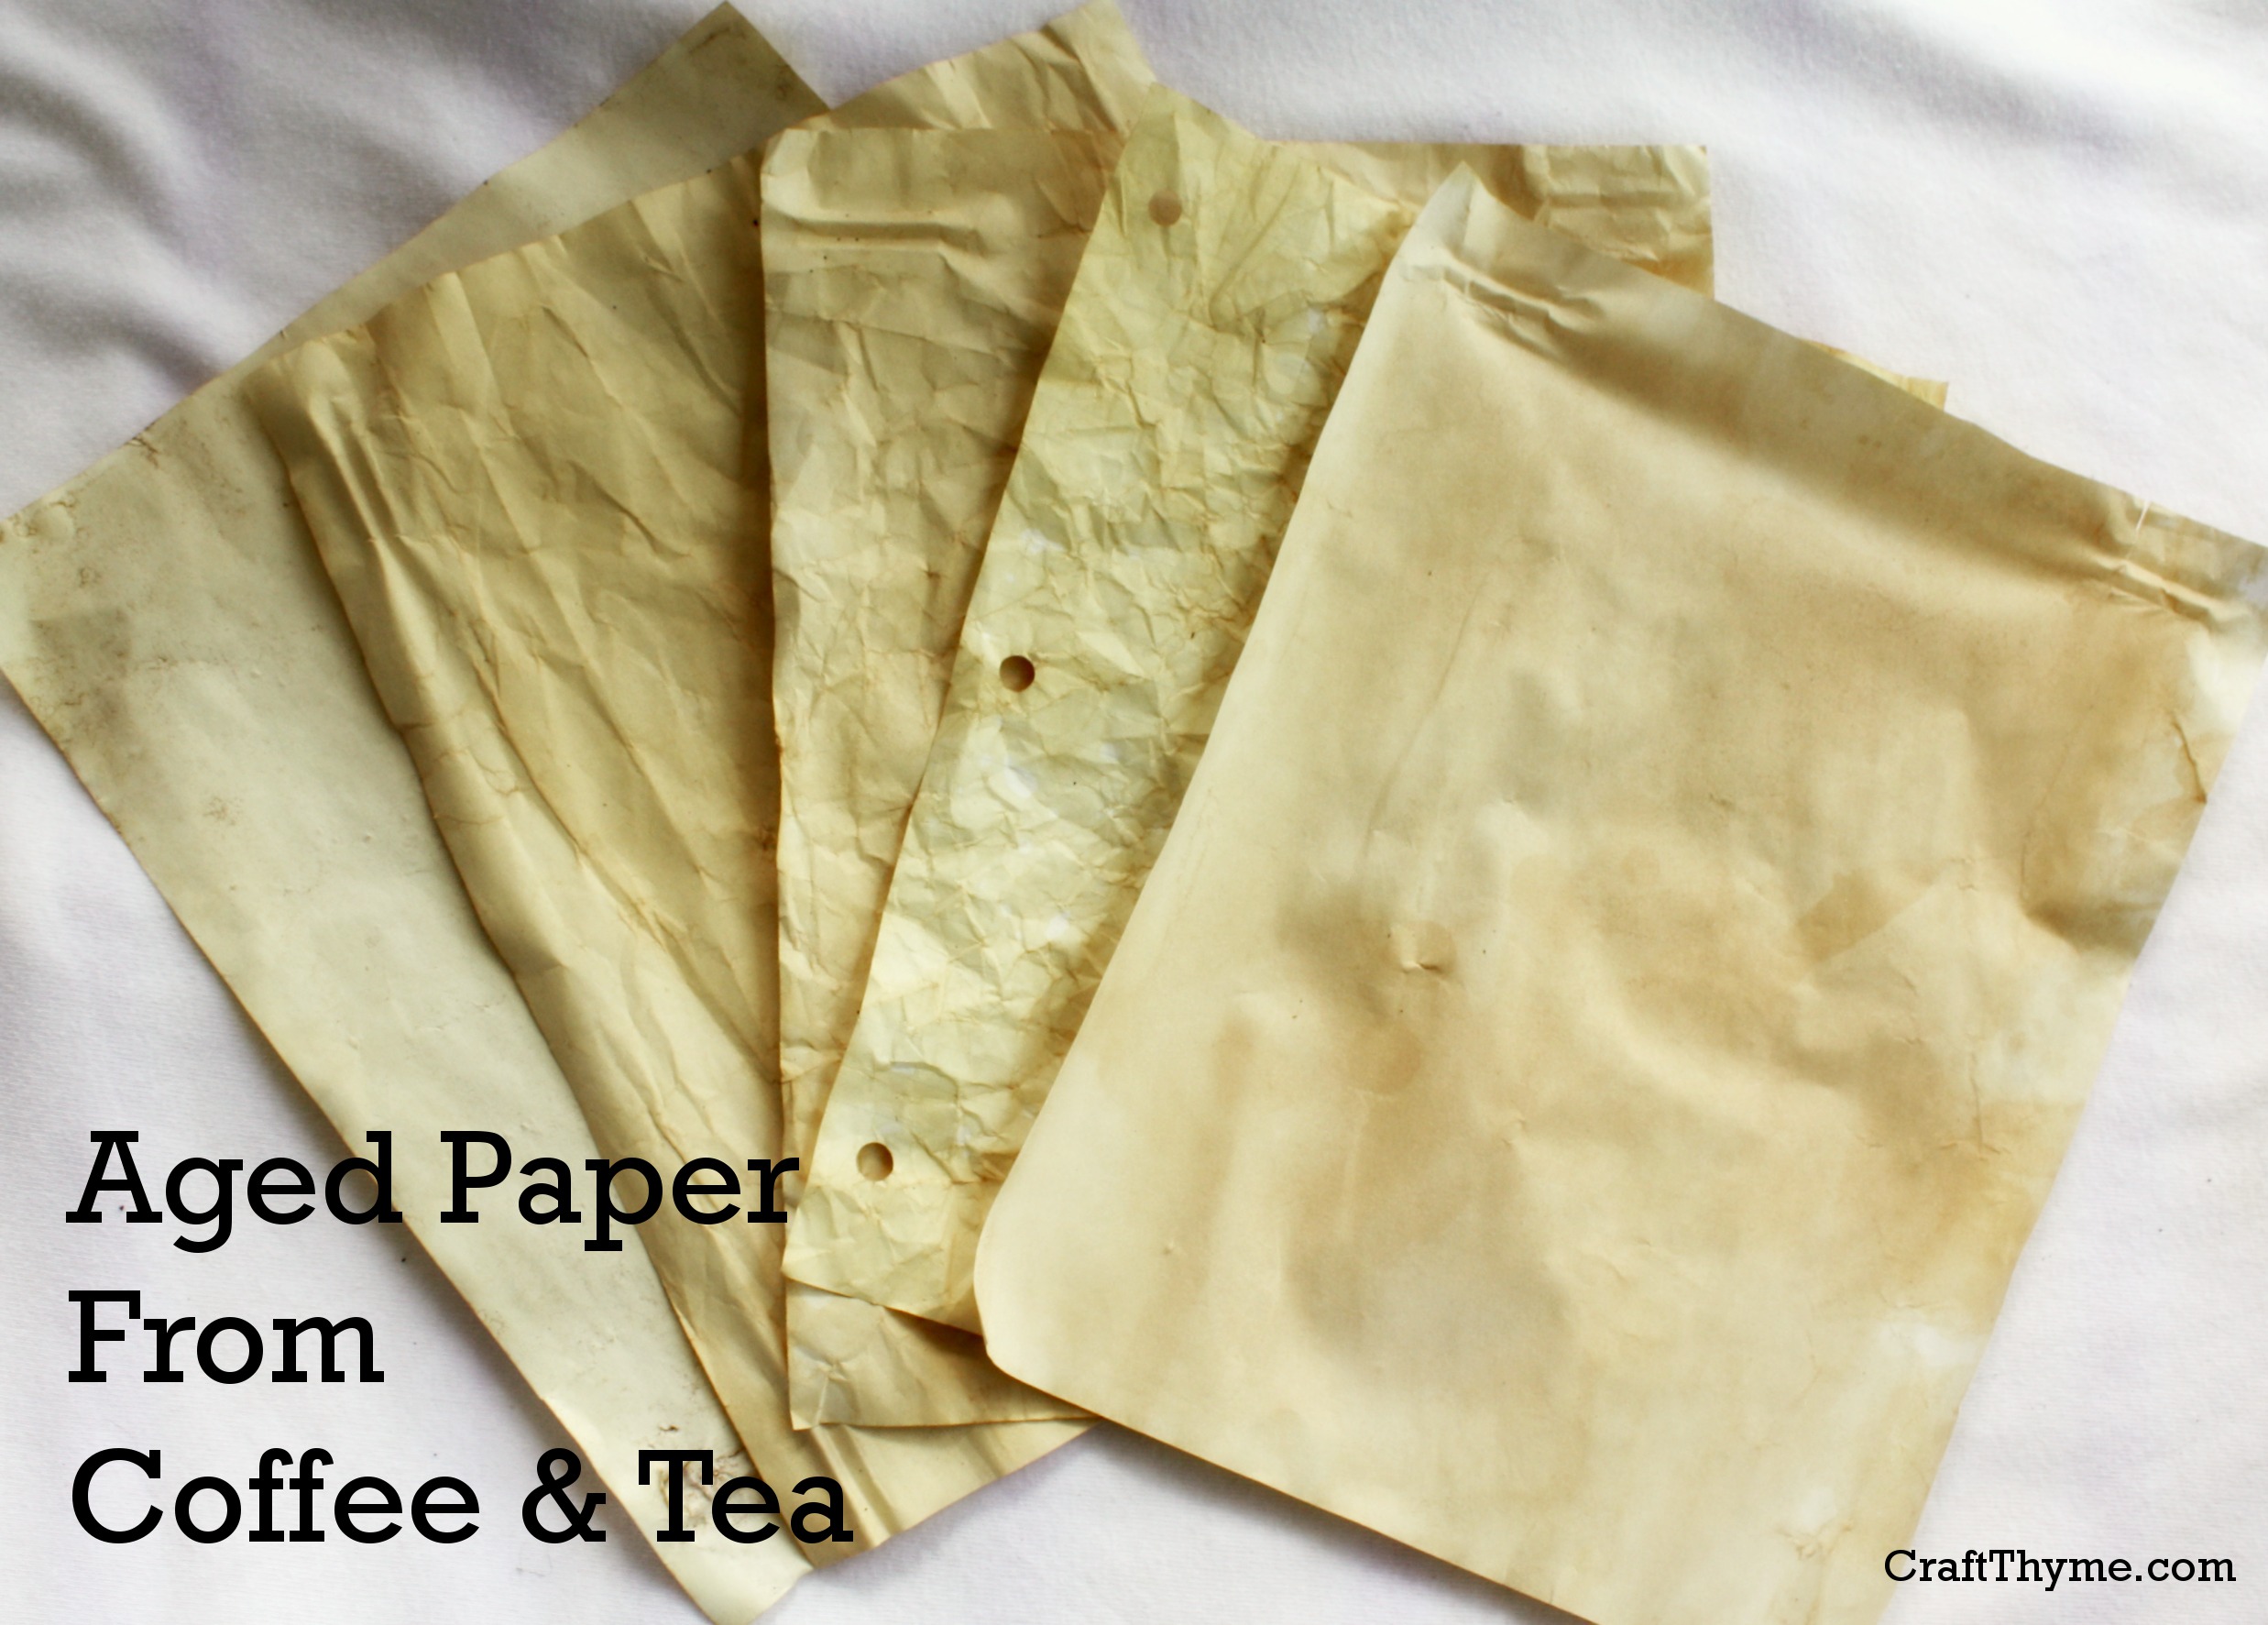
I wanted a variety of aged papers to cover books for my Thanksgiving Mantel. Not having any walnut ink on hand, but having plenty of old coffee grounds (One needs to appear slightly perky at work after blogging all night) I thought why not give it a try. It just grew there and I tried tea as well. Enter the tutorial on aging paper with coffee and tea:
Supplies
Got Paper?
Got Coffee or Tea?
Got Water?
You are good to go.
Coffee Steps
Mix some old coffee grounds in a shallow pan with hot water. Put the paper in and stir and press the coffee grounds around the paper. I let mine sit for a couple minutes to suck up the brown and then pulled the sheet out grounds intact and laid it on a old towel. If you look at #3 I had some cheapo kids clothes hangers I used to hand up each sheet to dry. The extra coffee brushes off when the paper is fully dry.
Tea Steps
Um… See coffee but leave it in longer and scrunch/squish the old tea bags onto the paper periodically. You can see in #4 how wrinkling the paper makes such a difference from #2. Not necessarily better, just an option for further aging the paper.
You can see how I used these papers on my Thanksgiving Mantel.
Enjoy these articles? Get biweekly updates by joining my mailing list (no spam, no way, no how)
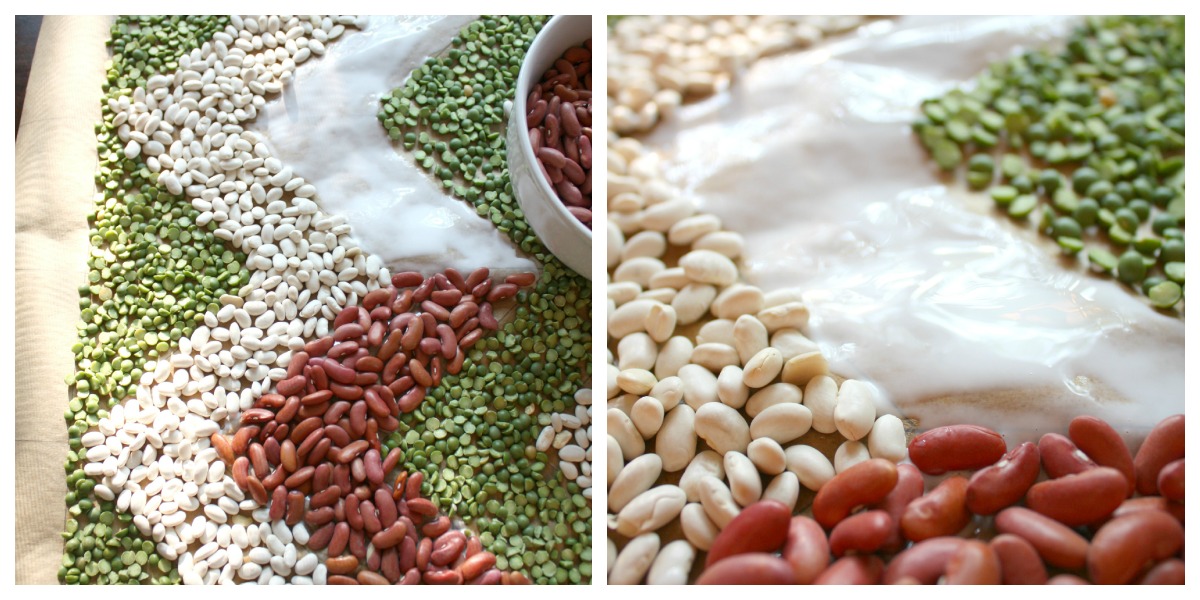
Have you had children? Were you a child? Then you should probably have made bean or macaroni art at one point and you are probably a homosapien. Have been recently gifted with some lovely artwork from my son I wondered if you could transform the homely bean art into something adult and sophisticated. Why yes, yes you can. Enter the Chevron Bean Table Runner.
Thick Craft Paper (this is the kind you can put down to catch paint splatters)
Pencil/Pen (to draw design)
White PVA Glue (thin lightly with water or you’ll be using a ton)
Patience
For the Chevron
Ruler
A way to mark 45 degree angles (I used a Triangle)
Step 1: Design
Decide on your design and cut out the length of paper you needed. I went with a straight forward chevron and penciled the pattern onto the paper.
Step 2: Distract Your Children
Sooo… If you have kids and there are tiny objects and glue they will want to help… Stop what you are doing cut them off some paper, add glue, beans, then begin your craft project again.
Don’t ask about the Mardi Gras beads. Its a ‘thing’ in my house.
Then give up and let the kids/cats/dogs/parakeets/slow loris help in the end. Tell me you don’t want a slow loris?
McClain says he is my “Little Helper”. He is my “Best Helper”.
Step 3: Glue beans, and glue beans, and glue beans
The technique matters, because after you put a lot of beans on the project you aren’t going to want to pick it up and shake it like when you are applying glitter. I found putting a thick layer of glue for one color of bean and pressing a single layer of beans into the project worked well. I watered the glue down until it was easy to brush (using an old brush) onto the paper, but not so much that it soaked into the paper. Don’t fill to much space with glue or it will dry before you can get it all filled in.
Allot way more time than you think this will take. Well if you are anal like me and apt to go back and fill in empty spots. Which is my final suggestion. If an area looks bare just dab a bit of glue and press in a few more beans.
Notes
Uh this is pretty straightforward. If it isn’t then feel free to comment or email me for clarification.
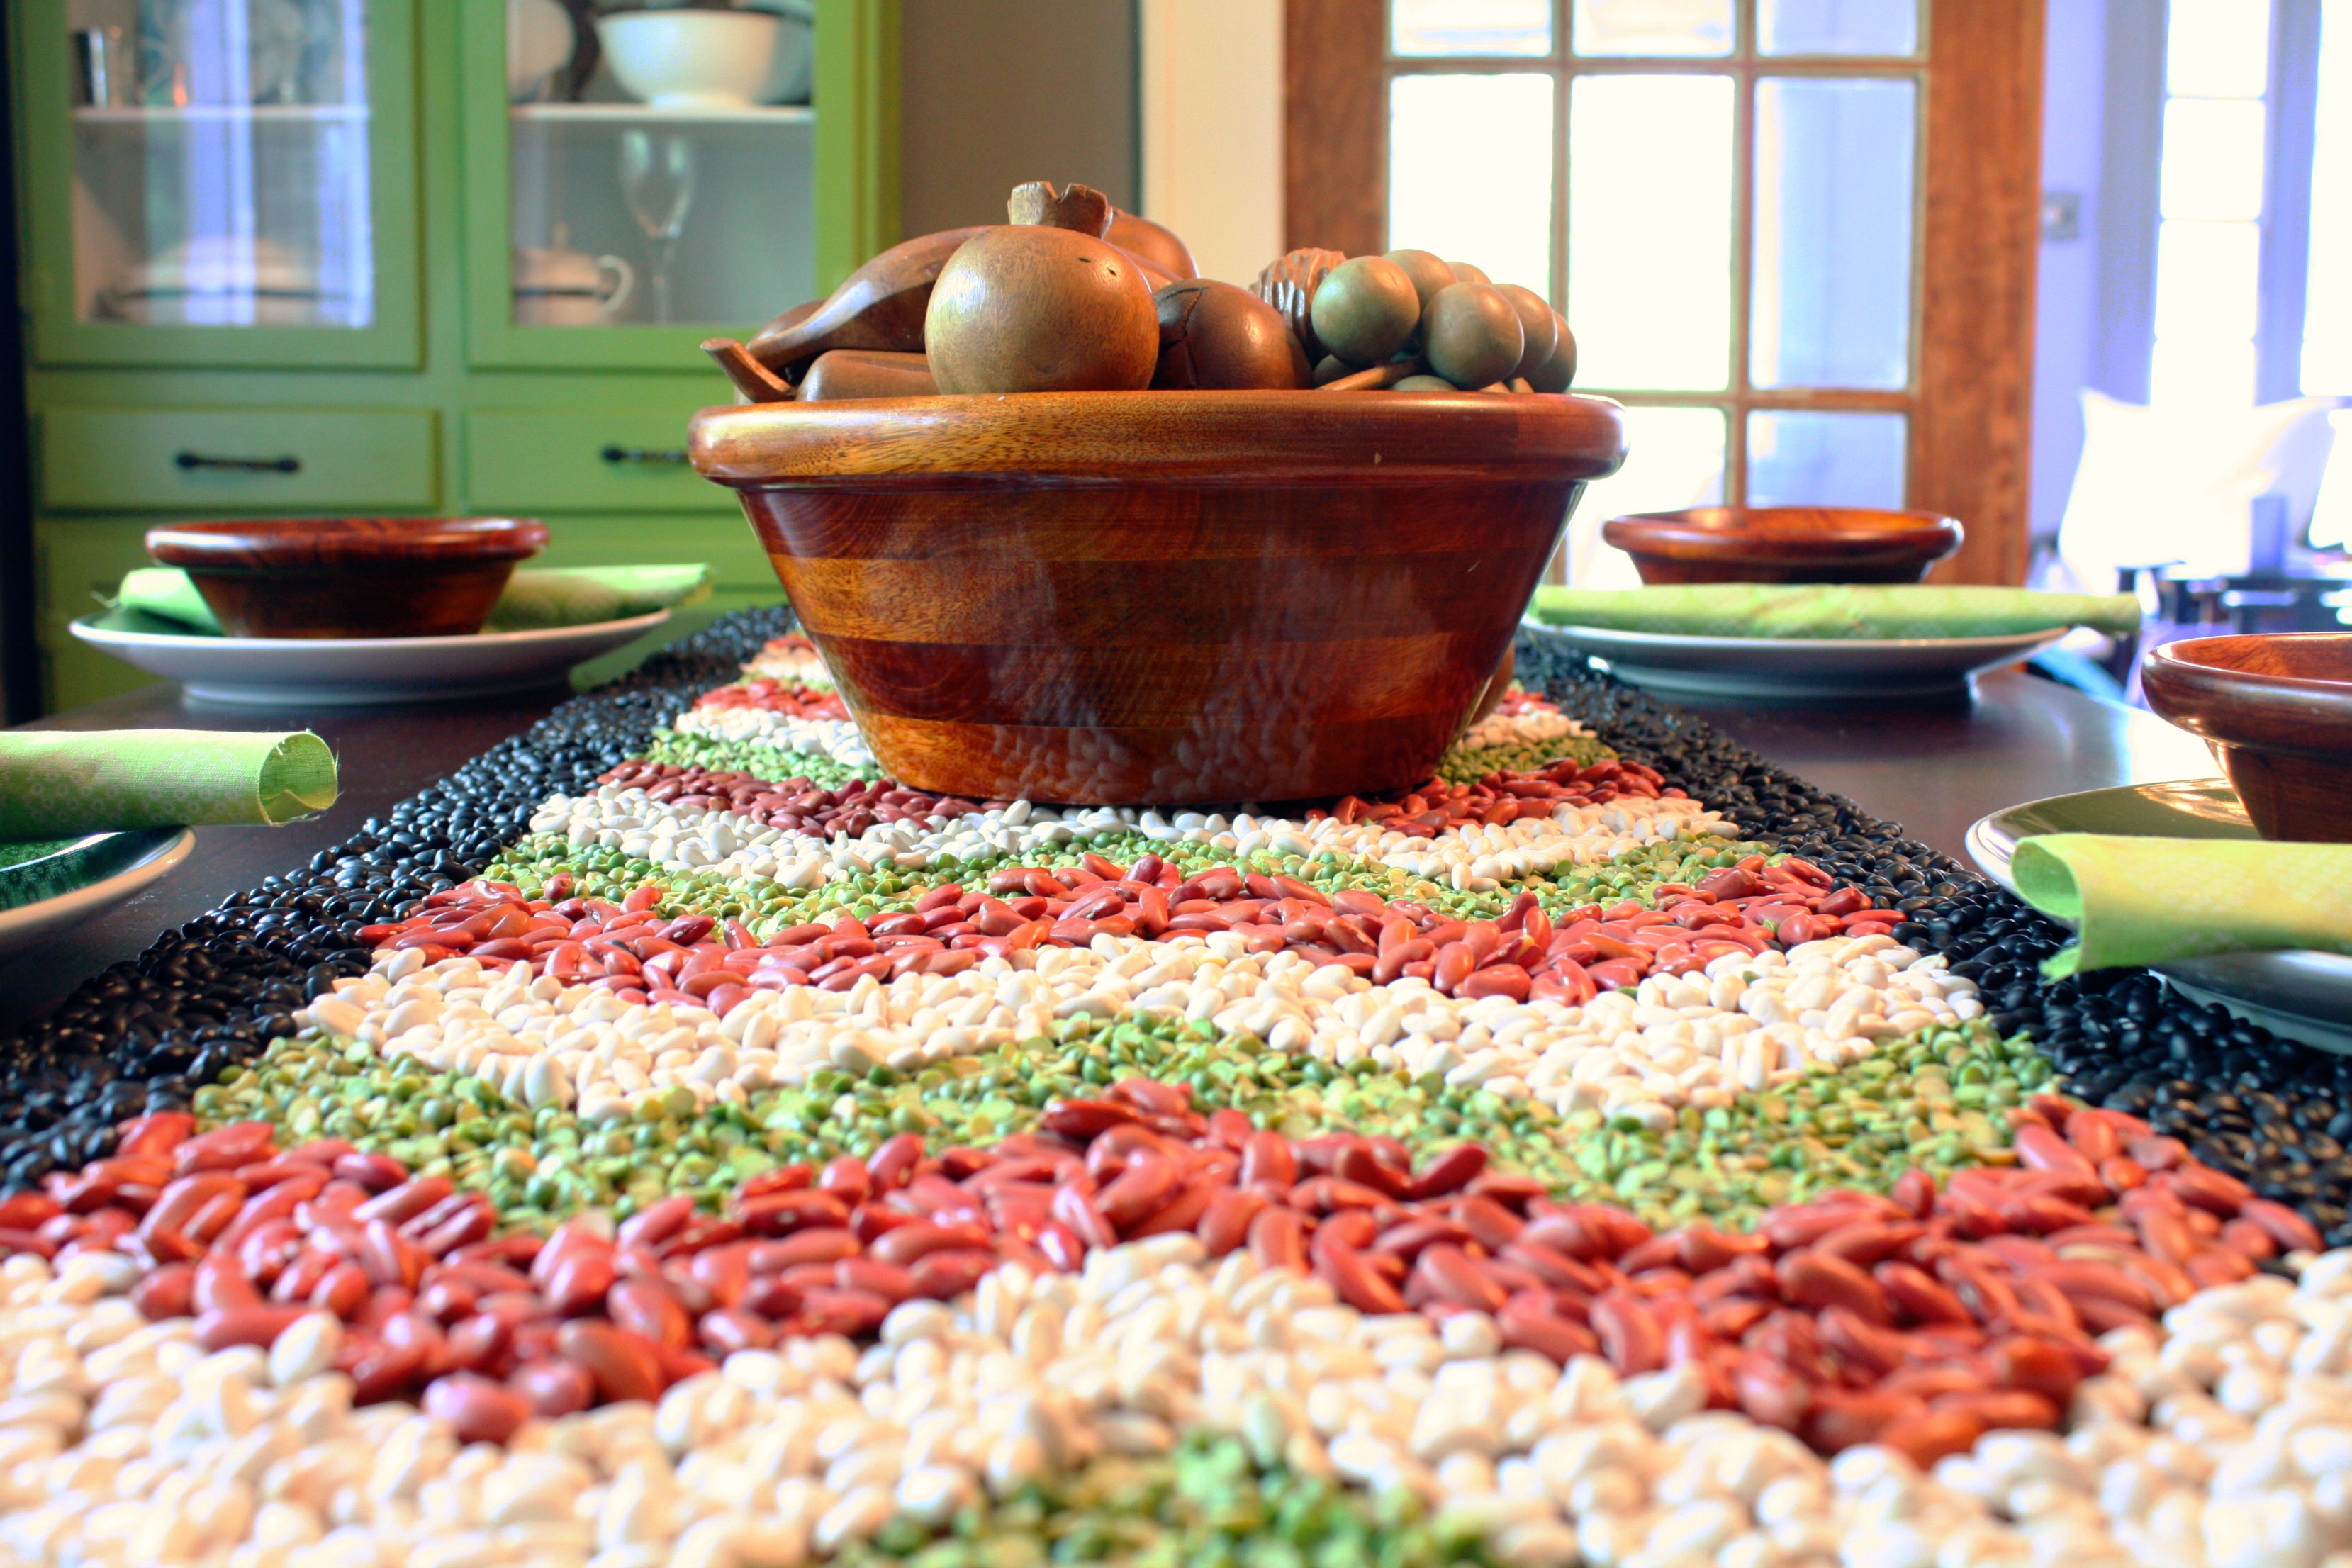
Autumn seems like a time for relaxation. The cooler weather forces an end to the constant outdoor activity but it is before the bustle of Christmas. Fall is a time to just let it go. Therefore my table is simple, clean, and easy.
See I can have a serious craft post from time to time.
The centerpiece is an assortment of carved wooden fruit. My grandparents lived for a time in Thailand, and brought back and assortment of hand carved furnishings and decor. I managed to snag a double set of the fruit. So much cooler than old-school wax ones.
Simple wooden bowls and green accents match the runners. Perfect from the green transition of summer to the ruddy browns of fall.
Enjoy these articles? Get biweekly updates by joining my mailing list (no spam, no way, no how)