Posted on 16 Comments

Bean Arts and Crafts Transformed

Detail of bean gluing process.

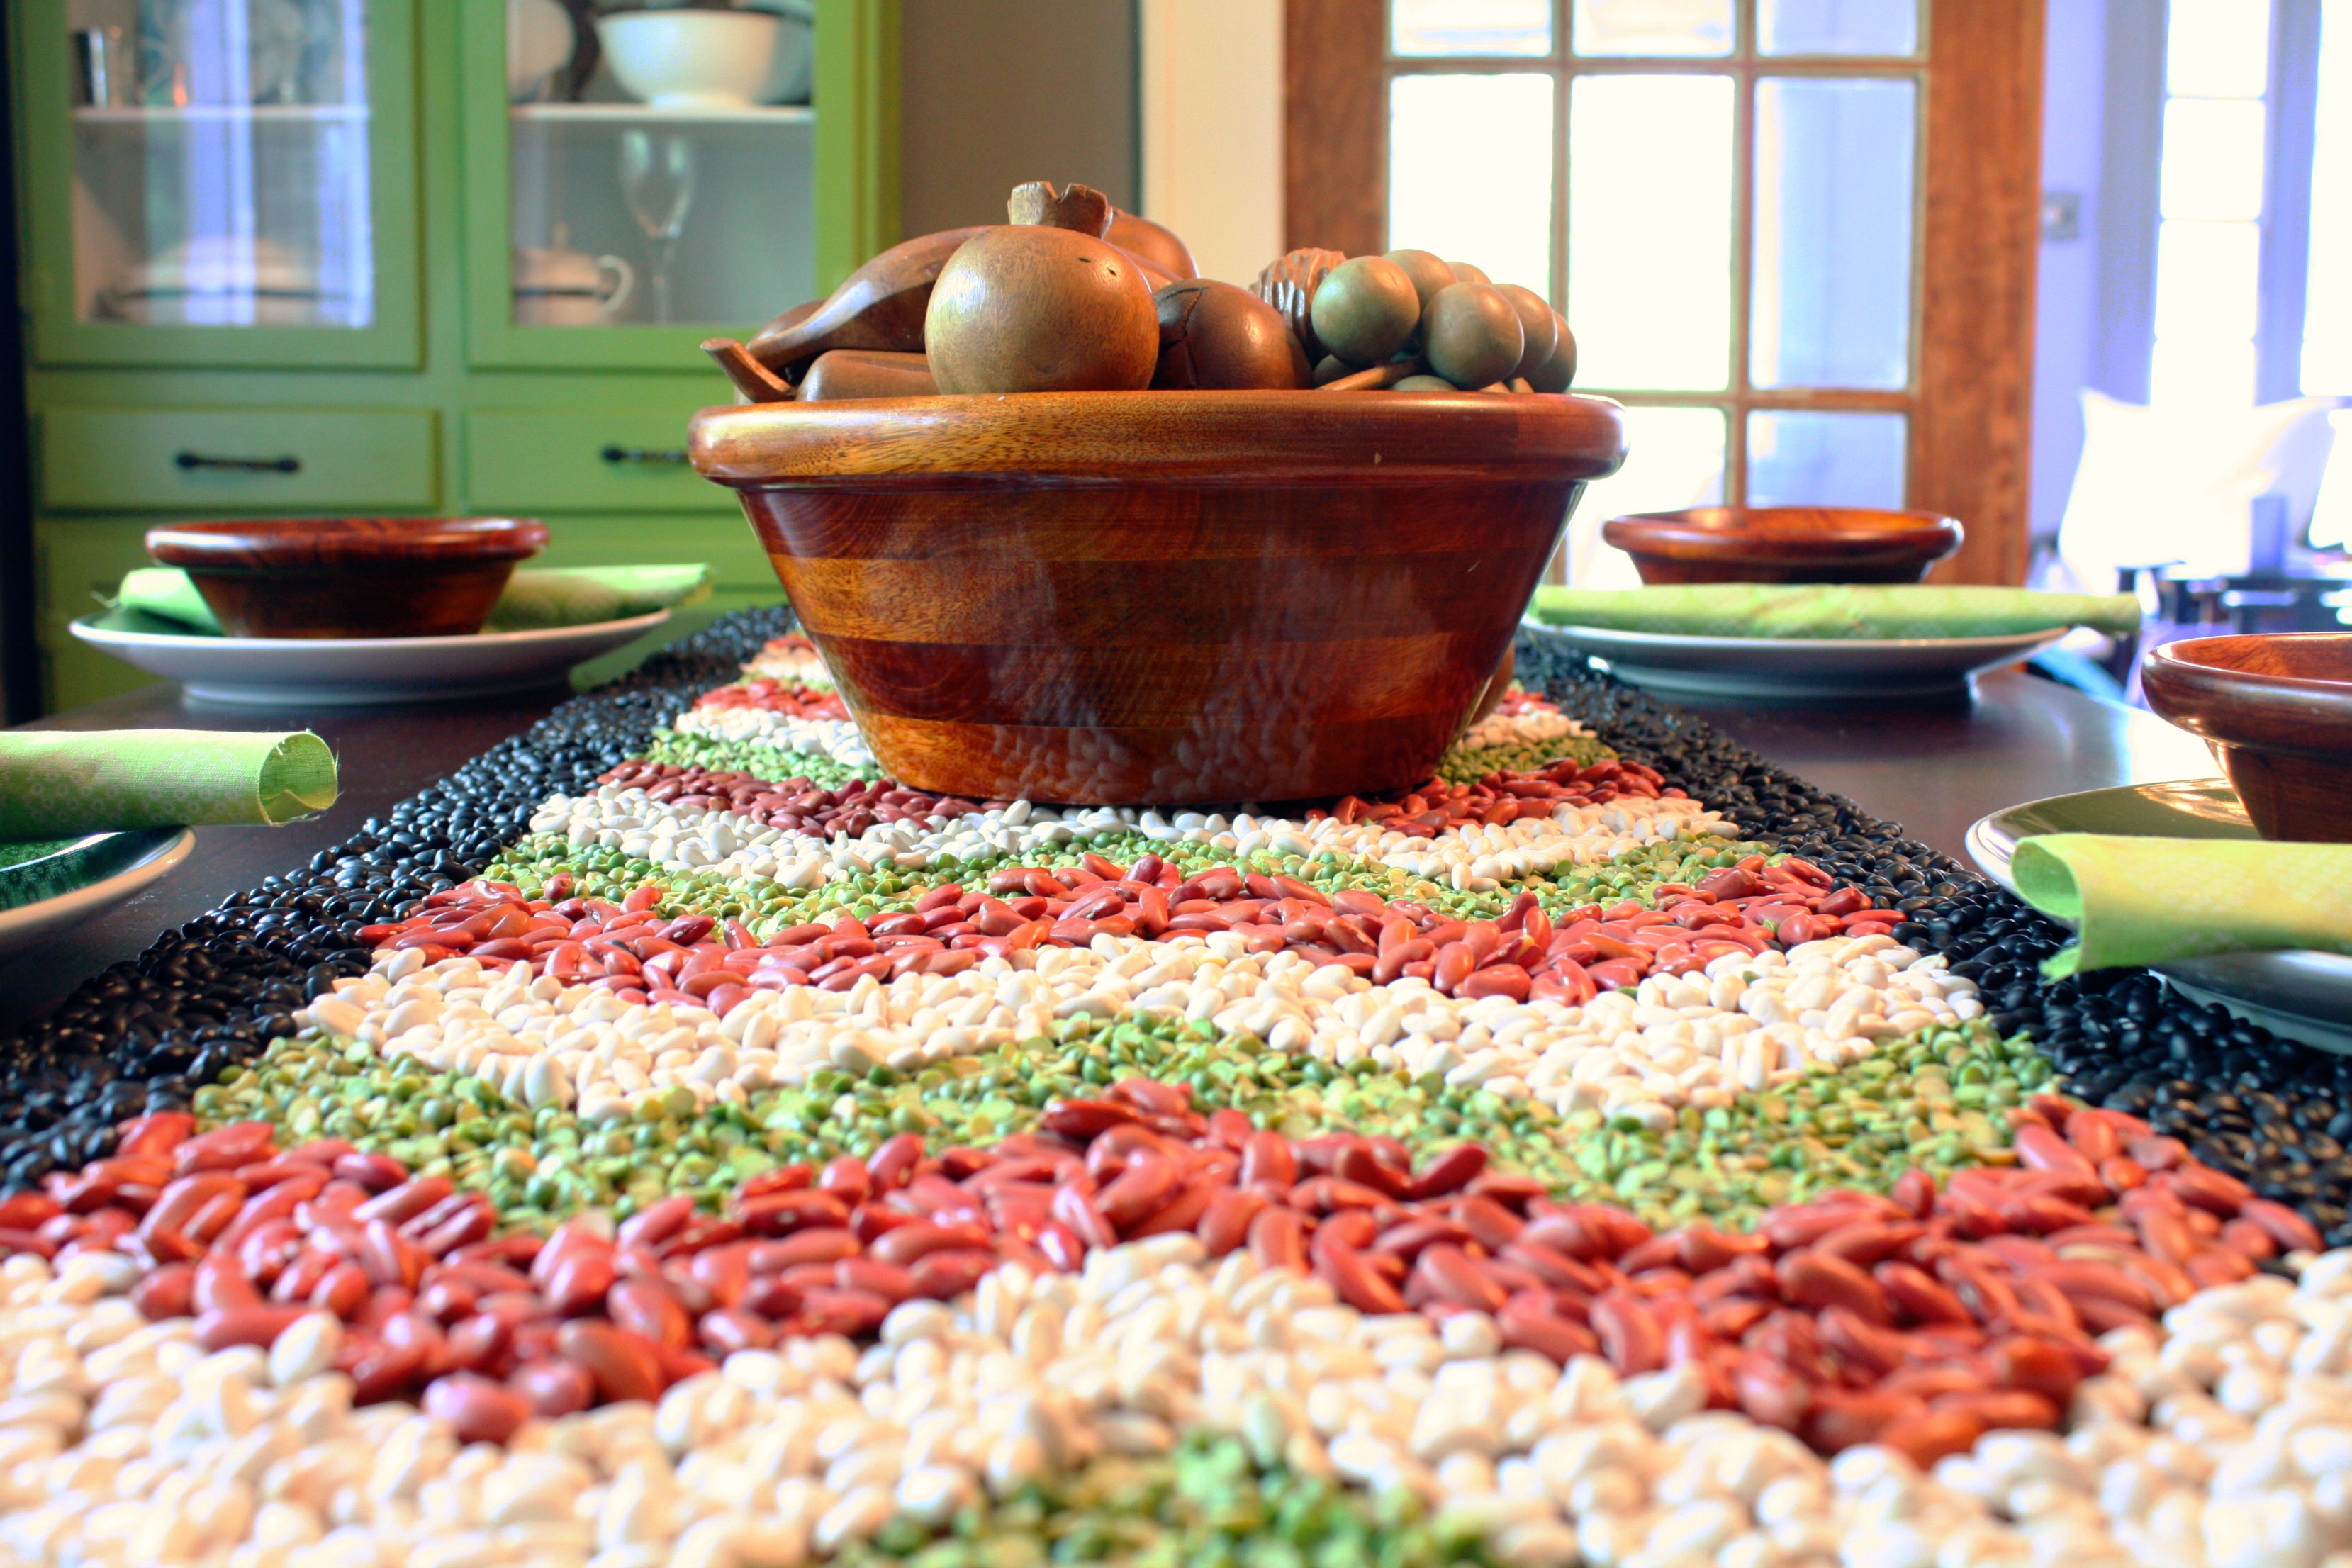
Have you had children? Were you a child? Then you should probably have made bean or macaroni art at one point and you are probably a homosapien. Have been recently gifted with some lovely artwork from my son I wondered if you could transform the homely bean art into something adult and sophisticated. Why yes, yes you can. Enter the Chevron Bean Table Runner.

Create a Textured Table Runner from bean crafting
Bean Craft At It’s Finest

Thank this is easy? Add a small child to the mix…

Supplies

Beans (various colors, split peas, rice, macaroni, whatever works)

Thick Craft Paper (this is the kind you can put down to catch paint splatters)

Pencil/Pen (to draw design)

White PVA Glue (thin lightly with water or you’ll be using a ton)

Patience

For the Chevron

Ruler

A way to mark 45 degree angles (I used a Triangle)


Step 1: Design

Supplies for textured bean runner


Decide on your design and cut out the length of paper you needed. I went with a straight forward chevron and penciled the pattern onto the paper.

Step 2: Distract Your Children

Sooo… If you have kids and there are tiny objects and glue they will want to help… Stop what you are doing cut them off some paper, add glue, beans, then begin your craft project again.

Child doing bean crafts
Don’t ask about the Mardi Gras beads. Its a ‘thing’ in my house.

Then give up and let the kids/cats/dogs/parakeets/slow loris help in the end. Tell me you don’t want a slow loris?

Child helping with bean art
McClain says he is my “Little Helper”. He is my “Best Helper”.

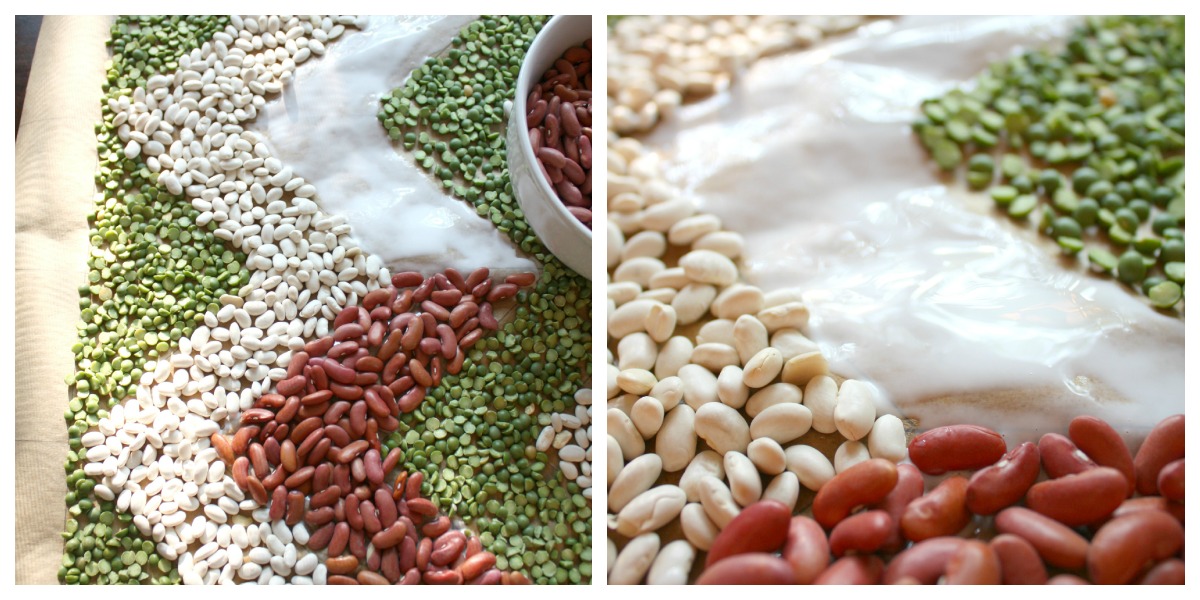
Step 3: Glue beans, and glue beans, and glue beans

The technique matters, because after you put a lot of beans on the project you aren’t going to want to pick it up and shake it like when you are applying glitter. I found putting a thick layer of glue for one color of bean and pressing a single layer of beans into the project worked well. I watered the glue down until it was easy to brush (using an old brush) onto the paper, but not so much that it soaked into the paper. Don’t fill to much space with glue or it will dry before you can get it all filled in.

Allot way more time than you think this will take. Well if you are anal like me and apt to go back and fill in empty spots. Which is my final suggestion. If an area looks bare just dab a bit of glue and press in a few more beans.

Detail of bean gluing process.


Notes

Uh this is pretty straightforward. If it isn’t then feel free to comment or email me for clarification.

Check out my fall table decor to see this bean craft runner in action… Well as actiony as a table runner gets.

Enjoy these articles? Get biweekly updates by joining my mailing list (no spam, no way, no how)

See other great DIY’s, Crafts, & Decor at these link parties: Lambert’s Lately, 52 Mantels, Live Laugh Rowe, Shabby Creek Cottage, The Pin Junkie, DIY Vintage Chic, Today’s Creative BlogC.R.A.F.T, Craft-o-Maniac, Home Coming

Posted on 19 Comments

Fall Table Decor

fall table decor featuring a chevron bean table runner

Autumn seems like a time for relaxation. The cooler weather forces an end to the constant outdoor activity but it is before the bustle of Christmas. Fall is a time to just let it go. Therefore my table is simple, clean, and easy.

The main show piece is a chevron table runner made from beans (click here for the tutorial).

See I can have a serious craft post from time to time.

The centerpiece is an assortment of carved wooden fruit. My grandparents lived for a time in Thailand, and brought back and assortment of hand carved furnishings and decor. I managed to snag a double set of the fruit. So much cooler than old-school wax ones.

Wooden fruit hand carved in Thailand

Simple wooden bowls and green accents match the runners. Perfect from the green transition of summer to the ruddy browns of fall.

Fall table decor details featuring pea green and ruddy browns

Enjoy these articles? Get biweekly updates by joining my mailing list (no spam, no way, no how)

Enjoy other great DIY, Crafts, & Decor at these link parties: By Stephanie Lynn,  The Pin JunkieCraftberry Bush, Craftionary, The Jenny Evolution, Peek into My Paradise, Tidy Mom, My Romantic Home, Simply Sweet Home, The Stitchin’ Mommy, DIY Vintage Chic, Twigg Studios, I Should Be Mopping The Floor

Posted on 15 Comments

Vases from Butternut Squash

Autumn vases created from butternut squash

If you haven’t read Monday’s post this is going to seem like a rather odd tutorial. I have a few of those from time to time. But I’ll shall forge ahead showing you one of my favorite ways to use vegetables and fruit: As decorative containers.

Autumn vases created from butternut squash
See? This does look cooler than the title implies.

Supplies (not shown because… well you read the list)

Butternut Squash (or similar gourd-like vegetable)

Knife

Long Handled Spoon

Floral Foam/Oasis or Test Tube

Step 1: Get an adult who can actually use a knife properly

DIY squash containers step 1, cutting the lid

‘Knife Skills’ are not my specialty but I found using a sharp steak knife to saw at the squash allowed for a straighter, cleaner cut that could be completed while the squash was standing upright. This is important because no squash sits perfectly level. You have to actually sit them on a flat surface then cut parallel to the surface of you want a nice flat vase-like top.

Step 2: Scoops Away!

DIY Autumn vase from butternut squash, step 2 hollowing it out.
So much less yuck than cleaning out pumpkins!


Use the same knife to begin hollowing out the squash. Follow up with a long handled spoon to get way down in the neck.

Step 3: Hold your Water

Butternut Vases Step 3: Options to hold water

Depending on how long you want to keep your arrangements you can use one of the two methods. The first way I insert a vial to hold water. You can get them in floral supply sections, however, I use leftover plastic ones from my husbands home-brewing hobby. They started their life holding yeast cultures. This method works well for longer periods. The squash can dry a bit and that keeps it from molding and deteriorating as fast.

The second method just jams pre-soaked floral foam into the vase. I have found the butternut squash will hold the wet foam without leaking. However, because the squash is constantly in contact with moisture it will mold much quicker. This method is a great option if you want them for a dinner party or just for a couple of days. And much easier since you won’t have to hollow out the squash as far to accommodate the vial.

So am I crazy? Or does anyone else use fruits and vegetables in decorating? If you do I’d love to hear in the comments below.

Posted on 9 Comments

Autumn Decoration

Autumn decorations made from butternut squash

The cool air at night just gets me all excited for Fall! It is my absolute favorite season (though followed closely by spring).  To celebrate the foreseen end to the humidity and heat of summer I added some autumn decor to the side table.

Autumn table decor made from butternut squash


Why yes, I am so glad you asked, those ARE butternut squash vases.  I have had a glut of butternut and self seeded calendula.  Since it really isn’t time to bring out the ‘full on fall’ (though I really want to)  items I tried to keep the arrangement summery by using yellow calendula (I had orange and cream too), carrot blossoms (since I was lazy and let some go to seed), feverfew, and parsley.

Autumn decorations made from butternut squash


The trio looked a little lonely so I got a scrap of white burlap to ground the arrangement.  I pulled out some strands in the burlap to mimic a pulled linen look and add a little visual interest.  I kind of want to make place mats from burlap since it was so easy to create.

I love using vegetables and fruit in decorating!  At my wedding in the early 2000’s my Uncle flew in from Washington State (we live in NC) and proceeded to core an ungodly number of apples and mini pumpkins to use as candle holders on my tables while we rehearsed the wedding.  They looked amazing and I have been hooked on fruit and vegetables ever sense.

If you would like some tips on making them into water tight vases see Thursday’s Tutorial by clicking here. (available 8/29)

Enjoy these articles? Get periodic updates by joining my mailing list (no spam, no way, no how) or subscribing to my RSS feed.

See more great decorations, decor, and DIY at these link parties: My Snippets of Inspiration, Yellow Bliss Road

Posted on 8 Comments

Sea Shells & Lemonade = Table Decor?

Sea shell inspired table decor.

I initially had the idea for this table setting from some sea shells I found when scrounging through my mess of a basement.   I had saved a small bag of pink scallop shells and thought they would make a good basis to start my summer decor.  Though I live  in the mountains my second love is the beach.  I wish I was a lake girl, since so many lakes are so much closer, but the mud, the dark water, the…  Nope it is sand and surf for me.  However, any good mountaineer knows overdoing the surf theme just seems out of place.  So here is my hybrid of pink, salmon, & gold.  Call it pink sand, shore, and lemonade inspiration.

Table decor inspired by pink sea shells
I’m so good at naming tablescapes… #sarcasm. Please suggest better names in the comments! Please!

The table setting is anchored by a diy ribbon chandelier (tutorial here) above and gold tulle net runner below.  The gold accents unify the various shades of pink that run from rose to salmon.  Shoo… okay I can say I used my art degree today to critique my design.  Now on the the fun stuff!

PINK LEMONADE CUPCAKES!

I knew I wanted some fun pink desserts and, thank the grocery gods, I walked by a display for Pillsbury pink-lemonade cupcakes.

Table setting inspired by pink seashells
Read below to learn more about my awesome baking skills.

Yes I can bake…  But can I decorate a cake?  Oh hell no.  It is a crafting skill that is just beyond me.  Knowing this, I often take the easy way out with mixes, pre-made icing, and sugar sprinkles.  As far as I can tell sugar sprinkles cover a multitude of sins.  Plus who could walk away from a thing of icing labeled ‘Pink Lemonade”.  And I swear I am not getting paid by Pillsbury to say all this awesome stuff.  Though, if they would like to, feel free to give me a ring.

Pink and Gold table decor
I like to call this the sugar, sugar, sugar portion of the table

Oh my!  I almost forgot mixed berry sangria!  Perhaps I should preface this with my Facebook status:pink-fb-statusNot to be a braggart but I make multiple awesome sangrias.  Citrus, berry, peach, etc… One for every season.  The recipe for this mixed berry and lemonade one will be up Thursday!

Salmon and Pink place settings
Gold Finger! A tutorial for creating your own gold sea shells and sand dollars from paper clay is in the works.

One of the things I enjoyed most about creating this display was learning to gold foil fabric (tutorial coming).  I thought the ombre dyed napkins (another upcoming tutorial) really set of each place setting because of the gold edging.  I’ll leave you with one more picture and a list of craft tutorials and how-tos required to recreate this summer table decor.

Sea shell inspired table decor.


I would love to have a better name and ideas on what you like or would improve.  Every table display is a learning experience so please leave comments.  Other than the cupcakes… Those mo-fo’s were delicious!

Tutorials:

How to Dye Sand

Permanent Sea Glass Finish

Modern Ribbon Chandelier (yes it is supposed to look like that)

Mixed Berry Sangria

Ombre Dyed Napkins

Gold Foiling Fabric August 8, 2013

Mold Making from Polymer Clay (Gold Seashells and Sand Dollars) I have photos and how tos but I am not sure how many people like to sculpt and make molds…  I may or may not post a tutorial.

Enjoy these articles?  Get periodic updates by joining my mailing list (no spam, no way, no how) or subscribing to my RSS feed.

See more great crafts and decor at these link parties: Our Home Away From Home, Today’s Creative Blog, Daisy Cottage Designs, Shabby Creek Cottage, House of Hepworths, Live Laugh Rowe, The Crafty Blog Stalker