Posted on 2 Comments

First Time Home Buyer Boot Camp

buying a house

Most of Craft Thyme’s exploits revolve around the little Reganskopp homestead, but occasionally we do projects in other’s homes. When our friends, Trevor & Justine, decided this would be the year to get married and buy a house we wanted to cheer them on. We also gave them LOTS of advice (solicited & unsolicited) as first time home buyers. They, at least, seemed appreciative (thanks for pretending guys) of our first time home buyer boot camp. While most real estate agents should help a first time home buyer, we thought we would distill our experience into a quick first time home buyer guide in case you don’t have the helpful sort.

First, let’s set the stage: Western North Carolina real estate is an odd market. Houses around Asheville, range from pricey to ridiculous. They are a mix of old (40’s-60’s), really old (1900’s-30’s), and brand spanking new (which are the ridiculous prices). It makes it very hard to find a first time home that can be afforded and also isn’t a dump. Which is where we come in! We offered to help look at houses and then do some basic cosmetic transformations when they finally found ‘the house’… Guess what? They found ‘the house’! Of course, the house came with some awesome items like cracked ceilings, faded eggplant paint, stale cigarette smell, but also large open living/dining area, and spacious yard. We looked it over with them and saw lots of the potential they also saw. Offer was made but that is just the beginning!

First Time Home Buyer Boot-camp

Please note we are NOT licensed real estate professionals, but we have bought, sold, refinanced, and fixed up a number of houses in Western North Carolina. Between Adam and I, we have purchased 5 houses. Three of them built before 1935! Talk about a lot of repairs, mortgages, and learning experience shooo, but always double check our advice with the paid professionals.

First Time Home Buyer Bootcamp

The Search

Before you begin any search make a list of the things you must have and want to have. If you are shopping with a spouse you might find that your ‘need to have’ list isn’t exactly the same.

When comparing lists our friends found that they had to pay attention to find both a large yard and a location that was not so far away from the city/civilization. The need list and your price range will inform your buyers agent and your search. Your ‘want list’ will help you make the final decision and allow you flexibility in your budget. Once you have a budget and your lists remember the following.

  1. Be prepared to look at a lot of properties. Most first time home buyers will not have a good idea of what items are in their price range. Hopefully you will be pleasantly surprised! However, in a lot of cases you may find you need to reign in your expectations to meet your budget.  Or you can be like us and buy the first house you saw (Brianna) or decide you will buy a house when you walk in the door (Adam).  Don’t be like us!
  2. Once you have seen a few properties start doing your own web searches. Many property websites will set up alerts to your email when something new comes in the market in your search criteria. Being the first to put an offer in on a property can make a huge difference in a hot market.  You will also get lots of spam.  Trust me I am still getting email about houses in and area I lived in 5 years ago… Which leads to #3
  3. Be prepared to make decisions quickly. One of the reasons I tell you #1 (Look at a lot of properties) is so that when you find a good home you can jump on an offer and not be stuck in indecisive mode. We have lucked out on a number of properties because we came in quickly with a fair offer. Our friends did too!  Pro Tip: Have that pre-approved mortgage letter.  It makes your offer much more attractive, plus it is a lot less worrisome if you know you can afford the offer you are placing.
  4. If you have a buyers, agent look at properties they suggest too. We found our previous house at the suggestion of our buyers agent. We actually would not have looked at the house. We had seen it online and made the assumption that the seller was going to place another house next to it and subdivide the lot. Our buyers agent knew they had plans to sell the house with the larger lot instead of developing it further. We would have passed on our perfect house!
  5. Bidding wars are just not worth it. It is tempting to pony up some more cash when you have been on a lengthy search, already fallen in love with your house, and then someone is out-bidding you by a few 1000 dollars. Don’t, just don’t. There is always another house. Being house poor and paying at the very top of your market value is never a good way to start off your first home. Leave the bidding war to more experienced home buyers. Even then…  I still give it a “don’t” no matter how experienced a buyer you may be.
  6. If you aren’t using a buyers agent make sure to have a reputable real estate lawyer.   Actually make sure to have one of those no matter what.  We had the worst time closing on our current house because the previous owner’s lawyer had been barred from practicing real estate law and there were title questions.  Anyway, a good lawyer can help you put in a formal offer (Buyer’s agents can do this part in many states) and close on your home (Buyers agents can not do this part in many states). This process is not one you want to scrimp on as a first time home buyer. A house is probably the largest investment you are going to make, you are going to want to protect yourself throughout the process.

buying a house

When Buying an Older Home or Any Home!

Great, now you have put in an offer and it has been accepted! Let the panic begin! Just kidding, don’t panic but do move fast. Hopefully, you have set a certain due diligence period to check out the house and back out of the offer if you found something cray, cray.  If you haven’t, well then, you probably didn’t pay attention to #6 from above.  Tsk, Tsk.

If you are a first time home buyer we must stress the importance of spending a little extra cash and getting an excellent home inspector. We have a great home inspector that we recommend. When he is done you basically end up with a 100 page manual and a 2 hour walk through that explains everything about your house. Not all home inspectors are the same! Ask around for recommendations and do not just use the first person on your real estate agent’s list. But Do book this person ASAP. Your due diligence period is likely small and home inspectors, contractors, surveyors, etc can often be booked up.

Older Home Buying
I see potential in older houses, but you also want to see electric, and foundation, and running water ;)!

Once you have your home inspection use that to negotiate repairs. Sometimes this works and sometimes it does not.

Our friends were able to get plumbing fixed and some money at closing. I have been able to negotiate money back for new electric. Sometimes, in the case of our current house, you are getting a cheap price so as NOT to negotiate repairs. It never hurts to ask, but you may not get anything. At that point you can make the informed decision if the work/DIY is something you are interested and capable of completing or if you need to accept the loss of a little money and move onto another property.

ALWAYS remember that cutting a loss of a few hundred dollars is better than being saddled with a house you are unhappy with and/or is so costly to repair you end up being house poor just to keep the lights and water on. That being said make sure to do the following as soon as you have an accepted offer.

  1. Notify your mortgage company: The time it takes to close a mortgage is really quite insane. Do yourself a favor and get the process moving as quickly as possible.
  2. Once you notify your mortgage company they will set up an appraisal. If for any reason, you think you might be backing out of the property have them hold the appraisal to you have the home inspection. BUT NOTE: holding the appraisal can hold up closing. Again, this seems like it shouldn’t be a big thing, but the bank ordering the appraisal to the actual time of completion can be pretty lengthy. You are not going to be able to close that mortgage till the bank makes sure you have enough equity to cover the purchase price.
  3. Home Inspection: Book one ASAP. If you really aren’t going to hire a professional at least get your home-knowledgeable friends to do a walk through and make a list of everything you want to repair upfront plus everything that may need fixing in the first few years (so you can start saving).
  4. Survey: Any time there might be property line questions it is worth it to get a fresh survey. You may need to ask for them to mark the line if you are trying to notify the neighbors that the line is not exactly where they thought it might be.
  5. After your due diligence: Go ahead and call cable/internet, power, water, and electric companies. I made this rookie mistake and forgot to book the internet provider till almost at closing. They were not able to come for 2 weeks! Talk about eating through data on our phones.
  6. Keep in contact with all parties. While in a perfect world the various home inspectors, real estate agents, lawyers, mortgage companies etc would be doing their job it never hurts to check in. You don’t have to be obnoxious, but a simple email or call to ask if they need anything else is a good reminder for them to pick up your file.

Great You Made It!

Great you made it…Almost!  You haven’t closed yet.  If you have gotten through all the hurdles it is time to start pestering your laywer for the HUD-1 Settlement Statement.  Depending on your state, they have to produce this a certain number of days prior to closing.  I know, I know, there are lots of numbers and columns.

Look Over your HUD-1 ASAP!

I am pretty sure I have never had a pre-closing HUD where it was correct.  You need to diligently contact the laywer, mortgage company, real estate agent, or any one else to correct any mistakes.  The HUD is the be all and end all of closing and if it isn’t right you may delay closing and/or spend an entire flipping day in a lawyer’s office (true story I even left for a lunch break).

Once your HUD is settled the only thing left to do is go get a cashiers check for closing from the bank, and bring your ID to closing.  You will be asked to sign or initial about 1000 documents.  It is impossible to read every piece of it (which is why we suggest the reputable lawyer), but make certain to pay attention to the high points.  You want to verify the title information, mortgage, etc matches what you have been discussing the whole time.  Once you close you should get some keys and be good to go!  We had a few closings that ran late and were registered at the court house till the next day.  You will want to consult that lawyer on whether you should move in or remain out of the house at that time.

But anyway once you have closed you are now a HOME OWNER!  Enjoy!

And if you want to grow some insta-equity we will be going over tips shortly on quick fixes that add a lot of equity to your home for little upfront cost!

Posted on 6 Comments

How to Prepare Raised Garden Beds: Weed Free Style

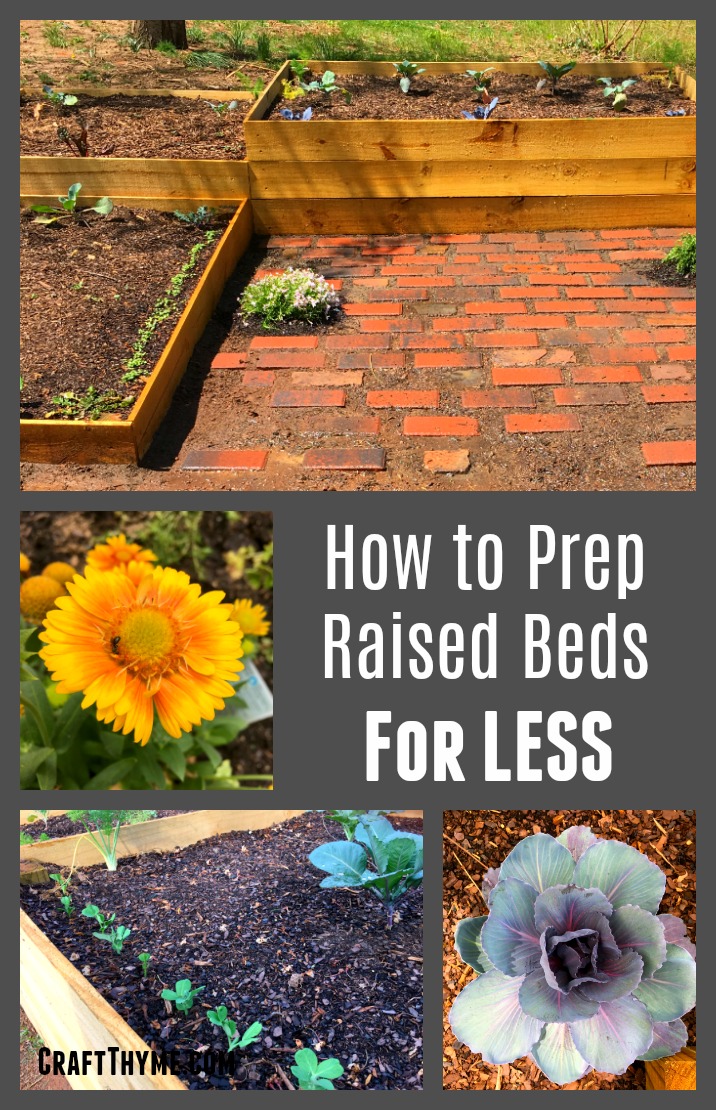
How to fill your raised beds with good soil, that maintains moisture, keeps out weeds, and doesn't cost a fortune.

Do you want to know the best way to prep raised beds once you have them built?  The soil mixture you use for your raised beds is a hotly contested subject; and everyone has their own techniques.  However, we have developed our own unique method that is cost effective (a nice way of saying cheap as possible), retains moisture, and keeps weeds from coming up through the bottom of your bed.  I feel pretty secure that our method will give you a good weed free start on your raised garden beds.  We have been working with it all summer and despite the groundhog setback the beds have been yielding lots of pretty veggies and flowers. We got the idea from hugelkultur beds (a topic for another post) and tested it out in our newest DIY garden boxes.  It is working great! First let us give you the lowdown on some of the problems of raised garden beds and then get onto prepping those beds.

Raised Garden Bed Issues

We can all agree raised beds have a lot of advantages.  You have more control of the soil, attractiveness, soil drainage, etc.  BUT, in our experience some of the great things about raised garden beds can also be issues.

  • Raised garden beds can dry out very quickly. Like whoa…
  • Weeds, especially grass, like to pop in from the bottom/sides
  • It costs a lot to fill a raised bed

Craft Thyme’s process for preparing raised garden beds addresses all the above issues and helps make the beds virtually weed free! Affiliate links may follow.

Supplies

  1. Landscaping Fabric (Yes, I am suggesting making a deal with the Devil)
  2. Stapler (Like a construction stapler, not a red swingline)
  3. Scissors
  4. Wood branches/chips/logs (see below)
  5. Topsoil
  6. Garden Soil
  7. Compost (Optional)
  8. Plain Cardboard or lots of Newspaper

Step 1: One of only two times you will hear me say use Landscaping Fabric

As a matter of course landscaping fabric is the devil.

Landscaping fabric is the thong of gardening.  It serves a small purpose and is always in the way forever after.

However, in preparing raised garden beds I have found it very useful.  Start with a long sheet of landscaping fabric.  I try for at least the length of one side of the raised garden bed and fold it in thirds.  But if you happen to be folding it outside on a windy mountain day, well you are going to curse and probably cut shorter sheets). Cut along those fold lines to make three strips of landscaping fabric that is about 12 inches wide (Most standard rolls come in 3ft widths.  Obviously, cut accordingly if you buy one of those big honking rolls).

Take the fabric and staple the fabric no more than 6 inches high on the wood of the bed.  Anytime you hit a corner or have to start a new piece fold the fabric and overlap.  More fabric is not bad in this case.

Found the perfect use for landscape fabric: A way to keep expensive soil inside a raised bed

This process is, in my humble opinion, and excellent squat workout.  Adam built a lot of beds… Let’s just say I got quit the glute workout.  You can staple it lower if you have small beds, but you want to insure that the fabric overlaps the ground below.  This will work as a barrier to keep dirt from leaking out of your beds and weeds from poking in on the sides.  Remember we are going for weed free raised garden beds!

Step 2: Wrap it up

Take sheets of cardboard or 5-6 sheets of newspaper and cover the entire bottom of the bed.  If you have issues with the newspaper blowing around you can wet it down to make it stick to the ground. It should overlap over the landscaping fabric.  This will make sure the fabric stays down when you start filling the beds.  The cardboard/paper will decompose over time and the roots of plants will be able to go past it to dig in the soil below.

How to prep a raised bed to minimize weeds and cost

Step 3: Wood is Good

NEXT LAYER!  Not sure why I needed to scream that, but it felt right.  So the next layer is dependent on the height or your bed.  Shallow beds will get just wood chips, deep beds get sticks covered with wood chips, deeper beds get logs, then sticks, then wood chips.  Hopefully you get the idea.

Modify hugelkultur to make a water-wise raised bed

The wood acts like a sponge and holds water in the raised bed.  I have heard the decomposition of wood can rob the soil of nitrogen, but so far we have been good because the soil is going to suck anyway.  Read further to see the discussion on supplementing the soil and how to tackle that going forward.

When gauging the depth of the bed, leave a minimum of 6 inches of room for actual dirt from the top!  Cause plants can’t live on wood alone, mushrooms are another story.  Few tips for selecting wood:

  • Old rotting logs are best
  • Small dry sticks and old leaves will also work
  • We happened to have a lot of fallen logs and wood chips from tree work we had done in the fall.  If you do not have your own; try to find twigs, branches, etc from the neighborhood.  It is always easy to collect fallen limbs after a storm.  Unless you live in a desert… Or grass lands…   If you have to buy bags of wood chips try for the non-colored/Untreated types where available

How to use rotting wood chips to keep moisture in the bottom of your raised beds

Step 4: 5 Second Rule (Dirt don’t hurt)

In case I hadn’t already diverged from traditional gardening advice enough…  You have two options available for dirt.  You can spend a fortune and get the best, compost-ful dirt you can find.  Almost every post you will read on the internet will suggest spending as much as possible on dirt.  Maybe that is a great way, but I follow the second method: 3 inches of cheap topsoil and the 3 inches of whatever gardening soil is available for sale at the local big box store.  I turn a blind eye to the label for this one moment in time and throw whatever horrible bag it is in the bed.

Adding topsoil to a DIY raised bed soil mixture
Can you say C-H-E-A-P topsoil?

Trust me these bags are labeled as fertilizer for 10,000 months!  Grow an Amazeballs Garden!  Etc.  They aren’t good, they do not last a quarter as long as they say, and I feel bad, but they are cheap, get your garden going, and give you a base to build really awesome soil in the future.  I’d choose gardening some over gardening perfect everyday!

Adding the final layer of premium garden soil to get your raised garden beds off to a good start.

Now What?

That folks, is how you prep a raised garden bed.  The landscaping fabric/cardboard and purchased soil insure you start with a weed free bed!  Feel free to plant away!  If you follow this planting guide your veggies will help shade the ground and keep a lot of new weeds from sprouting.

But wait there’s more…

Couldn’t resist the infomercial appeal.  Once you start with this technique you are going to have a couple options to ‘raise’ these beds to a higher level.  Get it?  You have a small amount of soil on top of a lot of ‘not exactly nutrient rich’ material.  The wood material is what is helping keep your beds nice and moist, but it isn’t adding a lot of umph to the growing power of your plants.  We combat that by adding organic fertilizer the first year.  I also throw every single earthworm I find into the raised bed.  You could, alternatively, add lots, and lots of compost throughout the growing season.

In fall I cut all the old annual plants at the base and allow their roots to rot in the soil all winter long.  Additionally I rake in mostly composted chicken droppings and/or mostly finished compost and let the bed set.  Do not rake it deeply into the soil (a couple of inches or two is perfect.  You want to let the earthworms, fungi, and other bugs do most of the work).  After the first year, I transition the dirt into a more traditional organic method.  I focus on building good soil out of my cheap base which is an entire topic for another post. In short,  I add compost as the season continues and by that point the soil is usually healthy enough to support year round planting!  In short, though, you can expect to get one good season just out of the crap soil.  So go out and get planting! And yes these seedlings and seeds came from my favorite vendor Sow True Seed!

How to fill your raised beds with good soil, that maintains moisture, keeps out weeds, and doesn't cost a fortune.

Posted on 4 Comments

How to Make a Goat Wire Fence Trellis

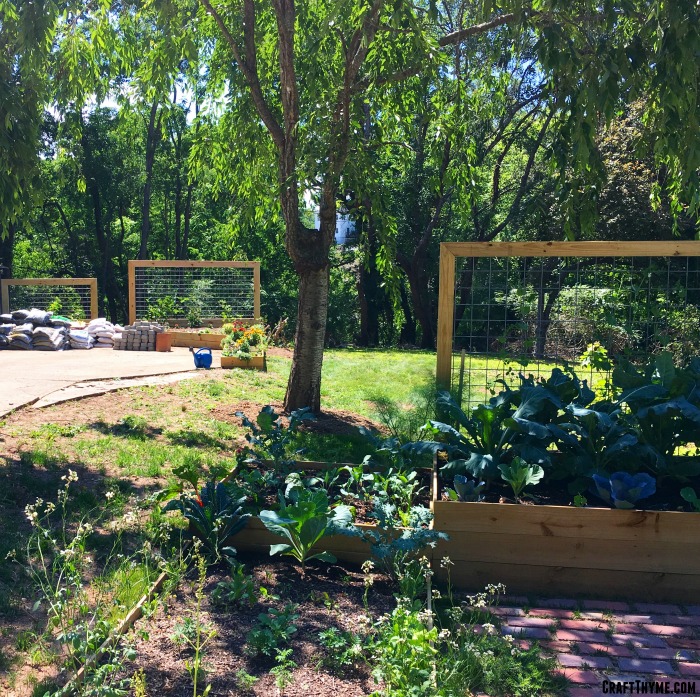
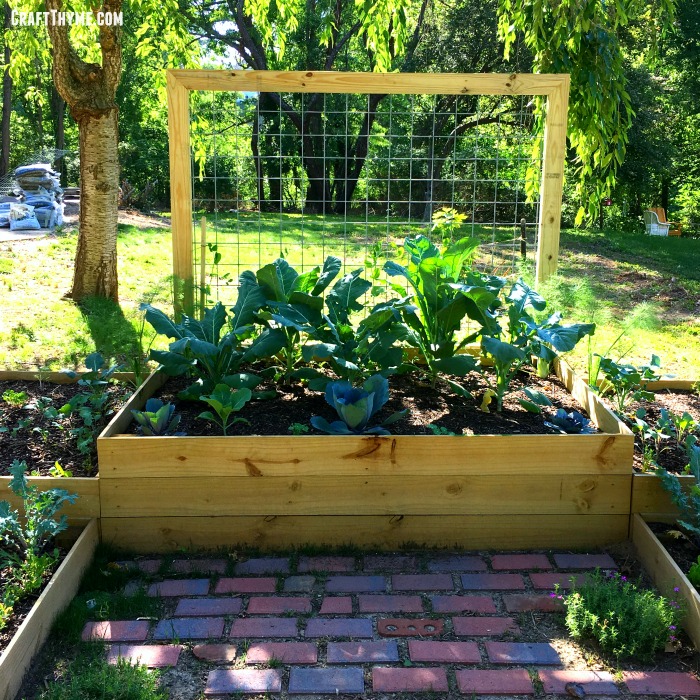
Completed goat wire trellises mounted to various raised beds

Goat wire fences are kinda the rage around Asheville at the moment. Trend or not, I personally enjoy the aesthetic. So why not build a goat wire trellis?! Craft Thyme tries to use similar materials for a lot of our builds so that everything in the outdoors has a more cohesive feel. In the last house it was a series of conduit structures. This one, well, Adam was kind enough to work with my goat wire obsession. We have lots of plans for the yard but are currently adding the goat wire in a series of trellises. I’m a big fan of growing food upwards in small urban environments and these DIY goat wire trellises are sturdy and perfect for everything from squash to grapes.

This build requires a few more tools than the usual, so I would rate this one intermediate. Not so much for the skill level, but mostly for the extra tools necessary.  As always be careful, don’t sue us, and build at your own risk! Affiliate links to follow.

Completed goat wire trellises mounted to various raised beds

Goat Wire Trellis Supplies

  • Goat Wire Fence Panel (4ft x 16ft)  You will need to get this from your local farm store (Think Southern States, Tractor Supply, etc).  The rolls of wire are impossible to get nice and flat.  Which is fine for a composting fence but not so great for a decorative trellis.
  • 2″ X 6″ or 2″X 4″ Lumber in lengths for your project. I discuss this more in step 1. Also if you want to get into that whole treated versus untreated controversy read the first few paragraphs of my How to Make Raised Garden Beds that Last.
  • 3″ Wood Screws
  • Waterproof wood glue (Or if you are forever forgetting supplies like us then regular gorilla glue works pretty well too)

Tools

Step 1 Deciding on Frame Size

In the supplies above you will note that I have two different wood sizes recommended. This is all because of proportion. We made some small goat wire trellises to replace some old ones that had been attached to the house. These looked nice with just plain 2X4 lumber. We also made some big honking trellises to go on the back of the aforementioned raised beds. Those were large and in charge and made with 2X6’s. Those large trellises also almost ended with a screaming match in the middle of the yard, but since neither of us decided we wanted to entertain the neighbors or get divorced we managed to remain civil and finally get the goat wire trellises in place. So you have been warned. The larger you make a goat wire trellis the more of a pain in the arse it becomes to install. THOUGH, we did actually work out a reasonable installation method by ginormous trellis #3.  You are welcome to skip our pain!

Now that your public service announcement and marriage saving tips are out of the way; plan out a simple box as follows.

You will have two long legs for installation. With the small goat wire trellises the legs just rested on the ground and attached the frame to the brick. With the larger ones we made extra long legs that were buried and screwed to the back of the raised beds.  You can see a back view below. Just remember to leave enough leg for your application!

Step 2 Time to Saw

We went to the trouble to miter cut the top board and side supports. Just a simple 45 degree miter looked a little more professional than a flat join. The bottom board fits flush on the inside of the side supports and does not need a miter.

Pro Tip: It is a little easier to create these goat wire trellises if you are a bit flexible in the finished interior height of the trellis not counting the legs. The wire will be set in channels and getting that wire set to an exact depth in the channels… Let’s just say even we weren’t silly enough to try that level of perfection.

Step 3 Channel Inner Peace or at least Channel your Wood

If you want the nice seamless finish that you see in these goat wire panels you are going to need to set them in channels in the wood. There are a few ways to make channels in wood but we opted for using the table saw. Even with the table saw there are two different was to make the channels. The first is the easiest and most expensive. It requires a dado blade. This blade is actually multiple blades you can set to create a channel in 1-2 passes. These are wonderful and also around $100! Though I did find one on Amazon for the 50ish range, but, I can not vouch for the quality. Since I don’t see a need to channel lots of wood in my life, and Adam didn’t see any immediate need to continue to channel after this project he opted to go the more labor intensive but cheaper method.

I heartily seconded his decision as I saw that as an extra $100 savings just asking to be spent on plants. I was informed math doesn’t work that way…

So how did Adam make the channels? Here is his description:

  1. Set the blade 1/4″ off center for the small width of your wood. You only need to set the height about 3/4″ inch deep to hold the goat wire.
  2. Run the board(s) down the entire length of wood
  3. Flip the board and run it down a second time.
  4. If you flipped it correctly you should now have a 1/2″ wide section in the center of your board. Now move your board slightly (1/8″ ish) in towards center. Run the board down, flip and repeat.
  5. Repeat step 4 if necessary.

After that you should have a 1/2″ channel in the center of your wood with lots of thin pieces of wood. Simply pull those out and break them off. I may have caught Adam using my old garden clippers and weeding tools to knock the wood bits out of the channel.

Ripping a channel in wood to make a slot for the goat wire fence

Step 4 Assemble Time!

You might notice that I haven’t had you cut the metal yet. There is a reason. it is a heck of a lot easier to adjust the goat wire panel than it is to reframe all the wood again. So let’s get to assembling! The small ones can be fully assembled on the ground. DO NOT try to assemble the large ones and then put them in place. Just don’t!  Recall marriage advice above step 1?

We made that mistake as you can see in the above framing picture. It broke and had to be reassembled in place. Feel free to dry fit it together and check to see if your channels are clear (seen in this smarter second attempt). Then do as we say and not as we did in the assembly.Test fitting the goat wire fence panel in the trellis frame

For both types of trellises start with your top bar and side bars. Line up your miter joints put in some glue and the angle screws into the wood. Next do the following:

Small Goat Wire Trellis

Now is time to cut the wire. We found it easier to measure the inside dimension and add 1 inch. Then you can lay the panel over the top of the wood and refine. Once cut, slide the wood into the channels. It is helpful to have two people to slide each side in but Adam manages to do the small ones with no help. I’m sure I was off eating bonbons or some such while he was making them.

Trimming the goat wire to fit in the channeled wooden frame.

After sliding the wire in, simply slide the bottom piece of wood into place and screw it in. Voila trellis done. We just installed by hammering masonry nails straight through the wood and into our brick..

Small goat wire trellis with muscadine grape

Large Goat Wire Trellis

After a lot of trial, error, and minor recriminations, we worked out the best method for installation of the larger trellises. Take your joined top and side supports and install them in place. You may be wondering how to get the goat wire into the trellis but trust us it works out just fine. Once you have your posts in place and the top leveled cut your wire to size. In the larger lengths it will bend enough in the middle that you will be able to slot the sides into the channels and then push it up to the top. It is super useful to have an assistant to hold the wire in place while someone else places the bottom board and screws it in.

Measuring goat wire to trim the panels to fit in the trellis frames

That’s it folks. With some wood, screws, a little glue, and a lot of patience you can have these very sturdy goat wire trellises. We have some muscadine grapes already headed up the small ones and have started training thornless blackberries up the largest one. The other side is holding some raspberry canes. Until I get the berries well established and I have some scarlet runner beans planted to add some color during the summer.

We love questions and comments! Please leave one below if you need any clarification from our tutorials.

Mounted goat wire trellis from the back
Back view of how we connected the trellis to the raised bed

How to build a trellis out of goat wire fence

Posted on 4 Comments

How to Build a Garden Box that Lasts

Completed version of our raised garden box. Also find information on how to prep your soil and make these goat wire trellises!

Before our last house I had never planted in raised beds, but let me tell you, it only took one planting season to make me a convert! Now that we (as in Adam) are in the new house we (as in I) had to build new garden boxes. But this time we wanted to figure out how to build a garden box that lasts, while not poisoning our veggies with lots of toxic chemicals from treated lumber OR spending a fortune on cedar.  Since we figured out this magic combo we thought we would share our raised garden box plans with you so that you could also save some moola and be able to use the raised beds more than a few years!

Time to get all gardening controversial right out of the gate.  Yes, shocking I know, but gardeners can have some very heated controversies.  Especially us younger new-comers on the gardening scene who refuse to blindly go all organic.  Yep, we scienced the heck out of these garden boxes.  First and foremost, not all treated wood is the same. Most of it is complete crap that you wouldn’t want to touch unless you have gloved hands.

Most treated wood = STAY AWAY Veggies!

BUT there is one form of treated wood that would be safe to use. Micronized copper treated wood.  While many still argue the safety we satisfied ourselves by reading page after page of research created by many extension agencies and laboratories.  The worst issue we could find was that it could potentially release the same amount of copper as a copper pipe water system in your home.  Additionally, if for some reason, large amounts of copper were leached into the soil your plants would die well before harvest.  I urge you to do similar research for yourself and boldly disclaimer my choices.  Basically be an adult, make your choices informed, and don’t sue us later if you do not like the outcome.

SHOOO, well now that all that science and research are out of the way let’s get on with learning how to build a garden box that lasts!

Garden Box Supplies

  • Fence Pickets
  • 4×4 Posts
  • 3″ Exterior Screws

Fence Pickets:  Why are we using fence pickets as garden bed walls???  I know it seems odd because we are going to have to make an extra cut to remove the top piece but, first, they are cheap.  Like cheap enough to make it worth the extra cut cheap. Secondly, there are two types of treated wood at our big box store.  Despite what common sense would tell you, the treatment referred to as Ecolife is DECIDEDLY NOT Eco… The other common treatment technique utilizes Micronized Copper Azole (or MCA) and has been tested and used for decades in these applications.

Craft Thyme!

The directions below are to create one, two-layer 4 x 6 foot box.  You can modify them to make any configuration you want.

Cut List

  • 4 – 10″ Corner Posts
  • 4 – 48″ Front/Back Bed Walls
  • 4 – 70.75″ Side Bed Walls

Cut list for DIY wooden garden boxes or raised beds

Step 1: Assembly Line

We decided to do this assembly line style and do all of the cuts up front.  Guess who got to cut too?!  Me!  I got a new saw for Adam’s birthday and his parents got him this hella cool stand for Christmas.  While we can (and have) cut wood old school with a crap saw on the ground, this certainly made the project a lot smoother.  Since this is a garden box we made square cuts.  While mitering the corners might look lovely, the purpose of these boxes are to hold dirt…  So cut time!  We start from the square end of the board and then when you are done the dog-eared end of the fence post will be tossed away.

Step 2: Screw It!

Now it is time to screw.  The easiest way to assemble is to start with the short end on a flat surface.  Lay your 4X4 posts down and place your flat boards on them.  Move the 4×4 posts in the width of one board (see the image) this will allow your long boards to sit flush when assembled.  Try to get these as straight/square/level as possible.  The straighter you have these sides the nicer your finished box will look.  However, there is wiggle room with the posts.  The end result will have small gaps the corners if your assembly is not straight.  This might be less aesthetically pleasing but will still function correctly!  I’m kind of the good enough camp… Adam had his level and square out… :)

Assembling a garden box
As you can see here we used a small piece of wood to gauge the space needed.

Screw each board using two screws into the 4×4 post.  Repeat for the other short side.

Assembling a DIY garden box
We placed two screws in each board down the post.

Step 3: Time to connect

This is a great time to connect with your loved ones… by having them hold boards, but if you do not have a build partner you are still going to connect, because now it is time to connect those boards! A partner can help hold everything in place, but for either instance find as flat/level of a place and stand up your pre-assembled 4 ft end.  Place the end of your board against the corner of the post starting at the bottom.  Push it flush against the boards and as level as possible and screw in place.  Take the other end of the board and connect it to the other short 4 foot end.  Why connect both?  Because when you have three sides assembled the structure becomes much more stable and easy to connect your boards.

Corner joint for DIY wood raised bed
Here you can see how we joined the edges and why a space was needed to attach the boards flush to the post.

Step 4: Rinse and Repeat

Connect one more board above the bottom layer and then connect the other side in the exact same manner as the first.  For added stability we took a small scrap of wood and screwed it in the middle of each long side as shown in the picture.  This step was simply to keep the boards nicely aligned.  After that your beds are D.O.N.E.  A bed this size is not lightweight but I could still easily drag it into place.  Keep in mind you might want to build it near your final site if you are not into lifting all that wood.

Center bracing on a wooden garden box.
Here is the optional center bracing. It doesn’t have to be beautiful as it will be covered with dirt.

Step 5: Prepping (but not with a concrete bunker)

How to fill and prep raised beds is a hotly contested topic.  No seriously!  Gardeners can get their collective yard-work granny panties in a wad over how you fill your beds.  I have my method outlined in the next post but for the purposes of making garden beds your last step is to install them.  You can choose to leave them on top of the slope or dig down to install them in level ground.  (Seriously, my method for prepping raised garden beds is cheap and awesome)

Finished DIY garden boxes or raised beds

I have done both methods.  I also find both attractive.  You will see more of the box when simply laid on the ground (Plus it is MUCH easier) but having it level can be important if you are going for a certain look with goat wire trellises as we did in the photo below.  This choice is really up to you!  Once installed you then fill with planting material and get planting!!!

Raised beds leveled in a sloped landscape.
This took a whole lot of digging!!!! Trellis in the next photo!

Notes: Keeping soil from going through small gaps, soil mixes, how to reduce weeds, water retention, etc is all available in my how to prep bed post! Yeah, I am plugging myself but seriously it is awesome!

Complete Garden Box

Completed version of our raised garden box. Also find information on how to prep your soil and make these goat wire trellises!


Posted on 10 Comments

Grow Marigolds! They Are Awesome!

Every garden can use Marigolds. Find out these fun facts about why you need to add marigolds

Grow Marigolds… Let’s be honest, marigolds seem kind of out-dated. Yellow or orange balls of flowers you can get for $1 at big box stores. Sure they add some color, have a slightly strange scent, and weather neglect pretty well, but in reality they are just kind of the bland work horses of the garden. They are like the grandma of flower gardens and I resisted growing them for years!  Except they AREN’T outdated; marigolds are awesome!

Grow Marigolds

First, let’s just discuss the plant itself. Marigolds (or Tagetes for you Latin purists) are native to North and South America. Many of flowers in American garden’s are not usually native, so if you are from North or South America you should get some gardening brownie points just for using a native. Marigolds come in both annual and perennial varieties, though, most of the varieties you can get in the big box stores are going to be annuals.

That funky smell? BREATHE IT IN!  Well in some varieties it has been bred out, so if you don’t like it do not despair!  You can find a marigold that suits your sensitive nose. I, however, want that smell. You know why? It makes marigolds unattractive to predators (deer, bugs etc). In addition it ends up making plants grown next to them unattractive. So grow next to your tender cabbages, tomatoes, etc. Just keep it away from your legumes as marigolds have been known to interfere with their growth.  I have personally found the numbers of aphids and other pests tend to be significantly smaller on veggies and fruit surrounded by these lovely yellow and orange marigolds.

Growing marigolds is easy, but you can always buy them in most garden centers

Fun Facts

Marigolds are used to flavor and to color dishes in South America. They are also used in many Hindu religious ceremonies. I saw tons of them used in Holi to make beautiful garlands and necklaces. They are also often used to celebrate the day of the dead in Mexico. It is said you can feed marigold flowers to chickens to increase the color of their yoke. I have yet to try this experiment but I might this next summer and let you know how it goes.

Marigold garlands found in a temple in India during Holi
These marigold flower garlands were hanging throughout temples during our trip to see Holi in India.

How to Grow Marigolds

These flowers are perfect for first time gardeners. They will grow in almost any soil, deal with fluctuating water, and are very pest resistant. They grow easily from seed, which is why so many teachers send kids home with marigolds around Mother’s day.

Basically a marigold is as close as you can come to a pretty flower that needs minimal intervention.

Plant after danger of frost, as most marigolds prefer nice warm weather and full sun. Most Marigolds will sprout from seeds in 1-2 weeks. You can expect flowers to show 1-3 months after planting seeds. They do wonderful as starts you can transplant out or directly seeded in the ground. Transplants can get you blooming in late May to early June. Expect direct seeded to get going late June to Early July.

If you are buying marigold plants I like to pick plants with only a few open flower buds, so I can get the first good show of flowers after it acclimates to my soil. However, since most varieties will re-bloom feel free to grab a marigold with open flowers for instant color in your garden.

For the best blooms you will want good, well draining soil with a high organic content (really what plant doesn’t like that). Regular watering that allows it to dry in-between is preferred. As the blooms die cut them back (dead head) and it will bloom more. You can expect most commercial varieties to bloom from spring through to frost. As long as you cut off the old blossoms.

Marigolds mixed with vegetables like these scarlet runner beans make for an attractive garden.

Now to the Good Stuff

Marigold varieties! There are way more choices to be had than one would realize.  Which is why i saying growing marigolds is no longer just the business of little old ladies and elementary school children. You can pick plant sizes that go from tiny 6-12 inch to some truly spectacular varieties that grow more than 5 feet tall. I think most of us have seen the plain yellow and orange marigold varieties, but did you know you can get your hands on an almost white one? Green tinted Marigolds? How about an orange so dark it is almost red? Stripes? Ball shapes, daisy shapes, tiny florets, two toned petals? Marigolds have all of these and more.

I am personally trying some adorable teeny-tiny yellow marigolds this year from Sow True Seed. (affiliate link to follow) These lemon gem flowers should be showy in the new raised beds.

Marigolds mixed with other flowers in a potted border in India.
Marigolds add a bright warm punch to other flowers. This potted border had just started blooming when I visited India.

So expand your gardening past the basic ball shape and add some low growing varieties to drape over the edges of raised vegetable beds or as the border of a path. Plant a drift of large vanilla flowered marigolds to set off other pink, purple, or red showstoppers. Or just put a lovely stripped version in a flower pot to add some sunny notes to your windowsill. Marigolds size, shape, color variety and ease of growth make them more than a boring work horse for your garden. They open up the possibility of beautiful base flowers for the entire summer, so you can focus on more finicky flowers and vegetables.

Every garden can use Marigolds. Find out these fun facts about why you need to add marigolds to your garden and how easy they are to grow.

Every garden can use Marigolds. Find out these fun facts about why you need to add marigolds to your garden and how easy they are to grow.