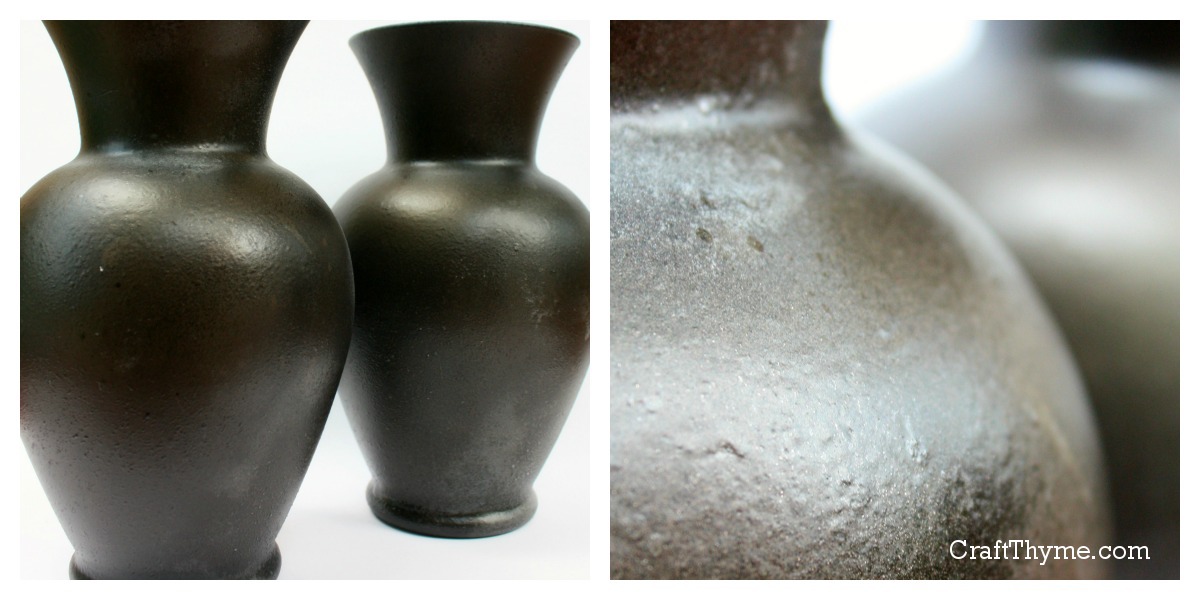
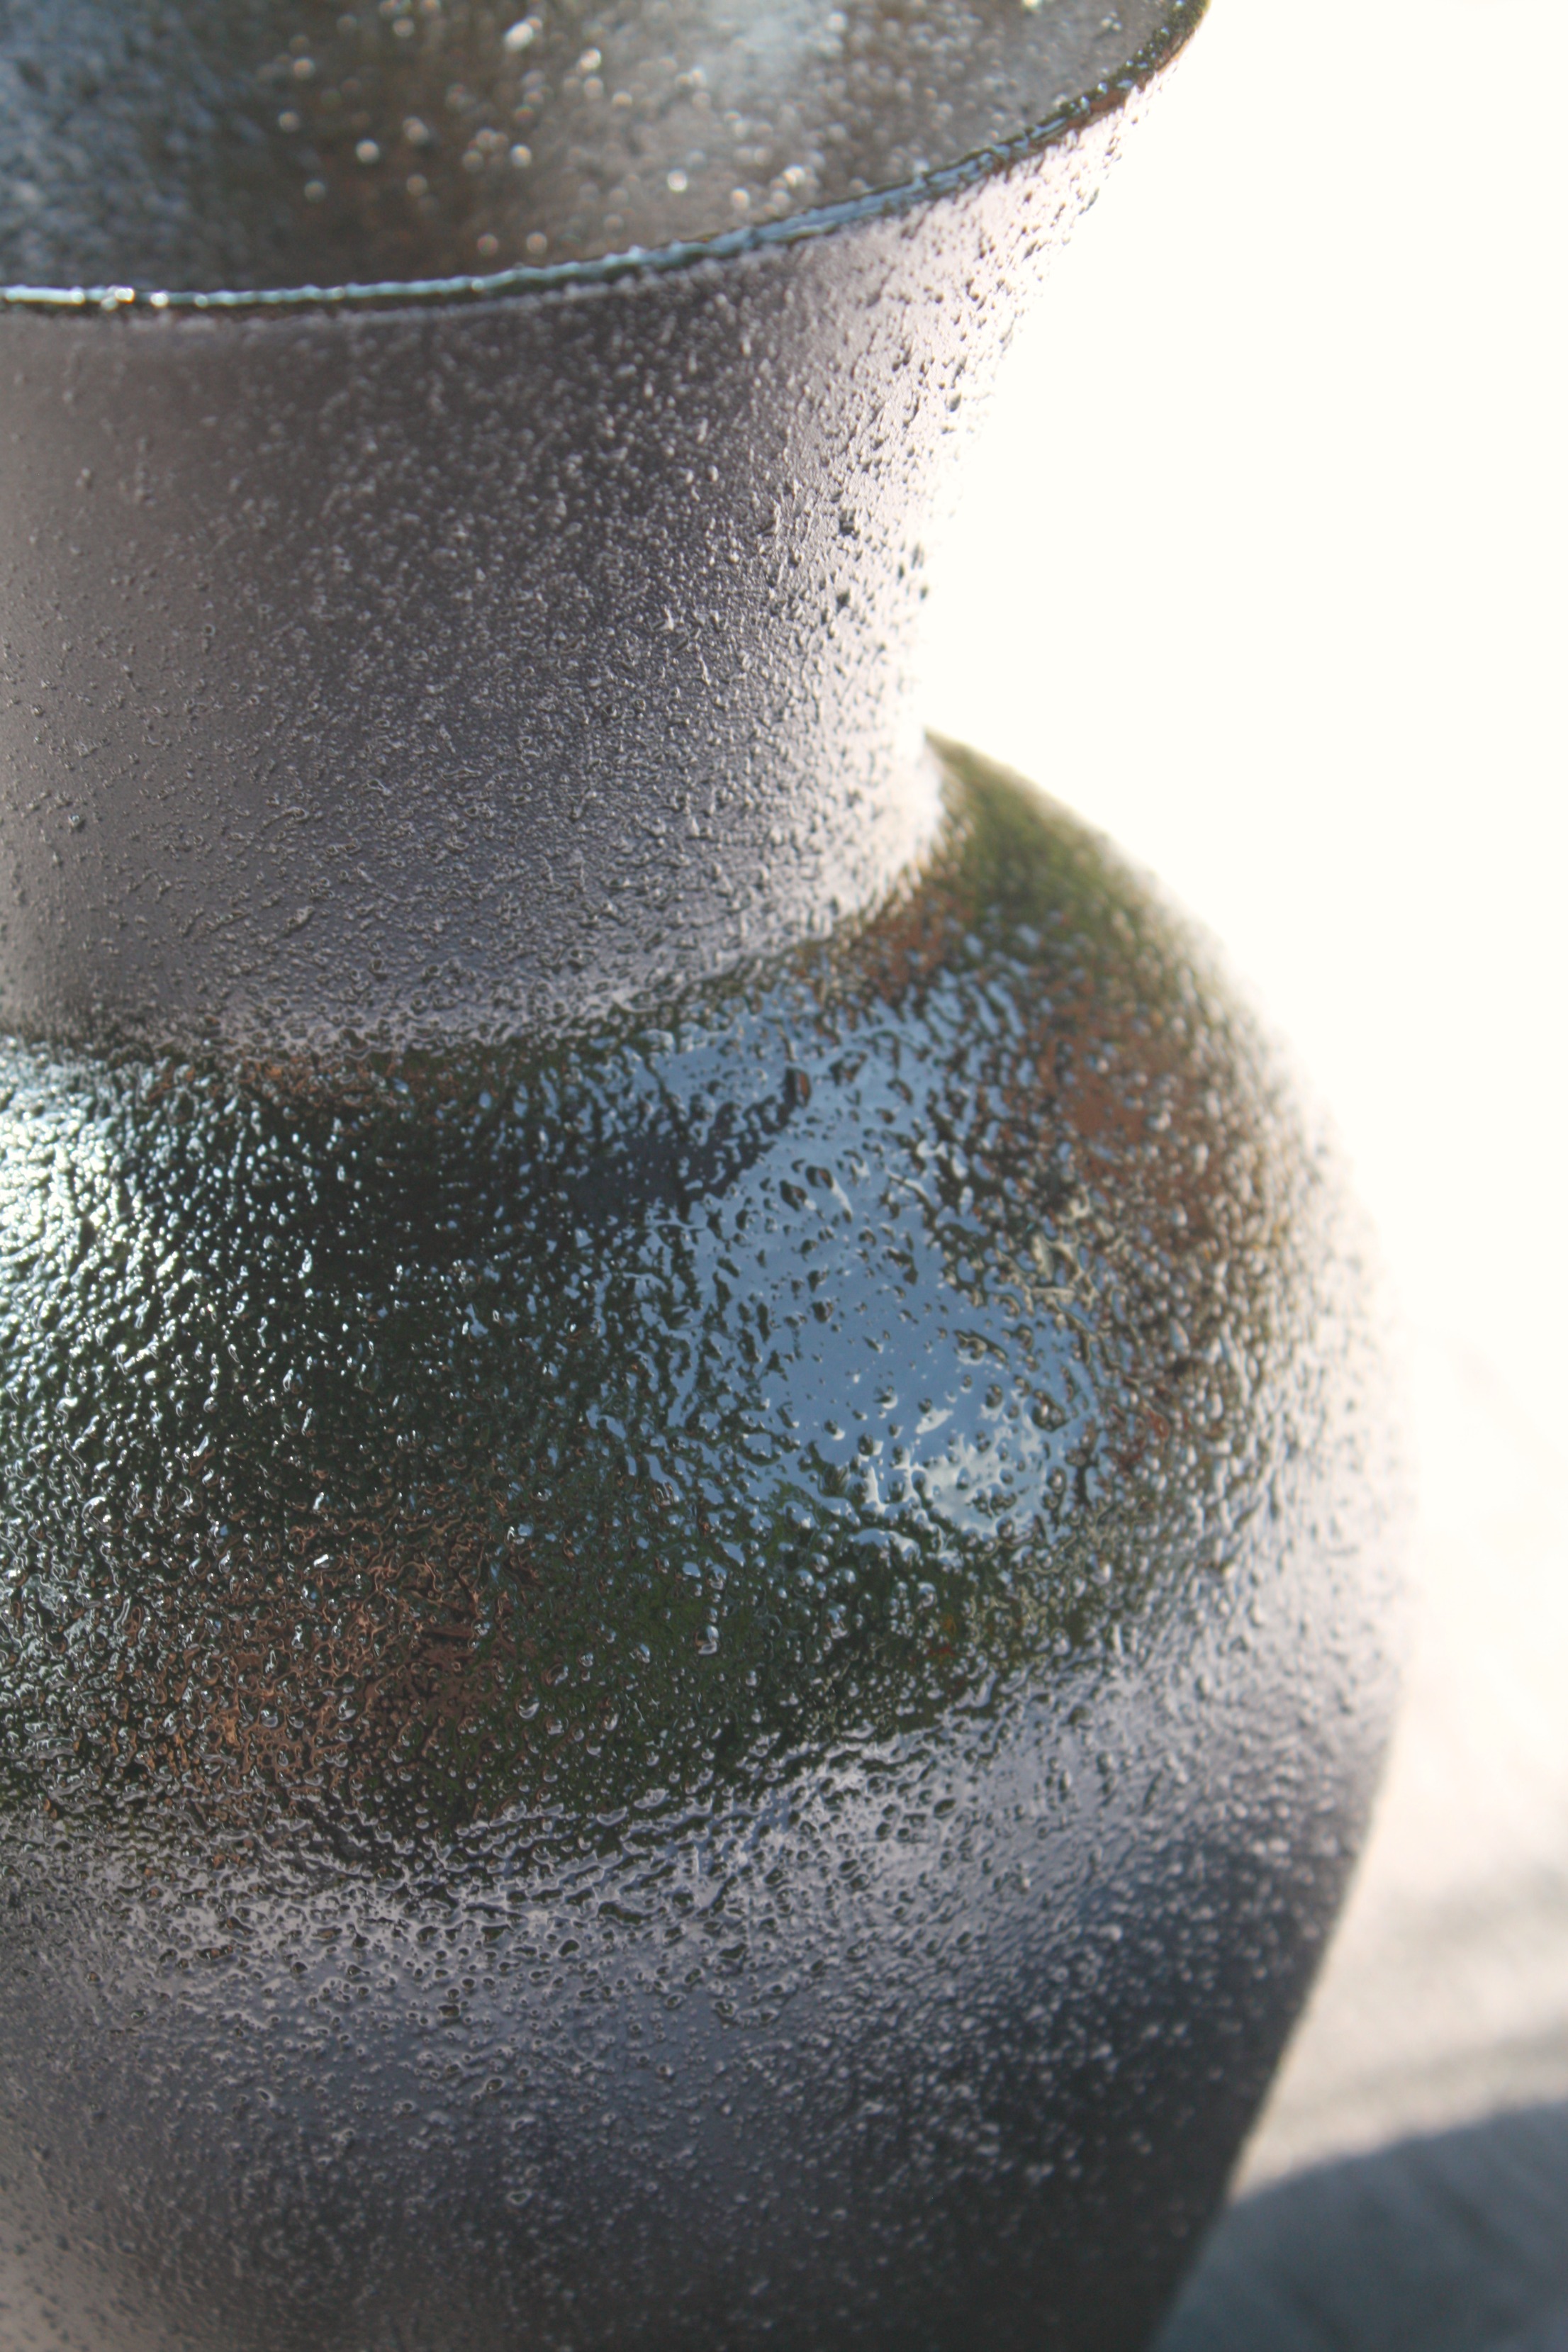
I developed this paint technique to create a cast iron finish on a HID-E-OUS brass lamp we had in our living room. My husband and I have a lovely cast iron legged side table and a shared like of Restoration Hardware. Also a shared like of not spending that type of money. I tried to find a good tutorial to fake a cast iron finish but gave up and started playing with paint. After multiple attempts, hauling the side table around to compare, and scraping off bad finishes I found a way to paint a faux cast iron finish.

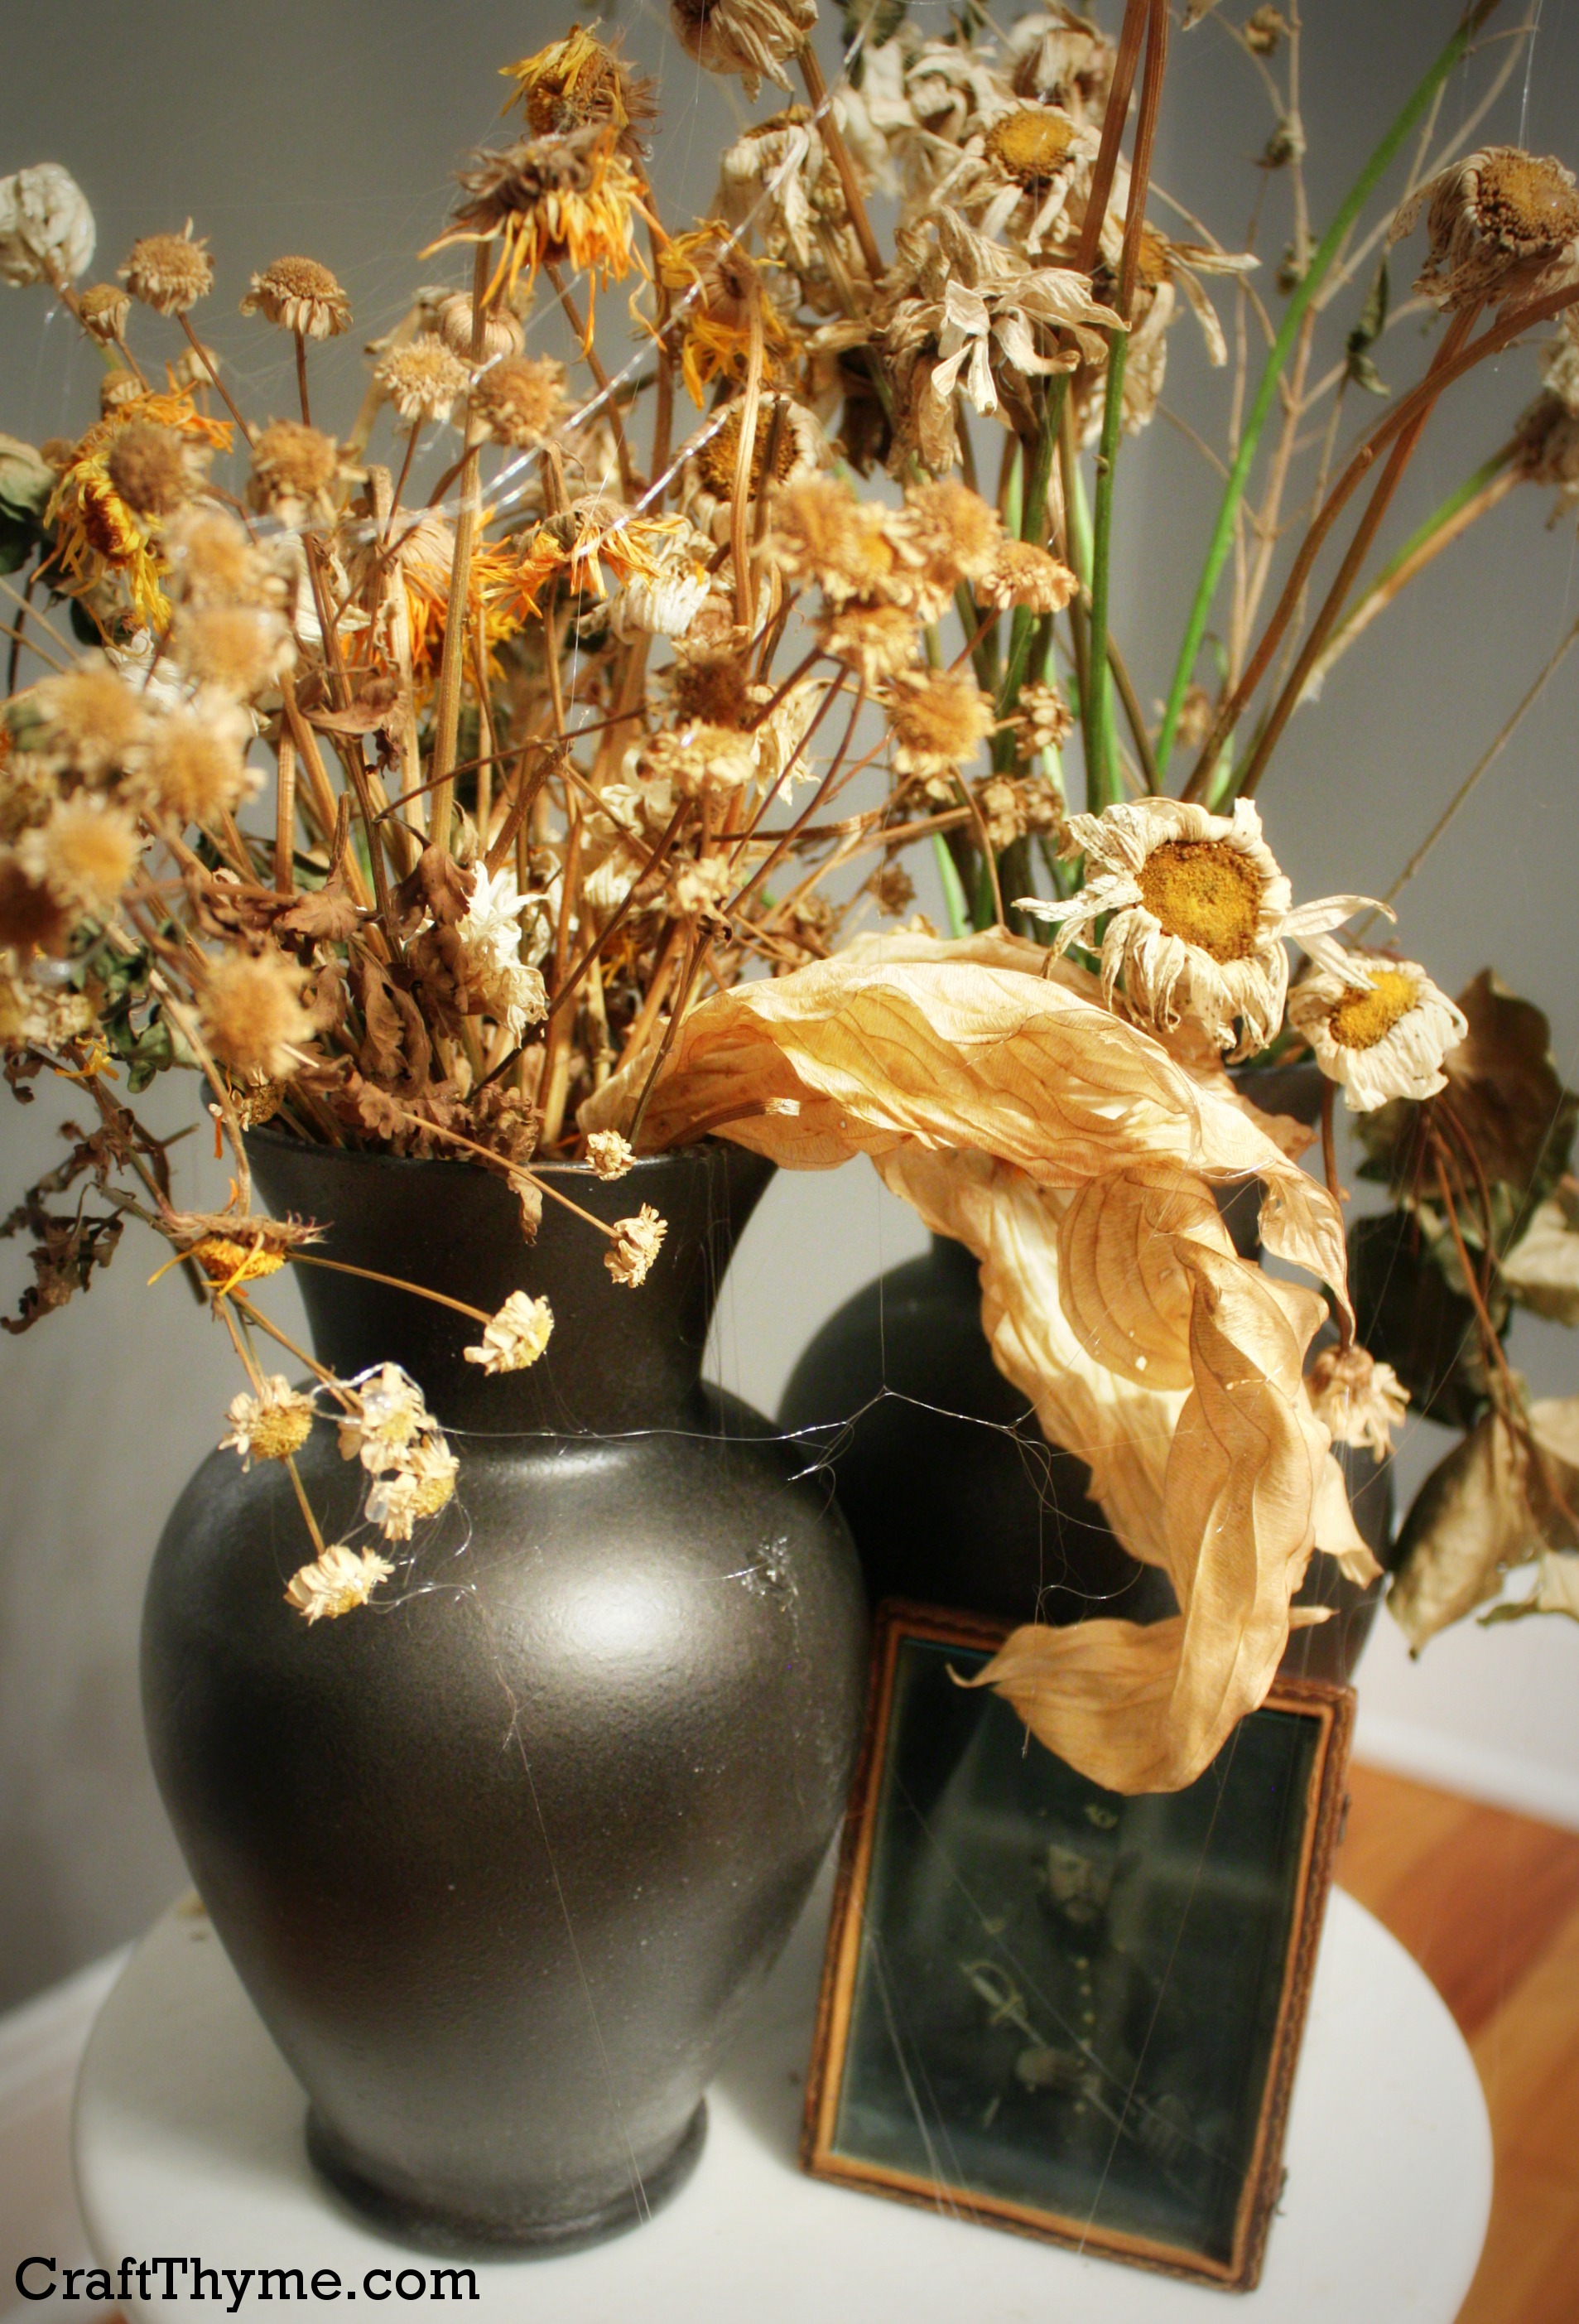
It looks great on furniture but also works to make an ‘urn’ like finish for Halloween.
Supplies

For the basic finish you need:
Rustoleum American Accents Stone Finish in Mineral Brown* (long enough title?)
Sand Paper (higher grit is better for smoother finish)
If you want to paint glass:
Add a glass primer or frosting spray*
Step 1 We All Hate It: Priming
Depending on the piece you are covering you’ll need to prime it. Glass required a coat of frosting spray. My horrible brass lamp needed a clear coat sanded off. Google directions for the piece you want to cover.
Step 2 Using the Rustoleum American… Ah to hell with it: The Stone Paint

I’m just going to call it stone spray paint from here on out. The title in supplies should let you know what I mean. By the way, I am only suggesting that particular brand for the stone paint because it is the only one I have used. I tried a variety of bronze paints and they worked fine, but I haven’t had a chance to try a different texture brand. If you do please leave a note in the comments.
Lightly cover the whole piece with a splattering of the texture. I moved waaaay back than my usual spray painting technique. You can see if just splattered a coating.
Step 3: Bronzer instead of Blush
You can go ahead and spray a covering coat of bronze spray paint before the stone paint is dry. Save some time and it doesn’t hurt anything. However, let the bronze mostly dry. I say mostly because I am impatient and if it is a bit tacky and peels up you’ll be fine. If you are doing it right it will look shiny and warty and you’ll be thinking “what the hell is this?”
Step 4: More OMG This Looks Awful
After the bronze ‘mostly’ dries take the sand paper and give it a buff. It will knock off a lot of the texture leaving pits, holes, and scuffs. Then cover in bronze paint again. Repeat step 3 & 4 if you don’t feel like it had a lot of varied texture, or you were impatient (like me) and gummed up the paint into a wad.
Step 5: Now It Will Come Together

Let everything dry and then cover the whole item with a thick coat of matte spray. By thick, I mean disregard the manufacturers guidelines and get that puppy about 3-6 inches from the surface. You want the matte paint to pool in the pits and any decorative carvings.
That is pretty much that! There aren’t really notes with this process other than more layers of paint give a richer finish. You can see how I styled these cast iron ‘urn’ vases for a Halloween Vignette.

Enjoy these articles? Get biweekly updates by joining my mailing list (no spam, no way, no how)
See more great DIY, Decor, & Crafts at these Link Exchanges: 52 Mantels, Lambert’s Lately, The Crafty Blog Stalker, Craftberry Bush, The Pin Junkie, The Stitchin Mommy, I Should Be Mopping The Floor, Craft-O-Maniac, Dream A Little Bigger, By Stephanie Lynn, Kitchen Table Art