Posted on 21 Comments

How to Make a Glass Terrarium

How to make a DIY Glass Terrarium

I will admit to having a plant obsession, so, it was only a matter of time till I started in on glass terrariums.  But what fueled the new obsession?  Adam and I recently got married and while we agreed not to get gifts for each other someone decided to get me a new book on terrariums (*cough* Dork *cough*).  Holy plant porn!  Not every project was to my taste but all of them were inspiring.  I had never thought of decorating glass terrariums with feathers, sand, bark, etc.  It opened up a new world of decoration that allows me to bring plants indoors in a modern display.  While it is fairly easy to create a glass terrarium there are some tricks that I have discerned that make the process a LOT easier.  On to the tutorial:

DIY Glass Terrarium

How to make a DIY Glass Terrarium

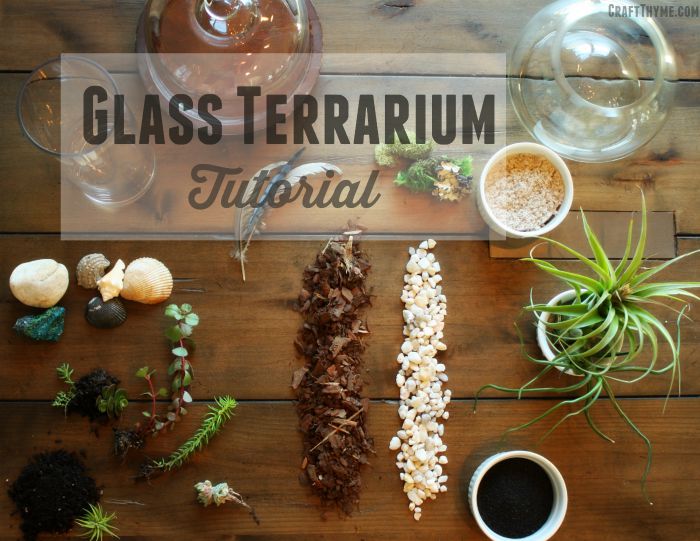
Glass Terrarium Supplies

There are really three basics that you must have outside of a glass container:

  1. Plants*: these are some succulents I have been propagating and some air plants we picked up at a recent craft festival
  2. Soil*: Potting or fast draining cactus mix; unless you are using air plants
  3. Drainage Material
  4. Container: I went to Goodwill and scoured the shelves.  I was able to find a number of interesting glass containers for $1-$4.  Just make sure they are clear glass.  Tinted or colored glass can mess with the plant photosynthesis

Additional items that make the terrarium look really good:

  • Moss: Hardware stores often sell sheet moss cheaply.  Pretty reindeer moss is available in most craft stores.  We waited till we had a 40% off coupon and got a large bag.
  • Sand: Craft stores have a number of colors.  I also might try dyeing sand like I do in this tutorial, however, I would likely keep that to air plants so I do not wash out the color when watering.
  • Rocks
  • Feathers
  • Wood
  • Sea Shells
  • Etc : Anything that can withstand water or, if using air plants, you are pretty much unlimited

How to make a DIY Glass Terrarium

Step 1: Planning

A little planning goes a long way with a glass terrarium.  First, look at your plant and the conditions it needs to survive.  I also tried to find a plant that had a shape that complimented my tall glass container.  After matching up your plant consider HOW you will be planting it.  You can pour the dirt in the container but if you can not fit your hand in there you will have some issues. Long cocktail stirrers or chopsticks can help press the dirt firmly around the plant.

Step 2: Keep it Dry

My first big mistake was trying to plant a glass terrarium with damp materials…  Ugh.  Everything sticks to the glass, or plants, getting everywhere and becoming near impossible to remove until it is dry again.  Start by placing your drainage material at the bottom, and layering your dirt next.  I placed a layer of bark between the rocks and dirt to keep the distinct bands.  That step was purely for aesthetics.  Next plant the plant but do NOT water yet.

Step 3: Clean and Tidy

If you have not watered, then you have the opportunity to take a soft cloth and wipe off the glass.  You can also blow SOFTLY through a drinking straw to clean dust or move sand around. Removing the dust and dirt from above the soil line is what gives the terrarium a clean modern feel.  Take this opportunity to place smaller decorative objects.  I used some reindeer moss and a small (live) hen and chick next to the main succulent.  You could also place rocks, a layer of sand, etc.  The only limit is space, ability to withstand dampness, and your imagination.

How to make a DIY Glass Terrarium

Step 4: Tips and Tricks

Time to water!  This is where everything can and has gone South for me.  Water too fast and you end up making holes in the soil, or flooding the entire terrarium.  Trust me on this one, flooding it is bad, bad, bad.  I was talking instead of paying attention (imagine that) and ended up floating all my plants out of the soil and mixing in my sand.  I had to dump everything and start over.  The easiest way to insure a non-messy watering is use a spray bottle and let it trickle down the glass.  Otherwise, be super careful to only add a trickle of water.

Notes:

Make sure to pay attention to the microclimate you just created.  The sun can get very warm through the glass and/or the environment can easily get too wet or dry.  The nice thing is that the container is glass so you can actually look at the soil and drainage material to see your water level.  Also, remember there is not a lot of nutrients (as in none) coming into your terrarium.  You may need to add a liquid fertilizer every 3-4 months to keep your plants nice and healthy.

If you want some amazing inspiration this was the book I got as a gift:*


Otherwise a quick glance through Pinterest can really give some great ideas to get you started.

How to make a DIY Glass Terrarium

Posted on Leave a comment

Yard Transformation

Humorous depiction of our new construction yard.

The yard… Ugh.  What can I say about the yard?  We bought the house last fall and the grass was not much to look at.  I assumed that spring would bring a lot more green.  All I can say is nope.  Big ole cup of N.O.P.E.  It was as though our entire front yard had been salted, then compacted, and then sand blasted for good measure.  I am not certain I have ever seen soil that poor outside of depression era photos of the dust bowl.  The first photo I took, we had at least raked the debris from the yard in preparation for attempting to grow some grass.

Humorous depiction of our new construction yard.

It was during the raking, that I discovered the thrilling fact that our yard was chocked full of rocks, and rocks, and then some more rocks.  Think new construction lot at its finest.

Really bad yard
Okay, so maybe this is a more realistic depiction of the yard. Still pretty awful.

Here is the thing they never tell you

They never tell you that a blank canvas of a yard can be intimidating.  We had nothing… Not even real grass.  So, imagine, you have two people who both like to garden, in completely different ways, faced with the possibility of doing absolutely anything in the yard.  Sounds like a dream right?!  Except for the part where we got in a ‘heated discussion’ over bed layouts.  Or the honest to goodness fight over organic versus non-organic.  Sounds ridiculous right?  It was ridiculous, so ridiculous, we made some final decisions, found a tree we liked, and asked to borrow a truck from a friend to pick up mulch.  Because the first step is always to buy a 15 foot birch with absolutely no plan!  So if you want to follow our dubious planting advice keep on reading!

Materials:

  1. Massive tree
  2. Lots of mulch
  3. Free Plants/seeds/etc
  4. More Mulch
  5. Dirt
  6. Grass Seed
  7. Clearance section of big box stores
  8. Patience (You can substitute arguments here instead)

Before and after of yard

Step 1: Buy a ridiculously huge tree, with no way to transport it, and no real plan for planting it.

To our credit the tree was an amazing deal.  We loved the bark, we loved the idea of having A TREE at least.  While running by the hardware store we also happened upon two yoshino cherry trees.  We though the silver bark might look nice with the white of the birch.  Plus 3 trees!

Step 2: Pray someone is stupid enough to help you transport it…

Oh by the way, can we get some mulch?  Needless to say we had a good friend who not only helped us transport the tree, but get truck loads of mulch.  Notice the ‘S’ on loads?  Honestly, I have lost count of how much mulch we have used.

Step 3: Spreading mulch

Apparently, Adam has not lost track of how much mulch we used. 7 cubic yards of mulch… That is close to 3500 lbs of mulch hauled with trucks, in bags, via camels.  Okay maybe not camels, but we have been hauling mulch all summer long.  On the first weekend we used 3 cubic yards to make the basic beds.  In a perfect world we would have had all the beds prepped with cardboard or newspaper underneath the mulch to smother the grass.  However, we were flying by the seat of our pants, so we simply piled it on.  Our aforementioned friend also helped us spread the mulch along the sides of the house, under the back deck, and make the nice arching and kidney shaped beds around the new trees.  I was called upon to climb/crawl under the front porch to place the mulch. Pro tip: Call before you dig.  In North Carolina simply dial 811.  Every utility will come out and mark the lines for free.  Marking the lines allowed us to plant the trees without cutting the cable to the neighborhood.

First stage of transforming a barren landscape.

Step 4: Continue to rely on the kindness of strangers

It took most of a weekend just to complete stage one of yard transformation.  Stage 1 simply involved mulching, planting trees, and planting a number of freebie plants.  I put the call out on facebook and an email at work asking for anyone who was dividing perennials, had left over seeds, or just had extra plants they wanted to get rid of to let me know.  I would show up shovel in hand and get the plants.  Surprisingly I manged to snag a number of free plants: Lemon balm, strawberries, leaf mulch, 50+ seed packets, ornamental plum sapling, redbud sapling, various bulbs, daisies, etc. It was an amazing amount of plant love from the community.

Stage 1 Complete

To be fair, we also assembled raised beds, put in a trellis, added soil to bare patches, and seeded grass.  Basically lots of manual labor.

We got trees up in here, up in here

If I had only known then what I know now

Beds are great, grass is great, vegetables are great, but that is not really enough to hold down a landscape.  We truly lucked soon after the beds were placed.  We went to one of the big box hardware stores to pick up something (probably mulch) and walked past the clearance plants. Lo and behold they were marking tons down.  I still do not know how we managed to get what we did, but we got close to $150 of annuals and perennials for $30.  Finally we had something to put in the beds!  Which I thought was a great plan, until I realized that I actually had to plant all of them.  Which leads to:

Step 5: Collecting over time

The rest of the landscape has been a complete work in progress for the entire summer. Dig, plant, weed, seed, repeat.  We picked up a beautiful Japanese maple at the WNC herb festival, worked on a chicken coop/castle (post TBD), added stepping stones for the boys.  The usual lawn maintenance and gardening work.  We have added a number of perennials such as blueberry bushes, blackberry vines, passionflower vines, various herbs; some gifted, some  bought.  Apparently, yards aren’t built in a day.  Pro Tip: Find a local rock seller.  A single flagstone can cost $7-$11.  We got ours for about $1 a rock from a local stone dealer.

Stage 2: Complete

As the summer has progressed we now have grass for the boys to play in, vegetables for eating, and flowers to admire.

I can not stress enough that time and water are really what it takes to totally transform a yard.  The hardscapes and beds have given it the frame work, but it will be a few years before all of the plants have matured enough to give a truly lush landscape.  Still I am quite happy to enjoy my hard earned squash, listen to my happily clucking hens, and run my hands through the fragrant lavender.  Stage two of the yard transformation, planting


Posted on Leave a comment

Small Chick Order: How to Pick your Breed

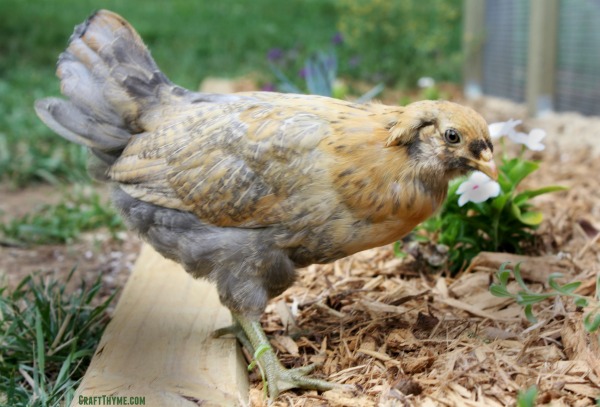
Easter Egger Chicken

Do you have any idea how many breeds of chickens there are?  Neither did we…  Selecting the perfect breed of chicken is not easy.  It is even harder to find the perfect small chick order.  By small,  I mean less than 10 ordered online!  Picking out the breed  and finding a place to order only 5 chickens involved a variety decisions, discussions, and research.  I’ll be honest it was a painful process. Well, at least for me.  Adam just kinda went with whatever I thought we should have.  Way to dodge the responsibility for bad chickens there!

I actually felt overwhelmed by the variety of chicks and underwhelmed by the choices of where I could order from.  I finally broke it down into some easy steps that let us come to a final choice of Easter Egger (Hybrid) chickens from Efowl.com.  If you follow these steps then this will really help narrow your selection if you choose egg laying chickens.  I will fully admit to just glancing over the meat breed selections, so keep that in mind if you use this to help narrow your breed.

Easter Egger Chicken

1. Do you want chickens for eggs, meat, or both?

We wanted egg laying chickens.  That cut our selection a ton.  While I am not entirely opposed to killing my own chickens I am entirely opposed to plucking a chicken.  Hello?! I find chopping vegetables to be more prep work than I want to do in the kitchen.  What are the real chances I am going to go out back and catch dinner? Um… None…

2. Alright we chose egg laying chickens turn to page 52.  Oh wait, this isn’t a choose your own adventure!  Here is the real question: What size chicken do you want?

The following are stats for hens:

Bantams

  • Full Grown: 1-2 lbs
  • Eats: 1 3/4 lbs per week
  • Pros: Need less space in the coop, eat less
  • Cons: Fly, small eggs, may need special consideration in cold weather

Standard Sized (Light Breed)

  • Full Grown: 4-6 lbs
  • Eats: 2 1/3 lbs per week
  • Pros: Many options for breeds, good for warm weather
  • Cons: May need special consideration in cold weather

Standard Sized (Heavy Breed)

  • Full Grown: 6-9
  • Eats: 3 1/2 lbs per week
  • Pros: Large eggs
  • Cons: May need special consideration in hot climates, eat large amounts of feed

You can get plenty of detailed information, but this gives you the initial stats.  We wanted a non-flying bird. Ain’t nobody got time to clip wings and we can’t let them fly around the neighborhood. The lighter breeds seemed like a good compromise.  Decent egg size, but we didn’t have to make a huge coop or invest a ton in feed.  Our climate is fairly mild so they should be fine all year round.

3. Rank the following in importance:

  • Resilience/Health
  • Temperament/intelligence
  • Egg Color
  • Looks

Having trouble ranking? Guess what?!  Me too!  That is how we ended up with Easter Eggers.  They are hybrid chickens, meaning I could never mate them and get more Easter Eggers.  Seeing as roosters are not exactly okay in the neighborhood I doubt we will be breeding chickens anytime soon.  But guess what else this means?!: They tend to be healthy, with even temperaments that are good for kids, and have eggs in blue, green, and rarely pink/brown.  The looks are up in the air…  Which is the only thing I didn’t get with this breed.  It was important to me to have a nice resilient bird.  I have no clue what I am doing! I need a good healthy bird that can withstand a few mistakes on my end.

Let’s say that maybe looks ranked higher.  Have you seen a Polish breed like a Golden Laced Polish?! Crest Yes! Or what about a beautiful feathered leg variety like a White Sultan? Or the long legged beauty of an Egyptian Fayoumis? Yeah… If you are in it for the looks then pick a beautiful breed. They are out there, but the Polish tend to be flighty since they can’t see.  A white sultan requires lots of grooming to look that good, and an Egyptian Fayoumis… Not going to be happy penned in our back yard.  For us it was more work for the beauty.  Maybe after we know what we are in for we can try a fancier breed.

If you are in it for specific egg color most websites will break down their chicken selection by egg color.  That makes it pretty easy.

Intelligence is just up in the air.  I scouted many a forum post at backyardchickens.com and read plenty blog posts my favorite being the ones at Northwest Edible Life. I figure it is like Amazon reviews.  If most everyone says it is a smart good chicken breed it probably is.  There are always going to be the 1 star reviews.

4. Finally and maybe most importantly how many chickens do you want and where do you plan on getting them?

Depending on the time of year and how many chicks you want you may find yourself S.O.L.  Locally sourcing (craigslist and auctions) are the way to go for a small number of chicks, but takes time and often limits your choices.  The internet opens up a lot of options for various breeds, but guess what?!  You want 5 chicks? Suck it.  Most hatcheries have a minimum order of 10-25 chicks.  They have good rational reasons such as needing to keep the chicks warm etc.  So if you want a small chick order (fewer than 10 chicks) your options are slimmed immediately.  You will have to look at some of the specialty websites and choose from their selection.  We looked at the following (these are not affiliate links, just places we checked out)

Meyer Hatchery

  • Pros: Order as few as 3 chicks
  • Cons: Had lots of customer service complaints

My Pet Chicken

  • Pros: Minimum order is 3 BUT…
  • Cons: Minimum order is based on your zip code ours was actually 7

eFowl (Don’t Laugh at the name)

  • Pros: 3, 5, & 10 chick special orders
  • Cons: Not all breeds are available at the special order sizes

The reason I say these options may be the most important factor for ordering is because we lost out on the Easter Eggers on Meyer and My Pet Chicken.  Literally, I had a cart full, went to lunch, came back to buy them and they were sold out of female chicks until July….  If you want a certain breed, at a certain time, in a certain sex, and you only want a few. Good Luck!  It would be way easier to look at the choices available from the various websites and choose from there.

Finally, you can always ask other chicken owners.  I asked a former co-worker of mine for advice and she was heartily behind the Easter Eggers for the reasons supplied above.  It is always good to get an experienced chicken owner’s opinion.  If you don’t know any there are plenty of chicken forums to read like I mentioned above.  Good luck selecting you breed!


Posted on 1 Comment

The Chicks Have Arrived!

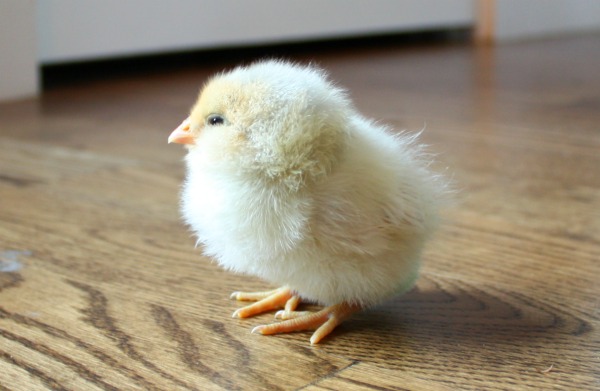
Yellow Easter Egger Chick

In case you are not following my Facebook Page, I have a huge announcement: The chicks have arrived!  5 puffy balls of Easter Egger cuteness arrived in the mail yesterday.

Alright, maybe that isn’t a huge announcement, but it is a big deal to us.  We are embarking on raising some urban, backyard chickens starting with chicks.  While, I grew up out in the country and spent many an hour terrorizing my neighbors chickens.  It is a hell of a lot of difference from being responsible for their welfare.  So I would say my experience with chickens ranges form next to none and Adam’s to none at all.  With that combined knowledge we seem like the perfect candidates to raise a small flock?! Don’t we?!

What we lack in practical knowledge we a desperately trying to learn from the internet and books.  That has meant spending countless hours planning a nice coop (yet to be built), pricing out supplies, choosing a breed, and finding a hatchery.  In case any of you want to follow along on our chicken progress, I’ll be posting the ins and outs of what we learn.  This will hopefully distill those hours of learning down to an easy guide to help you make the decisions to raise (or not to raise) your own backyard chickens.

Until then check out some of the fluffy cuteness:


5 Easter Egger Chicks
5 little balls of cheeping fluff. I thought it would be annoying, but their little peeps are quite relaxing. They are 3 days old!


Tiny Easter Egger Chick
A bird in the hand? Look at how tiny they are!


Yellow Easter Egger Chick
Yellow Fluff! Chick perfection.
Posted on 5 Comments

How to Make Raised Beds or Wooden Planter Boxes

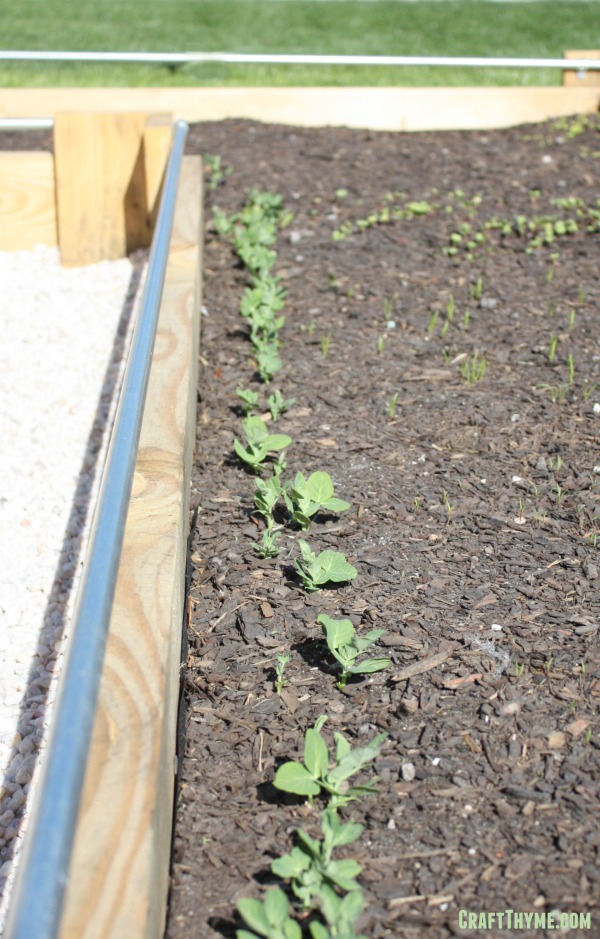
Raised beds with peas

[sam id=”1″ codes=”true”]

Do you want to know how to make your own decorative wooden planter boxes or raised beds?  Well then let me give you this How To Make Raised Beds tutorial. But first a little background! I have never done raised bed gardening before.  My family had always preferred to till or double dig a garden plot.  So when faced with the hard-pottery like surface of my yard I assumed it would be a year or two before I could remediate enough soil to plant a nice vegetable garden. We have been more focused on attempting to get some grass to grow and beds mulched before the entire yard became a pile of weeds.

I am sitting at work when this text comes through:

Hauling lumber in a CRV
And that is how you haul an ungodly amount of lumber in a CRV and take a selfie at the same time

Adam came through with planter boxes.  Not just some crappy raised beds!  No I was getting full, wooden, decoratively accented, planter boxes.  You might ask why we are about to get, yet another, Adam tutorial.  Well let’s face it folks, spreading mulch and planting 10 billion strawberries just doesn’t make for that great of a tutorial!  Which is all I have done the last few weeks, mulch, weed, plant, repeat.  Good for the soul, not so good for the interwebs fame.  On to the tutorial:

How to Make Raised Beds or Wooden Planter Boxes

DIY raised bed or wooden planter boxes

Material List

(Yet again furnished by Adam someone who actually makes note of these things)

  • Lumber:
    6 – 2″ x 8″ x 12′ untreated lumber. Unit cost: $8.05 Total cost: $48.30
    2 – 2″ x 8″ x 10′ untreated lumber. Unit cost: $6.63 Total cost: $13.26
    1 – 2″ x 4″ x 8′ untreated “cull” (second) lumber Discounted cost: $0.94
  • Metal Conduit: 10 – 10′ x 1/2″ . Unit cost: $2.30 Total cost: $23.00
  • Compression Coupling: 5 pack 1/2″ Unit cost: $2.16
  • Conduit Tube Straps: 25 pack 1/2″  Unit cost: $3.75
  • Wood Screws:
    1lb pack of 2-1/2″ exterior wood screws Unit cost: $8.47
    2 – #10 x 1 Wood Screw 10 Pack Unit cost: $1.18 Total cost: $2.36

Total Material Cost: $102.24 (99 square ft of garden space)

We can totally get into a discussion about treated versus untreated if you want.  Personally I would rather be on the safe side.  You can use expensive cedar etc if you like but I would read the analysis in this article about Raised Beds and False Economies from Northwest Edible and make a decision on the material you want to use.  We went with the cheaper, yet more often replaced version.

Cut List

  • Lumber:
    2 – 2″ x 8″ x 12′
    2 – 2″ x 8″ x 9′
    2 – 2″ x 8″ x 3′
    4 – 2″ x 8″ x 6′
    10 – 2″ x 8″ x 10″
  • Conduit:
    8 – 6′
    2 – 9′
    2 – 3′
  • Cull lumber:
    7″ sections to act as joining block in bed corners

Step 1: Cut Me Right Back Down to Size

I might just have aged myself with that title…  However, the first step is to make all your cuts, if you didn’t get the home improvement store to do it already.  As I mentioned in the matching Wooden Trellis post, it might be a good idea to get them to cut it.  Otherwise you need specialty blades and safety goggles for the conduit especially.   Please be careful and cut responsibly.  I don’t want anyone to lose a finger and/or sue us.  You decide which one worries me the most.

Step 2: Sides, Sides, Everywhere sides

Assemble each side as follows.  Screw two decorative end pieces to each end of the lumber.  They should be flush at the bottom, 1.5 inches on the side, and stick up 2.75 inches above. As Adam had to explain to me an 8″ board is really only 7.25 inches.  Hence the 2.75″ height on the 10″ cut end caps. Trust me I argued the math on that one before he reminded me about the measurements of dimensional lumber.   You can see the edge spacing a bit better in the next couple of pictures if my verbal description didn’t make sense. Note: He even made the screw holes into nice satisfying triangular shapes.

After you have all the wood joined, take your matching pieces of conduit and strap them down with the conduit tube straps.  Pick a height you think looks good.  Adam wrestled with the idea of making nice wooden joins to hold the conduit.  I reminded him that A) it would rot that much quicker and B) this was meant to hold dirt and plants.  Not survive the scrutiny of furniture design.  No one was going to come take points off for using straps…  The plants would cover the interior anyway!  My logic won the day and made the project much easier and faster.

Wooden Planter Box Side

Step 3: Screw It

Take your sides and overlap each piece the 1.5″ you left and screw them together, or take your cull lumber and use it as a block to join each side by screwing from the inside to the outside.  What is the difference?  Option 1 results in extra screw holes on the outside but is easier to hold in place and screw.  Option 2 leaves no new holes on the outside but really takes two people to hold all the pieces together and make a join.  We actually joined them together both ways.  The road facing side has the pretty joins as I was home and able to help at that point.

REMEMBER, you are going to want to screw the pieces together very near the final destination.  Like within inches!!!!  You are only going to want to scoot and shimmy these to make them square when all assembled.

joining wooden raised beds
Note the 1.5 inch overlap. You can screw those directly together of place your 7″ block on the inside and screw out to minimize visible screw holes.

Step 4: If I’m Lining I’m Crying

This next step is purely optional.  My yard is not level, not even close to level.  And I personally wanted as much of the box to show as possible, which means not burying it in the yard.  We could have leveled the ground but who the hell has time for that?  Or you can take some landscaping fabric and staple it to the interior.  I am sure the idea of landscaping fabric is not new BUT I felt pretty smart figuring it out on my own.  I took the 3 ft wide section and cut it into 1/4 sections that were 7′ to 13′ long.  Then I stapled the hell out of it along the interior bottom of the wood.  Why?!  Because usually I loathe landscaping fabric with a passion but I didn’t want all the dirt to wash out of the un-level areas.  It does have its uses. Note: I made sure not to go to far into the box either in case an intrepid root want to attempt to penetrate the godawful dirt below.

Once you have everything together and fabric stapled you will need to kind of shimmy all of into perfect square. This is a great time to argue about actually square versus what looks square in your yard.  It is even a more excellent time to keep readjusting the square after looking at it from various angles and arguing some more.  I bet you can guess this is about the part in the process that I came home.  I have the unique ability to complicate a project in less than .002 seconds.  Call it my DIY super power.

lined planter boxes

Step 5: Fill ‘Er Up

We bought soil (see the aforementioned craptastic clay lot we own) and it was my job to fill the beds.  We did throw in some lovely clay soil at the corners and to hold down the landscaping fabric.  Why?  Because we were planting some trees at the same time and it was so dang windy that day.  Seemed like a good place to dump it and hold it down.  On top of that I poured bag after bag of garden soil and mixed in some compost.  Note: The soil will settle so make sure to fill it slightly higher than you want for the final level.

DIY decorative raised beds
Just note… You should really get everything square before you offload the dirt like this. Else you will be spending your time moving the dirt twice. Ask me how I know…

The kids were so excited to plant seeds!!!  And I have been pleased by how weed free and easy to maintain they have been.  It has not hurt that I get compliments by all the joggers and walkers that pass by!  Hopefully I’ll have a nice small harvest to show for all this work!

Raised beds with peas