Posted on 15 Comments

Re-homing An Unwanted Rooster

10 tips for dealing with an unwanted rooster. How we rehomed our cockerel. #chickens #rooster

Despite our best efforts and attempts at denial we had to admit that we had a rooster among our hens.  We had wondered about the growing comb on his head and larger tail, but the crowing that began right around 11 weeks of age was the final straw.  We had to re-home the unwanted rooster pronto or find out if we really were capable of culling the flock.  If you are trying to deal with an unwanted rooster you can scroll to the bottom for 10 tips on how to deal with your unexpected cockerel.

Being responsible people we tried the absolute best we could to not have a rooster.  We knew it was illegal to have a rooster in town so we bought from a company that guaranteed 98% accuracy on sexing of small batches of chickens…  Clearly we should have bought lotto tickets the day we ordered our chicks since we fell in that lovely 2%.  We were obviously concerned that we would be unable to find a home for Ginsburg (yes we had a rooster named after Ruth Ginsburg, the irony…).  After asking around our facebook friends and getting no where we put a post up on our local freecycle boards.   With in an hour we had a bite and we were sooooo lucky.

10 tips for dealing with an unwanted rooster.  How we rehomed our cockerel. #chickens #rooster
Around 8 weeks we started to get nervous… See the tail feathers? None of the other hens had those.

A gentleman with a 15 free range hens wrote that he had been considering a rooster; could meet us after work that very day and take the rooster off our hands.  Personally, I did not care if he came in a van marked “Chicken Meat for Sale”. We needed rid of the unwanted rooster before we became the neighborhood pariah.  He had already been crowing all weekend long.  When our rooster savior and his family appeared we spent a bit chatting and I really thought our rooster was going to go to a good family.  His name was Adam too so that alone seemed like good luck.  They were so thrilled to have him and told us all about their flock.

10 tips for dealing with an unwanted rooster.  How we rehomed our cockerel. #chickens #rooster
Oh yeah. That is clearly a rooster. No doubt about it.

Little did we know that Ginsburg was going to the proverbial motherland of hens with awesome chicken owners. Chicken-Adam has been excellent.  It has been like the open adoption of roosters.  He has awesomely let us know how he fared his first night, how he was learning to integrate with the flock, asked us some questions about his breed, and sent us some amazing photos!  If I had to end up with a rooster I couldn’t be happier with how it turned out.

10 tips for dealing with an unwanted rooster.  How we rehomed our cockerel. #chickens #rooster
Now this is a happy rooster. You can see his flock and free range home in the background. So lucky to have found such a great owner for him.  Thanks Adam for keeping us up to date!

If you do not end up as lucky as us here are some ideas on how to take care of your unwanted rooster!

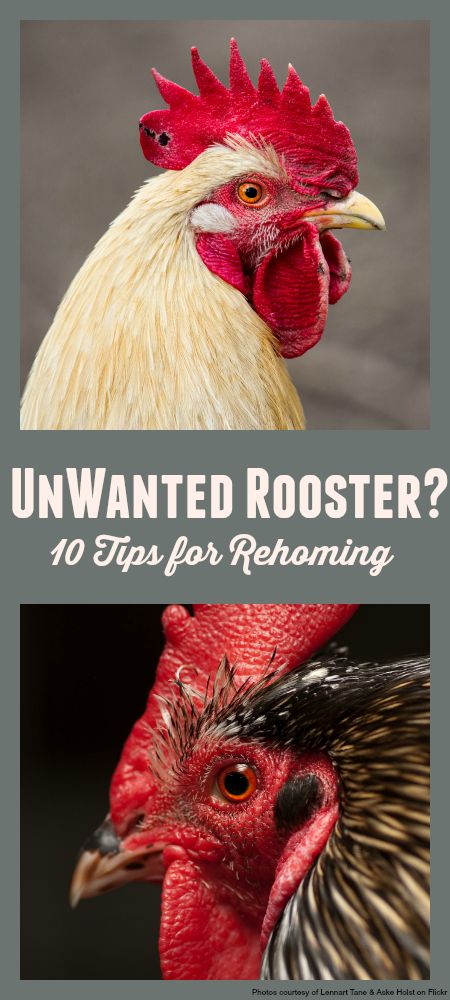
10 Tips on Re-Homing Your Unexpected Rooster

  1. Craigslist – You might be able to get $5-$15 for an unwanted rooster, but your best bet for quick placement is FREE.  Make sure to hit the free section and the farm + garden.
  2. Freecycle – Obviously you will need to offer the rooster for free on this site.  It is not quite as ubiquitious as Craigslist, but our Asheville, NC group seems pretty active
  3. Facebook groups – We have a local and very active group (+16K members) who buy, sell, trade and generally chat.  They help rehome all types of animals on the West Asheville Exchange.  If you search the name of your town or a close city you can usually find a number of groups to join.
  4. Local Feed Stores – They probably will not take your rooster BUT they know every poultry keeper in the surrounding area.  Ask them if they know anyone looking for a rooster.  If you are willing to let the bird be culled they will often know a farm or two that take free roosters for the eating
  5. Do the Deed – Oh yes, the traditional way to get rid of unwanted roosters!  Frankly, as a chicken owner I feel like you may need to know this technique even if you never plan on killing your chickens.  If one of them gets incredibly hurt or sick you may need to complete a mercy killing.  I thought this video was not terribly graphic but gave a good idea of how to complete the deed.
  6. Call your local animal control – They may take the bird (which will likely end with its death) or know local organizations that will help.
  7. Contact local 4-H groups –  Please do not do this is you have an aggressive rooster, but if you have a nice one then their may be kids looking for a rooster for their flock.
  8. Photos – With any of the above posting places you need photos.  Let me repeat add a photo.  People want to see what they might be getting.  A nice, healthy, plump rooster is much more appealing than a text ad.
  9. Words – Although I think a photo is a key ingredient in re-homing a rooster,  the text you type is also really important.  You also need to tailor it for your audience.  The local facebook group will band together if you have a good reason to need help.  I would have made certain to discuss how gentle he was, how good with the hens, the attempts we had gone to to NOT have a rooster etc.  Craigslist I would have made sure to discuss statistics like size, breed, feed, general health.  Make sure to give the information each platform needs and wants
  10. Bundle your rooster – If you can stand to lose a hen, or feed, or a cage etc it can make the offer that much more attractive.  Especially if the rooster is a fancy breed.  You can sell a breeding pair or just require that if someone wants to buy a hen they have to take the rooster too.

Bonus tip:

American Poultry Association – I am adding this as a bonus option.  They deal with clubs all over the US, but they are really only going to be helpful if you have a very nice purebred rooster on your hands.  You can look through a list of contacts by state to contact.

10 tips for dealing with an unwanted rooster. How we rehomed our cockerel. #chickens #rooster


Posted on 15 Comments

Fireplace Mantle Makeover

Completed wooden mantel

When we first bought our home, Brianna and I loved all but two things: the accent wall color in the living room and the fireplace mantle.  The accent wall was easy to take care of – just simply slap on a coat of paint!  (Valspar Winter Flannel for those curious minds.) Fixing our “dinky mantle” however required a little more work.  It, and the fireplace surround, were supposedly built to mirror the built-in shelves to the right of the room. Apart from being white, we just weren’t seeing it.  So in keeping with our theme, we took a day and decided to transform our mantle into something that really stood out in the space.

The Before: Behold the “Dinky Mantle”

This is the mantle we started with

Supplies

  • 3 – 1″ x 8″ x 8″ White Pine Lumber
  • 2 – Foam Brushes
  • Rust-Oleum Dark Walnut Stain
  • Rust-Oleum Semi-Gloss Polyurethane
  • Cotton Rags (for stain removal)
  • 1-1/4″ Brad Nails
  • Brad Nailer
  • Air Compressor

A few notes about your lumber selection:
You can work with any type wood.  White pine tends to be the most affordable of the “furniture grade lumber” and it fit into our budget the best at the time.  It’s a good standard lumber and it stains well.  If you hope to achieve a consistent look and feel with your finished piece, try to pick pieces of lumber with a similar wood grain.  The sizes and lengths noted above were what we needed for our application/space.  Your needs will most certainly differ.

Step-By-Step Instructions

This project is what I like to refer to as a beer project.  Outside of operating a saw and a nail gun (which you should ALWAYS do sober – 100% sober), there are a lot of “stain, wipe, dry” and “poly, dry, poly, dry” steps during which you should have ample opportunity to enjoy a tasty beverage.

Step 1: Measure

Ok, so you probably did this prior to purchasing your lumber in order to ensure you bought enough, but when it comes time to cut your lumber, you want to be certain that you’ve measured correctly. Measure again, take note of the dimensions you need to cut, translate those measurements by marking your lumber, and get ready to break out the saw of your choice.

measure-mantel

Step 2: Cut!

Carefully cut your wood to your desired dimensions.  For our project, our cut list was as follows:

  • 1 – 64″ (Mantle Front)
  • 2 – 61″ (Mantle Top & Bottom)
  • 2 – 7-1/4″ (Mantle Sides)

Yes, this left quite a bit of wood left over.  Think: FUTURE PROJECT!  You may be able reduce waste by purchasing longer lumber, but I very often have trouble finding straight lumber of this dimension in longer lengths.

Step 3: Stain and Rub Your Wood

With everything cut, break out your favorite shade of wood stain.  Apply your stain as per the provided instructions.  Wipe off the excess product after 2-3 minutes.  If you’re happy with the color, great!  If not, wait the indicated number of hours, apply a second coat, and rub everything down again.

Rubber gloves are essential to keeping your skin unstained. Somehow, I always forget this…

stain-wood-mantel

Step 4: Break out the Poly

When you’re happy with the look of your stain, it’s time to apply a protective coat of polyurethane.  The type of finish is up to you; matte, satin, semi-gloss, or gloss.  We’d played around with matte poly finishes in the past and weren’t too happy with the end result.  For this application, we ended up going with a semi-gloss finish and were thrilled with the final look.

It may take more than one coat of poly to achieve a uniform coat.  Let the polyurethane dry as per the manufacturer’s instructions and reapply.  Repeat until you’re happy with the resulting finish.

Step 5: Assembly and Installation

This is where all of your hard work comes together, and for us, this step was a breeze!  Our new mantle is simply a cover-up of the existing, so all of our major mounting was already taken care of for us.

  1. Starting with the top, center the piece of lumber you selected for this position over your existing mantle.  Using your brad nailer, fasten this board to the existing mantle.  Be generous with your use of nails; they’re tiny and you won’t see them.
  2. Add your side panels by nailing them to the ends of the top panel you just installed  Carefully align your nail gun and you should be able to shoot straight nails fairly easily.
  3. Mount your front panel.  Again, carefully position your nail gun, and you’ll shoot true. It helps to have a partner here to hold and square things up.
    • Pro tip: Don’t yell at your helper.  Treat them nicely.  They work better in pleasant working conditions.
  4. Install the bottom panel.  With all other facets in place, your bottom panel should fit in like a glove.  Shoot and be true.

mantel-assembly

Yes, I could have put everything together beforehand, simply slid the entire piece over the existing mantle, and nailed things down.  However, doing it the way we did allowed for on-the-spot micro adjustments and re-squaring.  So yes, more effort to do it my way, but a much “straighter” final product.

Step 6: Beer and Admiration

My favorite step! Grab another pour of your favorite beer, sit back, and admire your handiwork!

Completed wooden mantel

Of course, we didn’t stop there…

We loved the look of our new mantle; however, that fireplace surround just didn’t stand up to what we’d just created.  It was going to have to change….  Yippy!  Another project!  Stay tuned for our follow up post on how we continued to transform our fireplace to fit our style.

Posted on 21 Comments

How to Make a Glass Terrarium

How to make a DIY Glass Terrarium

I will admit to having a plant obsession, so, it was only a matter of time till I started in on glass terrariums.  But what fueled the new obsession?  Adam and I recently got married and while we agreed not to get gifts for each other someone decided to get me a new book on terrariums (*cough* Dork *cough*).  Holy plant porn!  Not every project was to my taste but all of them were inspiring.  I had never thought of decorating glass terrariums with feathers, sand, bark, etc.  It opened up a new world of decoration that allows me to bring plants indoors in a modern display.  While it is fairly easy to create a glass terrarium there are some tricks that I have discerned that make the process a LOT easier.  On to the tutorial:

DIY Glass Terrarium

How to make a DIY Glass Terrarium

Glass Terrarium Supplies

There are really three basics that you must have outside of a glass container:

  1. Plants*: these are some succulents I have been propagating and some air plants we picked up at a recent craft festival
  2. Soil*: Potting or fast draining cactus mix; unless you are using air plants
  3. Drainage Material
  4. Container: I went to Goodwill and scoured the shelves.  I was able to find a number of interesting glass containers for $1-$4.  Just make sure they are clear glass.  Tinted or colored glass can mess with the plant photosynthesis

Additional items that make the terrarium look really good:

  • Moss: Hardware stores often sell sheet moss cheaply.  Pretty reindeer moss is available in most craft stores.  We waited till we had a 40% off coupon and got a large bag.
  • Sand: Craft stores have a number of colors.  I also might try dyeing sand like I do in this tutorial, however, I would likely keep that to air plants so I do not wash out the color when watering.
  • Rocks
  • Feathers
  • Wood
  • Sea Shells
  • Etc : Anything that can withstand water or, if using air plants, you are pretty much unlimited

How to make a DIY Glass Terrarium

Step 1: Planning

A little planning goes a long way with a glass terrarium.  First, look at your plant and the conditions it needs to survive.  I also tried to find a plant that had a shape that complimented my tall glass container.  After matching up your plant consider HOW you will be planting it.  You can pour the dirt in the container but if you can not fit your hand in there you will have some issues. Long cocktail stirrers or chopsticks can help press the dirt firmly around the plant.

Step 2: Keep it Dry

My first big mistake was trying to plant a glass terrarium with damp materials…  Ugh.  Everything sticks to the glass, or plants, getting everywhere and becoming near impossible to remove until it is dry again.  Start by placing your drainage material at the bottom, and layering your dirt next.  I placed a layer of bark between the rocks and dirt to keep the distinct bands.  That step was purely for aesthetics.  Next plant the plant but do NOT water yet.

Step 3: Clean and Tidy

If you have not watered, then you have the opportunity to take a soft cloth and wipe off the glass.  You can also blow SOFTLY through a drinking straw to clean dust or move sand around. Removing the dust and dirt from above the soil line is what gives the terrarium a clean modern feel.  Take this opportunity to place smaller decorative objects.  I used some reindeer moss and a small (live) hen and chick next to the main succulent.  You could also place rocks, a layer of sand, etc.  The only limit is space, ability to withstand dampness, and your imagination.

How to make a DIY Glass Terrarium

Step 4: Tips and Tricks

Time to water!  This is where everything can and has gone South for me.  Water too fast and you end up making holes in the soil, or flooding the entire terrarium.  Trust me on this one, flooding it is bad, bad, bad.  I was talking instead of paying attention (imagine that) and ended up floating all my plants out of the soil and mixing in my sand.  I had to dump everything and start over.  The easiest way to insure a non-messy watering is use a spray bottle and let it trickle down the glass.  Otherwise, be super careful to only add a trickle of water.

Notes:

Make sure to pay attention to the microclimate you just created.  The sun can get very warm through the glass and/or the environment can easily get too wet or dry.  The nice thing is that the container is glass so you can actually look at the soil and drainage material to see your water level.  Also, remember there is not a lot of nutrients (as in none) coming into your terrarium.  You may need to add a liquid fertilizer every 3-4 months to keep your plants nice and healthy.

If you want some amazing inspiration this was the book I got as a gift:*


Otherwise a quick glance through Pinterest can really give some great ideas to get you started.

How to make a DIY Glass Terrarium

Posted on 4 Comments

Building an Industrial Table Lamp

How to DIY an industrial table lamp. #industrial #table #lamp

Unexpected Accent Décor

As you’ve seen from our previous posts on achieving an industrial décor (check out Part I, Part II, and Part III if you haven’t already), Brianna and I are always looking for ways to carry our theme throughout our home.  At the same time, we also don’t want to be ALL UP IN YOUR FACE about it either.  The last thing we want is for it to feel like you’re walking into a warehouse when you enter our home.  So how do we find that careful balance?

Focus and subtlety. We try to be very careful not to go overboard in any single space.  Our mantra:

  • If you’re going to have a big piece in a room – limit it to one big piece.
  • If you need something more – add interesting, eye-catching accent pieces as appropriate.
  • Add items you love/have sentimental value!!! (Added by Brianna)

The goal is to keep the focus where you intended (that’s why you went with that big piece in the first place, right?) and to add pops of décor that are interesting and don’t pull your focus (for too long).

You recently saw how we added a salvaged wood headboard to our master bedroom.  In this post we’ll take a closer look at one of our favorite accent pieces in our bedroom, and more importantly, show you how to build it!

Building a Meat Grinder Lamp

Yes, we built a lamp out of a meat grinder.  Why?  Honestly, I was walking through the Antique Tobacco Barn, saw an awesome, rusted old meat grinder for a great price and declared “I’ll do something with that one day!”  That something turned out to be a bedside lamp.  How’d we do it?  Here you go!

Supplies

  • Meat Grinder (one that has seen better days)
  • Steel Wool
  • Light Socket
  • 3 feet of 18-Gauge Lamp Wire
  • 2-Wire Electrical Plug
  • Edison-Style Light Bulb
  • Super Glue
  • Foam Paint Brush (optional)
  • Small Amount of your Favorite Paint Color (optional)

Preparation

Depending on how loved or neglected your meat grinder was in its past life, you may or may not have a lot of work ahead of you.  Our grinder had a lot of surface rust, an unknown white substance, and a few “bits” still rattling around inside. While we wanted to keep the repurposed look-and-feel, we wanted to clean things up a bit before putting it on the nightstand and touching it every day.  Enter the steel wool.

Dismantling your meat grinder should be pretty easy.  On any given model, there are typically only 5-6 parts, none of which should be sharp of warrant the use extreme caution.  Remove each component, and get to scrubbing with the steel wool.  The steel wool will do a great job at knocking away much of the neglect of the years while still preserving the harsh metallic look.

Our grinder’s wooden handle was pretty (ok, really) grimy.  As an optional step, or for a pop of color, consider sanding or painting your grinder handle.  We chose to use the same orange from our Pantry Door Project.

When done, wipe down your pieces and re-assemble the meat grinder.

How to DIY an industrial table lamp. #industrial #table #lamp

Assembly

Step 1: Wiring up your light socket

Light sockets are fairly easy to come by in a number of different styles from your local big box store.  We had ours from a past project where we had applied a faux cast iron finish.

Fortunately, the skill level required here is novice.  I know this is scary, but I promise you, it’s not.  You can do this!

  1. Remove the base and top sheath of the light socket.
  2. Slide the base of the light socket onto your lamp wire.  (DO NOT SKIP THIS STEP)
  3. Strip one end of your lamp wire, twist the wire, and shape it into a “candy cane” that will hook around the one of the screws of the light socket.
  4. You’ll likely need to loosen the screw on the light socket in order to hook your newly curved wire.
  5. Do this, then tighten the screw with the wire snugly placed between the screw and the metal backing of the socket’s center.
  6. Repeat for the other wire and side of your socket.
  7. Replace the top sheath of your light socket and push it down into the base.  You should feel/hear a click when the socket is re-attached.

Step 2: Wiring up your lamp’s plug.

This step is very similar to the light socket wiring.  As in exactly similar.  Here are your easy to follow steps:

  1. As you did before with your socket, remove the housing from your electric plug.
  2. Slide this housing over your lamp wire.
  3. Again, strip one end of your lamp wire, twist, curve, hook, and screw.
  4. Repeat for the other side of the plug/wire.
  5. Replace the plug housing.

Your lamp circuit is now complete! At this point, you can test your new creation by adding a light bulb and plugging in your lamp.  Utter the phase “Let there be light”, turn your switch, and be amazed at your ability to create light!

Step 3: Attaching your “lamp” to the meat grinder

Nearly all meat grinders have a bolt at the bottom (our new top) that is used to mount the grinder to a table or counter.  If not already removed, take it out.  Feed the other end of your lamp wire through this hole.  Get geared up for more wiring!

Bring out the super glue!  Admittedly, we used Gorilla Glue, but anything will likely work.  I like Gorilla Glue because it’s not activated till you add a little water.  It’s my way of making sure that I don’t glue myself to myself.

Unplug your lamp!  This isn’t completely necessary, because as you now know, the actual electrical connections are inside the socket, but we always err on the side of caution.

You’ll want your socket to sit directly on top of the former bolt hole.  As you can see from the photo, while the very bottom of the socket just BARELY fits inside the hole, a majority of the socket rests on top.  And that’s okay!  Add a good drop of glue and set your socket on top.  Gravity was enough to assist us in the drying process, but clamping may be necessary.  Let your baby dry as long as you can.  I know it’s exciting, but this is something you’re going to use regularly; let is sit so it can take the brunt of regular use.

How to DIY an industrial table lamp. #industrial #table #lamp

Step 4: Completion and Admiration

When your lamp is dry, go ahead and add your favorite light bulb.  We’ve collected more than 10 different styles of Edison bulbs over the last few months and opted for the “Christmas Tree” filament bulb.  Plug in your lamp, flip the switch, grab a libation of your choice (wait until after the electrical work is done for this step), flip the switch, and admire your handiwork.

Pro tip: Buy Edison-style bulbs on eBay.  We were able to snag our bulbs for around $2 each as opposed to $7 each in your big box stores!

How to DIY an industrial table lamp. #industrial #table #lamp

Posted on 11 Comments

Achieving an Industrial Décor with Black Iron Pipe – Part III

Tutorial on creating iron pipe curtain rods and pipe bannisters

In Part I of this series, you got a glimpse of how Brianna and I transformed our bare bones bathrooms with fixtures constructed out of black iron pipe.  In Part II we tackled an affordable way to craft standard and extra-long curtain rods in our living room.  Here in Part III we’ll take you upstairs and show you how you can continue this theme by installing industrial banisters sturdy enough to handle everything our four boys can throw at them.

Tutorial on creating iron pipe curtain rods and pipe bannisters

Industrial Banisters

The one accent that we wanted to add to our home “just because” was an industrial banister.  It wasn’t a need at the time, but we were really digging the theme that we’d started and the standard white painted banisters just weren’t doing it for us.  They were cheap, construction-grade quality, and after two days had gauges and chips in the paint from moving in.  Imagine what that while would look like after daily use from a family of 5 and a half – Ick!  So in a bold leap of faith, we tore down the two existing banisters, plastered and painted the walls, and attempted a statement piece by using 1-1/4″ black iron pipe to craft two new banisters.

Supplies

Assembly and Installation

Fortunately, assembly and installation is super easy.  That is, assuming you have a helping hand…  Preferably one that won’t get upset at you easily when you slip up and accuse her of not holding her mouth right.  (I promise, I really do love her.)

Step 1: Measure the Distance

Unlike the earlier projects, measure the distance you wish to cover first. Why? For this one, you’ll have to assemble everything before you mount anything to the wall.  By the time you add in additional the pipe fittings, you can expect the final piece to be 2-4″ longer than you measured.  Be sure to account for that when you head out to get your pipe.

Step 2: Assemble your Banister

  1. Connect a nipple to a flange.
  2. Connect an elbow to the other side of the nipple.
  3. Hand-tighten everything, then back it out just a little bit.  You’ll need a little flexibility to achieve the right angle when mounting your new banister to the wall.

Step 3: With a Willing Partner, Mount your Banister

I cannot stress how important it is to have 1) Someone’s Help, and 2) Heavy Duty Drywall Anchors during this process.  If you don’t have either, don’t proceed until you do.  Pipe of this width and length is heavy and awkward to handle.  We don’t want you to get hurt or damage your walls before you get to enjoy your new banister – after all, you’re so close to being done!

  1. With your partner, hold your new banister against the wall in the location that you’d like to mount it.
    • If you slightly loosened your elbows in Step 2 you should be able to get the perfect angle you’re looking for.  The fact that there is some wiggle room in the pipe parts won’t matter as soon as you have it mounted to the wall.
  2. Using a pen, pencil, crayon, etc., mark the hole locations of the flanges on each end.
  3. Remove the banister and drill out each hole as per the instructions on the drywall anchors you purchased.
    • Note: The anchors we purchased could sustain a sheering force of up to 142 pounds.  Each.  Yes, this was necessary; we have 4 boys.
  4. Install the drywall anchors as per the provided instructions.
  5. Nicely ask your partner to help hold the banister back up to the exact previous location and screw the banister to the wall/anchors.

Step 4: Cleanup and Admiration

Initially the pipe may be a little gunky and dirty from the hardware store.  Give it a good wipe down.  If it still feels a little odd to the touch, apply the secret rub:  Wax Paper.  Take a length of wax paper, wrap it around the banister, and (yes, I’m going to say it) wax your rod.  After you finish, it – and you – will feel much better.  Grab a beer, stand back, and admire your work.

Total Cost: $40.99 each

Tutorial on creating iron pipe curtain rods and pipe bannisters

Tutorial on creating iron pipe curtain rods and pipe bannisters