Posted on Leave a comment

A Felt Christmas

We want to wish you a Merry Felt-mas!  While much of our Christmas decor was Star Wars themed the other side of the house was all about felt Christmas.  I fell in love with some small felt Christmas birds a couple of years ago and the felt just grew from there.  Now we have even more felt birds, banners, trees, wreaths, table runners…  The felt list goes on and on.  You name it and we have felt Christmas’d it.  So to finish out this year’s Christmas posts and give you a final tour we welcome you to our felt Christmas.

Felt Christmas Decorations

In keeping with the felt Christmas theme we try to keep everything simple, cozy, and shades of red, green, and white.  The mantel features enough stockings for our family of six, a simple cut fabric banner, felt wreath, and some little felt animals.  We have a few Christmas pillows, that while not felt, have a warm crewel embroidered snowflake and birds.  Oddly, enough I don’t really even like birds that much IRL.  Apparently, I just like the felt ones.

Felt Christmas Mantel

In case you need some of your own felt Christmas birds I found these adorable ones on Amazon. (Affiliate links to follow)

Felt Christmas Birds

Since this is our main living room we put the live Christmas tree in there.  You will notice that the wreath is hung with the same ribbon on the tree.  I try to be all uniform and snazzy like that.  I have finally managed to replace 95% of my plastic ornaments with glass ones.  If you look closely you can see some mercury glass ornaments with everyone’s initials.  That was a splurge (even when they were on sale) from Anthropologie last year.  To add some pops we have started collecting white ceramic and glass ornaments.  Nothing really pops like white on a dark green tree.  Adam and I spent a lot of time carefully placing and re-placing each other’s ornaments.  Until we gave up on either of us getting them exactly like we wanted them.  Compromise is the soul of Christmas right?

Mercury glass letter Christmas ornaments

We add LOTs of lights (Cause why not make it glow like a thousand suns?!), crystals, but also some pretty cardboard stars to keep it glimmery but in keeping with the rustic felt Christmas theme.

Red, white, and gold Christmas tree in a felt Christmas living room.

The TV stand features a cut snowflake runner in… you got it… red felt.  With a matching tree like the one on the mantel and, of course, more felt animals.

Finally the bookcase showcases my true obsession with felt animals.  In case the fox and squirrel vignette wasn’t enough we also have a quartet of birds in felt camping and snow gear.  Don’t worry there are also Christmas books for the kids on the bookcase and a nice wooden ‘JOY’ sign to break up all the felt goodness.

Felt Christmas Animal Vignette

So if you are feeling our felt (and even if you aren’t) we just want you to know we wish you a Merry Christmas and a Happy New Year… felt Christmas style!

–Sincerely,

Adam & Brianna

Felt Christmas Birds

Posted on 15 Comments

Fireplace Mantle Makeover

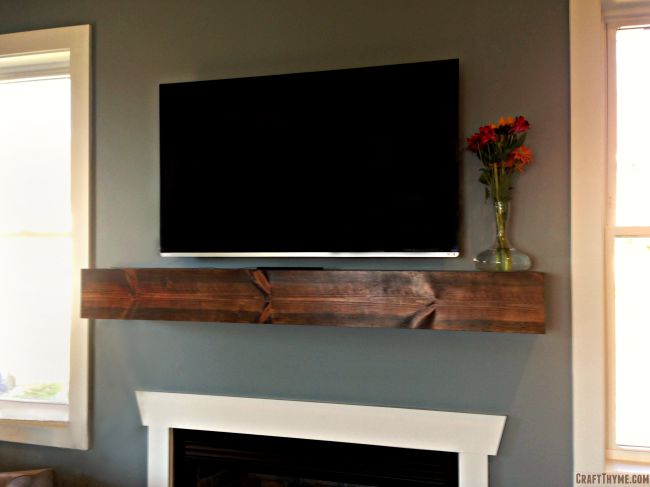
Completed wooden mantel

When we first bought our home, Brianna and I loved all but two things: the accent wall color in the living room and the fireplace mantle.  The accent wall was easy to take care of – just simply slap on a coat of paint!  (Valspar Winter Flannel for those curious minds.) Fixing our “dinky mantle” however required a little more work.  It, and the fireplace surround, were supposedly built to mirror the built-in shelves to the right of the room. Apart from being white, we just weren’t seeing it.  So in keeping with our theme, we took a day and decided to transform our mantle into something that really stood out in the space.

The Before: Behold the “Dinky Mantle”

This is the mantle we started with

Supplies

  • 3 – 1″ x 8″ x 8″ White Pine Lumber
  • 2 – Foam Brushes
  • Rust-Oleum Dark Walnut Stain
  • Rust-Oleum Semi-Gloss Polyurethane
  • Cotton Rags (for stain removal)
  • 1-1/4″ Brad Nails
  • Brad Nailer
  • Air Compressor

A few notes about your lumber selection:
You can work with any type wood.  White pine tends to be the most affordable of the “furniture grade lumber” and it fit into our budget the best at the time.  It’s a good standard lumber and it stains well.  If you hope to achieve a consistent look and feel with your finished piece, try to pick pieces of lumber with a similar wood grain.  The sizes and lengths noted above were what we needed for our application/space.  Your needs will most certainly differ.

Step-By-Step Instructions

This project is what I like to refer to as a beer project.  Outside of operating a saw and a nail gun (which you should ALWAYS do sober – 100% sober), there are a lot of “stain, wipe, dry” and “poly, dry, poly, dry” steps during which you should have ample opportunity to enjoy a tasty beverage.

Step 1: Measure

Ok, so you probably did this prior to purchasing your lumber in order to ensure you bought enough, but when it comes time to cut your lumber, you want to be certain that you’ve measured correctly. Measure again, take note of the dimensions you need to cut, translate those measurements by marking your lumber, and get ready to break out the saw of your choice.

measure-mantel

Step 2: Cut!

Carefully cut your wood to your desired dimensions.  For our project, our cut list was as follows:

  • 1 – 64″ (Mantle Front)
  • 2 – 61″ (Mantle Top & Bottom)
  • 2 – 7-1/4″ (Mantle Sides)

Yes, this left quite a bit of wood left over.  Think: FUTURE PROJECT!  You may be able reduce waste by purchasing longer lumber, but I very often have trouble finding straight lumber of this dimension in longer lengths.

Step 3: Stain and Rub Your Wood

With everything cut, break out your favorite shade of wood stain.  Apply your stain as per the provided instructions.  Wipe off the excess product after 2-3 minutes.  If you’re happy with the color, great!  If not, wait the indicated number of hours, apply a second coat, and rub everything down again.

Rubber gloves are essential to keeping your skin unstained. Somehow, I always forget this…

stain-wood-mantel

Step 4: Break out the Poly

When you’re happy with the look of your stain, it’s time to apply a protective coat of polyurethane.  The type of finish is up to you; matte, satin, semi-gloss, or gloss.  We’d played around with matte poly finishes in the past and weren’t too happy with the end result.  For this application, we ended up going with a semi-gloss finish and were thrilled with the final look.

It may take more than one coat of poly to achieve a uniform coat.  Let the polyurethane dry as per the manufacturer’s instructions and reapply.  Repeat until you’re happy with the resulting finish.

Step 5: Assembly and Installation

This is where all of your hard work comes together, and for us, this step was a breeze!  Our new mantle is simply a cover-up of the existing, so all of our major mounting was already taken care of for us.

  1. Starting with the top, center the piece of lumber you selected for this position over your existing mantle.  Using your brad nailer, fasten this board to the existing mantle.  Be generous with your use of nails; they’re tiny and you won’t see them.
  2. Add your side panels by nailing them to the ends of the top panel you just installed  Carefully align your nail gun and you should be able to shoot straight nails fairly easily.
  3. Mount your front panel.  Again, carefully position your nail gun, and you’ll shoot true. It helps to have a partner here to hold and square things up.
    • Pro tip: Don’t yell at your helper.  Treat them nicely.  They work better in pleasant working conditions.
  4. Install the bottom panel.  With all other facets in place, your bottom panel should fit in like a glove.  Shoot and be true.

mantel-assembly

Yes, I could have put everything together beforehand, simply slid the entire piece over the existing mantle, and nailed things down.  However, doing it the way we did allowed for on-the-spot micro adjustments and re-squaring.  So yes, more effort to do it my way, but a much “straighter” final product.

Step 6: Beer and Admiration

My favorite step! Grab another pour of your favorite beer, sit back, and admire your handiwork!

Completed wooden mantel

Of course, we didn’t stop there…

We loved the look of our new mantle; however, that fireplace surround just didn’t stand up to what we’d just created.  It was going to have to change….  Yippy!  Another project!  Stay tuned for our follow up post on how we continued to transform our fireplace to fit our style.

Posted on 8 Comments

Easy Advent Calendar Garland

Detail of the easy advent calendar garland

Although today is the first day of December it is not too late to make an easy Advent Calendar.  I whipped up this awesome collection of treats just using small boxes, ribbon, and wire.  As a child, the Advent Calendar I remember fondly was a simple felt Christmas tree.  Each day I got to remove an ‘ornament’ from the date and place it on the tree.  On the 24th the star went on top.  The boys are finally old enough that I wanted to institute some traditions of my own, starting with an Advent Calendar.Tutorial on creating an easy Advent Calendar Garland

Supplies

(Spoiler there isn’t a bunch of how to pictures, I am trusting you to use your brains on this one)

  • Small Boxes 12- 4″ x 4″ & 13- 3″ x 2″ (I have a Christmas Day Box if you realize that adds up to 25)
  • Various Ribbon
  • Wire (to hang boxes on)
  • Permanent Markers (colors to match ribbon)
  • Goodies to stuff in the boxes
Detail of Easy Advent Calendar Garland
Honestly, please tell me we don’t need the usual step by step photos on this one… Please…

Step 1: If You Saved Money & Bought Flat Boxes

If you have cash take the boxes that are pre-assembled.  If you didn’t, grab a beer and start folding.  Maybe catch up on Sherlock or Dexter.  Continue folding.  Stop to put on lotion because the paper has dried out your hands. Continue folding.  You get the idea….

Step 2: Divvy Up The Loot

I bought cheap little things like Hershey’s Kisses, marbles, couple little Hot Wheels, etc.  I made sure there was two of everything (since this is supposed to be fun and not a fight between siblings) and put some thought into days.  For example, I got two small craft kits and made sure to pick a weekend box so I could do the craft with the boyos and packed a special Christmas Morning box to finish it off.  Genius Moment!: I penciled the date in on the bottom of the boxes.Detail of the easy advent calendar garland

Step 3: If You Got To Skip Step 1

Ha ha ha.  If you skipped step one, then this is your payback.  Now tie tiny bows on all the boxes. Drink wine and catch up on the Daily Show.  Congratulate yourself on nominally watching some educational ‘news’ while crafting.

I tied a simple bow on each one.  This was on purpose (not just laziness/ beer) as the boys could each grab one side of the bow and untie it together. Take a moment to bask in the present-opening, brotherly-love scene I played out in my head. In actuality it played out exactly as I pictured which was damn good!

The key to uniformity of the garland is to pick coordinating ribbon.  I did a mix of bakers twine and satin ribbon in red and white.

Step 4: Marker Your Territory

If you have lovely handwriting, then I am envious and you can just go write in your numbers.  I cut out a 0-9 stencil using my Silhouette and created my numbers using red and gold permanent markers

Step 5: Ho Ho Hanging

String a selection of presents on the wire and hang.  I simply strung the wire under the bows.  I left some of the packages off and used extra ribbon to tie them in place staying nominally in day order.

More Details of the Advent Calendar Garland

Finale

We just pull off the correct box in the morning.  Then let the boys finish untying it and watch them get super excited about tiny trinkets.  Later I just tie the empty box back in place, which, is a hell of a lot easier than trying to move an elf around each night.  Bonus: Tie a special colored ribbon around that box of the day!

Advent Calendar Garland as part of a larger Christmas mantel
This is not my final Christmas Mantel. Though I will have a tutorial for the bleached/dyed bottle brush trees this week.

Enjoy these articles? Get biweekly updates by joining my mailing list (no spam, no way, no how)

See more great DIY and Decor at these link parties: Dream A Little Bigger, Craft-O-Maniac, By Stephanie Lynn

Posted on 3 Comments

Thanksgiving Mantel Decorations

Thanksgiving, for me, is about food, family, and giving thanks for all my friends and loved ones.  Plus it is the calm before the Christmas bonanza.  My mantel decorations are simplistic to reflect that.  Plus I like to have a nice clean look before the gobs of Christmas Decorations begin.

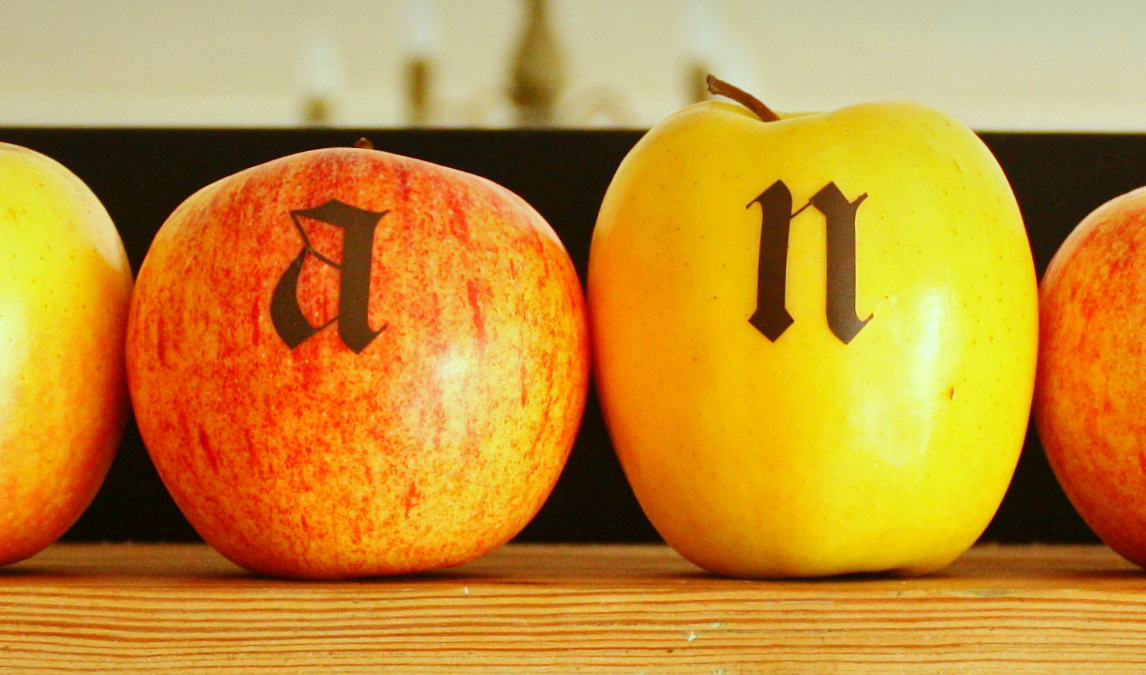
Thanks, spelled out from apples
Do as I say, in the apple tutorial and line up your letters. Not as I do :).

Thanksgiving is still about Fall for me.  I want to reflect the warm browns, russets, deep reds, and last golds of the season before giving over to the cold, crisp winter.  Plus I have a fruit decor obsession.

Details of Thanksgiving decorations using apples and aged papers
Told you all those aged papers would come in handy

So enjoy the last days of fall and relaxation before the excitement of Christmas.

Tutorials Used:

Golden Apples

Aging Paper with Tea or Coffee

How To Easily Cover a Book

Simple Thanksgiving Mantel
Just keeping it simple.

Enjoy these articles? Get biweekly updates by joining my mailing list (no spam, no way, no how)

See more DIY and Decor at these great link parties: Dream A Little Bigger

Posted on 2 Comments

Halloween Mantel

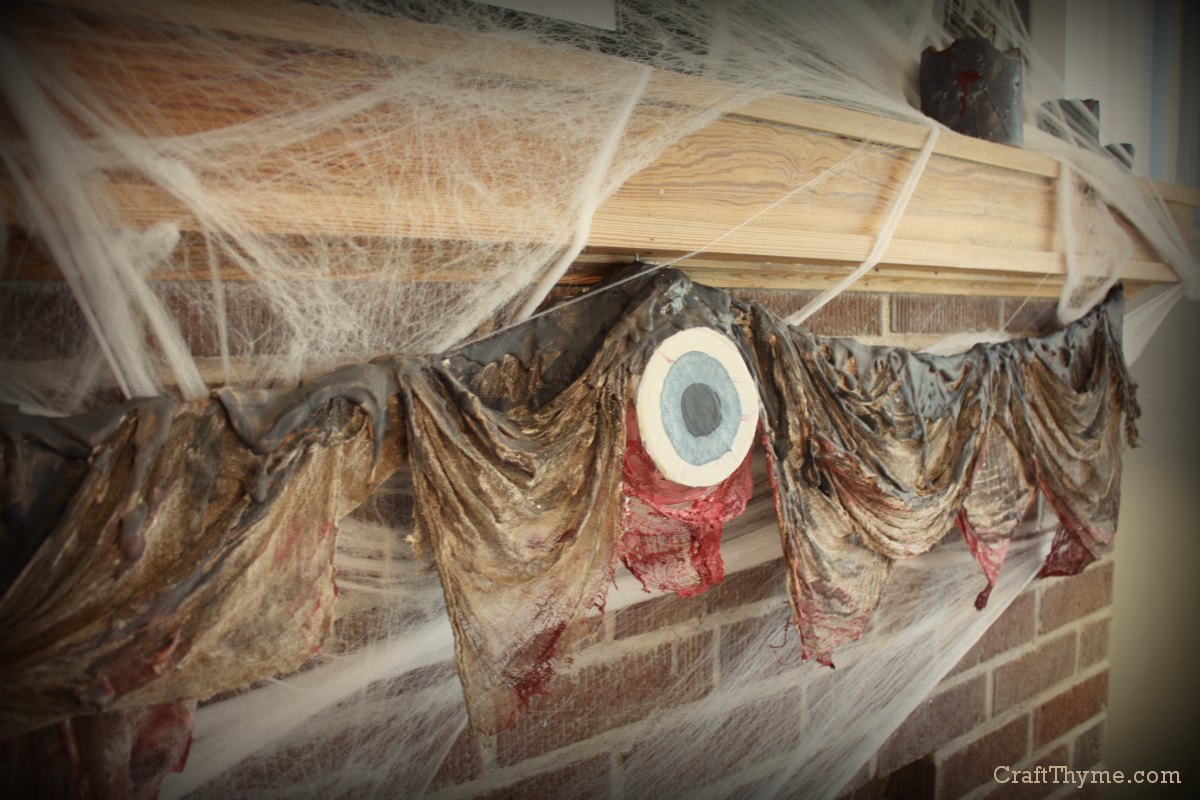
Halloween Mantel with Dripping Flesh Garland

I have stated before that I usually like the ‘prettier’ halloween.  Glittered skulls, pretty potions, mystical & magical versus ghouls and gore is more up my alley.  However, this year I just wasn’t feeling it.  I even had ravens, black tulle, and lots of green glitter all ready to go.  Instead I opted to make a huge mess with paint and plaster.

Halloween Mantel with Dripping Flesh Garland


I think once you have a giant eye attached to your mantel, you kinda have to continue with the theme.

Zombie Candles and Spider Webs


In comes spider webs and zombie candles.  Lots of spider webs…

Zombie Candles


And lots of zombie candles…

Best part?  My kids and husband didn’t even bat an eyelash at the giant evil eye.  I think they are immune to Mama’s decorating insanity.

Tutorials Used

Rotting Flesh Garland

Zombie Candles

Enjoy these articles? Get biweekly updates by joining my mailing list (no spam, no way, no how)