Posted on Leave a comment

Mixed Berry Sangria

Mixed berry sangria garnished with lemon balm

Sangria is perfect for anytime of year.  But this mixed berry sangria recipe adds a hint of lemonade, making it perfect for summer. It is a super easy recipe for sangria that everyone will rave over at dinner parties.  You can pretend it took a lot of time and labor.  I won’t tell.Mixed berry sangria garnished with lemon balm

Ingredients

1/2 to 1 bottle of White or Blush Wine (don’t go for super expensive but don’t go for super cheap)

1/4 Cup Chambord

1/4 Cup Peach Schnapps

Lemonade

Superfine or Confectioners Sugar (if not using a sweet commercial lemonade)

2 Cups mixed berries (frozen or fresh)

Lemon Balm (for garnish)

Mixed berry and lemonade sangria recipe

Directions For Awesomeness

Fill a pitcher 1/2 full with wine.  Add the liqueurs and the berries.  Top off with lemonade.  Taste test and add sugar till sweet enough for your tastes (I like mine tart so I don’t add sugar).  Allow the mixture to set overnight as it will develop more berry flavor.  Pour into glasses and garnish with fresh lemon balm.

Pitcher of mixed berry sangria


While you are waiting for the Sangria to develop you probably have an almost full bottle of Chambord and Schnapps with a half a bottle of wine…  Do I need to fill your time in for you?

Have you ever had Chambord over ice cream?  I mean what is there not to like about alcohol and ice cream? Or Schnapps in lemonade? Or alcohol in alcohol… Did I mention I have two boys.  Ages 3 and 1. Yeah I know my way around some alcohol.  Hope you enjoy as well ;).

Enjoy these articles?  Get periodic updates by joining my mailing list (no spam, no way, no how) or subscribing to my RSS feed.

See more great crafts and decor at these link parties: Pink Recipe Box, Somewhat Simple, The Stitchin’ Mommy, Lovely Crafty Home, Pint Sized Baker

Posted on 8 Comments

Sea Shells & Lemonade = Table Decor?

Sea shell inspired table decor.

I initially had the idea for this table setting from some sea shells I found when scrounging through my mess of a basement.   I had saved a small bag of pink scallop shells and thought they would make a good basis to start my summer decor.  Though I live  in the mountains my second love is the beach.  I wish I was a lake girl, since so many lakes are so much closer, but the mud, the dark water, the…  Nope it is sand and surf for me.  However, any good mountaineer knows overdoing the surf theme just seems out of place.  So here is my hybrid of pink, salmon, & gold.  Call it pink sand, shore, and lemonade inspiration.

Table decor inspired by pink sea shells
I’m so good at naming tablescapes… #sarcasm. Please suggest better names in the comments! Please!

The table setting is anchored by a diy ribbon chandelier (tutorial here) above and gold tulle net runner below.  The gold accents unify the various shades of pink that run from rose to salmon.  Shoo… okay I can say I used my art degree today to critique my design.  Now on the the fun stuff!

PINK LEMONADE CUPCAKES!

I knew I wanted some fun pink desserts and, thank the grocery gods, I walked by a display for Pillsbury pink-lemonade cupcakes.

Table setting inspired by pink seashells
Read below to learn more about my awesome baking skills.

Yes I can bake…  But can I decorate a cake?  Oh hell no.  It is a crafting skill that is just beyond me.  Knowing this, I often take the easy way out with mixes, pre-made icing, and sugar sprinkles.  As far as I can tell sugar sprinkles cover a multitude of sins.  Plus who could walk away from a thing of icing labeled ‘Pink Lemonade”.  And I swear I am not getting paid by Pillsbury to say all this awesome stuff.  Though, if they would like to, feel free to give me a ring.

Pink and Gold table decor
I like to call this the sugar, sugar, sugar portion of the table

Oh my!  I almost forgot mixed berry sangria!  Perhaps I should preface this with my Facebook status:pink-fb-statusNot to be a braggart but I make multiple awesome sangrias.  Citrus, berry, peach, etc… One for every season.  The recipe for this mixed berry and lemonade one will be up Thursday!

Salmon and Pink place settings
Gold Finger! A tutorial for creating your own gold sea shells and sand dollars from paper clay is in the works.

One of the things I enjoyed most about creating this display was learning to gold foil fabric (tutorial coming).  I thought the ombre dyed napkins (another upcoming tutorial) really set of each place setting because of the gold edging.  I’ll leave you with one more picture and a list of craft tutorials and how-tos required to recreate this summer table decor.

Sea shell inspired table decor.


I would love to have a better name and ideas on what you like or would improve.  Every table display is a learning experience so please leave comments.  Other than the cupcakes… Those mo-fo’s were delicious!

Tutorials:

How to Dye Sand

Permanent Sea Glass Finish

Modern Ribbon Chandelier (yes it is supposed to look like that)

Mixed Berry Sangria

Ombre Dyed Napkins

Gold Foiling Fabric August 8, 2013

Mold Making from Polymer Clay (Gold Seashells and Sand Dollars) I have photos and how tos but I am not sure how many people like to sculpt and make molds…  I may or may not post a tutorial.

Enjoy these articles?  Get periodic updates by joining my mailing list (no spam, no way, no how) or subscribing to my RSS feed.

See more great crafts and decor at these link parties: Our Home Away From Home, Today’s Creative Blog, Daisy Cottage Designs, Shabby Creek Cottage, House of Hepworths, Live Laugh Rowe, The Crafty Blog Stalker

Posted on 13 Comments

Faux Permanent Sea Glass Tutorial

Tutorial to create permanent faux sea or beach glass

I saw a how-to for creating beach glass from Elmer’s Glue and food coloring on Pinterest.  While lovely, I wanted to create a more permanent sea glass finish for some cake stands (NOT FOOD SAFE FINISH please don’t sue me if you eat off this and get sick) I was making.  That way they could be gently washed and I wouldn’t have to worry about moisture making the finish tacky or white.  After, oh so many attempts…. I came up with a good working finish. Thank goodness glass plates are cheap at Goodwill.  On to the tutorial:

Tutorial to create permanent faux sea or beach glass


Supplies

Translucent Glass Paint/Stained Glass Paint (A watered down enamel did not work)

Glass Frosting Spray Paint

Water or Glass Paint Thinner w/ a container to mix them in

Soft brush or Foam Brush

Clear Glass Items

Supplies to create faux beach glass
Your eyes are deceiving you.
You do not see the stiff paint brush in this picture… You see a foam brush.

Step 1 Clean & Paint

Clean your glass well.  Did you get it clean?  Good clean it again, wipe it down with rubbing alcohol and try not to touch it.  I may sound a little crazy here but if you want your paint to adhere clean the glass.  Depending on the paint you have chosen you may water it down with water or a specific thinning agent.

Why am I watering it down?  Because you want to achieve a nice thin even coat of transparent to translucent paint.  The thicker the paint the more brush strokes showed.  The more brush strokes that show the less it looks like sea glass and the more it looked like a hot mess.  You can still see some drips and mess ups if you look closely in these photos.  The key is multiple coats of thin paint.

Oh and some paints say to dry of oh… 20 days… Um hell no. Ain’t nobody got time for that.  Usually you can bake them for a faster finish, but read the directions for your particular paint.

Painting translucent finish on glass as the first step in faux sea glass tutorial
You can now see why I have such a large and well used drop cloth. I am messy.

Step 2: Spray Paint Against All Directions

Take the frosting spray….  Now I know you are supposed to be well away from the object etc when spray painting.  Ignore all that.  You want a THICK coat.  Get in close with that spray bottle!  You want it to pool in the niches and look glossy and wet before it dries.  This will insure a white textured finish akin to actual sea glass.  And if it just looks frosted when done, get closer and spray more!

Using glass frosting spray paint to mimic beach glass finish
Spray Away!

Step 3: Use As Is

That is really the only steps to making a more permanent beach glass finish, suitable for hand washing.  I went and finished mine with a little E-6000 glue.  Just simply attached my plates to a cup and candle stick to make two cake plates in two shades of pink.  The frosting spray says nothing, zip, zero, zilch about being food safe.  So I plan to use a paper doily under any food, just to be safe.

creating faux beach glass cake plates

Notes:

Spray Away!, Hand Wash, and not food safe!  Otherwise you should be good to go.

The key is piling on the frosting spray!

DIY faux beach glass cake stands

Posted on 3 Comments

Creating a Modern Ribbon Chandelier

How to make a modern ribbon chandelier

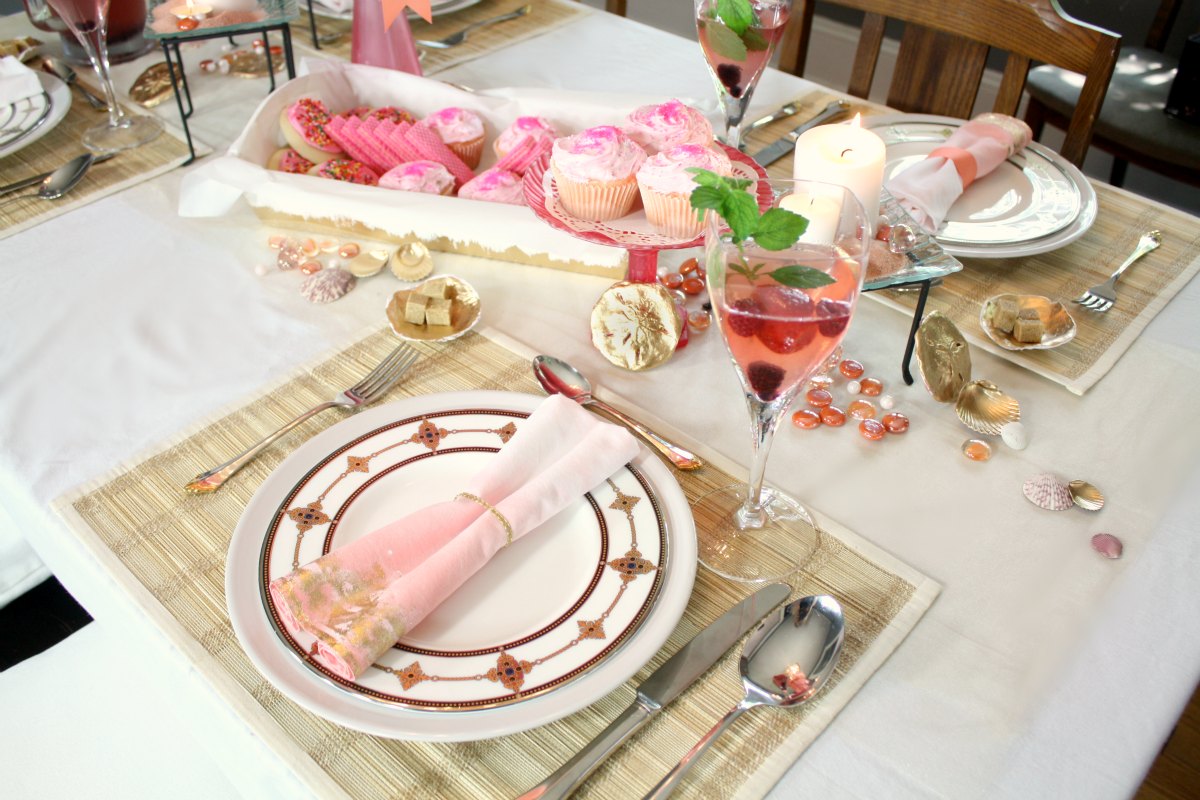
DIY ribbon chandeliers are showing up everywhere from weddings to backyard dinners.  This tutorial will show you how to create a modern take on a ribbon chandelier.  The pink and gold color scheme is part of an overall sea themed summer table setting I will be revealing over the next few weeks, provided no more of my crafts fail.  Let’s get down to bid-ness:

How to make a modern ribbon chandelier

Supplies:

Ribbons

2 Hoops in 2 sizes (You can use wire, hoola hoops, etc. but at 1.20 the inside of an embroidery hoop was where it was at)

Wire (Thin floral wire is fine, unless you plan on wiring a heavy light or are making a very large hoop)

Spray Paint

Hot Glue (if you have a low-temp glue gun that’s a good choice here)

Scissors

Note on Ribbon Selection:

I laid a bunch of ribbon out first to see if I liked the color combination.  I wanted to make sure

Supplies for a diy ribbon chandelier

Step 1: Wiring the Hoops (This step is the longest.  I promise.)

The arrangement of hoops is what will give the chandelier a more modern shape so this first step is really the base of your foundation.  I take my time here to give a nice sturdy start, because after that it really becomes a ribbon hot glue nightmare…

Take wire and very tightly cross from one side to the other through the center.  Repeat on the other side to form 4 equal areas.  Did I say tight?  Pull it tighter.  Take another small piece of wire and tie it around the center.  I like to make a nice clean loop.  To do this I simply wound it a few times around a kids marker.

Next comes the hellacious part.  I suggest cutting three lengths of wire the same length,  divide the first hoop (mentally) into three equal sections and tie the wire.  Then get the smaller hoop figure out how far you want it to hang below the first and lightly tie wire it.  You may find it easier to hang the whole thing at this point.  I hung mine from a light fixture, shower curtain rod, and finally a wire I strung across my craft area.  Once you have it at the proper height secure one wire well.  Then play with the other two to get an off kilter angle.  Secure all wires tightly.

creating the chandelier frame with wire and hoops

Step 2: Holy Crap you made it through step 1…  Okay.  Step 2 is Spray Painting

Now that you have your base spray paint the hell out of it.  This is why the ugly green floral wire didn’t matter.

Step 3: Ribbons and Glue

Now comes the fun part burning your fingers adding ribbons.  To really create a modern look to the ribbon chandelier this step is more important than one would think.  Draping the ribbons and connecting them to the rings in a clean manner gives a sharper look than the bohemian feel of other styles.  I wouldn’t necessarily spend this time on a ribbon chandelier that would be 20 feet in the air, however my plan is for this to be right over an intimate table setting.

I cut a bunch of ribbons after figuring out around what length I needed then tightly glued all of the ribbons to the top ring on the inside and bottom so they would lay flat.  Burning only my pinkie on the top ring and saying for the 1000th time that I needed to purchase a low temp glue gun.  After connecting them all I then slowly began the process of looping them in an undulating pattern to the bottom ring.  They are actualy glued to the outside of the ring and hang loosely in the middle.  REMEMBER:  The center ring is smaller than the top so the ribbons will have to overlap.  While this is basic geometry I seemed to have blanked and had to rip a bunch off and start again.  Cussing gleefully the whole time and burning my ring finger to the point of blistering.

Construction of the ribbon chandelier

Step 4: Scissor Time

I wanted the bottom to be asymmetrical like the top, so I grabbed the ribbons in a handful and chopped them at a diagonal.  After that I went and finished each edge in double points and made some minor adjustments to the length. Then you are done!

Completed pink and gold ribbon chandelier

Notes:

  • Wired Ribbon is a BEOTCH.  I thought it might be easier, but trying to get it to mimic the natural fall of the other ribbon was an exercise in patience.  Oh and god forbid you hit it on anything and have to start the whole process of bending the wire again.
  • The second hoop is going to swing and bend and basically act like a wild animal in your grasp.  It is okay, the ribbon will cover a multitude of sins.
  • Battery operated tea lights tied on fishing wire and hung from the cross wires can light the interior at night

Enjoy these articles?  Get periodic updates by joining my mailing list (no spam, no way, no how) or subscribing to my RSS feed.

See more great crafts and decor at these link parties: Making The World Cuter, Today’s Creative Blog, Cherished Bliss, One Artsy Mama, I Should Be Mopping the Floor

Posted on 7 Comments

How to Dye Sand

Tutorial on How to Dye Sand

Honestly, one of my absolute favorite things to do is change the color of things.  You would be amazed the number of things you can dye, sand just being one of them.  See how to dye sand so you will never need to go buy the colored stuff for arrangements, crafts, and kid friendly art.  On to the tutorial:

Tutorial on How to Dye Sand
You might guess from this photo there are a bunch more tutorials in the works. (I made that gold sand dollar and will have a tutorial in the next bit)

Supplies:

Supplies needed to dye sand
Please don’t comment on the state of that cookie tray.

Sand: $2.50 (US) will snag you 50 lbs of play sand at the hardware store or you can simply steal some from your kid’s sandbox while they are napping

Rubbing Alcohol: Higher the alcohol content, the faster it dries

STURDY Plastic Bag

Food Coloring: Cheap liquid will do just fine

Cookie Sheet or something on which the sand can dry

Step 1: Pour Everything In a Bag

Adding food coloring to dye sand

I already knew what container my sand was going to go in, so I poured in slightly more than I needed to measure it.  Then I simply poured sand in the STURDY bag.  Shall I repeat sturdy? Start with only a few drops of the color you want to achieve.  I was going for a coral-pink so I put about 5 drops of red and 3 of yellow to begin.  Then throw in some alcohol.  I’m not much for measuring, just give it a splash.

Step 2: Smoosh and Repeat

Matching colors of dyed sand
I hope you don’t need an action shot of smooshing a bag. If you do email me, I’ll send you a picture of my white arms kneading a bag of sand.

What is the technical term we need for this step.  Umm… Squeeze the bag?  Smoosh the sand around?  Knead the color in?  Whatever you do, move the sand around until the color is evenly distributed.  If it is really hard to mix add a splash more rubbing alcohol.

Perhaps you are thinking “whoa that is a little light/dark/fugly” while looking at the color.  Hold up! before you go messing with it.  Make sure it is fully mixed before making assumptions.  If you are trying to match a color (see the ribbon above) then make one special note: It dries much lighter.

I wanted sand a couple shades lighter than the above pink ribbon so I matched it to the exact shade before drying.

Step 3: Remember that gross cookie sheet?

Spreading DIY dyed sand to dry

Once you have the color you want spread the sand out on a cookie sheet. Might I suggest gloves unless you also want to DIY dye your hand?

You can bake the sand at the lowest setting on your oven until dry (always check on the sand to make sure you aren’t about to cause some sort of oven fire, though I am unaware of spontaneous sand combustion) or leave it out overnight to dry.

That is pretty much all there is to dyeing sand.  So go “borrow” some sand from your kids and get crafty.